Before developing any land, one question is very important that comes to the mind and that is
What is really happening beneath the surface?
And in appearance, as we view the outside, the place might seem clean and steady, but when you begin it digging or drilling it, it usually works out quite differently. E.g., the polluted soil, waste concealed in the soil, or polluted groundwater might be present, but they cannot be noticed on the surface. Before land purchase, redevelopment or construction, it therefore becomes significant to have a deep site assessment.
These evaluations assist in determining the risks that can pose any threat to human health, project safety, or land use in the long run. This is the stage at which it becomes practical. Surface inspection and reports can merely tell half of the story. Teams use geotechnical drilling to know what is beneath the ground.
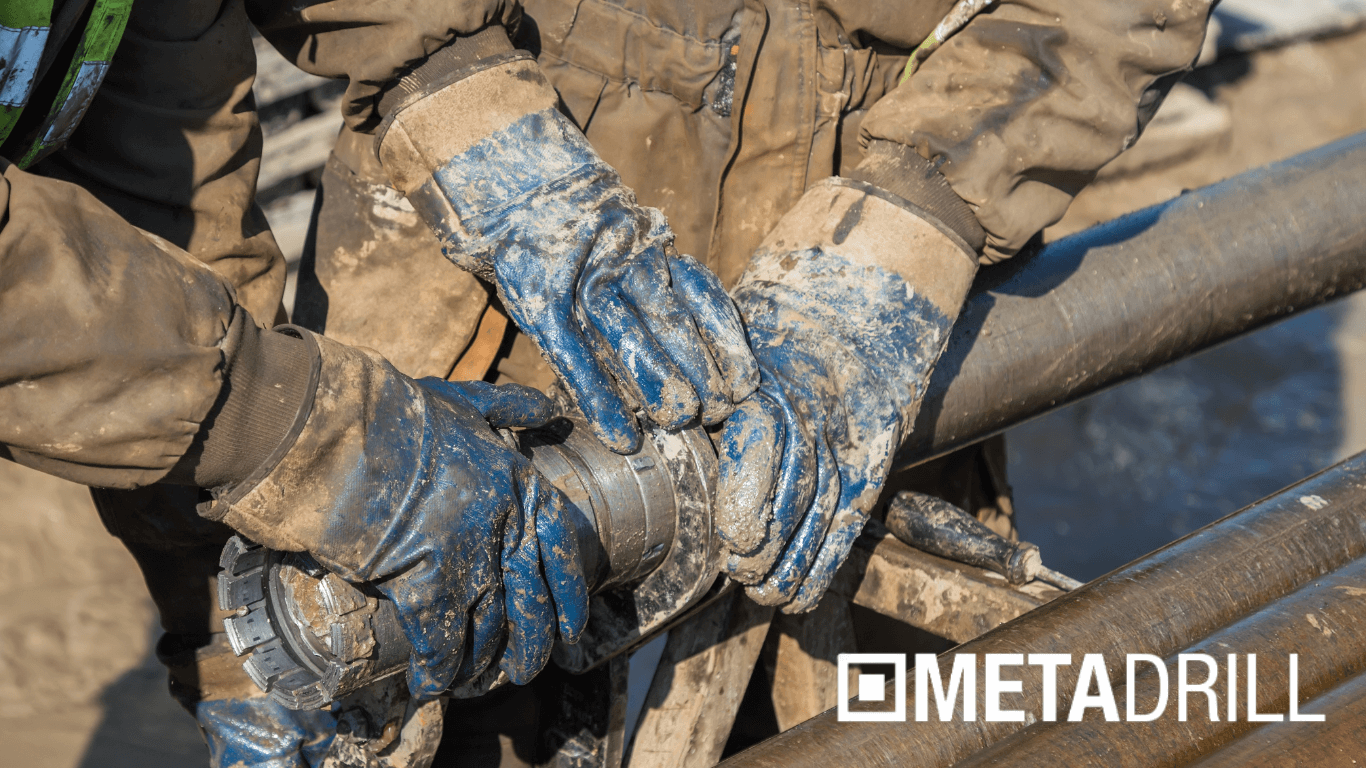
Drilling enables engineers to take real samples of soil and groundwater, and this provides an accurate picture of the conditions at the sites. Decisions are made without dwelling on assumptions. Drilling makes decisions that are grounded on real-life information. This is the reason why geotechnical drilling in the environmental site assessment is so crucial. It assists in identification of contamination, analyzing the soil, and providing safe development on the first stage. Environmental Site Assessment (ESA) What is it? The drilling rigs manufacturers attempt to know the site by not touching the ground before any drilling is done. This is referred to as an environmental site assessment, or ESA.
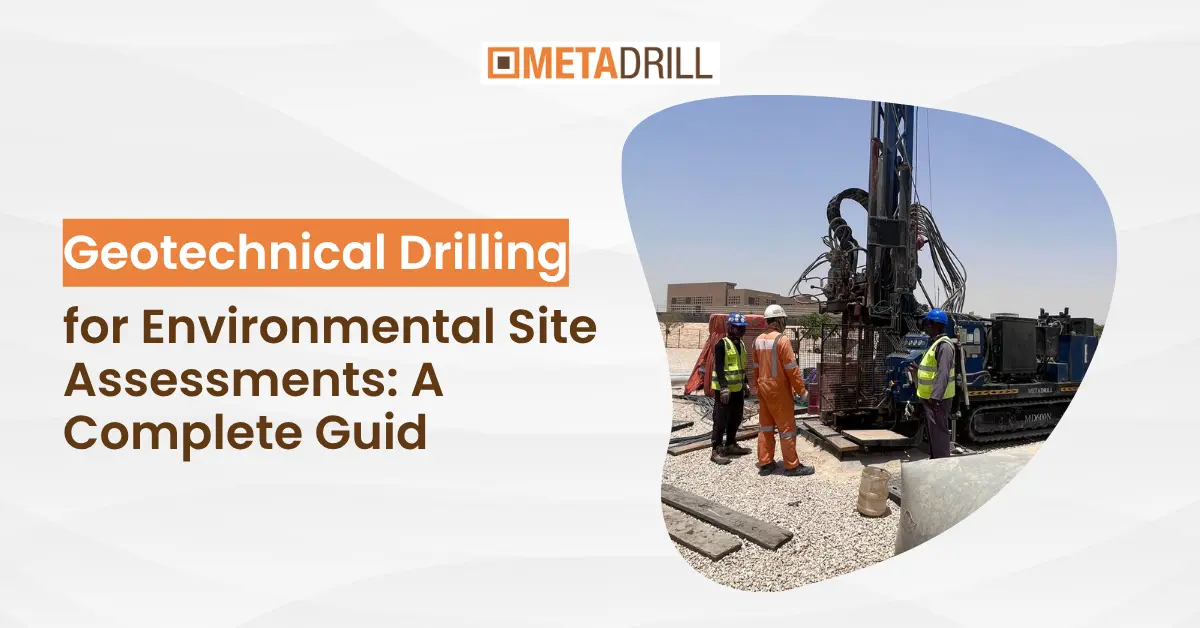
What Is Environmental Site Assessment (ESA)?
Teams also attempt to know the site prior to touching the ground before the actual drilling begins. This is referred to as an environmental site assessment, or ESA. An ESA proves to answer a simple question.
Is the land safe in use, or does it have a concealed risk to the environment?
The process tends to take place in stages to respond to this. The first one is what is referred to as Phase 1 ESA. There is no drilling at this stage. Rather, the team examines site history, old records, maps and past land use. They also go to the area and search to see indications such as the presence of fuel stores, dumping or industry.
In some cases, such a step alone is informative enough. However, in most instances, it brings about new questions. As an illustration, in case the site appeared to have a fuel station or industrial activity, there is a possibility that contamination might exist underground. Surface checks at this stage are not sufficient anymore. This results in the second step, which is Phase 2 ESA. At this point the strategy is more feasible.
The team does not use documents and instead collects actual samples on the ground. This involves soil samples and samples of groundwater at various levels. This is purely where geotechnical drilling comes in. Drilling enables the team to pass underneath the surface and examine things that are inaccessible. In the absence of this step, pollution may be concealed, and it may result in grave consequences later in construction or land use. So in simple terms:
Phase 1 tells you what might be wrong
Phase 2 confirms what is actually there
Because of this connection, environmental site assessments and drilling always work together. One identifies the risk, and the other proves it with real data.
Role of Geotechnical Drilling in Environmental Site Assessments
Once Phase 1 raises concerns, the whole process shifts in one direction.
The team needs real proof from the ground.
This is where geotechnical drilling becomes the turning point.
Up to this stage, most decisions depend on records, site history, and surface observations. These give clues, but they don’t confirm what actually exists below. So instead of guessing, the team moves to drilling.
Drilling allows engineers to go below the surface and collect actual soil and groundwater samples. These samples show what is really happening underground, not what is assumed.
As drilling begins, each borehole reveals something new.
At one depth, the soil may appear clean. A few meters below, contamination may show up. In some cases, groundwater carries pollutants that move across the site without any visible sign on the surface.
Because of this, drilling changes the entire direction of the assessment.
What started as a possibility now becomes measurable data.
This data then connects directly to decision-making.
Engineers identify whether contamination exists
They measure how deep it goes
They understand how far it has spread
They decide what action is required
Without drilling, these decisions would remain uncertain. With drilling, the team works with clear evidence.
The other significant aspect is accuracy. Environmental hazards do not always remain at the same location. Pollution could travel in underground layers of soil or ground waters. The drilling of various points and different depths enables the engineers to create the complete picture of the site rather than just one point.
In the real world, therefore, geotechnical drilling is not a simple process of collecting samples. It relates research to action. It makes doubt into assurance.
And above all it assists teams in the decision-making process before the project becomes at a point where errors turn out to be costly.
The real revelation of Geotechnical Drilling.
As soon as the drilling begins the actual picture of the site starts to form. On the surface things appear to be normal but, on the ground, they are quite different.
This is where speculations cease and actual knowledge starts. The deeper the drill the story behind the layer is. The color of soils alters, the texture also changes, there is a change in the amount of moisture and occasionally, unforeseen materials are also present. All this provides hints regarding the past activity on the site. But drilling is not just a way to demonstrate layers.
It reveals three critical things that directly affect environmental decisions.
1. Hidden Soil Contamination
Conducting environmental drilling to detect contamination is one of the primary motivations of forming teams. The pollution of the soil is not always observable. A site might appear to be clean yet underground, fuel, chemicals or industrial waste can be trapped. Crews take samples of soil using drilling at various depths. These samples are sent to the lab, and specialists test them on the presence of harmful substances. In most scenarios, contamination manifests itself only at specific depths, hence making drilling important. In its absence, the problem may go undetected by teams.
2. Groundwater Conditions/ Pollution
When drilling becomes deeper, it usually crosses groundwater. This is significant as ground water may be contaminated to other sources other than the source. A minor problem in one location can be propagated by the water flow in a bigger region. Through sample ground water, the engineers are able to:
By collecting groundwater samples, engineers can:
detect pollutants in water
understand how contamination is spreading
evaluate risks to nearby areas
This step becomes critical when the site lies near residential zones, water sources, or agricultural land.
3. Soil Layers and Subsurface Structure
Drilling also reveals how the ground is built below the surface.
Different soil layers behave differently. Some layers support structures well, while others create instability. In environmental assessments, this information helps understand how contamination moves and where it may settle.
For example:
sandy soil may allow faster movement of pollutants
clay layers may trap contamination in one place
fractured zones may create unexpected pathways
Because of this, soil layering becomes a key part of the analysis.
When all these findings come together, the site starts to make sense.
Instead of working with assumptions, engineers now understand:
where the problem exists
how serious it is
what needs to be done next
That is why drilling becomes the most revealing part of the entire environmental assessment process.
How Geotechnical Drilling Works for Environmental Site Assessment
After the site goes into Phase 2 assessment, the activity is no longer observation but action. At this stage, the team ceases to be dependent on the reports or assumptions. They begin to gather actual facts on the ground. This is a linear process with every step having a linkage to the other.
This process follows a clear sequence, and each step connects to the next.
Step 1: Select Drilling Locations
The team does not drill randomly. Instead, they choose locations based on earlier findings from Phase 1.
If a certain area shows signs of past industrial use or possible contamination, that spot becomes a priority. In some cases, multiple points are selected to understand how conditions vary across the site.
This step ensures that drilling targets the areas that matter most.
Is the site safe for construction?
Does contamination require cleanup?
Are there risks to nearby areas?
These answers guide the next steps of the project.
When you look at the full process, one thing becomes clear.
Drilling is not just about creating holes in the ground. It is about uncovering what the surface hides and turning that information into decisions that affect safety, cost, and project success.
Types of Samples Collected in Environmental Drilling
Once drilling begins, the main goal becomes clear.
The team needs reliable samples from below the surface so they can understand what is actually present in the ground. These samples are not random. Each one is taken carefully because it represents a specific depth and condition.
As the process continues, three main types of samples are collected, and each one adds a different piece to the overall picture.
1. Soil Samples
Soil sampling usually starts as soon as drilling begins.
As the drill moves through different layers, the crew collects soil at selected depths. Each sample shows how the soil changes as you go deeper. Sometimes the difference is obvious. Color, texture, and moisture levels can shift within a short distance.
These samples are important because contamination often hides within specific layers.
For example:
fuel residues may appear in one layer but not in another
industrial waste may settle deeper below the surface
some pollutants remain trapped in clay layers
Because of this, sampling at multiple depths helps avoid missing critical information.
2. Groundwater Samples
Drilling then commenced after the locations are marked. The rig drills boreholes to reach the depths of the critical layers of soil and groundwater. The depth needed varies according to the project, although the objective is the same. The team would like to have an overview of what is going on under the carpet, not around it. The deeper the borehole is the more the driller will notice the change in soil conditions and document them.
This makes groundwater testing especially important when:
the site lies near residential areas
there are nearby water sources
long-term environmental impact is a concern
By analyzing groundwater, engineers can track how contamination moves and how far it may extend.
3. Core Samples (When Required)
In some cases, especially in harder formations, the team collects core samples.
These samples come out as solid cylindrical sections of the ground. Unlike loose soil samples, cores show the structure of the ground more clearly.
Core samples help when the team needs:
a detailed view of soil or rock layers
better understanding of how materials are arranged
more accurate analysis in complex ground conditions
They also help confirm findings from other samples and provide additional clarity.
When all these samples come together, they create a complete picture of the site.
Instead of looking at isolated data, engineers start seeing connections between soil layers, groundwater movement, and contamination patterns.
This combined understanding helps them move forward with confidence.
Drilling Methods Used in Environmental Site Assessments
Once the team decides where to drill, the next question usually comes up on site.
“Which drilling method should we use here?”
There is no single answer, because every site behaves differently. Ground conditions, project goals, and required sample depth all influence this decision.
Because of this, teams choose the method that fits the situation instead of forcing one approach everywhere.
1. Auger Drilling
Auger drilling is one of the most commonly used methods, especially for shallow investigations.
The process looks straightforward. A rotating auger cuts into the soil and brings it up to the surface as drilling continues.
This method works well in softer ground where the soil holds together easily. It allows crews to collect samples quickly without complex setup.
However, once the ground becomes harder or starts collapsing, auger drilling becomes less reliable. At that point, the team usually switches to another method.
2. Rotary Drilling
When the ground becomes tougher or the project requires deeper investigation, crews often move to rotary drilling.
This method uses a rotating drill bit along with drilling fluid. The fluid helps cool the bit and carry cuttings back to the surface.
Rotary drilling works well in a wide range of conditions, from soft soil to harder formations. It also allows the team to go deeper compared to simpler methods.
Because of this flexibility, many environmental projects rely on rotary drilling when conditions become more demanding.
3. Direct Push Method
In some situations, especially when the goal is quick sampling, teams use the direct push method.
Instead of drilling in the traditional way, this method pushes tools directly into the ground using hydraulic force.
It works best in soft to medium soils where resistance stays manageable. The process is fast, and it creates minimal disturbance to the surrounding area.
Because of this, it is often used for environmental investigations where speed and efficiency matter.
When you look at these methods together, one thing becomes clear.
There is no “best” method for every project.
The right approach depends on:
ground conditions
required depth
type of samples needed
That is why experienced teams stay flexible. They adjust their method as conditions change instead of sticking to one approach.
Common Challenges in Environmental Drilling
Once drilling begins, things rarely go exactly as planned. On paper, the process looks straightforward. But on site, ground conditions, contamination behavior, and sampling accuracy can create real challenges.
Because of this, experienced teams stay alert from the start.
1. Contamination Spread During Drilling
One of the biggest concerns is spreading contamination while drilling.
As the drill moves through different layers, it can carry pollutants from one level to another. This process, often called cross-contamination, can affect the accuracy of results.
For example, if contaminated soil from an upper layer moves downward, it may give a false impression that deeper layers are also polluted.
To avoid this, crews follow strict procedures:
clean tools between samples
control drilling speed
use proper casing when required
These steps help maintain sample integrity.
2. Unstable Ground Conditions
Not every site behaves the same way.
In some areas, soil holds its shape well. In others, especially in loose or wet conditions, borehole walls may collapse during drilling.
When this happens, it creates two problems at once.
First, drilling becomes difficult. Second, the collected sample may not represent the actual soil layer properly.
To manage this, teams adjust their drilling method or use casing to support the borehole.
3. Difficulty in Accurate Sampling
Collecting a sample is easy. Collecting the right sample from the right depth is where the real challenge lies.
If samples mix during extraction or get disturbed, the lab results may not reflect true site conditions.
Because of this, crews pay close attention to:
labeling samples correctly
maintaining depth accuracy
handling samples carefully
Even small mistakes at this stage can affect the entire assessment.
4. Groundwater Control Issues
When drilling reaches groundwater, things become more sensitive.
Water flow can disturb soil layers and affect sampling. At the same time, contamination may move through water, which makes it harder to track its original source.
To handle this, teams often install monitoring wells and take controlled samples instead of rushing the process.
5. Access and Site Limitations
Not all sites are easy to work on.
Some locations have limited space, nearby structures, or restricted access. In such cases, bringing large rigs or setting up equipment becomes difficult.
Because of this, teams sometimes need to adjust equipment size or drilling method to fit the site conditions.
When you look at these challenges together, one thing becomes clear.
Environmental drilling is not just about technique. It requires awareness, control, and careful handling at every step.
You can also check: 7 Mistakes Companies Make When Buying Drilling Rigs
Why Geotechnical Drilling Matters for Real Projects
At this point, everything comes together.
Environmental site assessment may start with reports and site history, but it does not become reliable until drilling begins. Without drilling, teams work with assumptions. With drilling, they work with actual conditions from the ground.
This difference changes how decisions are made.
When drilling reveals clean soil and stable groundwater, the project can move forward with confidence. On the other hand, if contamination appears, the team can respond early instead of dealing with problems during construction.
This early clarity saves both time and cost.
For example, imagine starting construction without proper investigation. If contamination shows up later, work may stop completely. Cleanup, redesign, and delays can quickly increase project expenses.
Now compare that with a site where drilling happens at the right stage.
The team already knows:
where contamination exists
how deep it goes
whether it spreads through groundwater
Because of this, they plan ahead instead of reacting later.
This is where geotechnical drilling proves its real value.
It does not just support environmental assessment. It protects the entire project from uncertainty.
So if you are planning land development, construction, or site purchase, one thing becomes clear.
Skipping proper drilling is not a risk worth taking.
Even if everything looks fine on the surface, the real condition always lies below. And the only way to understand it properly is to test it.
In the end, the decision becomes simple.
If you want assumptions, you rely on surface checks
If you want certainty, you rely on drilling
And in projects where safety, cost, and long-term performance matter, certainty always wins.

This question comes up a lot on drilling sites. “How deep can this rig actually go?”
It is a mere question in the beginning. Citizens want a direct answer, perhaps in meters. However, having visited the crews of drilling, you know that nothing is that simple. There is no specific depth limit to a compact wireline drilling rig.
Two rigs which appear nearly identical on the surface may behave quite differently after the drilling has begun. The depth is based on the underground happenings.
The deeper the hole the harder the rock, and the heavier the drill string becomes, the conditions on the ground change. All these begin to influence the distance covered by the rig.
There is also an easy time in most scenarios when a compact rig can drill a few hundred meters. In different cases, the same rig can perform much worse. Conversely, given the correct installation and environment, certain small rigs can go down to nearly 1000 meters. Then, rather than inquiring simply about deepness, it would be more logical to inquire: “Under what conditions can a compact wireline rig reach deeper depths?”
That is exactly what we will break down in this guide.
Typical Depth Range of Compact Wireline Drilling Rigs
When people ask about depth, they usually expect one clear number. In reality, compact wireline rigs don’t work like that, so the answer always depends on how the drilling conditions unfold.
A small size wireline drilling rig in most activities can comfortably work between a range of 200 and 600 meters. Under this limit, the rig is not required to strain much on drilling and crew can keep the pace. Things begin to change as the drilling continues deeper. Drill rods become heavier, the ground resistance accumulates and the machine must work more to keep it going. Thanks to this fact, there are still rigs, which reach 700 to 800 meters, provided the ground remains stable and the drilling process is handled by the crew very carefully. In some cases depth may even be more. Well-developed compact rigs can occasionally go to near 1000 meters under ideal conditions of drilling, balanced drilling pressure and ground conditions. This, however, does not just occur by default. It happens only when multiple factors align properly.
At this point, it becomes clear that the rig alone does not decide the depth. Several elements start influencing performance as drilling moves deeper.
One of the first things drill rig manufacturers look at is the rod size, since it directly affects how much load the rig has to handle.
When crews use NQ rods, the rig can drill deeper because the rods are lighter
When they switch to HQ rods, the depth reduces slightly because the rods add more weight
When they use PQ rods, the weight increases further, which limits how deep the rig can go
As a result, even a small change in rod size can shift the overall drilling depth.
At the same time, ground conditions continue to influence everything. Soft soil may allow faster penetration at first, but it often creates instability as drill rig parts go deeper. On the other hand, harder formations slow the process but usually support better hole stability.
Because of these changing conditions, two rigs with similar specifications rarely perform the same way on different sites.
That is why experienced drillers avoid giving fixed numbers. Instead, they observe how the rig behaves during drilling and adjust their expectations based on real conditions.
What Actually Limits Drilling Depth in Compact Rigs
Once drilling goes deeper, the real challenge begins. On the surface, the rig may look strong enough, but as the hole extends, several forces start building up at the same time.
Because of this, depth is never controlled by a single factor. Instead, multiple things work together, and each one starts affecting performance step by step.
One of the first limits comes from rod weight.
As drilling goes deeper, more rods get added into the hole. This increases the total weight hanging from the rig. At shallow depths, this does not create much pressure. But as the depth increases, the load becomes heavier, and the rig has to work harder just to rotate and lift the string.
At the same time, torque demand also increases.
The deeper the hole, the more resistance builds between the rods and the ground. The rig must generate enough torque to keep the parts of a drilling rig rotating. If torque drops, rotation slows down, and drilling progress starts to suffer.
Then comes another important factor, which is hole stability.
In some ground conditions, the borehole walls remain strong and stable. In other cases, especially in loose or fractured formations, the walls may start collapsing or squeezing the drill rods.
When this happens, the rods face extra friction. As a result, the rig needs more power to continue drilling, and in some cases, the operation has to stop.
Along with that, drilling fluid performance also plays a role.
Drilling fluid helps remove cuttings and keeps the hole clean. If the fluid does not circulate properly, debris starts building up inside the hole. This increases resistance and slows down the drilling process.
One more aspect that is easily neglected is operator control. A trained drill rig manufacturers is aware of the pressure, rotation speed, and feed rate equilibrium. When these are managed properly, the rig works better and attains much depth. Conversely, inefficient management may decrease the drilling efficiency even on moderate depths. All these factors interact with one another and therefore, depth is an outcome of managing all the factors appropriately while drilling. This is why two similar rigs can perform very differently. One may stop early due to poor conditions or handling, while another may continue deeper under better control.
How to Increase the Depth Capacity of a Compact Wireline Rig
When drilling starts getting deeper, most people think the rig has reached its limit. In reality, many times the problem is not the machine, it’s how the drilling is managed.
Small changes in approach can make a big difference.
1. Choose the Right Rod Size
Depth often depends on how much weight the rig has to handle. As the hole gets deeper, every additional rod adds load to the system, which slowly reduces performance.
Because of this, experienced crews usually prefer NQ rods when they aim for deeper drilling. These rods are lighter, so the rig handles them more easily at greater depths.
At the same time, heavier rods like HQ or PQ provide better core samples, but they increase the load quickly. So crews need to balance between sample quality and depth.
When the goal is depth, lighter rods usually give better results.
2. Maintain Proper Drilling Pressure
Once drilling starts going deeper, pressure control becomes more important than most people expect.
Most operators make heavy hands when the progress is reduced, but in most cases, this only causes more problems than they can address. In the excessive pressure, the drill bit expires too quickly. Simultaneously, the rods begin to gain additional stress, and the whole system begins to be struggling rather than enhancing the performance. Conversely, when the pressure is low, this is a different problem. The bit continues to rotate, however, it is not a good cutter and thus slows down the process of drilling making it slow and ineffective. This is the reason why the appropriate balance must be searched. The old-time drillers tend to operate in a plain manner:
apply steady pressure, not sudden force
increase pressure gradually in hard formations
reduce pressure when the rig shows resistance
avoid forcing the rig when progress slows
This way, the rig keeps working smoothly instead of fighting against the ground.
Over time, proper pressure control helps in two ways. It protects the equipment from unnecessary stress, and at the same time, it allows the rig to reach greater depth without breaking the drilling rhythm.
3. Control Rotation Speed and Torque
As drilling goes deeper, rotation and torque start playing a bigger role. At shallow depth, the rig rotates easily. But as more rods go into the hole, resistance builds up, and the machine needs more control to keep things moving.
If rotation speed is too high, the drill bit may spin without cutting properly. This creates heat, increases wear, and reduces efficiency.
On the other hand, if rotation is too slow, the drilling process becomes weak and inconsistent, especially in harder formations.
This is where torque also comes into play.
The rig needs enough torque to keep the bit turning under load. If torque drops, the rods may start binding, and drilling progress slows down.
Because of this, the operator needs to manage both rotation and torque together.
A practical approach usually looks like this:
keep rotation steady, not aggressive
reduce speed when resistance increases
allow torque to build gradually instead of forcing it
avoid sudden changes in speed during drilling
This balance helps the rig maintain smooth cutting action instead of creating unnecessary stress on the system.
When rotation and torque stay under control, drilling becomes more stable. As a result, the rig performs better at deeper levels without losing efficiency.
4. Keep the Borehole Clean
As drilling goes deeper, keeping the hole clean becomes more important than many people realize. At shallow depths, small amounts of debris may not cause serious issues. But as the hole extends, even a slight buildup inside can start affecting the entire operation.
When the drill bit cuts through the ground, it produces small rock fragments known as cuttings. These cuttings must move out of the hole continuously. If they stay inside, they begin to settle around the drill string and create resistance.
This is where drilling fluid plays a major role.
The fluid moves down through the rods and then flows back up, carrying cuttings to the surface. This circulation keeps the borehole clear and allows drilling to continue smoothly.
If this flow weakens or slows down, problems start building step by step.
cuttings begin to settle at the bottom
debris starts blocking the drilling path
rods face extra friction while rotating
the rig needs more power to continue
In worse cases, the drill string can even get stuck inside the hole, which stops the operation completely.
Because of this, experienced crews pay close attention to hole cleaning. They adjust fluid flow, monitor circulation, and make sure cuttings keep moving out without interruption.
A simple approach usually works best:
maintain steady fluid circulation at all times
check that cuttings are reaching the surface properly
avoid slowing down the flushing system during drilling
increase flow when drilling deeper sections
When the borehole stays clean, the rig operates with less resistance. As a result, drilling becomes smoother, and the machine can reach greater depth without unnecessary strain.
5. Use Experienced Operator Techniques
As drilling goes deeper, the machine alone cannot carry the job. At that stage, the operator starts making the real difference.
Two rigs with the same setup can perform very differently, and most of the time, the reason is how the operator handles the drilling.
An experienced driller does not rely only on gauges. They read the behavior of the rig while drilling. Small changes in sound, vibration, or resistance tell them what is happening underground.
Instead of forcing the machine, they adjust step by step.
A skilled operator usually focuses on a few key things:
listens to the rig and notices unusual vibration
adjusts pressure slowly instead of pushing suddenly
controls rotation based on ground response
pauses drilling when resistance increases too much
avoids rushing when drilling becomes difficult
Because of this approach, the rig stays stable even at deeper levels.
Less experienced operators often make one common mistake. When drilling slows down, they try to force progress. This creates more load on the system and reduces depth capacity instead of improving it.
On the other hand, experienced drillers stay patient. They allow the machine to work with the ground instead of against it.
Over time, this controlled approach reduces equipment stress, improves drilling efficiency, and helps the rig reach deeper depths safely.
That is why on many sites, people say:
“The rig matters, but the driller matters more.”
You can also check: Essential Drill Rig Spare Parts You Must Keep In Stock
Final Thoughts
By now, one thing should be clear.
A compact wireline drilling rig does not have a fixed depth limit. You won’t find one number that fits every project, and if someone gives you one, they are simplifying a much more complex reality.
Depth depends on how everything comes together on site.
If the ground stays stable, the rods remain manageable, and the drilling process stays controlled, a compact rig can go much deeper than expected. On the other hand, if conditions turn difficult or the operation lacks control, even a capable rig may struggle early.
So instead of asking, “How deep can this rig go?”, a better question is:
“Is this setup prepared to reach the depth we need?”
That’s where smart decisions come in.
Before choosing a compact wireline rig, you should think about:
the type of ground you will drill into
the required drilling depth for your project
the rod size you plan to use
the experience level of your drilling crew
how well you can manage pressure, rotation, and hole cleaning
When you have the middle-depths of your project, and require mobility, flexibility and an efficient setup, a compact rig can happen to make ideal sense. But in case your project requires a high level of depth or acquires extremely demanding ground situations, then you should consider acquiring a stronger system rather than using a compact one exclusively. At the close of the day, the optimum results are achieved through the appropriate rig being used with the appropriate conditions as well as the appropriate rig manufacturers. Success in drilling does not rely on the machine itself. It is based on the successfulness of all working together.
Before any construction work begins, one question always comes up on site.
“What is happening under the ground?”
From the surface, everything might look stable. The land may appear solid and ready for construction. But once drilling starts, the story often changes. One layer might be strong, the next one suddenly turns soft, and sometimes unexpected loose zones appear where no one planned for them.
This is exactly why geotechnical testing becomes important.
Engineers do not like to work on assumptions, and they want actual ground data. There is one technique that appears in many sites of a drilling among all the tests that have been employed in the process of drilling. That is called SPT hammer testing. It does not look complicated. As a matter of fact, when you come close to a drilling rig, you will notice a hammer falling up and down. However, there is more behind that uncomplicated exercise as the engineers receive insightful information that directly impacts foundation design, safety, and construction planning. This test has gained credibility over the years since it is not only effective in the theory but also in practice.
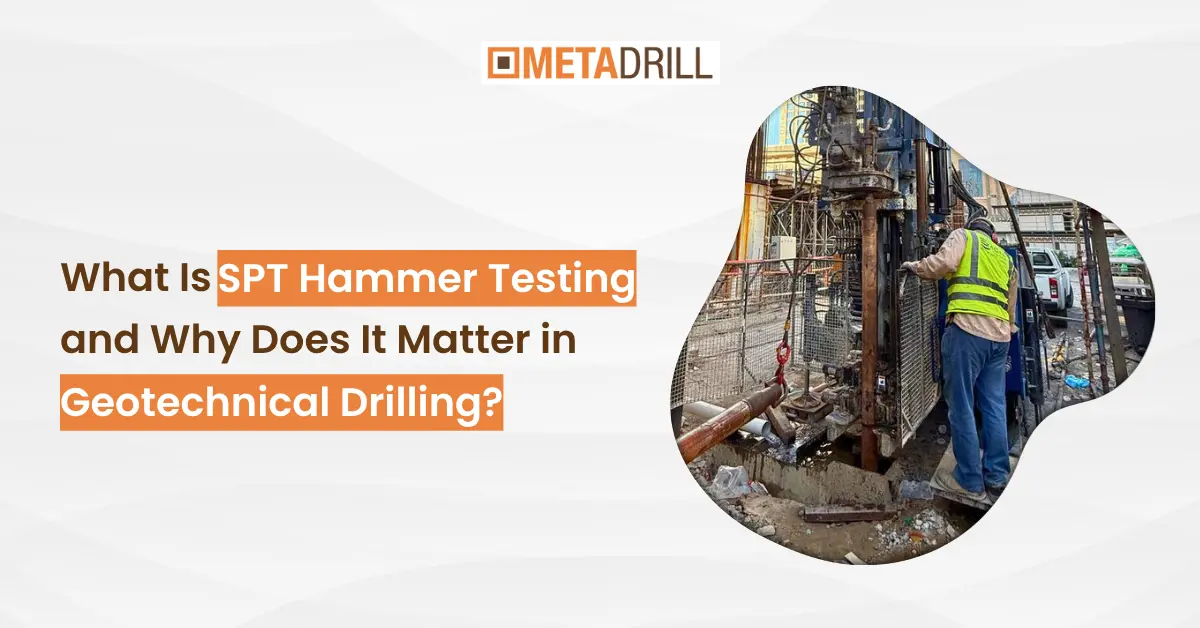
What Is SPT Hammer Testing?
SPT hammer testing is one of those methods that looks basic but gives practical results.
The crew uses a tool called a split spoon sampler, which they push into the ground using a heavy hammer. The hammer drops from a fixed height, and each drop pushes the sampler slightly deeper.
Now here is the part that really matters.
The crew does not just push the sampler and move on. The crew does not just push the sampler and move on. They count every blow carefully. This count tells them how the soil reacts.
When the sampler moves easily, the soil is loose
When it resists, the soil is dense
On site, you can actually feel the difference. In loose soil, the hammer feels like it is doing most of the work. In dense layers, you can see the resistance build up with each blow.
That number, known as the SPT N-value, becomes the key piece of data engineers use later.
So instead of guessing soil strength, the team gets a measurable response directly from the ground.
How SPT Hammer Testing Works
The process on site follows a routine, but it does not feel mechanical. Each step depends on what happened in the previous one.
The crew starts by drilling a borehole to a certain depth. They do not drill all the way down at once. Instead, they stop at intervals because they want to test the soil layer by layer.
At this point, keeping the borehole clean becomes important. If loose material stays at the bottom, it can affect the test result. So the driller takes a moment to prepare the hole properly.
Next, they lower the split spoon sampler down to the bottom.
Once everything sits in position, the hammer comes into action.
The operator lifts the hammer and lets it fall from a fixed height. Each drop pushes the sampler deeper into the soil. The process repeats, and the crew starts counting the blows.
This part usually gets everyone’s attention on site.
People naturally watch how many blows it takes. In soft soil, the number stays low. In harder layers, the count starts increasing, and you can almost sense the ground pushing back.
After the required depth is reached, the crew records the blow count. This value becomes the SPT N-value.
Then they pull out the sampler and collect the soil inside it. This sample goes into labeled boxes, and later engineers study it along with the recorded data.
Once this step finishes, the crew continues drilling and repeats the same process at the next depth.
Over time, these repeated steps build a full underground profile.
SPT vs Other Soil Tests
On most sites, SPT is not the only test available. Engineers have other options too, and each one gives different types of data.
But here is the thing.
Not every project needs highly complex testing. Sometimes, engineers need quick and reliable information while drilling continues. That is where SPT becomes the practical choice.
Test Method | How It Works | What It Measures | Speed | Cost | Best Use |
SPT | Hammer drives sampler, blows counted | Soil strength and density | Fast | Low | General site investigation |
CPT | Cone pushed with sensors | Soil resistance and layering | Fast | Medium | Soft soil profiling |
Plate Load Test | Load applied on plate | Bearing capacity | Slow | High | Foundation checks |
Vane Shear Test | Vane rotated in soil | Shear strength | Medium | Low | Soft clay |
Triaxial Test | Lab-based testing | Detailed behavior | Slow | High | Detailed analysis |
So while other tests give more detail, SPT stays useful because crews can perform it quickly without stopping the entire operation.
Why SPT Hammer Testing Matters
This test matters because it directly connects to real decisions on site.
Each blow count gives engineers a clearer idea of soil behavior. As they collect values at different depths, they start to understand where the ground is strong and where it might fail.
This understanding changes everything.
If engineers find weak soil early, they adjust the foundation design. If they detect loose layers, they plan ground improvement before construction begins.
Without this data, geotechnical drilling rig manufacturers would move forward blindly, which often leads to delays, extra cost, or structural issues later.
SPT also helps reduce surprises. Construction problems rarely happen because of what is visible. They happen because of what no one checked below the surface.
By running this test during drilling, rig manufacturers remove that uncertainty.
Another reason this method stays popular is its practicality. It does not slow down the project. Crews perform it as part of normal drilling work, which keeps everything moving smoothly.
So even though the method looks simple, the impact reaches every stage of the project.
You can also check: 9 Most Common Drill Rig Failures And The Parts That Fix Them
Final Thoughts
SPT hammer testing might not look advanced, but it plays a serious role behind the scenes.
Each hammer blow adds information. Each test point adds clarity. Over time, these small pieces help engineers build a complete understanding of the ground.
That understanding leads to better decisions, safer structures, and fewer problems during construction.
On site, many things change quickly. Ground conditions shift, drilling conditions vary, and unexpected challenges appear. But one thing remains consistent.
Crews continue to rely on SPT hammer testing because it gives answers when they need them most.
Every drilling job needs a machine, yet the real challenge is choosing the right one. Many people get stuck between two options, track-mounted and truck-mounted drill rigs.
Both machines can drill, yet they behave differently on site. This is where most confusion starts.
Now think about your work area. Some sites are rough, muddy, or hard to reach. Other sites have proper roads and open space. Because of this, one rig fits better than the other.
Track-mounted rigs move on tracks, so they stay stable on uneven ground. Truck-mounted rigs move on wheels, so they travel faster on roads. This small difference changes how your work runs.
As the project begins, movement, stability, and access start to matter more. A machine that cannot move easily will slow everything down. On the other hand, the right machine keeps the work going without trouble.
Machines built by drilling rig manufacturers include different drilling rig components and strong drilling rig tools and equipment. These parts work together, yet the base of the machine decides how well it performs on your site.
So the decision is not about which rig looks better. The real question is simple.
Which rig fits your site and your work?
Why This Comparison Matters
Helps you avoid the wrong machine
Keeps your work moving smoothly
Saves time and cost
Makes your project easier to manage
What Is a Track-Mounted Drill Rig
When you look at rough or uneven ground, movement becomes the biggest problem. This is where a track-mounted drill rig starts to make sense.
This type of rig moves on tracks instead of wheels. Because of this, it stays stable even on soft, muddy, or rocky surfaces.
Now think about a site where the ground is not flat. A normal wheeled machine may slip or struggle to move. On the other hand, a track-mounted rig spreads its weight, so it moves smoothly without losing balance.
As the work begins, this stability helps a lot. The machine stays steady, and drilling becomes easier. This also reduces shaking, which improves accuracy.
Inside the rig, different drilling rig components work together to support the drilling process. At the same time, strong drilling rig tools and equipment help the machine cut through the ground without slowing down.
Where This Rig Works Best
Rough and uneven ground
Muddy or soft soil areas
Remote locations with no proper roads
Construction sites with difficult access
Why People Choose This Rig
Strong grip on the ground
Better stability during drilling
Works well in difficult conditions
Less chance of slipping or getting stuck
What Is a Truck-Mounted Drill Rig
Now look at the other side, where the ground is clear and access is easy. This is where a truck-mounted drill rig fits better.
This type of rig is fixed on a truck, so it moves on wheels. Because of this, it travels fast on roads and reaches the site without delay.
Now think about a project in a city or along a roadside. The area has proper access, so movement is not a problem. In this situation, a truck-mounted rig saves time because it moves quickly from one location to another.
As the work begins, the machine sets up and starts drilling. The process stays smooth as long as the ground is stable. On rough or muddy ground, the machine may struggle, yet on flat surfaces, it performs well.
Inside the rig, different drilling rig components support the drilling process. At the same time, strong drilling rig tools and equipment help the machine drill efficiently without slowing down.
Where This Rig Works Best
Urban and roadside projects
Sites with proper road access
Flat and stable ground
Projects that need quick movement
Why People Choose This Rig
Fast movement between sites
Easy transport without extra setup
Saves time on travel
Works well on smooth surfaces
Key Differences Between Track-Mounted and Truck-Mounted Drill Rigs
Now you understand both rigs, so the next step becomes simple. You need to see the difference side by side.
When you compare both machines, the main difference comes from movement, stability, and where they work best.
Track-Mounted vs Truck-Mounted Drill Rig
Factor | Track-Mounted Drill Rig | Truck-Mounted Drill Rig |
Movement Type | Moves on tracks | Moves on wheels (truck) |
Ground Handling | Works well on rough, muddy, uneven ground | Works best on flat and stable ground |
Stability | High stability during drilling | Less stable on uneven ground |
Speed of Movement | Slower movement | Faster movement on roads |
Site Access | Best for remote or hard-to-reach areas | Best for areas with road access |
Setup Time | Takes more time to move between sites | Quick setup and easy transport |
Use Case | Tough terrain and difficult sites | Urban and roadside projects |
What This Means in Real Work
Now connect this with your project.
When your site has rough ground or no proper access, a track-mounted rig makes your work easier. It moves slowly, yet it stays stable and handles difficult conditions.
On the other hand, when your site has proper roads and open space, a truck-mounted rig saves time. It moves fast and helps you shift between locations quickly.
Because of this, the decision depends on your site, not on which machine looks better.
When a Track-Mounted Drill Rig Is Better
Now that you see the difference, the next step becomes easy. You need to know when a track-mounted rig is the right choice.
This rig works best when the ground makes movement difficult. When the site is rough, soft, or uneven, stability becomes more important than speed.
Think about a location where the surface is muddy or rocky. A wheeled machine may slip or struggle to move. In this situation, a track-mounted rig stays balanced and keeps the work moving.
As the drilling begins, this stability helps the machine stay steady. Less movement means better control, and better control improves the drilling result.
Inside the rig, strong drilling rig components support this stability. At the same time, reliable drilling rig tools and equipment help the machine perform well even in difficult conditions.
Situations Where This Rig Fits Best
Ground is soft, muddy, or uneven
Site is remote or hard to reach
Area does not have proper road access
Project needs stable drilling on difficult terrain
Why This Choice Works
Better grip on the ground
Less chance of slipping
More control during drilling
Stable performance in tough conditions
When a Truck-Mounted Drill Rig Is Better
Now look at the other side, where movement becomes easy and fast. This is where a truck-mounted drill rig works better.
This rig fits best when the site has proper road access and stable ground. When the surface is flat, the machine moves smoothly and reaches the location without delay.
Think about a city project or roadside work. In this case, speed matters more than heavy ground support. A truck-mounted rig travels quickly, so you save time when moving from one site to another.
As the work begins, the machine sets up and starts drilling without much effort. Because the ground is stable, the rig performs well and keeps the process smooth.
Inside the machine, strong drilling rig components support the drilling process. At the same time, reliable drilling rig tools and equipment help maintain steady performance during work.
Situations Where This Rig Fits Best
Site has proper road access
Ground is flat and stable
Project needs fast movement between locations
Work is in urban or roadside areas
Why This Choice Works
Fast travel from one site to another
Easy transport without extra setup
Saves time during project shifts
Works well on smooth surfaces
You can also check: Signs Your Drilling Rig Needs Immediate Refurbishment
Final Insight: Which Drill Rig Should You Choose
Now you have seen both options clearly. You understand how each rig works and where each one fits best.
So the final decision becomes simple. It depends on your site and your working conditions.
When the ground is rough, soft, or hard to reach, a track-mounted rig supports your work better. It moves slowly, yet it stays stable and keeps drilling smooth.
On the other hand, when the site has proper roads and flat ground, a truck-mounted rig becomes the better choice. It moves fast, saves time, and helps you handle multiple locations easily.
Machines built by drilling rig manufacturers include strong drilling rig components and reliable drilling rig tools and equipment, yet the base of the machine decides how well it performs on your site.
Because of this, the decision is not about which rig is better in general. The real answer depends on your project needs.
Quick Way to Decide
Choose track-mounted when ground is difficult
Choose truck-mounted when movement needs to be fast
Choose track-mounted for remote or uneven sites
Choose truck-mounted for urban and roadside work
Drilling projects move fast, and every minute matters. Teams want results without stopping the machine again and again. That is where N-Wireline Drilling steps in to change everything, because it saves time and keep the drilling process easy.
Many people hear about this method but don’t fully understand how it works. So let’s break it down in simple words. This system lets workers pull out the core sample without removing the full drill rod from the hole. That single change improves both speed and cost control.
Now think about a deep drilling project. Workers use heavy machines built by drilling rig manufacturers and core drilling rig manufacturers. These machines include many parts of a drilling rig, and each part helps keep the drilling process stable.
When teams use traditional drilling:
They stop the machine
They remove drill rods
They collect the sample
Then they restart drilling
This process takes time and effort, so progress slows down.
With this wireline system, the process becomes faster and more efficient. Workers keep the drill rods inside the hole, and they pull the core sample using a wireline tool. Because of this, work continues with fewer delays, and productivity improves.
This method also works closely with modern equipment made by drill rig manufacturers and geotechnical drilling rig manufacturers. These rigs include advanced drilling rig components and strong drilling rig tools and equipment that handle deep and complex drilling conditions.
Why This Method Stands Out
Reduces downtime during drilling
Improves project speed
Keeps workflow continuous
Supports deep drilling operations
Works with modern rig systems
So if you want to understand modern drilling, you need to understand N-Wireline Drilling. In the next section, you will see exactly how this system works step by step in real projects.
What Is N-Wireline Drilling
You already saw why N-Wireline Drilling matters, so now let’s understand it in simple words. This method belongs to core drilling, and teams use it to collect rock samples from deep inside the ground without stopping the drilling process.
In simple terms, this system uses a special inner tube placed inside the drill rods. This tube holds the core sample as drilling continues. When the sample fills up, workers do not remove the full rod string. Instead, they lower a wireline tool into the hole, connect it to the inner tube, and pull it back to the surface.
Because of this process, the drill rods stay inside the hole while sampling takes place. So the work continues without long pauses, and the drilling speed improves.
Now connect this with real equipment. Modern machines built by drilling rigs manufacturers and core drilling rig manufacturers support this system with precision. These rigs include advanced drilling rig components that allow smooth operation during sampling.
Each part plays a role here. Important parts of a drilling rig like rods, inner tubes, and wireline tools must work together without error. If one part fails, the process slows down. Because of this, many rig manufacturers design their systems for accuracy and stability.
Now think about older methods. Workers had to remove every rod to collect samples, which slowed down the job. This wireline approach removes only the inner core, so the outer setup stays in place. That change saves time and reduces effort.
To put it simply, this method gives faster sampling, less downtime, and better control during deep drilling projects.
Why N-Wireline Drilling Matters in Modern Projects
Drilling projects today move under tight deadlines, so teams need speed without losing control. Because of this, N-Wireline Drilling plays a strong role in modern operations.
This method reduces downtime in a direct way. Workers do not stop the machine to remove rods again and again. Instead, they collect samples while the drill rods stay inside the hole. So the workflow continues without long pauses.
Because of this, projects move faster and stay more organized. Teams collect more samples in less time, which improves overall output.
Now let’s look at why this method stands out in real projects:
Key Advantages of This Method
Faster sampling without removing drill rods
Less downtime during drilling operations
Reduced manual work for workers
Better safety due to less handling of heavy parts
Improved sample quality and accuracy
These advantages directly impact project performance. For example, in deep drilling, even small delays increase cost. This system reduces those delays, so teams maintain steady progress.
Cost control also becomes easier. Less handling means less wear on drilling rig parts, and that reduces maintenance needs. At the same time, modern machines built by drilling rig manufacturers include advanced drilling rig components that support smooth operation.
Safety also improves. Workers perform fewer heavy tasks, and machines handle more of the process. This reduces physical risk on site.
Many geotechnical drilling rig manufacturers and oil drilling rig manufacturers now design rigs that fully support this system. These rigs use strong drilling rig tools and equipment, which handle deep and complex drilling conditions with better stability.
To put it simply, this method improves speed, safety, and efficiency at the same time. That is why modern drilling projects rely on it more than older methods.
Parts of a Drilling Rig Used in Wireline Drilling
You already understand how this method works, so now let’s look at the parts of a drilling rig that make the wireline system possible. Each part works together, and even a small issue can slow down the whole process.
Modern rigs built by drilling rig manufacturers and drilling rigs manufacturers include advanced systems that support smooth wireline operations. These systems rely on strong and well-connected drilling rig components.
Main Drilling Rig Components in Wireline Drilling
Each component plays a clear role during drilling and sampling:
Drill Rods
These rods go deep into the ground and create the drilling path. They also hold the inner tube system used in wireline drilling.
Inner Tube Assembly
This part collects the core sample. Workers pull this tube out using the wireline system while the rods stay inside the hole.
Outer Core Barrel
This section stays connected to the drill rods and supports the inner tube during drilling.
Wireline Cable System
This system pulls the inner tube back to the surface. It connects with the core barrel and lifts the sample without stopping the drilling setup.
Drilling Derrick Components
The derrick supports lifting operations and helps manage tools during drilling. It keeps the system stable while handling vertical movement.
Rotary Head or Drive System
This part rotates the drill rods and allows the rig to cut through soil or rock layers.
Hoisting System
This system controls lifting and lowering of tools and wireline equipment during the operation.
How These Drilling Rig Parts Work Together
All these drilling rig parts stay connected during the drilling process. The outer system keeps rotating and cutting through the ground, while the inner tube collects the sample.
When the sample fills up:
Workers lower the wireline tool into the hole
The tool locks into the inner tube
The system pulls the tube back to the surface
The drill rods remain inside the hole
Because of this setup, the drilling process continues without interruption.
Why These Parts Matter in Real Projects
Each part must perform without failure. If one component stops working, the entire drilling process slows down. Because of this, many rig manufacturers design machines with strong and precise systems.
You will also notice that modern rigs from oil drilling rig manufacturers and geotechnical drilling rig manufacturers use high-quality rig machine parts. These parts handle pressure, depth, and continuous operation without frequent breakdowns.
How N-Wireline Drilling Works Step by Step
You already know the parts involved, so now let’s see how the full process works in real conditions. This section will help you understand the flow in a simple and practical way.
Step 1: Start Drilling the Hole
Workers set up the rig and begin drilling using rotating drill rods. These rods cut through soil or rock layers and move deeper into the ground. Modern machines built by drilling rig manufacturers support stable and continuous drilling from the start.
At this stage, the inner tube stays inside the core barrel, ready to collect samples.
Step 2: Core Sample Collection Begins
As drilling continues, the inner tube starts collecting the core sample. This sample gives important information about the ground layers.
Because the system works inside the rods, there is no need to stop drilling during this phase. The outer system keeps moving while the sample forms inside the tube.
Step 3: Stop Rotation for Sample Retrieval
Once the inner tube fills with the core sample, workers stop the rotation of the drill rods. The rods stay inside the hole, so the setup remains stable.
Now the focus shifts to retrieving the sample without disturbing the outer system.
Step 4: Lower the Wireline Tool
Workers send a wireline tool down through the drill rods using a cable. This tool moves quickly and reaches the inner tube inside the core barrel.
This step connects the surface system with the sample inside the ground.
Step 5: Lock and Pull the Inner Tube
The wireline tool locks into the inner tube assembly. After locking, workers pull the tube back to the surface using the cable system.
Because of this design, only the sample moves upward, while the drill rods remain in place.
Step 6: Remove Sample and Reset System
Workers remove the core sample from the inner tube at the surface. This sample is then sent for testing and analysis.
After that, they send the inner tube back into the hole to continue drilling.
Step 7: Resume Drilling
Drilling starts again without rebuilding the setup. This keeps the workflow smooth and reduces time loss.
Why This Process Works Better
This step-by-step system improves efficiency in multiple ways:
Reduces time spent on removing drill rods
Keeps drilling continuous and stable
Improves sample collection speed
Supports deep drilling operations
Works smoothly with modern drilling rig tools and equipment
Because of this process, many core drilling rig manufacturers design rigs specifically for wireline systems. These machines support fast and accurate operations in real projects.
Tools and Equipment Used in N-Wireline Drilling
You already understand the process, so now let’s look at the tools that make this system work in real conditions. Each tool plays a clear role, and together they keep the operation smooth and fast.
Modern rigs built by drilling rig manufacturers depend on strong and accurate drilling rig tools and equipment. These tools handle pressure, depth, and continuous use without slowing down the process.
Core Drill Rig Tools Used in Wireline Drilling
These tools work together during drilling and sample collection:
Core Barrel System
This tool holds the inner tube and supports sample collection inside the drill rods. It stays connected during drilling.
Wireline Overshot Tool
This tool connects with the inner tube. Workers use it to pull the tube back to the surface using a cable system.
Wireline Cable
This cable carries the overshot tool down and pulls the inner tube up. It allows fast movement without removing drill rods.
Inner Tube Assembly
This unit collects the core sample. It moves in and out of the hole during the drilling cycle.
Drill Bit
This tool cuts through soil and rock layers. It works at the bottom of the drill string and drives the drilling process.
Supporting Drill Rig Tooling for Smooth Operation
Along with core tools, several supporting tools help maintain efficiency:
Rod Handling Tools
These tools help manage drill rods during setup and adjustments.
Circulation System Tools
These tools control drilling fluid, which helps cool the drill bit and remove cuttings.
Measurement Tools
These tools help track depth, alignment, and drilling performance.
Role of Specialized Systems
Some projects also use advanced systems like cable tool drilling rig setups in specific conditions. These systems work differently but still support drilling operations where wireline systems may not fit.
Why Tool Quality Matters
Every tool must perform without failure. If one tool stops working, the whole process slows down. Because of this, many core drilling rig manufacturers design high-quality systems that handle continuous operation.
You will also notice that tools used in this method face heavy load and deep drilling pressure. So strong design and proper maintenance become important for long-term performance.
You can also check: Refurbished Vs New Drilling Rigs: Which Is Smarter?
Quick Checklist for Efficient Operation
Use high-quality drill rig tools
Ensure proper fit between inner tube and core barrel
Maintain wireline cable condition
Monitor drill bit performance
Keep all tools clean and ready for reuse
To put it simply, tools drive the entire process. When the right tools work together, N-Wireline Drilling becomes fast, stable, and efficient.
Final Insight on N-Wireline Drilling
You have now seen how this system works from start to finish. From rig components to tools and step-by-step operation, each part connects to the next and keeps the process smooth.
This method improves drilling in a practical way. Workers collect core samples without removing drill rods, so time loss stays low and workflow remains stable. Because of this, projects move faster and teams handle deep drilling with better control.
Modern machines built by drilling rig manufacturers and core drilling rig manufacturers support this process with strong systems and precise drilling rig components. These machines rely on durable drilling rig tools and equipment that handle pressure, depth, and continuous use.
At the same time, skilled workers play an important role. Proper handling, regular checks, and correct use of tools help maintain performance throughout the project.
What You Should Remember
This method keeps drilling continuous while collecting samples
Drill rods stay inside the hole during sample retrieval
Strong parts of a drilling rig ensure stable operation
Quality tools improve speed and accuracy
Modern rigs support deeper and more complex drilling
This approach brings together speed, safety, and efficiency in one system. Because of this, many teams prefer it for exploration and geotechnical drilling projects.
Every drilling project depends on one key factor. The person operating the machine.
Machines built by drilling rig manufacturers are strong and advanced, yet they only perform well when a trained person runs them. Without proper drilling rig operator training, even the best equipment fails to deliver the expected results.
Now think about a real drilling site. Work moves fast, pressure stays high, and mistakes cost time and money. Because of this, skills matter more than anything else. This is where drill rig training changes everything.
Many businesses ignore training at the start. They rely on basic experience and expect operators to learn during work. This approach slows progress and increases risk. On the other hand, trained operators handle machines with confidence and keep operations smooth.
This also connects with safety. Proper drilling rig safety training helps operators understand risks before they become problems. Because of this, teams work with better control and fewer accidents.
Why Training Matters More Than You Think
Improves machine handling
Reduces mistakes during operation
Increases project speed
Supports safe working conditions
Builds confidence in operators
So instead of seeing training as an extra cost, you need to see it as an investment. When your rig operator understands the machine, the whole project runs better.
In the next section, we will first understand what drilling rig operator training really includes. Then we will break down the 11 real benefits that make this training important for every drilling business.
What Is Drilling Rig Operator Training
You already saw why training matters, so now let’s understand what it actually includes.
Drilling rig operator training teaches a person how to handle a drilling machine safely and efficiently. This training covers both machine operation and on-site decision-making.
Now think about a real drilling setup. A rig operator controls machines that include multiple drilling rig components and heavy-duty drilling rig tools and equipment. Each part works together, so the operator needs to understand how the full system behaves.
Because of this, training does not stay limited to basic machine use. It builds real skills that help during daily operations.
What This Training Covers
Machine setup and operation
Understanding drilling rig components
Safe handling of tools and equipment
Reading ground conditions
Basic troubleshooting during work
Different Types of Training
Training also changes based on the type of work. For example:
drill rig training for general operations
drilling rig safety training for risk control
oil rig driller training for energy sector work
underground drill rig training for deep projects
drill rig machine training for technical handling
Each type builds a different skill set, yet all of them improve operator performance.
Why This Training Builds Strong Operators
A trained driller operator does not depend on guesswork. They understand how the machine reacts, how to adjust during problems, and how to keep the process stable.
Because of this, trained operators reduce downtime, improve output, and handle complex situations with confidence.
To put it simply, drilling rig operator training turns basic workers into skilled professionals who can manage machines, safety, and performance at the same time.
11 Benefits of Professional Drilling Rig Operator Training
You already understand what training includes, so now let’s look at the real impact. These benefits show how drilling rig operator training improves performance, safety, and business results at the same time.
1. Better Machine Control
Trained operators understand how machines respond. Because of this, they handle controls smoothly and avoid sudden mistakes during drilling.
2. Improved Safety on Site
Proper drilling rig safety training helps operators identify risks early. So they prevent accidents instead of reacting after problems occur.
3. Faster Project Completion
When operators know what they are doing, work flows without delays. This leads to faster project completion and better time management.
4. Reduced Equipment Damage
Machines include many sensitive drilling rig components. Trained operators handle them carefully, which reduces wear and damage.
5. Lower Operational Costs
Fewer mistakes mean less repair and downtime. Because of this, businesses save money over time.
6. Better Use of Tools and Equipment
Operators learn how to use drilling rig tools and equipment correctly. This improves performance and extends tool life.
7. Strong Decision-Making Skills
A trained rig operator knows how to respond during unexpected situations. This keeps the drilling process stable even under pressure.
8. Higher Work Efficiency
Training removes confusion during operations. So operators complete tasks faster and with better accuracy.
9. Consistent Work Quality
Each project delivers better results when handled by a skilled driller operator. This builds trust with clients.
10. Support for Advanced Drilling Projects
Complex projects require skilled handling. Training prepares operators for deep, technical, and challenging drilling conditions.
11. Long-Term Business Growth
When your team performs better, your business grows stronger. Skilled operators improve output, reduce cost, and support long-term success.
Quick Insight
Training improves performance
Training reduces risk
Training increases efficiency
Training supports growth
You can also check: How Quality Drilling Accessories Improve Performance
Final Insight on Drilling Rig Operator Training
You have now seen how training impacts every part of a drilling project. From safety to performance, each benefit connects back to one thing. Skilled operators make the difference.
Machines built by drilling rig manufacturers are designed for high performance, yet results depend on the person operating them. When a trained rig operator handles the system, every drilling rig component works the way it should.
Now connect this with real work. Projects run smoother, delays reduce, and teams stay safer. At the same time, proper use of drilling rig tools and equipment improves efficiency and reduces unnecessary damage.
Training also builds confidence. Operators stop relying on guesswork and start making clear decisions during work. This keeps the process stable even in challenging conditions.
What You Should Take Away
Skilled operators improve overall performance
Training reduces risk and operational mistakes
Proper handling increases equipment life
Better efficiency leads to faster project completion
Strong teams support long-term business growth
Every drilling project begins with one decision that shapes everything that follows. You need the right machine, yet the real question sits deeper. Should you choose drilling equipment rental, or should you invest in your own setup?
This choice connects directly with how your project runs day to day. Cost, speed, and flexibility all depend on it. Many businesses pause here because both options bring value in different ways. Renting gives quick access with less commitment, while buying gives control and long-term stability.
Now think about how a real drilling site operates. Work depends on machines built by drilling rig manufacturers, and these machines include many drilling rig components working together at the same time. Along with that, teams rely on durable drilling rig tools and equipment to handle pressure, depth, and continuous operation.
Because of this setup, the decision becomes more serious. Equipment is not a small investment, and one wrong move can slow down progress or increase cost.
When you choose rental drilling equipment, you get modern machines without paying a large upfront amount. This helps when projects run for a short period or when work comes in phases. On the other side, buying equipment gives you full ownership, which supports long-term projects where machines stay active every day.
Why This Decision Matters
It shapes your total project cost
It controls how you manage cash flow
It affects how fast your project moves
It defines your long-term business direction
So instead of making a quick choice, you need a clear view of both sides. In the next section, we will break down what drilling equipment rental really means and how businesses use it in real projects.
What Is Drilling Equipment Rental
Once you understand the importance of the decision, the next step becomes clear. You need to know what rental actually looks like in real work.
Drilling equipment rental means you use machines for a fixed time without owning them. You pay for usage, and once the job ends, you return the equipment. This setup helps businesses stay flexible while avoiding heavy investment.
Now connect this with real projects. Many companies choose options like core drilling equipment rental, directional drilling equipment rental, or well drilling equipment rental based on the type of work they handle. Each option gives access to the right machine for a specific job without long-term commitment.
Because of this, rental works well when:
Projects run for a limited time
Workload changes from project to project
Budget needs tight control
New businesses want to avoid large investment
At the same time, rental providers often maintain the equipment. This reduces the need for repair handling and technical management on your side.
To put it simply, rental gives you access, flexibility, and lower upfront cost. In the next section, we will look at the other side of the decision and understand what happens when you choose to purchase equipment instead.
What Does Purchasing Drilling Equipment Mean
You already understand how rental works, so now let’s look at the other side of the decision. Purchasing equipment means you invest in your own machine and use it whenever your project needs it.
This changes how your business operates. Instead of depending on availability, you control your schedule, your workflow, and your output. That control becomes important when projects run continuously.
Now think about the type of machines involved. Equipment built by drilling rig manufacturers includes complex systems with many drilling rig components working together. These machines also rely on durable drilling rig tools and equipment to handle heavy-duty operations.
Because of this, buying equipment is not a small step. You pay a higher upfront cost, yet you gain full ownership. This means you use the machine across multiple projects without paying again and again for access.
This approach works well when:
Your business runs long-term projects
Equipment stays in use regularly
You want full control over operations
You plan to scale your drilling work
At the same time, ownership brings responsibility. You handle maintenance, repairs, and performance checks. In some cases, teams also invest in drill rig operator training and drilling rig safety training to ensure smooth and safe operations.
So while buying gives control and long-term value, it also requires planning and management.
To put it simply, purchasing equipment supports stability and long-term growth. In the next section, we will compare both options side by side so you can clearly see which one fits your business better.
Key Differences Between Rental and Purchase
You now understand how both options work, so the next step is to see them side by side. This comparison helps you make a clear business decision instead of guessing.
When you look at equipment rental vs purchase, the difference shows up in cost, control, and long-term value. Each option fits a different type of project and business model.
Rental vs Purchase Comparison
Factor | Drilling Equipment Rental | Purchasing Equipment |
Upfront Cost | Low, you pay for usage | High, you invest once |
Flexibility | High, choose equipment per project | Limited, you use what you own |
Control | Depends on availability | Full control over usage |
Maintenance | Handled by provider | Your responsibility |
Long-Term Cost | Increases with repeated use | Decreases over time |
Technology Access | Easy access to latest machines | Upgrade requires new investment |
Project Suitability | Best for short-term work | Best for long-term operations |
What This Means in Real Projects
Now connect this with real drilling work. When you choose drilling equipment rental, you get quick access to machines built by drilling rig manufacturers without spending a large amount upfront. This works well when projects change frequently.
On the other hand, when you purchase equipment, you rely on your own system. Your machines include all drilling rig components and drilling rig tools and equipment, and you manage everything from operation to maintenance.
Because of this, the decision depends on how your business runs. If your projects come in phases or vary in size, rental gives you flexibility. If your work stays consistent, ownership gives better long-term value.
Quick Decision Clues
Choose rental if you need flexibility and lower upfront cost
Choose purchase if you want control and long-term savings
Choose rental if project demand changes often
Choose purchase if your equipment stays in use regularly
This comparison gives you a clear picture, yet the real decision depends on your project type and budget.
Cost Comparison: Short Term vs Long Term
You already saw the basic differences, so now let’s talk about what really drives decisions. Cost always sits at the center of rental vs purchase, and this is where things become clear.
When you choose drilling equipment rental, your initial cost stays low. You pay only for the time you use the machine. This helps when projects run for a short period or when work is not consistent.
Because of this, rental protects your cash flow. You avoid a large upfront payment, and you keep your budget flexible.
Now look at the other side. When you purchase equipment, you invest a higher amount at the start. Machines built by drilling rig manufacturers include complex systems, and each unit includes multiple drilling rig components and heavy-duty drilling rig tools and equipment. This makes the initial cost higher.
At first, this looks expensive. Yet over time, the cost per project starts to drop. You stop paying repeatedly for access, and the machine becomes part of your long-term asset.
Short-Term Cost View
Rental keeps initial spending low
No major investment required
Best for limited or one-time projects
No maintenance cost on your side
Long-Term Cost View
Purchase reduces cost over multiple projects
Equipment becomes a business asset
Better return when usage stays consistent
More control over operational expenses
Real Scenario to Understand Better
Think about a project that runs for two months. In this case, rental drilling equipment works better because you avoid a large investment.
Now think about a company handling continuous drilling work across the year. Here, buying equipment makes more sense because repeated rental costs start adding up.
This means the decision is not about which option is cheaper. The real question is how long and how often you will use the equipment.
To put it simply, rental saves money in the short term, while purchase saves money in the long run. Your business needs decide which path gives better value.
Why Businesses Prefer Rental in These Cases
Short-term projects do not justify heavy investment. Because of this, many companies choose options like core drilling equipment rental, directional drilling equipment rental, or well drilling equipment rental based on project needs.
This approach keeps operations flexible. You use the right equipment at the right time without worrying about long-term ownership.
At the same time, rental providers often handle maintenance and service. This reduces the burden of repairs and technical issues on your team. You focus on completing the project instead of managing equipment problems.
Real Example
Consider a contractor working on different drilling sites across locations. One project requires core sampling, while another needs directional drilling. Instead of buying multiple machines, the contractor uses drilling equipment rental to match each project requirement.
This keeps cost under control and improves efficiency.
Quick Checklist Before Choosing Rental
Project duration stays short
Equipment usage is not continuous
Budget limits large investment
Project requirements change frequently
This option gives flexibility, lower initial cost, and less operational responsibility. That is why many growing businesses start with rental before moving toward ownership.
When Drilling Equipment Rental Makes More Sense
Now the decision becomes real. You don’t just compare options, you match them with your work.
Drilling equipment rental works best when your projects don’t stay constant. You take one job, complete it, then move to another with different needs. Because of this, owning one fixed machine does not always help.
Think about how your work flows. Some months stay busy, while others slow down. In this situation, rental drilling equipment gives you breathing space. You use machines only when needed, and you don’t carry cost when work stops.
Where Rental Fits Naturally
Short projects that finish quickly
Work that changes from site to site
New businesses testing the market
Limited budget at the start
Jobs that need different machines
How Rental Supports Your Work
Now look at real project needs. One job may require core drilling equipment rental, while another may need directional drilling equipment rental. In some cases, you might even go for well drilling equipment rental.
Because of this, rental gives you freedom. You don’t stay locked to one machine. You pick what fits the job and move forward without delay.
At the same time, rental providers usually handle service and repair. So your team spends more time on work and less time fixing machines.
Simple Way to Think About It
If your equipment does not stay in use every day, buying does not make sense. In that case, drilling equipment rental keeps your cost low and your work flexible.
Quick Check Before You Choose Rental
Your projects don’t run all year
Your equipment needs keep changing
Your budget needs control
You want to avoid maintenance responsibility
This option keeps things light, flexible, and easy to manage. That is why many businesses start with rental before moving toward ownership.
When Purchasing Drilling Equipment Makes More Sense
Now flip the situation and look at the other side. Sometimes rental stops making sense, and ownership becomes the smarter move.
This happens when your work stays consistent. You run projects regularly, and your machines stay active most of the time. In this case, buying equipment gives you better control and long-term value.
Think about a business handling continuous drilling jobs. You don’t want to depend on availability every time. You want your machine ready whenever work starts. That is where purchasing becomes the stronger option.
Where Buying Fits Naturally
Projects run throughout the year
Equipment stays in use regularly
Work type does not change often
Business plans long-term growth
You want full control over operations
How Ownership Supports Your Business
When you buy equipment from drilling rig manufacturers, you build your own setup. Your machine includes all drilling rig components and heavy-duty drilling rig tools and equipment needed for daily work.
Because of this, your workflow becomes stable. You don’t wait for availability, and you don’t adjust based on rental limits. You run your projects on your own terms.
At the same time, ownership helps reduce cost over time. You stop paying again and again for access. As your machine continues to work across projects, your cost per project starts to drop.
Responsibility Comes with Ownership
Buying equipment also brings responsibility. You handle maintenance, repair, and performance checks. In many cases, teams also invest in drill rig operator training and drilling rig safety training to keep operations smooth and safe.
Because of this, ownership requires planning, not just investment.
Simple Way to Think About It
If your equipment stays busy most of the time, renting becomes expensive. In that case, buying gives better value and control.
Quick Check Before You Choose Purchase
Your projects run continuously
Your equipment stays in use most days
Your work type remains consistent
You want long-term cost control
You can manage maintenance and operations
This option gives stability, control, and long-term savings. That is why established businesses often move toward ownership after gaining steady work.
Real Example: Drilling Equipment Rental vs Purchase
Now let’s move from theory to real life. This is where the decision becomes easy to understand.
Think about two drilling businesses. Both take on projects, yet their approach stays different.
Case 1: Business Using Drilling Equipment Rental
This company works on short-term contracts. One month they handle soil testing, next month they move to a different site with different requirements.
Because of this, they choose drilling equipment rental.
For one project, they use core drilling equipment rental. For another, they switch to directional drilling equipment rental. In some cases, they go for well drilling equipment rental.
This approach gives them flexibility. They use the right machine for each job without locking their budget into one setup.
Result:
Lower upfront cost
High flexibility
Easy project switching
No maintenance responsibility
Case 2: Business That Purchased Equipment
Now look at another company. This business handles continuous drilling work across multiple sites. Their projects stay consistent, and machines run almost every day.
Because of this, they invest in equipment from drilling rig manufacturers.
Their machines include all required drilling rig components and strong drilling rig tools and equipment. They build their own system and run operations without depending on rental availability.
Result:
Full control over operations
Lower cost over time
Stable workflow
Higher responsibility for maintenance
What This Example Shows
Both businesses succeed, yet their decisions match their work style.
One chooses flexibility
One chooses control
One avoids heavy investment
One builds long-term assets
So the decision is not about right or wrong. It is about what fits your business model.
You can also check: Smart Reasons Companies Prefer Renting Drilling Equipment
Final Insight: Making the Right Choice for Your Business
You have now seen both sides in detail, so the decision becomes clearer. The real answer does not depend on one option being better than the other. It depends on how your business operates every day.
Drilling equipment rental works when flexibility matters more than ownership. It helps you handle short-term projects, changing workloads, and limited budgets without pressure.
On the other side, purchasing equipment supports long-term stability. Machines built by drilling rig manufacturers give you full control, and your setup includes all essential drilling rig components and drilling rig tools and equipment needed for continuous work.
Now bring everything together.
How to Decide Quickly
Choose rental if your projects change often
Choose rental if equipment is not used daily
Choose purchase if your work stays consistent
Choose purchase if you want long-term cost control
What This Means for Your Growth
Your decision shapes how your business grows. Rental keeps things flexible and low-risk. Purchase builds assets and strengthens long-term operations.
Because of this, many businesses start with rental. As their workload becomes steady, they move toward ownership.
Imagine you have a drilling project ready to start, but buying a big machine feels like too much pressure at once. Many companies stand in the same place. They need equipment quickly, yet they also want to stay careful with money and future planning. This is where renting drilling equipment starts to make real sense, because it gives teams the tools they need without forcing them into a long commitment.
Key Benefits of Renting vs Buying Drilling Equipment
When companies plan a project, they often stand between two choices: rent or buy. Both options have their place, yet the decision becomes easier when you look at how each one affects daily work. Instead of thinking only about ownership, many teams compare flexibility, cost, and ease of use before moving forward.
Simple Comparison to Understand the Difference
Factor to Consider | Renting Equipment | Buying Equipment |
Upfront Cost | Lower starting expense, payments stay manageable | Large investment required at the beginning |
Flexibility | Easy to switch machines based on project needs | Limited flexibility once equipment is purchased |
Maintenance Responsibility | Often handled by rental provider | Managed fully by the company |
Project Adaptability | Helps adjust to short-term or changing jobs | Best suited for long-term consistent use |
Storage and Logistics | Returned after use, less storage pressure | Requires storage space and long-term planning |
Technology Access | Opportunity to use newer models when needed | Upgrades require additional spending |
Financial Risk | Lower risk if project demand changes | Higher risk if equipment stays unused |
This comparison shows why many businesses feel more comfortable with rental solutions, especially when projects vary in size or duration. Renting gives companies room to adjust while keeping operations simple and controlled, which helps teams stay focused on completing the work rather than managing heavy ownership responsibilities.
Practical Cases Where Renting Makes More Sense
Every project moves differently, and sometimes flexibility becomes more valuable than ownership. When companies look closely at how their work changes over time, renting starts to feel like a practical step that supports progress without adding extra pressure.
Short-Term Projects with Tight Timelines
Projects that last only a few weeks or months often do not need permanent equipment. Renting allows teams to complete the work without worrying about long-term storage or unused machines once the job ends.
Changing Workload Throughout the Year
Some companies face busy periods followed by slower seasons. Instead of keeping extra equipment idle during quiet months, rent helps maintain balance while still supporting productivity when demand increases.
New Project Requirements or Ground Conditions
When teams move into unfamiliar drilling environments, renting provides a safer way to test different setups. Operators learn what performs best before thinking about long-term investment, which keeps decisions simple and low risk.
Unexpected Equipment Downtime
Work can slow quickly if a machine stops working during an active project. Rental equipment helps crews continue without long waiting periods, allowing operations to stay steady while repairs happen in the background.
These practical cases show how renting fits naturally into real project needs. Companies stay flexible, teams keep moving forward, and planning feels lighter because every decision connects with the work happening right now.
Performance Benefits of Renting Drilling Equipment
When companies choose rental options, they often notice small improvements that make daily work feel easier and more controlled. Instead of focusing on ownership pressure, teams pay attention to performance and progress. These benefits build gradually and help operations stay steady from one project phase to the next.
Faster project start because equipment arrives ready to use, which helps crews begin work without long preparation time
Better flexibility that allows teams to adjust machines based on changing drilling needs and project size
Reduced maintenance stress since servicing is often handled by the provider, letting operators focus more on performance
Access to updated equipment which helps maintain strong efficiency without large investment in new machines
Balanced operational cost so companies manage budgets more comfortably while keeping workflow smooth
Less downtime pressure because replacement equipment can be arranged quickly when unexpected issues appear
These benefits work together to create a smoother experience on site. As teams rely on flexible equipment access, they spend less time dealing with ownership challenges and more time moving projects forward with confidence.
You can also check: Why Preventive Rig Maintenance Reduces Downtime
Wrap-Up
Choosing the right equipment approach often depends on how a company wants to manage its projects, budget, and daily operations. For many teams, renting feels easier because it keeps planning flexible while still supporting strong performance on site. Instead of carrying the pressure of ownership, companies focus on completing work smoothly and adapting to changing project needs.
When flexibility, cost control, and reliable equipment come together, operations begin to feel more balanced. Crews work with greater confidence, timelines stay clearer, and decisions become simpler because the focus remains on progress rather than long-term commitments. Over time, this practical mindset helps companies stay prepared for both current projects and future opportunities.
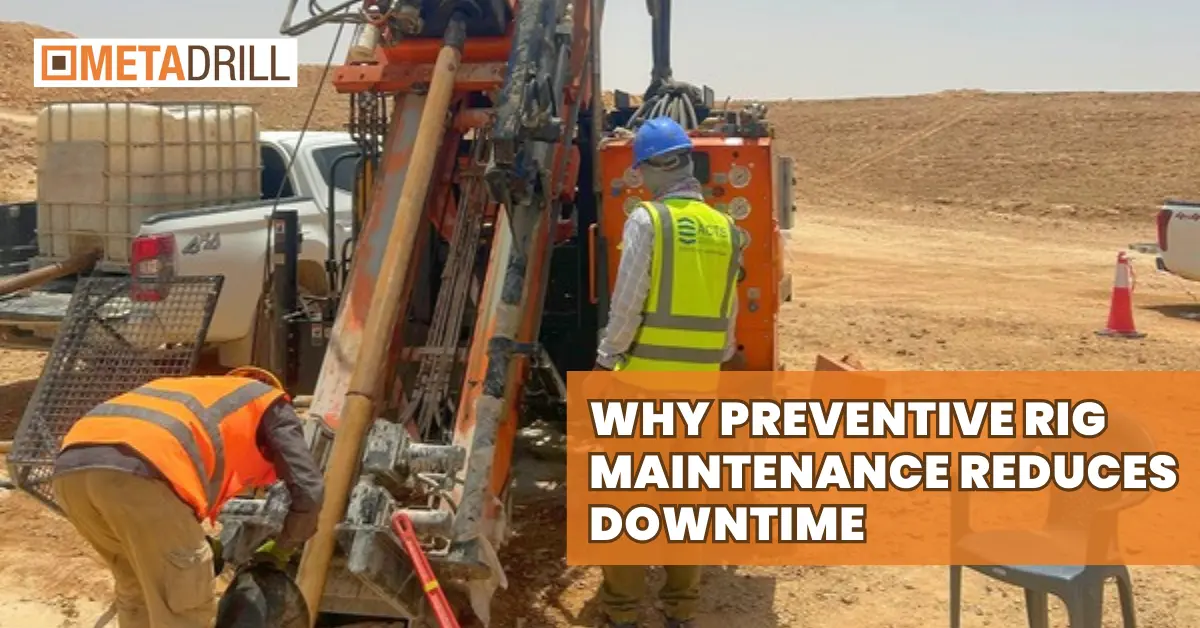
Early morning on a drilling site, the crew waits beside a silent rig. Work should start, yet one small part has failed and everything stops. Hours pass, costs rise, and pressure builds. This situation shows why preventive rig maintenance matters long before problems appear.
When people hear the word maintenance, they often think about fixing something after it breaks. In reality, preventive rig maintenance means checking equipment early so small issues never grow into big failures. Because of this approach, teams protect their schedule and avoid sudden stops during operations. In other words, the goal is simple: keep the rig running without interruption and reduce rig downtime.
At the same time, drilling equipment works under heavy stress every day. Heat, vibration, and long working hours slowly affect parts inside the system. If no one checks these parts, a minor fault can shut down the entire project. That is where drilling rig maintenance becomes a smart habit instead of a last-minute reaction. By planning inspections, teams improve equipment reliability and keep work moving forward.
Also, planned care creates a clear workflow. Instead of waiting for emergencies, technicians follow a maintenance schedule and solve problems early. This steady process helps companies reduce unplanned downtime and maintain strong drilling equipment efficiency. As a result, operations feel smoother, workers stay confident, and projects stay on track.
In this blog, you will learn how preventive rig maintenance supports daily operations, protects equipment, and reduces downtime step by step. Each section will explain the idea in simple words so you can see how small actions today prevent bigger problems tomorrow.
What Is Preventive Rig Maintenance?
Work on a drilling site moves fast, and every part of the equipment carries pressure throughout the day. Because machines operate in harsh conditions, small changes inside the system can slowly turn into serious problems. For this reason, teams follow a planned care routine instead of waiting for damage to appear.
Planned Care Creates Stability
When technicians check equipment on a schedule, they understand how each part performs over time. These regular checks help them notice early signs like unusual vibration or heat. Once a small issue appears, they fix it before the situation grows bigger. As a result, the workflow stays calm and organized rather than reactive.
Routine Inspections Protect Daily Operations
Each inspection connects to the next stage of work. After checking moving parts, crews often clean filters or adjust pressure levels. These simple actions support smooth performance during long drilling hours. Since every step builds on the previous one, equipment health improves gradually instead of changing only after a breakdown.
Small Adjustments Build Long-Term Reliability
Tightening loose bolts or replacing worn seals may look minor, yet these tasks strengthen the entire system. When crews handle these small details regularly, machines respond better under heavy load. Over time, consistent attention reduces unexpected stress on both equipment and workers.
Structured Planning Supports Better Workflow
Clear servicing plans give managers and technicians confidence in daily tasks. Teams understand when checks take place and how each step connects with ongoing operations. Since maintenance becomes part of the routine, projects move forward without confusion or unexpected disruption.
Planned care creates a steady rhythm on site, where one action flows into the next and supports stable performance. Rather than waiting for problems to appear, crews follow a process that keeps equipment prepared for every shift.
How Downtime Happens in Drilling Operations
Downtime rarely starts with one big failure. In most cases, small issues build up quietly until the rig can no longer continue working. When teams understand how these problems develop step by step, they gain better control over daily operations and avoid sudden delays.
Step 1 — Small Wear Often Goes Unnoticed
Heavy drilling equipment works under constant pressure, so parts slowly wear down during normal use. If crews miss early signs like heat changes or unusual sounds, minor damage keeps growing in the background. Over time, this hidden wear weakens performance and prepares the ground for a larger stop.
Step 2 — Delayed Inspections Slow Problem Detection
Regular checks connect directly with equipment health. When inspections get delayed due to tight schedules, technicians lose the chance to catch faults early. Because of this gap, small technical issues move from manageable to serious, increasing the risk of unexpected shutdowns.
Step 3 — Sudden Component Failure Stops Operations
Once a worn part reaches its limit, the system reacts quickly. Pumps lose pressure, motors struggle, or hydraulic lines fail without warning. At this point, work pauses immediately, and the entire crew waits while repairs begin. What started as a minor issue turns into full operational downtime.
Step 4 — Repair Delays Extend the Downtime Chain
Fixing a breakdown takes more than replacing one part. Teams may need tools, spare components, or extra support from technicians. Each delay adds more idle time, which affects drilling schedules and project timelines. As hours pass, productivity drops and pressure on the team increases.
Step 5 — Workflow Disruption Affects the Entire Site
Downtime does not stay limited to one machine. Support crews, transport planning, and safety checks all slow down when the rig stops. Because operations depend on continuous movement, even a short pause can create a ripple effect across the entire site.
Understanding these steps helps teams see how downtime develops gradually rather than appearing suddenly. When crews recognize this chain of events, they focus more on early action and smarter planning, which keeps drilling work steady and predictable.
Key Reasons Maintenance Planning Reduces Downtime
Downtime follows a pattern, so prevention can follow a pattern too. Once you know where failures usually begin, you can stop them early with the right routine. This is where proactive maintenance makes the biggest difference, because it targets the root cause before the rig is forced to stop.
Table: Common downtime triggers and what stops them early
What usually starts the problem | What it turns into on site | What stops it early |
Dirty filters and clogged breathers | Pressure drops, overheating, sudden shutdown | filter replacement schedule + quick daily checks |
Low or contaminated oil | Faster wear, rough performance, part failure | lubrication management + oil sampling on routine |
Loose fasteners and misalignment | Vibration, damaged bearings, unexpected stoppage | torque checks + alignment checks during service windows |
Hoses and seals aging quietly | Leaks, hydraulic failure, unsafe conditions | hose inspection routine + seal replacement plan |
Electrical connections loosening | Sensors fail, alarms trigger, system stops | electrical inspection checklist + tightened connections |
Spare parts not available on time | Repair waits, downtime stretches longer | spare parts inventory + reorder points and tracking |
Early warning signs ignored | Small fault grows, full breakdown happens | condition monitoring + clear reporting process |
Maintenance tasks done randomly | Missed steps, repeated failures | planned maintenance schedule + documented checklists |
How these reasons connect back to real downtime
Small tasks feel basic, yet each one blocks a common failure path. When teams follow a planned maintenance schedule, checks stop being guesswork, so problems get caught while they are still small. At the same time, condition monitoring turns “something feels off” into a clear signal that leads to action. Because technicians also keep a spare parts inventory ready, repairs do not turn into long waits, and the downtime chain breaks early.
Preventive vs Reactive Maintenance
Many teams confuse planned care with repair work, yet both follow very different paths on site. One approach focuses on stopping problems early, while the other begins only after something breaks. Understanding this difference helps crews choose methods that keep operations stable and predictable.
Simple Comparison Between the Two Approaches
Maintenance Approach | How It Works on Site | Effect on Operations | Long-Term Impact |
proactive maintenance strategy | Equipment gets checked and serviced before faults grow | Work continues with fewer interruptions | Better performance and smoother workflow |
reactive maintenance approach | Repairs begin only after failure appears | Sudden stops and pressure on crews | Higher repair cost and repeated issues |
Why Planned Care Keeps Work Moving
When teams follow a proactive maintenance strategy, technicians inspect systems regularly and solve issues while they remain small. Because problems get handled early, crews avoid stressful repair situations and keep daily tasks consistent. This steady routine also supports safer working conditions, since machines operate within normal limits.
How Reactive Repairs Create More Pressure
Breakdown-based work often starts with urgency. Once equipment stops, teams rush to diagnose faults and search for replacement parts. During this time, operations slow down and schedules shift unexpectedly. Since repairs happen under pressure, the same issue may appear again if root causes remain unchecked.
Choosing the Right Direction for Long-Term Stability
Planned servicing builds confidence across the site because everyone knows what to expect. Instead of reacting to failures, crews move forward with clear routines and steady performance. Over time, this mindset reduces stress on both equipment and workers, which supports smoother operations during demanding drilling cycles.
Real Maintenance Practices That Keep Rigs Running
Simple daily habits keep equipment stable and help teams avoid sudden problems. When crews stay consistent with small checks and clear routines, operations continue smoothly without unnecessary pressure. These practical actions support long working hours and help maintain steady performance on site.
Daily visual inspection to spot leaks, loose parts, or unusual wear early
Fluid level monitoring to maintain clean systems and balanced pressure
Lubrication routine to protect moving components from friction and stress
Maintenance record tracking to understand equipment patterns over time
Team communication so small issues get attention before they grow
You can also check: Downtime killers: hydraulics, cooling, dust-fix them early
Conclusion
Every drilling operation depends on steady performance, and small actions taken early often decide how smoothly work continues. When teams focus on regular care instead of waiting for failures, they create a workflow where problems stay manageable and schedules remain stable. Over time, consistent planning builds stronger equipment health and reduces unexpected stops on site. The goal is not only to fix machines but to create a routine that supports long-term reliability and confidence during every shift.
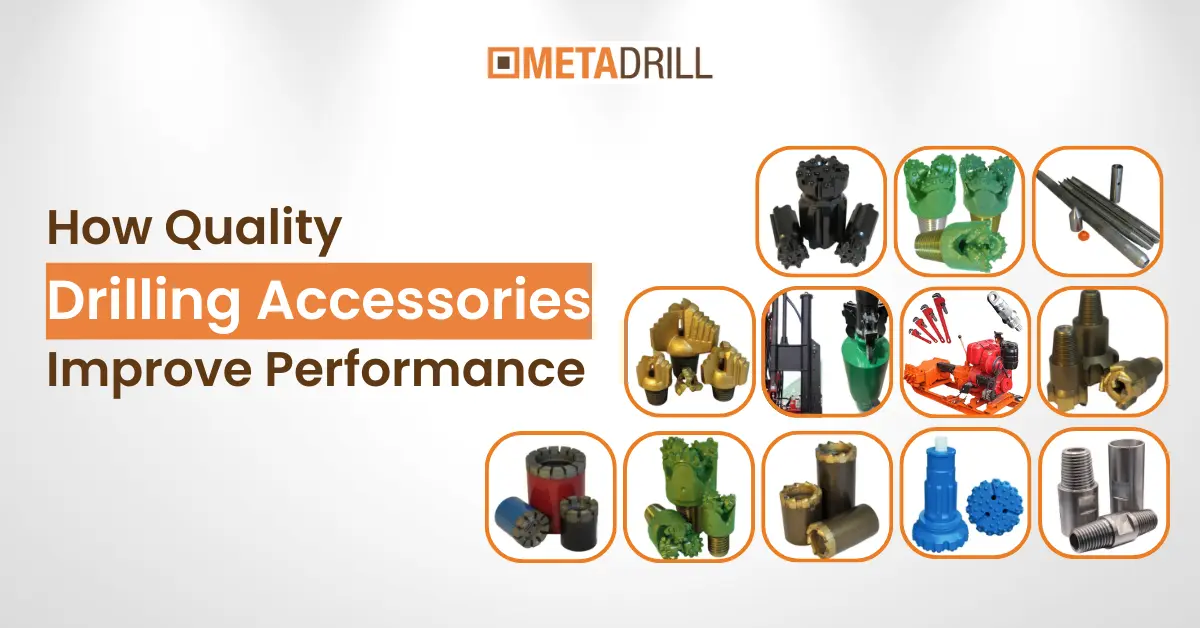
Picture a drilling site where everything looks ready, yet the rig struggles to move smoothly through the ground. The engine runs, the crew waits, and progress feels slower than expected. Often, the problem does not come from the main machine. Small supporting parts decide how well the whole system performs. When you choose quality drilling accessories, you give your equipment the support it needs to work without extra stress.
Think of these accessories like helping tools that guide the rig during every step of the job. Each connector, bit, or support part works quietly in the background. When these pieces fit well and stay strong, drilling feels more controlled and steadier. Because of this balance, the rig moves forward without shaking too much, which improves overall drilling performance and helps operators stay confident while working.
Now imagine the opposite situation. If accessories wear out quickly or do not match the job conditions, the rig begins to struggle. You might notice slower penetration, more vibration, or uneven movement. These small issues connect together and slowly reduce equipment efficiency. Over time, crews spend more effort fixing problems instead of focusing on progress.
Here is the simple idea: good accessories do not only support the machine; they help the entire workflow feel smoother. When parts work together in harmony, you spend less time worrying about interruptions and more time completing the task. In this guide, you will learn step by step how the right accessory choices help you achieve stable results and keep your drilling operations moving forward in a simple and practical way.
What Are Drilling Accessories and Why Do They Matter?
When people think about drilling equipment, they usually focus on the main machine. Yet many small parts work alongside it every second. These supporting tools guide movement, control pressure, and help the rig stay stable while working through tough ground. Without the right support pieces, even a strong system can struggle to perform at its best.
Drilling accessories include items like connectors, stabilizers, bits, hoses, and safety attachments. Each one has a simple job, but together they create balance across the entire setup. When these parts match the job conditions, the rig moves more smoothly and operators feel more control during long working hours. This is why many professionals pay close attention to accessory quality instead of treating them as minor additions.
Think of accessories like small helpers that keep everything aligned. One stabilizer reduces shaking, while a well-fitted connector keeps pressure flowing correctly. As these pieces work together, the system becomes easier to manage and more predictable. Over time, the right setup supports better results without forcing major changes to the main equipment.
Here is an easy way to understand their importance:
Control: Accessories guide movement and help maintain steady direction.
Support: Strong components reduce stress on larger equipment parts.
Balance: Proper fittings minimize vibration and uneven motion.
Safety: Reliable attachments lower the chance of sudden failure.
Once you understand what these accessories do, it becomes clear why choosing them carefully makes such a difference. Small upgrades often create smoother performance, and that steady improvement builds confidence across the entire drilling process.
Keyways Quality Accessories Improve Performance
When the right accessories support your equipment, you notice small changes that lead to better results. Each part plays a quiet role, yet together they help the rig move with more control and less effort. Instead of forcing the machine to work harder, strong supporting components allow the system to perform in a smoother and more balanced way.
Better Stability During Operation
Stable accessories help reduce shaking while drilling through tough surfaces. As vibration lowers, the rig stays aligned and operators feel more control over movement. This steady motion supports consistent progress and protects important machine parts from extra stress.
Improved Energy Use and Efficiency
Well-designed components allow power to transfer smoothly through the system. Because energy flows without resistance, the rig completes tasks with less strain. Over time, this balanced performance supports stronger equipment efficiency and helps crews maintain steady work speed.
Longer Life for Supporting Parts
Quality materials handle pressure better than weak or poorly fitted components. When accessories stay durable under heavy load, teams spend less time replacing damaged pieces. This steady reliability helps maintain strong drilling performance throughout long projects.
Safer Working Conditions for the Crew
Reliable accessories reduce unexpected movement and sudden pressure changes. As a result, operators feel more confident while handling equipment during active drilling. Safe and stable systems also help prevent delays caused by minor technical issues.
Smoother Workflow Across the Site
Every accessory connects with another part of the system. When these pieces work together correctly, operations feel organized and predictable. Crews focus more on progress rather than troubleshooting, which keeps daily tasks moving forward without confusion.
Small improvements often create the biggest impact over time. Once accessories match the job needs, the entire setup works with greater balance, and each shift feels easier to manage from start to finish.
How To Choose the Right Drilling Accessories (Simple User Guide)
Choosing the right accessories becomes easier when you follow a clear path instead of guessing. Each decision connects with the next one, so the goal is to move step by step while keeping the whole system in mind. When you understand the job conditions first, you begin to see which parts will truly support smooth drilling and which ones may slow performance later.
Step-by-Step Guide
Understand your drilling environment: Look at ground type, pressure level, and working conditions so you choose parts that match the real demands of the job.
Focus on strong material quality: Durable components handle heat and vibration better, which helps maintain steady drilling performance during long shifts.
Check compatibility with your equipment: Proper fitting keeps connections balanced and supports better equipment efficiency without adding stress to the system.
Think about future maintenance: Accessories that are easy to inspect and replace help crews keep workflow stable when schedules become busy.
Listen to operator experience: Feedback from people working closest to the rig often reveals small issues early, which guides smarter accessory choices.
Following these steps keeps the process simple and connected. Instead of making random selections, you move through a clear guide where each choice supports smoother operations and helps your equipment stay ready for daily challenges.
Common Mistakes That Reduce Accessory Performance
Many performance issues do not come from the main equipment but from small decisions made during accessory selection. When parts look similar, people often choose quickly without thinking about long-term impact. Over time, these small mistakes create imbalance in the system and slow down overall progress. Understanding these common errors helps you avoid unnecessary stress on both equipment and workflow.
Table: Common Mistakes vs Their Impact on Performance
Common Mistake | What Happens During Operation | Better Approach |
Choosing low-quality materials | Parts wear out faster and create vibration | Select durable components built for heavy use |
Ignoring compatibility checks | Pressure imbalance and unstable movement | Match accessories with equipment specifications |
Focusing only on price | Frequent replacements increase long-term cost | Balance quality with long-term reliability |
Skipping regular inspection | Small damage grows into bigger issues | Follow routine checks and monitoring |
Using one setup for every job | Performance drops in different ground conditions | Adjust accessories based on drilling needs |
Not listening to operator feedback | Early warning signs get missed | Use real field observations to guide choices |
When teams recognize these patterns, they begin to see how small decisions connect directly with performance. Avoiding these mistakes allows accessories to support the system instead of creating hidden problems that slow progress.
Performance Benefits Breakdown
Once the right accessories support your setup, improvements start appearing in daily operations. These changes may feel small at first, yet they build strong momentum over time and help crews work with more confidence.
Smoother drilling movement which helps maintain steady control during long shifts
Reduced vibration levels that protect both equipment parts and operator comfort
Better energy transfer allowing the system to perform without unnecessary strain
Longer component lifespan because balanced accessories reduce wear over time
More predictable workflow where crews focus on progress instead of constant adjustments
When these benefits come together, the entire drilling process feels more stable and organized. Instead of reacting to small problems, teams move forward with a setup that supports consistent results from one task to the next.
You can also check: GCC case notes: urban drilling lessons you can use tomorrow
Wrap-Up
Strong performance does not always come from big upgrades. Many times, small accessory choices shape how smoothly a drilling operation moves from start to finish. When you understand how each supporting part works with the system, you begin to notice better balance, steadier control, and fewer interruptions during daily tasks.
Quality selections, simple planning, and regular attention create a setup where equipment feels easier to manage. Instead of dealing with constant adjustments, teams focus on steady progress and safer operations. Over time, these small improvements build confidence across the site and help drilling projects move forward with greater stability and consistency.
Choosing between refurbished and new drilling rigs depends on more than price. Project timelines, operating pressure, and long-term maintenance goals all influence the final decision. Some teams prefer new equipment for modern features, while others choose refurbishment to extend equipment life without slowing operations.
New rigs deliver factory performance and updated systems. Refurbished rigs provide flexibility and faster deployment when done correctly. Understanding where each option fits helps operators make smarter decisions instead of following trends.
Understanding the Core Difference
Refurbished rigs involve rebuilding existing equipment through structural repair, mechanical upgrades, and system improvements. New rigs come directly from manufacturers with untouched components and the latest configurations.
Both options support drilling operations. The smarter choice depends on how the equipment will be used in real working conditions.
Quick Comparison Overview
Factor | Refurbished Drilling Rig | New Drilling Rig |
Upfront Cost | Lower initial investment | Higher purchase cost |
Deployment Time | Faster return to operation | Longer manufacturing timeline |
Customization | High flexibility during rebuild | Limited after production |
Technology Level | Upgraded based on need | Latest factory technology |
Maintenance Needs | Depending on rebuild quality | Lower during early years |
Initial Investment and Budget Flexibility
Cost planning usually drives the first discussion. New drilling rigs require significant capital, which can affect cash flow and project scaling.
Refurbished rigs allow teams to focus spending where it matters most. Instead of paying for a complete build, companies upgrade only the systems that influence performance.
Key financial advantages of refurbishment include:
Lower upfront investment
Opportunity to phase upgrades over time
Better control over operational budgeting
Teams working under tight financial planning often prefer refurbishment because it balances cost with performance improvement.
Deployment Speed and Project Timelines
Project deadlines often decide which option feels more practical. Manufacturing new rigs takes time due to production schedules and shipping logistics.
Refurbished rigs return to operation faster because the base structure already exists. Technicians rebuild and upgrade instead of waiting for full assembly from scratch.
Benefits of faster deployment include:
Reduced project delays
Faster response to new contracts
Less downtime between drilling phases
Shorter turnaround gives refurbishment an advantage when timelines are tight.
Technology and Performance Differences
Performance gaps between refurbished and new rigs depend on how upgrades are handled during rebuilding. New rigs usually include modern monitoring systems and improved automation.
Refurbished rigs can reach similar performance levels when technology upgrades become part of the rebuild plan.
Common upgrades during refurbishment:
Digital monitoring systems
Updated control panels
Improved hydraulic components
Energy-efficient engine tuning
Performance does not always depend on equipment age. Quality of upgrades often matters more than whether the rig is new.
Maintenance and Long-Term Reliability
Maintenance needs change based on equipment condition and operational habits. New rigs typically require less servicing during early years because all components start fresh.
Refurbished rigs demand structured maintenance routines to protect rebuilt systems. Strong refurbishment reduces unexpected breakdowns, but consistent servicing keeps performance stable.
Maintenance Comparison
Maintenance Aspect | Refurbished Rig | New Rig |
Early Maintenance Frequency | Moderate | Low |
Long-Term Service Planning | More flexible | Manufacturer-guided |
Spare Part Availability | Often easier for older models | Depends on brand support |
Reliable maintenance planning helps both options deliver long service life.
Customization and Operational Flexibility
Customization becomes easier during refurbishment because technicians work directly with existing systems. Engineers can adjust hydraulic layouts, control systems, or structural reinforcements based on real drilling experience.
New rigs follow manufacturer designs. Custom changes often happen after delivery, which may increase cost or delay operations.
Situations where refurbishment offers strong flexibility:
Unique drilling environments
Specialized load requirements
Teams needing gradual upgrades instead of full replacement
Flexibility allows companies to shape equipment around real project needs rather than adapting operations to fixed configurations.
When Refurbished Rigs Make More Sense
Refurbishment becomes the smarter option when:
Structural condition remains strong
Projects require fast deployment
Budget control matters more than factory upgrades
Teams want targeted performance improvements
Operators who understand their equipment history often gain strong value from rebuilding instead of replacing.
When New Drilling Rigs Become the Better Choice
New rigs offer clear advantages in certain situations:
High-intensity drilling environments requiring latest technology
Companies starting large-scale operations from scratch
Long-term projects where manufacturer warranties add value
New equipment provides a fresh operational baseline, which reduces early maintenance concerns.
You can also check: From CAD to Site How Meta Drill Engineers Rig Performance
Final Thoughts: Choosing What Fits Your Operation
No single option works for every drilling company. Refurbished rigs provide flexibility, faster deployment, and controlled investment when rebuilding happens correctly. New rigs deliver advanced technology and predictable performance during early operation.
Smart decisions come from understanding project goals rather than comparing equipment age alone. Teams that evaluate cost, timelines, customization needs, and maintenance planning often discover that the best solution depends on how the rig supports real field operations, not just whether it is new or rebuilt.
Indications Your Drilling Rig Big Time Needs Refurbishment.
The majority of drilling rigs do not just go amok. The changes in behavior begin gradually, and when a person is operating the equipment every day, the slightest changes become evident before any catastrophic failure occurs. Occasionally, the rig will be heavier to lift, the rotation will not sound the same, and there will be some operators who will start changing controls more than they usually do just to ensure the rig continues drilling at normal rates. The signs are normally overlooked since the rig is still operating; however, it is still operating within the conditions that are causing further pressure to the system.
Old age is not the sole reason to refurbish; there are still a lot of systems that possess a good structural life left on, but due to the years of constant use, some of them start losing their balance. Vibration developing When vibration develops, there will be delays in hydraulic response, or electrical controls will become unstable. This is typically an indication that the rig requires some attention before the problem can be transmitted to many components. Being aware of these early warning signs assists the team tin performing at the appropriate moment rather than responding to costly mistakes.
In this guide, we will take the obvious indicators that a drilling rig requires urgent refurbishment so that the operators and technicians can make decisions that reflect the actual working conditions and not be caught in an abrupt downtime.
Decelerated Response and Drops of Hydraulic Pressure.
The other red flag is the initiation of hydraulic movements that are no longer fast-moving or even regular. The operators may note that lifting is more difficult, rotation is slow, or pressure is not constant throughout the drilling. Initially, these changes can be small ones, and the teams are capable of adapting to them by adding more power or repeating certain motions, yet these modifications tend to add more load to the system rather than address the actual problem.
The loss of hydraulic pressure is usually caused by the old hose, old valves, or internal leaks that cannot be observed from the outside. These minor vulnerabilities have an overall impact on the efficiency of the whole rig in the long run since hydraulic systems are used to govern the majority of core drilling activities. Refurbishment can also be used when the pressure is not constant, other response is slow, and technicians can change important hydraulic parts and restore the system to a stable working point. Early action at this stage ensures that the rig does not get to a stage where lifting or rotational operation is not possible when active operations are taking place.
Electrical Control instability, sensor errors.
The issue is sometimes not initiated by noise or vibration but rather by the behavior of the rig with in espect to responding to commands. When an operator presses a control, he/she will see a delay that is slight, or some of the numbers on the panel will start moving around without an apparent cause. Initially, these problems are not big since the rig is still functioning, but sporadic indications of faulty sensors orthe control system may be a source of information that any electrical parts are either old or becoming volatile.
Slowly, loose wiring, old control panels, or deteriorated sensors may lead to compromising the accuracy of the way the rig reports its performance. When the red light starts showing too frequently, or the information on the monitor begins to be untrustworthy, the problem is not just a matter of servicing. Due to electrical instability, the drilling process becomes erratic since the operators are not able to rely wholly on the information the system provides them with. This step of refurbishing will assist in the replacement of old electrical components and will enhance effective communication between the controls, sensors, and the mechanical systems.
Open Structural Wear and Frame Fatigue.
Some of these warning signs are manifested by the changes in performance, but others can be seen by the physical state of the rig itself. With time, the mast, frame, and welded joints are under constant stress due to heavy drilling loads, and minor cracks on the surface, corrosion, or slight bending can start appearing. The changes usually evolve,e and thus they can be easily ignored in the day-to-day running of business.
The term structural fatigue does not necessarily indicate that the rig is approaching its end-of-service, but it is an indicator that reinforcement or refurbishment is required to be performed with the aim of ensuring safe working conditions. Not taking notice of the apparent wear may enable the stress to spread on the frame that would consequently lead to unexpected breaking during lifting or rotation. When crews observe stress lines, poor welds,s or poor alignment in the arrangement, refurbishment is used to provide the structure with strength,th and the rig keeps on working in a safe condition despite the challenging working conditions in drilling.
Constant Failures and Increasing Service Charges.
The other indicator that a drilling rig might require urgent refurbishment is when minor repairs begin occurring at a higher rate than normal. The breakdowns are at first unrelated, such as a replacement of a hose one week and a mechanical part the following week, but with time, the trend is seen. The rig has spent most of its time in repair rather than in real drilling, and crews have to work on problem-solving rather than having a machine that is stable.
When it is found that frequent repairs are being done, it is quite possible that it is not a failure of systems but aged systems. When technicians continue repairing one component after another without repairing the root cause, the maintenance cost is gradually rising, and performance is still falling. Refurbishment is effective in resetting this cycle, as it addresses the need to rebuild core systems collaboratively, rather than individually treating the problems. Intervention at this point has the potential to minimise long-term costs as well as return the rig to a more foreseeable operating state.
Inefficient Drilling and Increased Fuel Usage.
In some cases, the red flags come not when the rig experiences obvious destruction but due to incremental alterations in the performance of the rig during the day-to-day operations. There are chances that the operators might observe that the drilling is slower than before or that the engine may be consuming more fuel to obtain the same output. These transformations tend to emerge gradually and are hence hard to notice until the time when productivity starts to decline in various projects.
Reduced efficiency occurs most commonly when mechanical alignment changes, a hydraulic system loses pressure balance, or when the engines work extra hard to accommodate internal wear. The rig begins to burn more energy, instead of running smoothly on power, to continue running at normal drilling speed. This not only increases fuel expenses but also causes additional strains on the engine and other parts around it. At this point, refurbishing assists in restoring system equilibrium, enabling the rig to resume stable operation and increase the overall efficiency of operation.
When to Act: Select Refurbishment in Advance of Collapse.
It is common to see many groups take up the decision to refurbish only when a drilling rig has stopped, but most equipment has enough indicators long before it gets to that stage. When one acts early, it does not imply that the rig is weak; it just implies that the systems have reached a point where it will be safe to rebuild to safeguard the long-term performance. At the points of increased vibration, controls become less responsive, or maintenance is more frequent; these are the indicators that the rig is demanding our attention and still has enough strength to be brought back to usefulness.
Timing refurbishment also contributes to preventing unexpected delays of the project, as the scheduled upgrades enable technicians to work in a regulated setting rather than addressing the emergency failures in the field. Timely intervention maintains the structural integrity and avoids the expansion of stress in several systems simultaneously. Instead of waiting until it failed, the time to realize when it is better to refurbish gives the companies assurance of saving productivity and safety, besides ensuring that the drilling equipment has a longer-than-anticipated working life.
You can also check: MD600N vs MD600X: Choosing the Right Rig for Torque, Depth, and Uptime
Conclusion: Your rig is trying to tell you something.
Each drilling rig has its own rhythm, formed over several years of work, and those working around it can easily feel it start to alter. The change in vibration, progressive hydraulic reaction, electrical variations, or observable structural deterioration are not accidental; these areas are indicators that the machine is approaching the point where refurbishment can truly help. Areas not attended to tend to increase the costs of repair and never really know when to be offline, whereas areas given attention will enable teams to operate with confidence.
Refurbishment is not merely about the repair of the damage; it is about the restoration of equilibrium within the whole system in such a manner that the rig can proceed to work safely and effectively. When the operators know the indicators of an early warning and act before the performance becomes too low, the used drilling rigs can be a reliable drill tool, rather than becoming an operational risk. Listening to what the equipment is conveying based on its daily performance, companies develop a more intelligent way of maintenance and continued drilling business without having to make a non-needed stop.
The restoration of a drilling rig starts long before any tools touch the equipment, since the successful rebuilding of a drilling rig requires a clear understanding. Older rigs represent a risk for many companies, but they are an opportunity to extend the performance of old rigs instead of spending money on purchase. When restoration is done in a systematic manner, worn parts become effective systems that sustain the challenging drills. Instead of rushing to repair, the teams are busy with checking, strategizing, and accurate upgrades so the rig can run stably and safely. Our guide will take you through all the steps of rehabilitating used drilling rigs, and you will be confident to transition to the point of full readiness to operate.
Why Restoring Used Drilling Rigs Makes Business Sense
Re-using a worn-out drilling rig makes a functional decision once you understand how systematic reconstruction improves both cost management and effective functions. Restoration is favored by many drilling companies, as it helps them to relieve pressure on capital and maintain the equipment according to the current project requirements. Teams do not have to wait until lengthy manufacturing schedules are completed, as they instead reassemble old rigs and put them back into service in less time, so the drilling can continue without delay.
Technical flexibility is also developed through this method since restoration enables engineers to direct their efforts towards certain areas in the system that require upgrades. The problems that were experienced during the previous operations are frequently addressed by hydraulic upgrades, reinforced structures, and new control panels. The closer the rig can get to a stable and predictable performance, the more each improvement will be related to real field experience. These specific upgrades over the years minimise the occurrence of unwanted downtime and promote the daily drilling production, a reason as to why restoration is still a strategic option among many operators operating used drilling rigs.
Step 1: Perform a Detailed Initial Inspection
Before starting any restoration, it is important to have a detailed inspection that creates the foundation for every decision that follows, because the condition of the rig determines how far the rebuilding process should go. To begin with, teams assess structural integrity to make them aware of whether the mast, frame, and load-bearing parts can support future drilling. When the structural review has given some clarity of picture, the focus is moved to the mechanical systems, where rotary components, gear assemblies, and pumps will show the impacts that have been imposed on the performance in the past.
The mechanical evaluation should also be given the same consideration as the hydraulic and electrical systems, as after restoration, the hidden leaks, old hoses, and old wires tend to bring about unstable operation. The engine performance is also directly linked to the general rebuilding strategy since the level of power efficiency and vibration can tell whether it is more reasonable to perform refurbishment or to replace the engine. All the findings must be recorded in measurements and pictures to transform the inspection into a clear technical road map. Restoration planning is more precise, controlled, and in line with actual equipment conditions when inspection goes beyond surface-level and is an organised evaluation.
Step 2: Plan the Restoration Strategy
As soon as the actual state of the rig is reflected by the inspection, planning is the gate between the judgment and the action, since all decisions regarding the repair must be determined by a specific goal. A formalised restoration plan assists teams to manage budget, schedule, and technical focus rather than respond to issues in the rebuild. Proper planning also minimises the misunderstanding between the engineering teams, technicians, and the project managers because the various phases have a documented route.
The plan to restore needs to divide the complicated work into specialised steps to ensure that the progress can be tracked and systematised. Rather than restoring as one task, breaking it down into certain stages aids in keeping things straight and, at the same time, structural, mechanical, and safety improvements are made in the correct sequence.
Restoration Planning Framework
Restoration Phase | Main Objective | Key Actions | Expected Outcome |
Structural Assessment | Ensure stability and safety | Frame inspection, weld repair, corrosion treatment | Strong foundation for rebuilding |
Mechanical Overhaul | Restore core drilling performance | Gearbox service, pump rebuild, bearing replacement | Smooth mechanical operation |
Hydraulic System Upgrade | Improve pressure control and efficiency | Hose replacement, valve testing, and leak prevention | Stable hydraulic performance |
Electrical Modernization | Increase control accuracy and safety | Wiring checks, sensor upgrades, panel optimization | Reliable monitoring and control |
Safety Integration | Aligning with operational standards | Emergency stops, guards, and system testing |
By organizing restoration into a structured framework, teams move forward with clarity instead of uncertainty. Each phase connects with the next, which allows restoration progress to remain consistent while reducing unexpected delays during later stages.
Step 3: Disassembly and Component Evaluation
When you have a specific restoration plan, it makes disassembly the next logical choice, as in most cases, deeper inspection shows that the details that remain hidden during the surface evaluation are visible. Instead of removing parts quickly, teams follow a structured teardown process, so every component stays traceable during reassembly. When a rig is disassembled into individual parts of mechanical systems, careful labelling, storage, and documentation can be used to ensure order.
As components come apart, cleaning plays an important role because dirt and drilling residue often hide cracks, wear patterns, or alignment issues. Once surfaces become visible, technicians measure tolerances, check rotating parts, and compare component condition against manufacturer standards. This evaluation stage connects directly with earlier planning decisions since engineers can confirm which parts need refurbishment, which require replacement, and which remain suitable for reuse.
Disassembly further provides the time to examine the influence of past operational stress on the rig since asymmetrical wear or broken seals frequently indicate more profound functioning concerns. When teams perceive teardown as both a technical assessment and not a mere cleaning process, the restoration process remains structured and helps to rebuild properly in subsequent phases.
Step 4: Repair and Replace Major Components.
Once the actual state of everything has been revealed by dismantling, the decision-making of repairing shifts more towards action than planning, since every repaired part has to be capable of ensuring safe and stable drilling operations. Teams do not pay equal attention to all damage; rather, critical systems that have an impact on load handling, power transfer, and operational control. This targeted strategy helps to keep the restoration during the real performance objectives and avoid spending money on non-impact repairs.
Step 5: Upgrade Technology Where Needed
After physical strength has been rebuilt through critical repair, the rig can be upgraded by technology to narrow the transition between the existing old equipment and the new demands of drilling due to the increased precision and safety brought by the new monitoring and control systems. There are a high number of drilling rigs that are using old interfaces that reduce performance visibility when in operation. The addition of targeted upgrades enables the introduction of the original mechanical strength of the rig and enhances the interaction of operators with the system.
Step 6: Chassis Reassembly and Alignment.
With the rig redesigned by repairs and technology upgrades to the core systems, when it comes to putting the rig back together, it is the phase where all the parts that have been restored and every component reconnects to each other in the rig, as fine-tuning is the factor that dictates how smoothly the rig will act in the natural conditions of drilling. Technicians work in a controlled series rather than hurry to rebuild the structure lest mechanical balance be lost, and the stress is not unevenly distributed among the parts that are connected. Every reassembly step is tied directly to the data on the inspections collected previously, which allows us to make sure that the restored elements are back where they belong without creating new performance problems.
Step 7: Quality Checks and Testing.
When every system is restored through reassembly, the next level of restoration is testing, since the quality of the restoration is transformed into quantifiable performance, due to the fact that when real operating conditions are applied, it will be known whether the repair and upgrade efforts have been successful. Rather than putting the rig into active drilling, controlled testing can help the teams monitor the response of structural strength, mechanical motion, and hydraulic pressure to load. This cautious step between reconstruction and validation assists in avoiding the sudden problems that may arise after the rig has been brought to the field.
Step 8: Safety Compliance and Certification.
Once testing is accomplished to ensure that the repaired drilling rig functions properly, the last technical check in the process of field deployment is safety compliance, as the functionality of the operational approval requires adherence to the established industry standards. Performance is reinforced by restoration work, but certification is used to guarantee the compliance of every upgrade to the current safety expectations. This phase bridges the gap between engineering work and regulation needs in order to ensure that the rig is within acceptable limits and limits risk to the operators and the surrounding conditions.
You can also check: From CAD to Site How Meta Drill Engineers Rig Performance
The Conclusion: Making Restoration a Long-term Drilling Value.
The rehabilitation of used drilling rigs is more than a technical exercise when each phase of the work is interrelated with an apparent purpose since systematic inspection, planning, accurate rebuilding, and systematic maintenance are all integrated to help to increase the life of the equipment. The steps in this guide are based on the steps that came before it, forming a course of restoration on which the concepts of safety, performance, and operational efficiency are kept on track throughout the evaluation and to the final deployment.
When restoration is not viewed as a patch fix but rather as a long-term investment by the teams involved, the old rigs develop into reliable resources that can withstand the requirements of modern drilling. The technology upgrades enhance the monitoring, balance in the mechanical aspect is also enhanced, and the structured testing ensures that all the systems are functioning with stability. Since maintenance is done after restoration, the rig retains the same degree of reliability that it had during rebuilding.
Drill rig failures cost operators $8,000 to $20,000 per hour in lost production. Therefore, understanding common drilling rig problems prevents catastrophic downtime costs and project delays.
Drilling equipment problems strike without warning during critical operations. Consequently, your ability to diagnose and fix these issues determines profitability. Moreover, having the right spare parts for drilling rigs on hand separates successful operations from failed projects.
Why These 9 Failures Matter Most
Industry data shows these nine drill rig failures account for 78% of all rig breakdown incidents. Furthermore, each failure follows predictable patterns with specific warning signs. Thus, you need to recognize symptoms before complete equipment shutdown occurs.
Drilling equipment breakdown happens in three stages:
Early Warning Stage: Minor performance changes appear first. However, operators often ignore these initial symptoms.
Degradation Stage: Performance drops noticeably during this phase. Additionally, unusual sounds or vibrations become apparent.
Critical Failure Stage: Complete system shutdown occurs suddenly. Consequently, emergency repairs become necessary to restore operations.
The Real Cost of Equipment Failures
Rig breakdown creates multiple cost layers beyond lost drilling time. Therefore, you must calculate total failure impact accurately.
Direct costs include component replacement parts and labor expenses. In addition, indirect costs involve crew standby time and contract penalties. Moreover, reputation damage affects future project opportunities.
Preventive maintenance costs 60-70% less than emergency repairs after failures. Thus, investing in scheduled maintenance and critical spare parts inventory protects your bottom line.
What You'll Learn in This Guide
This comprehensive guide covers nine critical drilling rig failures with exact solutions. Consequently, you'll understand:
Specific symptoms that indicate each failure type
Root causes behind drilling equipment problems
Exact spare parts for drilling rigs needed for repairs
Step-by-step rig repair solutions for each issue
Rig failure prevention strategies that work
Cost comparisons between preventive and reactive approaches
Each section provides actionable drilling rig troubleshooting steps. Furthermore, you'll learn which parts to stock for immediate response. Therefore, your operation maintains uptime when others face extended shutdowns.
Understanding Hydraulic System Failure
Hydraulic system failure ranks as the leading cause of drill rig failures worldwide. Therefore, hydraulic pressure loss shuts down critical rig functions immediately. Consequently, your entire drilling equipment breakdown stops operations until pressure restoration.
Hydraulic system failure accounts for 32% of all drilling equipment problems. Moreover, pressure drops below 2,000 PSI prevent safe operations.
Warning Signs and Root Causes
Hydraulic pressure loss shows these symptoms before total shutdown:
Slower hydraulic cylinder movements
Inconsistent control response times
Visible fluid leaks around fittings
Pressure gauge fluctuations
Increased pump temperatures
Seal degradation causes 45% of hydraulic system failure incidents. In addition, pump wear and contaminated fluid accelerate rig breakdown. Therefore, regular fluid analysis prevents catastrophic failures.
Parts Needed for Repairs
Spare parts for drilling rigs must include:
Complete seal kits for all cylinders
10-15 high-pressure hydraulic hoses
One spare hydraulic pump assembly
Control valves and relief valves
20 hydraulic filters minimum
Quick Fix Solutions
Rig repair solutions start with pressure testing at pump outlet. Furthermore, inspect all connections for leaks systematically. Thus, component replacement follows manufacturer torque specifications.
Preventive maintenance including fluid changes every 2,000 hours eliminates 70% of hydraulic system failure. Consequently, prevention costs AED 11,000 annually versus AED 128,500 for emergency repairs.
FAILURE #2 - MUD PUMP VALVE FAILURE
Critical Mud Pump Problems
Mud pump problems cause immediate drill rig failures during circulation operations. Therefore, valve seat damage stops drilling fluid flow completely. Consequently, rig breakdown occurs when pumps cannot maintain pressure.
Mud pump problems account for 28% of all drilling equipment problems on active rigs. Moreover, valve assemblies wear rapidly in abrasive drilling conditions. Thus, valve replacement becomes routine component replacement every 200-400 hours.
Identifying Valve Failure Symptoms
Valve seat damage shows these warning signs:
Decreased pump discharge pressure
Excessive vibration during pumping
Metal particles in discharge fluid
Unusual knocking sounds from pump
Reduced flow rates at constant RPM
Fluid leaking from valve covers
Abrasive drilling fluids accelerate mud pump problems significantly. Furthermore, hard rock drilling reduces valve life by 50%. Therefore, frequent inspections prevent sudden drilling equipment breakdown.
Essential Replacement Parts
Spare parts for drilling rigs must include these valve components:
8 complete valve assemblies per pump
Matched poppet valves and seats
Valve springs in correct specifications
Valve cover gaskets and seals
Discharge line gaskets
Repair Procedures
Rig repair solutions require removing worn valve assemblies completely. Additionally, inspect valve seats for erosion and pitting damage. Thus, replace both poppets and seats as matched sets.
Preventive maintenance through 100-hour valve inspections catches valve seat damage early. Consequently, scheduled valve replacement costs AED 7,400 versus AED 55,000 for emergency repairs during operations.
FAILURE #3 - ROTARY TABLE BREAKDOWN
Rotary Table Failure Impact
Rotary table failure stops all drilling operations immediately. Therefore, drill rig failures from rotary system problems halt drill string rotation completely. Consequently, your crew cannot advance the hole or trip pipe safely.
Rotary table failure represents 18% of critical drilling equipment problems. Moreover, bearing damage and drive mechanism wear cause most breakdowns. Thus, understanding failure patterns prevents costly rig breakdown situations.
Early Warning Indicators
Rotary table failure shows these symptoms before complete shutdown:
Unusual grinding noises during rotation
Excessive vibration in rotary assembly
Increased torque requirements for rotation
Visible metal shavings in rotary area
Irregular rotation speeds under load
Hot bearings or smoking from table
Bearing wear progresses rapidly once symptoms appear. Furthermore, continued operation damages expensive table components. Therefore, immediate shutdown prevents catastrophic drilling equipment breakdown.
Critical Spare Parts Required
Spare parts for drilling rigs must include:
Complete rotary table bearing assemblies
Master bushings in three sizes
Kelly drive bushings (2 sets minimum)
Pin and box protectors
Rotary seals and gaskets
Effective Repair Methods
Rig repair solutions start with complete bearing inspection and replacement. Additionally, measure bearing clearances against specifications. Thus, proper component replacement restores full functionality.
Drilling rig maintenance schedules require bearing inspection every 1,500 hours. Consequently, preventive bearing replacement costs AED 18,500 versus AED 92,500 for complete rotary table failure repairs including emergency repairs and downtime.
FAILURE #4 - DRAWWORKS BRAKE FAILURE
Understanding Draw works Failure
Drawworks failure creates immediate safety hazards during hoisting operations. Therefore, brake band wear prevents safe load control and pipe handling. Consequently, drill rig failures from brake problems stop all tripping operations.
Drawworks failure accounts for 15% of safety-critical drilling equipment problems. Moreover, worn brake bands cannot hold suspended drill string weight. Thus, brake system integrity determines operational safety.
Critical Warning Signs
Brake band wear shows these symptoms:
Reduced braking force during pipe trips
Brake handle requires more force
Burning smell from brake assembly
Visible smoke during heavy braking
Uneven brake engagement and slipping
Glazed or cracked brake band surfaces
Brake temperature exceeding 400°F indicates severe brake band wear. Furthermore, continued operation risks catastrophic load drops. Therefore, immediate brake inspection prevents rig breakdown accidents.
Required Brake Components
Spare parts for drilling rigs must include:
4 complete brake band assemblies
Brake lining material for repairs
Hydraulic brake actuator seals
Brake linkage pins and bushings
Brake drum inspection tools
Repair and Prevention
Rig repair solutions require complete brake band replacement when thickness drops below specifications. Additionally, resurface brake drums if scoring appears. Thus, proper component replacement restores safe braking capacity.
FAILURE #5 - ENGINE OVERHEATING
Power System Overheating Issues
Engine overheating causes immediate power system shutdown on drilling rigs. Therefore, coolant system failure destroys diesel engines within minutes of temperature spikes. Consequently, drill rig failures from overheating halt all rig power generation.
Engine overheating represents 22% of power-related drilling equipment problems. Moreover, coolant temperatures above 220°F trigger automatic engine shutdowns. Thus, cooling system maintenance prevents catastrophic engine damage.
Overheating Warning Symptoms
Coolant system failure displays these indicators:
Engine temperature gauge in red zone
Steam escaping from radiator cap
Coolant leaks under engine area
Reduced engine power output
Unusual engine knocking sounds
White smoke from exhaust stack
Radiator blockage and water pump failure cause most engine overheating incidents. Furthermore, low coolant levels accelerate temperature rises. Therefore, daily coolant checks prevent power system shutdown.
Essential Cooling Parts
Spare parts for drilling rigs must include:
Complete water pump assemblies (1 per engine)
Radiator hoses and clamps
Thermostats in correct temperature range
Radiator caps and overflow tanks
Coolant additives and antifreeze
Repair Procedures and Prevention
Rig repair solutions require water pump replacement and radiator flushing. Additionally, pressure test cooling systems monthly. Thus, component replacement prevents engine destruction.
Preventive maintenance with coolant changes every 2,000 hours eliminates 80% of engine overheating problems. Consequently, cooling system service costs AED 5,500 versus AED 185,000 for complete engine replacement after coolant system failure.
FAILURE #6 - TOP DRIVE MOTOR FAILURE
Top Drive System Issues
Top drive issues stop modern drilling operations instantly. Therefore, motor failures prevent drill string rotation and pipe makeup operations. Consequently, drill rig failures from top drive problems create extended downtime costs.
Top drive issues account for 12% of drilling equipment problems on mechanized rigs. Moreover, motor bearing failures and electrical problems cause most breakdowns. Thus, top drive reliability determines drilling efficiency.
Failure Warning Indicators
Top drive issues show these symptoms:
Unusual motor noise during rotation
Inconsistent torque output readings
Motor overheating during operations
Electrical fault alarm activation
Reduced rotation speeds under load
Vibration in top drive assembly
Motor bearing wear progresses from noise to complete seizure. Furthermore, electrical connection failures interrupt power delivery. Therefore, early detection prevents complete drilling equipment breakdown.
Critical Top Drive Parts
Spare parts for drilling rigs must include:
Motor bearing assemblies
Electrical connection components
Hydraulic motor seals and pistons
Top drive swivel seals
Control system circuit boards
Repair Solutions
Rig repair solutions require motor disassembly and bearing inspection. Additionally, test all electrical connections for proper voltage. Thus, systematic component replacement restores full functionality.
Drilling rig maintenance schedules demand monthly top drive inspections. Consequently, preventive bearing service costs AED 22,000 versus AED 165,000 for complete motor replacement during emergency repairs.
FAILURE #7 - BOP CONTROL SYSTEM MALFUNCTION
Critical Safety System Failures
BOP malfunction creates severe safety risks during drilling operations. Therefore, control system malfunction prevents blowout preventer activation when needed. Consequently, drill rig failures in BOP systems pose life-threatening hazards.
BOP malfunction accounts for 8% of safety-critical drilling equipment problems. Moreover, hydraulic control failures and electrical issues disable BOP functions. Thus, BOP system integrity remains non-negotiable for safe operations.
Malfunction Warning Signs
Control system malfunction shows these indicators:
BOP fails to close during tests
Slow hydraulic actuator response
Control panel alarm activation
Pressure drops in accumulator system
Solenoid valve electrical failures
Leaking hydraulic control lines
Accumulator pressure below 2,500 PSI indicates BOP malfunction development. Furthermore, annual BOP testing reveals hidden control problems. Therefore, weekly pressure checks prevent rig breakdown during well control situations.
Essential BOP Components
Spare parts for drilling rigs must include:
Complete solenoid valve assemblies
Hydraulic accumulator bottles
Control pod electronic components
BOP hydraulic hoses and fittings
Backup control system batteries
Repair and Testing Protocols
Rig repair solutions demand immediate pressure testing and valve replacement. Additionally, test all BOP functions before drilling operations. Thus, proper component replacement ensures well control capability.
Preventive maintenance with weekly BOP tests catches control system malfunction early. Consequently, scheduled BOP service costs AED 18,500 versus catastrophic well control incidents exceeding AED 3,700,000 in emergency repairs and cleanup.
FAILURE #8 - WIRE ROPE FAILURE
Hoisting System Cable Problems
Wire rope failure causes catastrophic load drops during tripping operations. Therefore, drilling line breaks create extreme safety hazards and equipment damage. Consequently, drill rig failures from rope breaks result in severe injuries and downtime.
Wire rope failure accounts for 10% of hoisting-related drilling equipment problems. Moreover, broken wires and internal strand damage weaken rope strength. Thus, daily rope inspection prevents deadly accidents.
Wire Rope Failure Symptoms
Wire rope failure shows these warning signs:
Visible broken wires on rope surface
Rope diameter reduction from wear
Kinks or bird caging deformations
Corrosion on wire strands
Flat spots from sheave damage
Internal wire breaks detected magnetically
Rope strength drops 50% when 10% of wires break. Furthermore, continued use accelerates complete wire rope failure. Therefore, immediate replacement prevents load drops and injuries.
Required Rope Components
Spare parts for drilling rigs must include:
5,000 feet of drilling line matching specs
Rope sockets and wedge assemblies
Wire rope lubricant
Magnetic rope inspection tools
Rope cutting and splicing equipment
Replacement Procedures
Rig repair solutions require complete rope replacement after 300-500 trips. Additionally, rotate rope every 100 trips to distribute wear. Thus, systematic component replacement maintains safe working loads.
COMPLETE FAILURE COMPARISON TABLE
Quick Reference Guide for All Failures
This comprehensive table summarizes all nine drill rig failures with critical repair information. Therefore, you can quickly identify drilling equipment problems and required solutions. Consequently, faster diagnosis reduces downtime costs significantly.
Failure Type | Frequency % | Primary Cause | Critical Parts Needed | Repair Cost (AED) | Prevention Cost (AED) |
Hydraulic System Pressure Loss | 32% | Seal degradation | Seal kits, hoses, pumps | 128,500 | 11,000 |
Mud Pump Valve Failure | 28% | Valve seat damage | Valve assemblies, seats | 55,000 | 7,400 |
Rotary Table Breakdown | 18% | Bearing wear | Bearings, bushings | 92,500 | 18,500 |
Drawworks Brake Failure | 15% | Brake band wear | Brake bands, actuators | 110,000 | 14,800 |
Engine Overheating | 22% | Coolant system failure | Water pumps, radiators | 185,000 | 5,500 |
Top Drive Motor Failure | 12% | Motor bearing wear | Bearings, seals | 165,000 | 22,000 |
BOP Control Malfunction | 8% | Hydraulic control issues | Solenoids, accumulators | 3,700,000 | 18,500 |
Wire Rope Failure | 10% | Wire breakage | Drilling line, sockets | 740,000 | 37,000 |
You can also check: Best Guide to Choosing the Right Drilling Rig Manufacturer
PROFESSIONAL SUPPORT FOR FAILURE PREVENTION
Drilling Equipment Rental Solutions
Drilling Equipment Rental services provide backup equipment during rig breakdown situations. Therefore, rental programs minimize downtime costs when primary systems fail. Consequently, you maintain project schedules despite unexpected drilling equipment problems.
Rental equipment comes with complete spare parts for drilling rigs and technical support. Moreover, experienced rental providers stock critical components for immediate deployment. Thus, rental solutions bridge gaps during emergency repairs.
Training & Technical Solutions
Training & Technical Solutions programs reduce drill rig failures through improved operator competence. Therefore, trained personnel recognize early warning signs before complete breakdowns occur. Consequently, proper training prevents 60% of operator-related drilling equipment breakdown incidents.
Technical training covers drilling rig troubleshooting procedures for all major systems. Furthermore, certified technicians perform faster rig repair solutions with fewer errors. Thus, investing in training delivers better preventive maintenance outcomes and reduces emergency repairs frequency.
Expert technical support provides remote diagnostics during critical failures. Additionally, experienced engineers guide repair procedures in real-time. Therefore, technical solutions minimize repair time and restore operations faster.
Drill rig spare parts inventory defines your operational success. Without the right components ready, your entire drilling operation stops. Consequently, smart inventory management becomes your best defense against costly downtime.
Why Spare Parts Management Impacts Your Bottom Line
Equipment failures cost drilling operations $5,000 to $15,000 per hour in lost revenue. Therefore, you need strategic spare parts stocking to protect your profits.
Unplanned downtime accounts for 35% of total drilling costs. Moreover, emergency part orders carry premium pricing and extended shipping times. Thus, maintaining proper inventory levels saves money while keeping operations running smoothly.
Three Critical Risks You Face Without Proper Inventory
Equipment Breakdown: Drill rigs operate under extreme conditions. As a result, component failures happen without warning.
Extended Lead Times: Specialized drilling parts take 4-12 weeks to arrive. Furthermore, international shipping adds complexity and delays.
Production Losses: Every hour of downtime multiplies across your entire project timeline. In addition, delayed projects damage client relationships and future business opportunities.
Rotary System Spare Parts
Kelly Bushings and Drive Components
Your rotary system powers the entire drilling operation. Accordingly, you must stock critical rotary components to prevent total shutdowns.
Kelly drive bushings wear out after 500-800 drilling hours. Additionally, formation hardness accelerates wear rates significantly. You should stock:
Two complete Kelly bushing sets minimum
Three master bushings in different sizes
One spare rotary table bearing assembly
Rotary table bearings handle massive loads continuously. Consequently, these bearings fail after 1,200-1,500 operating hours. Furthermore, bearing replacement requires specialized tools and training.
Drive Mechanism Protection
Drive mechanisms transfer power to the drill string. Therefore, worn drive components reduce drilling efficiency and increase fuel consumption.
Stock spare drive gears and coupling assemblies. In particular, inspect couplings every 500 hours for wear patterns. Moreover, damaged couplings cause vibration that destroys other components.
Hydraulic System Components
High-Pressure Hoses and Fittings
Hydraulic systems control most rig functions. Consequently, hydraulic failures stop operations immediately.
Hydraulic hoses degrade from heat and pressure cycling. Thus, you must replace hoses every 2,000 hours or annually. Stock these essential items:
10-15 hydraulic hoses in common sizes
Complete fitting assortment for quick connections
Pressure-rated hoses for 3,000-5,000 PSI systems
Temperature extremes destroy hose materials rapidly. In addition, ultraviolet exposure weakens outer layers over time.
Seals and O-Rings
One failed seal can shut down your entire operation. Therefore, you need comprehensive seal kits covering all cylinder sizes.
O-rings prevent fluid leaks throughout hydraulic circuits. Furthermore, different cylinder bores require specific seal dimensions. You must maintain:
Complete seal kit for all hydraulic cylinders
High-temperature seals for hot climate operations
Backup seals for critical safety systems
Seal failures cause contamination in hydraulic fluid. Subsequently, contaminated fluid damages pumps and valves throughout the system.
Hydraulic Pumps
Pump failures account for 25% of hydraulic system downtime. Accordingly, stock one complete spare pump assembly for your primary system.
Hydraulic pumps operate under extreme pressure. As a result, internal components wear from metal-to-metal contact. Additionally, contaminated fluid accelerates pump wear significantly.
Replace pump filters every 500 hours. Moreover, use manufacturer-specified fluids to prevent premature failures.
Mud Pump Spare Parts
Valve Assemblies and Components
Mud pumps circulate drilling fluid through your system. Therefore, valve failures stop drilling operations completely.
Mud pump valves experience the most severe wear. In particular, abrasive drilling fluids destroy valve seats rapidly. Stock these critical components:
Eight complete valve assemblies per pump
Matched poppet valves and seats
Valve springs in correct specifications
Replace valve assemblies every 200-400 hours depending on conditions. Furthermore, hard rock drilling reduces valve life by 40-50%.
Pistons and Liners
Piston assemblies and liners work as matched sets. Consequently, you must replace both components simultaneously for optimal performance.
Stock three complete piston assemblies per mud pump. Additionally, never mix worn pistons with new liners. In fact, mismatched components accelerate wear rates by 300%.
Inspect piston rubbers every 100 operating hours. Moreover, replace rubbers when compression set exceeds manufacturer specifications.
Discharge Lines and Manifolds
Discharge lines handle extreme pressure cycling. Thus, cracks develop in weld joints and connection points.
Keep two spare discharge line assemblies ready. In addition, stock complete gasket sets for all manifold connections. Furthermore, inspect discharge lines daily for visible cracks or leaks.
Pressure testing prevents catastrophic failures. Accordingly, test all pressure components at 1.5 times working pressure annually.
Hoisting System Components
Brake Assemblies
The draw works controls massive loads during drilling. Therefore, brake system failures create immediate safety hazards.
Brake bands wear from friction during load control. Consequently, you should replace brake bands every 1,000-1,500 hours. Stock these safety-critical items:
Four complete brake band assemblies
Brake lining material for emergency repairs
Hydraulic brake actuator seals
Inspect brake systems before every shift. Moreover, measure brake band thickness weekly to track wear rates.
Wire Rope and Drilling Line
Wire rope carries the entire drill string weight. Accordingly, rope inspection and replacement prevents catastrophic failures.
Replace drilling line after 300-500 drill pipe trips. In addition, inspect for broken wires every 100 trips. You must maintain:
5,000 feet of spare wire rope
Rope that matches your rig specifications exactly
Documentation of rope inspection history
Internal wire breakage occurs before external damage appears. Therefore, magnetic rope inspection detects hidden failures.
Crown Block and Traveling Block Sheaves
Sheaves guide wire rope through the hoisting system. Consequently, worn sheave grooves damage rope and reduce service life.
Stock two spare sheaves in sizes your rig uses. Furthermore, inspect sheave grooves monthly for wear patterns. Additionally, damaged sheaves create flat spots on wire rope.
Rotate sheaves every 2,000 hours to distribute wear evenly. Thus, proper rotation extends sheave life by 50-75%.
Power Generation Spare Parts
Engine Filters and Consumables
Diesel engines power most drilling operations. Therefore, you need adequate filter inventory for 500 operating hours minimum.
Stock these essential consumables:
20 fuel filters per engine
20 oil filters per engine
20 air filters per engine
Coolant and fuel additives
Replace fuel filters every 250 hours in clean conditions. However, dusty environments require 100-hour replacement intervals. Moreover, contaminated fuel destroys injection systems rapidly.
Fuel Injection Components
Fuel injection systems deliver precise fuel metering. Consequently, injector failures reduce engine power and increase fuel consumption.
Keep two spare injectors per engine on hand. In addition, stock one complete fuel pump assembly. Furthermore, fuel system parts have 2-4 week lead times when ordered.
Clean fuel prevents injector deposits. Therefore, use fuel additives in extreme temperature conditions.
Electrical Starting Components
Alternators and starters fail from vibration and heat. Thus, you must stock one spare alternator and starter per engine.
Vibration loosens electrical connections over time. Additionally, corrosion increases resistance in starting circuits. Inspect electrical connections monthly. Moreover, clean battery terminals weekly in dusty conditions.
Cooling System Parts
Overheating destroys engines within minutes. Accordingly, you need complete cooling system spare parts.
Stock one water pump assembly per engine. In addition, maintain thermostats and radiator hoses for quick replacement. Furthermore, cooling system failures cost 10-20 times more than preventive parts inventory.
Coolant mixture protects against freezing and corrosion. Therefore, test coolant concentration monthly in extreme climates.
Drilling Tools and Downhole Components
Drill Bits for Different Formations
Formation type determines bit selection and wear rates. Consequently, you need multiple bit types in your inventory.
Hard rock formations destroy bits in 20-40 drilling hours. In contrast, soft formations allow 100-200 hour bit life. Stock these essential bits:
Five tricone bits in primary hole sizes
Three PDC bits for soft to medium formations
Two diamond bits for extremely hard rock
Track bit performance by formation type. Thus, historical data guides future bit selection and inventory levels.
Drill Collars and Stabilizers
Drill collars provide weight on bit for drilling. Therefore, collar integrity affects drilling performance directly.
Stock two spare drill collars per drilling assembly. Additionally, inspect collars using magnetic particle testing annually. Furthermore, fatigue cracks develop in high-stress connection areas.
Stabilizers center the drill string in the hole. Accordingly, bent stabilizers cause hole deviation and drilling problems. Keep three stabilizers in each size you use regularly.
Fast-Moving Consumable Inventory
Filters Across All Systems
Filters protect expensive components from contamination. Therefore, adequate filter inventory prevents premature equipment failures.
Replace filters on schedule regardless of appearance. In fact, internal filter damage occurs before external signs appear. Maintain these minimum quantities:
20 hydraulic filters
20 transmission filters
15 air compressor filters
10 fuel water separators
Bypass indicators show filter condition during operation. Moreover, operating with clogged filters damages pumps and cylinders.
Lubricants and Fluids
Proper lubrication extends component life dramatically. Consequently, you must stock adequate fluids for all systems.
Keep 500 gallons of hydraulic fluid on site. Additionally, maintain 200 gallons of engine oil in correct viscosity grades. Furthermore, extreme temperatures require different fluid specifications.
Grease fittings need lubrication every 8-12 operating hours. Therefore, stock 50 pounds of high-pressure grease minimum.
Drilling Fluid Additives
Mud chemistry affects drilling performance and hole stability. Thus, you need sufficient additives for 1,000 barrels of drilling mud.
Stock these essential mud additives:
Bentonite for viscosity control
Polymers for fluid loss prevention
Barite for mud weight increases
Lost circulation materials
Formation changes require immediate mud adjustments. Accordingly, inadequate additive inventory causes drilling delays and hole problems.
Electrical System Components
Control Panel Parts
Electrical failures often occur during weather events. Therefore, you must maintain complete electrical spare parts kits.
Stock five of each critical component:
Fuses in all voltage ratings
Relays and contactors
Circuit breakers and switches
Panel indicators and meters
Label spare parts to match circuit diagrams exactly. Thus, technicians locate correct parts during emergencies.
Wiring and Connections
Vibration and environmental exposure degrade electrical connections. Consequently, you need adequate wire and connector inventory.
Keep 500 feet of wire in common gauges. In addition, stock assorted electrical connectors and terminals. Moreover, proper crimping tools ensure reliable connections.
Inspect wiring monthly for chafing and damage. Furthermore, replace damaged wiring immediately to prevent equipment failures.
Fasteners and Hardware Inventory
High-Grade Bolts and Nuts
Drilling rigs use hundreds of fastener sizes. Therefore, you need comprehensive fastener kits organized by size and grade.
Grade 8 bolts handle high-stress applications. Accordingly, stock 50 of each common size from 1/2 inch through 1.5 inches. Include matching nuts and lock washers for complete assemblies.
Torque specifications prevent fastener failures. Thus, use calibrated torque wrenches for all critical connections.
Hydraulic Fittings
Hydraulic fittings connect hoses throughout the rig. Consequently, damaged fittings cause leaks and pressure losses.
Keep 20 of each fitting type in inventory. Additionally, cross-reference fittings to manufacturer part numbers. Moreover, mixing fitting types creates leak points and safety hazards.
Thread sealant prevents hydraulic leaks. Therefore, use thread sealant on all tapered pipe threads.
Strategic Inventory Management
Criticality Classification System
Classify parts by failure impact and replacement time. Consequently, critical parts need immediate availability regardless of cost.
Critical Parts: Components that halt operations completely. Stock these items at 100% availability targets.
Important Parts: Components that reduce efficiency but allow limited operations. Maintain 85-90% availability for these items.
Standard Parts: Common consumables with short lead times. Stock based on usage rates and economic order quantities.
Safety-critical components require higher inventory levels. Thus, never substitute inferior parts in brake systems or pressure vessels.
Supplier Partnership Development
Single-source suppliers create supply chain vulnerabilities. Therefore, establish accounts with multiple suppliers for critical components.
Negotiate volume discounts and priority shipping agreements. In addition, request supplier-managed inventory programs for high-volume consumables. Furthermore, supplier partnerships reduce lead times by 30-50%.
Qualify at least two suppliers per major component category. Accordingly, backup suppliers prevent production delays during supply disruptions.
Storage Organization Methods
Organize spare parts by equipment system and criticality. Thus, personnel locate parts quickly during equipment failures.
Label all storage locations with:
Part numbers and descriptions
Stock quantities and reorder points
Equipment applications
Shelf life dates for perishable items
Climate-controlled storage protects sensitive components. Consequently, hydraulic seals and electrical parts need temperature and humidity control.
Documentation and Tracking Systems
Maintain detailed inventory records for all spare parts. Therefore, track usage rates, failure frequencies, and reorder points.
Digital inventory systems provide real-time visibility. In addition, barcode scanning automates inventory transactions. Moreover, cloud-based systems allow access across multiple drilling sites.
Update equipment-specific parts lists after modifications. Thus, inventory alignment matches actual equipment configurations.
Economic Order Calculations
Balancing Order Costs and Inventory Investment
Calculate optimal order quantities based on usage rates. Consequently, you balance ordering costs against inventory carrying costs.
Annual usage divided by order quantity determines ordering frequency. For instance, 100 hoses used yearly with 25-unit orders means quarterly ordering.
Carrying costs include storage, insurance, and tied-up capital. Therefore, these costs typically equal 15-25% of inventory value annually.
Volume Discount Strategies
Volume discounts often justify larger orders. However, you must compare total costs including discounts, shipping, and carrying expenses.
Negotiate pricing tiers with key suppliers. Additionally, combine orders across multiple rigs for better pricing. Furthermore, annual contracts lock in favorable pricing for 12-24 months.
Integration With Drilling Equipment Rental Services
Rental equipment requires different inventory strategies. Therefore, coordinate spare parts availability with your rental provider before operations begin.
Some rental agreements include spare parts coverage. In contrast, others require separate parts arrangements. Verify parts responsibility in rental contracts. Moreover, mixing rental and owned equipment parts creates accountability problems.
Rental equipment often uses different component specifications. Accordingly, maintain separate inventory tracking for rental equipment spares.
Training & Technical Solutions for Better Parts Management
Technical training reduces spare parts consumption significantly. Therefore, invest in training programs that teach proper maintenance practices.
Trained personnel identify wear patterns early. Consequently, they replace components before catastrophic failures occur. In addition, proper installation techniques extend component life by 25-40%.
Training programs should cover:
Proper installation procedures
Torque specifications and sequences
Inspection techniques and intervals
Troubleshooting common failures
Partner with equipment manufacturers for technical training. Thus, manufacturer-certified training ensures best practices.
Environmental and Seasonal Considerations
Cold Weather Operations
Cold climates require specialized spare parts. Therefore, maintain separate inventories for extreme temperature conditions.
Stock cold-weather hydraulic fluids and lubricants. Additionally, keep engine block heaters and battery warmers available. Furthermore, cold temperatures reduce battery capacity by 50-60%.
Synthetic fluids perform better in extreme cold. Accordingly, switch to synthetic hydraulics below 0°F operating temperatures.
Hot Climate Challenges
Desert operations accelerate component wear. Consequently, dust infiltration destroys seals and bearings rapidly.
Increase air filter replacement frequency by 50% in dusty conditions. Moreover, stock additional filtration components for frequent changes. In addition, dust creates abrasive wear on all moving parts.
Offshore Drilling Environments
Salt water accelerates corrosion on metal components. Therefore, stock corrosion-resistant fasteners and protective coatings.
Inspect electrical connections weekly in marine environments. Additionally, use dielectric grease on all electrical connections. Furthermore, humidity causes condensation in electrical enclosures.
Emergency Spare Parts Kits
Remote Location Preparedness
Remote drilling sites need emergency kits for quick repairs. Consequently, assemble kits containing parts for common failure modes.
Emergency kits typically weigh 500-1,000 pounds. Additionally, standard shipping containers provide weather protection. Include these items:
Critical seal and O-ring assortments
Common fasteners and hardware
Basic hand tools for repairs
Quick-connect hydraulic fittings
Test emergency kit contents annually. Thus, verify completeness and part condition before deploying to remote locations.
Helicopter-Deliverable Kits
Offshore and remote operations need air-deliverable emergency parts. Therefore, weight and volume constraints limit kit contents.
Prioritize highest-value, lowest-weight components. In addition, vacuum-sealed packaging reduces kit volume by 40%. Moreover, waterproof containers protect parts during transport.
Obsolescence Risk Management
Identifying Discontinuation Risks
Equipment manufacturers discontinue parts as models age. Consequently, you must identify obsolescence risks before parts become unavailable.
Purchase lifetime buys of critical parts before discontinuation. Additionally, engineering drawings enable aftermarket production. Furthermore, reverse engineering provides alternatives for obsolete components.
Aftermarket Parts Qualification
Aftermarket suppliers provide alternatives for obsolete parts. However, you must qualify aftermarket parts carefully before adding to inventory.
Test aftermarket parts under actual operating conditions. Thus, verify compatibility and reliability before large purchases. In addition, some aftermarket parts exceed original equipment quality.
Equipment Upgrade Strategies
Equipment upgrades sometimes eliminate obsolete parts entirely. Therefore, evaluate upgrade costs against long-term parts availability.
Upgrading old equipment reduces spare parts complexity. Consequently, newer models often use common components across multiple systems.
Quick Reference: Inventory Priority Levels
Priority Level | Description | Stock Target | Examples |
Critical | Halts operations immediately | 100% availability | Brake bands, hydraulic pumps, mud pump valves |
Important | Reduces efficiency significantly | 85-90% availability | Drill bits, wire rope, cooling pumps |
Standard | Common consumables | Based on usage rate | Filters, fluids, fasteners |
Performance Tracking Metrics
Inventory Turnover Rates
Track spare parts turnover by category. Accordingly, high turnover items need frequent reordering while low turnover indicates overstock.
Target 4-6 inventory turns annually for most consumables. However, critical safety parts may turn only 1-2 times yearly. Furthermore, slow-moving inventory ties up capital unnecessarily.
Stockout Frequency Analysis
Measure stockout frequency for critical parts. Therefore, frequent stockouts indicate inadequate inventory levels.
Zero stockouts is unrealistic and expensive. However, you should target less than 2% stockout rate for critical items. In addition, track stockout costs to justify inventory investment.
Return on Investment Calculations
Calculate ROI by dividing prevented downtime costs by inventory value. Consequently, this metric justifies inventory investment to management.
Typical spare parts ROI ranges from 300-500% annually. Thus, preventing one major breakdown pays for entire inventory investment.
Digital Inventory Systems
Real-Time Tracking Technology
Modern inventory software tracks parts automatically. Therefore, barcode scanning and RFID tags eliminate manual counting.
Cloud-based systems allow remote inventory visibility. In addition, personnel access inventory data from any location. Moreover, real-time updates prevent ordering errors and stockouts.
Predictive Analytics Applications
Machine learning forecasts parts demand based on historical usage. Consequently, predictive analytics optimize reorder points automatically.
Input accurate usage data for effective forecasting. Thus, garbage-in produces garbage-out in predictive systems. Additionally, usage patterns change over time requiring system retraining.
Multi-Site Inventory Sharing
Share inventory data between drilling rigs. Therefore, transfer parts between sites when needed.
Multi-site visibility reduces total inventory requirements by 20-30%. Furthermore, coordinate transfers during scheduled equipment moves.
Building Your Inventory Systematically
Prioritization Framework
Start with critical safety items and high-failure components. Consequently, you build inventory based on actual operational risks.
Prioritize parts using this framework:
Phase 1: Safety-critical components and high-failure items
Phase 2: Components with long lead times
Phase 3: Consumables with predictable usage rates
Phase 4: Nice-to-have items for convenience
Budget constraints require phased inventory building. Therefore, systematic prioritization ensures critical items come first.
Quarterly Review Process
Review and update inventory quarterly based on actual experience. Thus, drilling conditions change and equipment ages differently than predicted.
Compare actual usage against forecasts. Additionally, adjust reorder points based on failure patterns. Moreover, eliminate slow-moving inventory that ties up capital.
Supplier Expertise Utilization
Partner with experienced suppliers who understand drilling operations. Consequently, supplier expertise helps you select correct parts.
Request technical support from supplier representatives. In addition, suppliers often identify common mistakes before you make them. Furthermore, supplier relationships provide market intelligence on part availability.
Cost Impact Summary
Metric | Target Range | Industry Average | Your Goal |
Inventory Turnover Rate | 4-6 turns/year | 3.5 turns/year | 5+ turns/year |
Stockout Frequency | Less than 2% | 5-8% | Under 2% |
Downtime Cost per Hour | $5,000-$15,000 | $8,500 | Minimize to $0 |
Inventory ROI | 300-500% | 250% | 400%+ |
Carrying Cost | 15-25% of value | 20% | Optimize to 18% |
You can also check: Desert-Proof Maintenance for Geotechnical Rigs in the UAE
Your Path to Inventory Excellence
Proper spare parts inventory prevents downtime and reduces costs. Therefore, commit to professional inventory management as a core competency.
Your inventory investment directly affects drilling profitability. In addition, systematic inventory management extends equipment life significantly. Moreover, proper parts availability improves safety and reduces emergency repairs.
Start building your inventory today using these proven strategies. Consequently, your operations will run smoother and more profitably tomorrow.
Buying a drilling rig often feels like a one-time decision, but the truth is, one wrong purchase can create long-term problems. Many companies buy rigs with high expectations, believing the machine will improve productivity and expand projects. Then reality hits: breakdowns increase, spare parts take too long, operators struggle with controls, and site deadlines slip. At that stage, the rig becomes less of an asset and more of a burden.
Most of these issues don’t happen because drilling is difficult. They happen because companies ignore key checks before purchasing. The UAE and Dubai market offers many options, including drill rigs for sale, rentals, and imported units, but not every deal is safe for long-term work. If you want stable performance, controlled maintenance, and predictable output, you must avoid the common mistakes that buyers repeat again and again.
This guide breaks down the 7 biggest mistakes companies make when buying drilling rigs and explains how you can choose the right setup based on your project type, soil conditions, and support requirements.
Mistake #1: Choosing Price Over Manufacturer Support
The most common mistake is focusing on cost first. Buyers compare only the quote and choose the lowest offer, thinking they found a smart deal. This is exactly how many companies end up stuck with weak equipment, limited support, and expensive downtime.
In Dubai, you’ll see many listings for cheap drill rigs for sale in Dubai, but low price usually hides hidden risks such as weak hydraulics, low-quality components, and missing spare parts support. The problem isn’t only quality. The bigger issue is what happens after purchase. When the rig needs parts, support, or troubleshooting, cheap suppliers disappear or respond too slowly.
If you are comparing Best drill rigs for sale in Dubai, don’t compare pricing only. Compare the manufacturer’s strength:
spare parts availability
service engineer response
warranty clarity
documented rig performance
A rig with strong support always delivers better results than a low-cost rig with no backup.
Mistake #2: Buying the Wrong Rig Type for the Job
Many companies buy a rig based on popularity instead of actual job needs. That decision creates constant performance issues because one rig type cannot solve every drilling requirement.
If your projects are geotechnical investigations, you need a Geotech drill rig designed for stability, sampling support, and controlled drilling. If you buy a heavy well rig for this work, you’ll increase operating cost, fuel usage, and site handling issues, especially in limited-access areas.
If your projects involve deep water wells, choose water well drilling rigs that are built for torque, depth, and fluid drilling systems. A Geotech rig will struggle in deeper drilling work and may overheat under continuous heavy load.
Site access also matters. Many UAE sites require Compact drilling rigs because space is limited in urban projects and infrastructure work zones. If you ignore compact access needs, your rig becomes hard to mobilize and slow to set up.
Buying the right rig type from day one keeps your project stable and prevents constant modifications and field compromises.
Mistake #3: Ignoring Drilling Method Compatibility
Companies often assume any rig can handle any drilling method. This mistake becomes clear when the project demands a specific method and the rig fails to deliver consistent output.
For example, the direct push drilling method requires rig compatibility in push force, tooling support, and stable control. Some rigs claim compatibility but lack the force and structural setup required for proper direct push work. This can lead to:
poor sample quality
tooling damage
unstable profiling
higher wear on rods and accessories
If your work includes direct push, the manufacturer must confirm direct push performance with proof, not only verbal claims. They should also guide you about tooling requirements and expected output based on UAE soil layers.
Mistake #4: Skipping Rental Testing Before Buying
Many companies buy a rig without testing it in real site conditions. They trust brochures, short videos, or supplier claims, then discover later that the rig does not match UAE soil, drilling methods, or operator handling. That gap creates delays, higher wear, and more breakdowns.
Using Drill rig rental as a testing phase gives you clear answers before you invest. Rental helps you understand how the rig performs under real workload, not just in a showroom. It also shows whether the supplier offers real support or only sells machines.
Rental testing helps you confirm:
drilling stability on UAE soil layers
overheating behavior during long shifts
control smoothness for operators
fuel use and productivity rate
spare support and service timing
This is also why contractors search terms like well drill rental, water well rig rental, and Water well drilling rigs for rent. Short-term rental reduces risk while keeping work moving.
Mistake #5: Ignoring Rental Terms and Hidden Costs
Some companies rent a rig and assume the daily rate covers everything. Later, extra charges start appearing, and the project budget gets disturbed. This happens when the rental agreement is not reviewed properly.
drill rig rental price depends on more than the machine itself. Many suppliers charge separately for transport, operator support, servicing, consumables, and breakdown responsibility. Rental becomes expensive when these items are unclear from the start.
Key factors that affect drill rig rental price include:
rig type and drilling capacity
project duration
operator included or not
mobilization and return transport
maintenance responsibility
fuel and consumables
downtime replacement conditions
Always ask these questions before signing:
What is included in the rental package?
Who pays if the rig stops due to failure?
How fast will replacement parts arrive?
Will you provide a backup rig if downtime increases?
This keeps rental smooth and avoids surprise billing.
Mistake #6: Overlooking Spare Parts and Local UAE Support
Many rigs perform well for a few months, then one part fails and everything stops. The real damage is not the failure itself. The real damage is the waiting time. If spare parts take weeks, your rig becomes idle while deadlines slip.
Local spare support matters most when you buy drilling rig equipment in UAE. A manufacturer or supplier must provide clear spare stock planning. Without that, even a quality rig will create stress during site work.
Before buying, confirm:
spare parts list shared in advance
recommended spare stock quantity
local spare stock availability
service engineers available in UAE/GCC
response timeline for urgent repairs
Also ask what drilling rig equipment should come with the purchase, such as filters, belts, hoses, and sensors. Strong suppliers guide you properly so downtime stays controlled
Mistake #7: Buying Without Proof of Performance
Many companies buy rigs based on claims. Suppliers often say “high performance” or “best quality,” but real proof is what matters. Without evidence, the purchase becomes risky, especially in UAE and Dubai markets.
Proof should include:
rig demo videos under load
real drilling logs or reports
customer references
system testing details
component brand list
This becomes even more important when buying modern efficient geotechnical rigs. Efficiency is not a word. Efficiency is performance under pressure, less overheating, controlled hydraulics, and smoother drilling results.
If you want reliable geotechnical drilling rigs for sale, insist on performance proof and service support. Also confirm compatibility if your work involves Meta drill geotechnical drilling setups or sampling-based geotechnical projects.
Dubai Market Tips: Cheap vs Best Drill Rigs
Dubai offers many rig deals, but not every deal is safe. Low-cost offers attract buyers quickly, especially when suppliers advertise cheap drill rigs for sale in Dubai. Many companies choose these rigs and regret it later because breakdowns increase and spare support stays weak.
Common issues with cheap rigs:
weak hydraulic performance
overheating under long shifts
poor weld strength and vibration issues
parts not available quickly
no real service response
Better results come from selecting the Best drill rigs for sale in Dubai, which usually include:
proven performance
solid warranty terms
spare parts support
service engineers in the region
When comparing drill rigs for sale, focus on long-term reliability, not only price.
Exploration Drilling Projects: Biggest Buyer Mistake
Exploration projects need strong rigs. Many companies buy general rigs for exploration work and face performance issues later. Exploration requires stable torque, deeper capacity, and safer rod handling.
If your work involves:
exploration drilling in dubai
exploration drilling services in uae
exploration drilling services in dubai
working with exploration drilling companies in dubai
long-term exploration drilling projects
Choose suppliers who provide proof of exploration performance. Without that proof, the rig may struggle under deeper drilling load.
You can also check: Best Guide to Choosing the Right Drilling Rig Manufacturer
FAQs
1) What are the biggest mistakes when buying drilling rigs?
Most mistakes involve choosing price over support, ignoring spare parts planning, buying the wrong rig type, and skipping performance verification.
2) How do I avoid buying low-quality drill rigs for sale?
Check warranty terms, service support, spare stock, and rig demo proof before finalizing any drill rigs for sale deal.
3) Is Drill rig rental better than buying?
Drill rig rental works better for short projects, testing phases, and budget-controlled jobs where you need flexibility before purchasing.
4) What affects drill rig rental price in UAE?
drill rig rental price depends on rig type, drilling capacity, rental duration, transport, operator inclusion, and maintenance responsibility.
5) Why do companies regret buying cheap drill rigs for sale in Dubai?
Many cheap drill rigs for sale in dubai come with weak after-sales support, low spare availability, and frequent breakdown risks.
6) Which Geotech drill rig is best for UAE soil investigation?
A strong Geotech drill rig should offer stable drilling control, sampling compatibility, strong hydraulics, and desert-ready cooling support.
7) What drilling rig equipment in UAE should I confirm before buying?
Confirm drilling rig equipment in uae coverage like filters, hoses, sensors, belts, and a recommended spare parts list with fast delivery options.
8) Should I buy or rent water well drilling rigs?
For short or seasonal contracts, rental can help. Long-term projects usually benefit from buying reliable water well drilling rigs.
9) How do I choose the right rig for exploration drilling in Dubai?
For exploration drilling in dubai, choose rigs with high torque stability, safe rod handling, deeper drilling capacity, and proven performance demos.
10) What proof should a manufacturer provide before selling a rig?
Manufacturers should share demo videos, drilling logs, test data, customer references, and after-sales support plans.

Buying a drilling rig looks easy until your project hits delays. One supplier promises “premium build,” another offers a cheaper quote, and a third claims fast delivery. You choose one, the rig arrives, and everything looks fine at first. Then real problems start: overheating, unstable drilling, missing spare parts, slow support, and frequent breakdowns that stop your work.
This is why choosing the right drilling rig manufacturer matters more than the model itself. In the UAE market, you’ll find many sellers, but not all of them provide real long-term support. Some vendors only deliver machines, while genuine manufacturers support you with strong engineering, service engineers, spare parts availability, and technical guidance for UAE desert conditions.
This guide helps you choose the right manufacturer, whether you need a Geotech drill rig, water well drilling rigs, or equipment for exploration drilling in Dubai.
Why Choosing the Right Manufacturer Matters More Than the Rig Itself
Most buyers compare rigs using price only, but a drilling rig is a complete system. Your manufacturer decides how long it stays productive, how easily you get parts, and how quickly you get support when something stops.
The best supplier will always help you reduce downtime through:
consistent build quality and tested performance
strong after-sales network and spare parts supply
real warranty coverage and clear terms
proper manuals and training for operators
If you’re sourcing drilling rig equipment in UAE, always confirm the supplier’s spare stock, service presence, and response time. That support makes the difference between smooth work and repeated shutdowns.
Understand Your Drilling Needs Before Contacting Any Manufacturer
Before you shortlist manufacturers, define your drilling goal clearly. This protects you from buying the wrong equipment type.
If your work is Geotechnical drilling
If you handle site investigation and sampling, choose manufacturers that build Meta drill geotechnical drilling rigs designed for stability and controlled drilling. You should also compare modern efficient geotechnical rigs because efficiency reduces fuel use, overheating, and tool wear.
If your work requires Direct Push
If your job depends on fast profiling and disturbance-free sampling, confirm the rig supports the direct push drilling method with enough push capacity and correct tooling compatibility.
If your work is Water well drilling
For deep well projects, you need higher torque and stronger rotary systems. This is where water well drilling rigs perform better than Geotech rigs. UAE buyers often compare buy vs rental for this category, especially for water well drilling rigs in Dubai.
Buying vs Renting in UAE: What’s Smarter?
Many contractors avoid heavy upfront investment and choose Drill rig rental for short projects or testing phases.
When rental is the better option
Choose rental when:
your project duration is short
you need different rigs for different sites
you want performance proof before buying
you want lower upfront cost
This is why people search terms like:
well drilling equipment rental near me
well drill rental
water well rig rental
Water well drilling rigs for rent
How to judge drill rig rental price
drill rig rental price depends on:
rig type (Geotech / water well / exploration)
drilling depth and torque capacity
included operator/service support
transport and mobilization
project duration
Low price is not always a win. Always inspect the machine condition, maintenance record, and support response time.
Dubai Market: Cheap vs Best Drill Rigs
Dubai has both low-cost and high-performance options. If you plan to buy drill rigs for sale, don’t decide based on price alone.
Why cheap rigs become expensive later
Many buyers regret going for cheap drill rigs for sale in Dubai because they later face:
overheating and hydraulic issues
unstable drilling performance
faster wear of parts
missing spares and slow service
What defines the best rigs
The Best drill rigs for sale in dubai usually offer:
tested rig performance history
verified component brands
spare stock planning
proper after-sales support
You can also check: Remote ops on rigs: safer crews, faster fixes, better data!
Exploration Drilling Projects: Choose Manufacturer Carefully
Exploration projects need high reliability because downtime becomes costly quickly. If your work includes exploration drilling, only shortlist manufacturers who can show proven performance for:
exploration drilling services in uae
exploration drilling services in Dubai
service networks like exploration drilling companies in Dubai
Exploration rigs must support stable rotary systems, strong mast design, and safe tool handling.
FAQs
1) How do I choose the right drilling rig manufacturer in the UAE?
Pick a manufacturer with proven rig performance, spare parts support, local service engineers, and clear warranty terms for UAE site conditions.
2) What should I check before buying a Geotech drill rig?
Check drilling stability, sampling compatibility, hydraulic performance, spare parts availability, and whether the rig suits UAE soil and site access limits.
3) What are modern efficient geotechnical rigs used for?
Modern efficient geotechnical rigs are used for site investigation and soil testing, where smooth drilling control, fuel efficiency, and stable sampling matter.
4) What does Meta drill geotechnical drilling refer to?
Meta drill geotechnical drilling usually refers to geotech-focused drilling setups designed for accurate soil investigation, sampling support, and controlled rig performance.
5) When is the direct push drilling method the best option?
The direct push drilling method works best for fast soil profiling and shallow investigations where you want minimal disturbance and quicker results.
6) Is Drill rig rental better than buying in Dubai?
Drill rig rental is better when projects are short-term, budgets are limited, or you need flexibility to use different rigs for different site conditions.
7) What affects drill rig rental price in the UAE?
Drill rig rental price depends on rig type, drilling depth capacity, project duration, service support, mobilization, and whether an operator is included.

Geotechnical rigs in the UAE do not fail because they are weak machines. They fail because the desert does not allow mistakes. One small crack in a hose, one dusty radiator, or one ignored filter warning can turn into a full shutdown in the middle of a borehole job. Then your site team stands waiting, your schedule slips, and your cost per day jumps because heavy equipment downtime is never cheap.
The real frustration is this: many failures don’t look serious in the beginning. The rig still starts, the engine still sounds normal, and the hydraulics still move, but desert dust slowly enters the system, heat stresses every seal, and vibration loosens components until the machine suddenly refuses to cooperate. That is why desert-proof maintenance is not optional in the UAE. It is a survival plan.
This article gives you a clear, detailed maintenance system that works in UAE desert conditions. You’ll learn what fails first, why it fails, and how to prevent it using daily routines, weekly inspections, and smart preventive maintenance habits that protect your rig from dust, heat, and sandstorms.
Why Geotechnical Rigs Face More Damage in the UAE Desert
UAE desert work combines multiple harsh elements at the same time. Some environments are dusty but not hot. Some are hot but not dusty. The UAE gives you both, and that combination is the reason your rig ages faster here than it would in many other regions.
1) Extreme heat attacks your rig from every side
In summer months, ambient temperature becomes a daily test. The rig works under direct sunlight, the ground heat rises, and the engine bay temperature climbs even higher. This heat impacts performance in ways many teams ignore:
Engine oil thins faster and loses protection
Hydraulic oil becomes less stable and loses pressure performance
Seals harden and crack
Rubber hoses become brittle
Electrical sensors struggle due to overheating
Heat also increases expansion in metal components. This changes tolerances inside pumps, valves, and connectors. Small changes create big long-term damage.
2) Fine dust is more dangerous than visible sand
Many people think sand is the biggest issue, but fine desert dust causes the most damage. UAE dust has tiny particles, and these particles enter areas you don’t expect. Even if your rig looks sealed, dust finds weak points:
air intake gaps
worn-out door seals and panel edges
hydraulic breathers
open service ports
refueling openings
electrical enclosures with loose gaskets
Once dust enters, it behaves like sandpaper. It grinds internal parts slowly, reduces efficiency, increases friction, and eventually causes failure.
3) Dust + oil becomes a grinding paste
A small hydraulic leak in a clean environment is manageable. In a desert environment, it becomes a major threat. Dust sticks to oil, turns into thick paste, and that paste collects around joints, cylinders, and fittings. Over time:
hoses rub against this paste and wear faster
moving joints become stiff
dirt enters seals and scratches rods
leakage increases, so more dust sticks again
This cycle is one of the most common reasons rigs “randomly” start leaking more over a few weeks.
4) Wind changes everything
In the UAE, wind can turn a normal day into a dust event within minutes. During high winds:
filters clog quickly
radiators fill with dust
exposed grease points gather grit
electrical connections collect dust layers
If your rig is parked facing the wrong direction or left with open panels, wind will push dust directly into sensitive components.
5) Coastal humidity (for some UAE regions)
Geotechnical projects often happen near developed cities and coastal zones. In those areas, humidity adds another risk:
corrosion on battery terminals
connector rust inside electrical harness points
faster failure of sensor connections
rust on exposed metal components
This combination of humidity + dust can cause strange electrical issues that are difficult to diagnose unless your maintenance plan includes connector inspection.
The Most Common Desert Failures in Geotechnical Rigs (What Breaks First)
To desert-proof your maintenance plan, you need to know which parts fail first. That lets you focus energy where it matters instead of doing random servicing.
1) Air filtration failure (the #1 early warning system)
Your engine needs clean air. In UAE dust, air filtration becomes your first line of defense. When filters clog:
The air supply reduces
combustion quality drops
fuel consumption rises
The engine works harder
Overheating becomes more likely
Carbon builds up faster
Many teams wait for an alarm. That approach costs money. In desert work, filter inspection must be part of the routine, not an emergency reaction.
2) Cooling system overload and overheating
Cooling problems are extremely common in UAE rigs. The reason is simple: radiators and coolers collect dust like a carpet. When fins clog:
airflow reduces
heat cannot escape
coolant temperature increases
hydraulic oil temperature rises
The rig loses performance or shuts down
The dangerous part is that radiators can look “fine” from the front but remain clogged deep inside. Desert maintenance requires proper cleaning direction and correct routine timing.
3) Hydraulic system contamination and heat stress
Hydraulics run the rig’s core operations. When the UAE heat increases oil temperature:
viscosity drops
pressure stability reduces
performance becomes sluggish
seals weaken
Then dust contamination adds another layer of damage:
pumps develop wear
Valves become sticky
Filters clog more frequently
Cylinder rod seals fail faster
Most hydraulic failures do not happen overnight. They build slowly. A desert-proof plan catches early signs before replacement becomes necessary.
4) Hoses, seals, and rubber cracking
Rubber components suffer silently in the desert. Sunlight and heat harden hoses and seals. You’ll often see:
microcracks in hoses
Brittle rubber near clamps
Seals are leaking during peak temperatures
A cracked hose will not always leak immediately. It can hold until pressure rises or vibration increases, then burst suddenly during drilling.
5) Electrical sensors and connector issues
Dust does not only harm mechanical parts. It also disrupts electronics:
dust coats sensors and blocks accurate reading
connector seals weaken and allow intrusion
heat stresses circuits and wiring insulation
Corrosion appears in humid zones
That’s why rigs sometimes show confusing alarms, even when the mechanical system seems okay.
Daily Desert Maintenance Routine (Pre-Start + Post-Shift Checklist)
Daily maintenance in the UAE is not “extra work.” It is the only way to stop desert damage before it becomes expensive. Dust and heat do not wait for your weekly inspection. They attack the rig every day, which is why your daily routine must be short, strict, and consistent.
Think of it like this: if you complete the right daily checks, you stop 70% of unexpected breakdowns. You also reduce overheating issues, hydraulic failures, and filter problems, which are common in geotechnical rigs working in desert conditions.
A. Pre-start checks (10–15 minutes that save hours later)
Before the rig starts, your goal is to catch small signs early. Many major failures leave small clues one day before they become big downtime.
1) Walk-around inspection (start with the ground)
Begin by looking under the rig and around the work area.
check for fresh oil drops or wet patches
check for coolant stains (coolant often leaves a dry mark)
check for fuel smell or damp soil near tank area
look for loose bolts, missing clips, or broken guards
This quick walk tells you whether the rig has leaks or weaknesses before pressure builds up.
2) Visual inspection of hoses and lines
In the UAE, hoses age fast. Heat hardens rubber, and dust sticks to weak points.
Look for:
cracks near fittings
bulging hose sections
rubbing marks (shiny areas show friction)
loose clamps or oil “mist” around joints
A hose that looks slightly damaged today often becomes a burst hose during drilling.
3) Engine oil level and oil condition
Check engine oil level first thing. But don’t only check level. Also observe oil quality:
if oil looks too thin, heat might be breaking it down
if oil looks overly dark too quickly, dust ingestion may be happening
if oil level rises unexpectedly, fuel dilution could be possible
Your oil condition tells you a lot about your engine health.
4) Coolant level and radiator surface
Cooling is a survival system in the UAE. If coolant is low or radiator is blocked, overheating becomes likely.
confirm coolant is at safe level
check radiator cap area for leaks
inspect radiator fins for heavy dust build-up
Even a thin dust layer reduces airflow, so this is not a small check.
5) Hydraulic oil level and hydraulic warning signs
Hydraulic systems suffer heavily in desert heat. Check:
hydraulic oil level
tank breather area (it should not be packed with dust)
any new hydraulic leak points
If your rig has a display system, also notice hydraulic temperature trends. High temperature early in the day is a warning sign.
6) Air filter restriction indicator
Air filtration is one of the fastest desert failure points. If your rig has an indicator, use it.
if restriction level is rising, the filter is choking
if dust enters engine, the damage becomes internal and expensive
If no indicator exists, create a habit: open and inspect filter housing daily during peak dust periods.
7) Fan belt and cooling fan check
Check:
belt tension (not too loose)
cracks and glazing on belt surface
any unusual belt smell or powder near pulleys
Belts in heat fail earlier, and one broken belt can stop the rig instantly.
B. Post-shift cleaning and shutdown routine (non-negotiable)
Many teams focus on morning checks only, but desert maintenance depends more on how you treat the rig after work. Dust settles into cooling fins and compartments all day, so if you clean properly at end of shift, you start the next day stronger.
1) Clean radiators, coolers, and grills (daily)
Radiator clogging is one of the biggest causes of overheating.
use compressed air
blow from the correct direction (inside-out where possible)
remove dust trapped in corners and side gaps
avoid bending fins by keeping distance
If dust stays inside the cooler fins, tomorrow your rig will run hotter even with the same workload.
2) Remove dust from engine bay and hydraulic compartment
Focus on dust collection zones:
engine bay corners
near hydraulic tank
under the covers and behind guards
battery area
Dust builds up around heat zones. When it mixes with oil vapor, it forms thick deposits.
3) Clean exposed cylinder rods and moving parts
Hydraulic cylinder rods collect dust. When dust stays, it scratches seals during movement.
wipe cylinder rods gently
remove stuck grit near seals
inspect seals for early leaks
This single habit prevents seal failure and leakage.
4) Basic end-of-day leak check
After shutdown, check again for leaks:
hydraulic oil drip points
fuel tank seepage
coolant seepage
Sometimes leaks appear after pressure reduces, so post-shift inspection is the best moment to spot them.
5) Park smart (wind direction matters)
When parking for the night:
avoid parking facing direct wind
close and secure panels
keep intake points protected
avoid leaving service doors open
In desert sites, overnight wind pushes dust into open spaces, and your rig starts next morning already contaminated.
You can also check: Coring QA and QC: Sampling, Handoffs, and Data You Trust
Section 4: Weekly + Monthly Preventive Maintenance Plan (Desert-Specific)
Daily checks keep your rig stable. Weekly and monthly maintenance keeps your rig healthy long-term. In the UAE, preventive maintenance must be more frequent than normal schedules because desert work speeds up wear.
Strong desert plan reduces:
sudden pump failures
repeated overheating
fast filter consumption
sensor errors
unexpected hose bursts
This section gives you a practical desert schedule without making it complicated.
A. Weekly preventive maintenance plan (for UAE conditions)
Weekly checks focus on the systems most affected by dust and heat.
1) Deep filter inspection and replacement planning
Filters protect expensive systems, so check these weekly:
engine air filter condition
pre-filter (if rig has it)
cabin air filter (if cabin exists)
fuel filter bowl and water separator
If you wait for failure, dust might already enter the engine.
Desert habit that works: keep spare filters on site. Many breakdowns happen because parts are not available quickly.
2) Cooling system inspection beyond surface cleaning
Daily cleaning removes surface dust, but weekly checks must go deeper.
inspect radiator fins closely
check oil coolers and hydraulic coolers
check fan blade condition and mounting
inspect belt tension properly
inspect hoses near clamps for early cracking
If airflow is reduced even slightly, UAE heat will amplify the issue.
3) Hydraulic system leak and hose inspection
Heat increases hydraulic pressure stress and weakens seals.
Weekly inspection must include:
hose rubbing points
loose fittings
dusty oil paste build-up (a sign of leak + dust mixing)
hydraulic tank breather condition
Also check hydraulic hose routing. Sometimes a hose becomes loose and starts rubbing slowly until it fails.
4) Greasing routine with desert focus
In heat and dust, grease does not behave like normal climates. Grease points must be clean before applying grease.
Weekly greasing routine:
wipe grease nipples first
grease using correct quantity
remove excess grease (excess collects dust)
check pins and joints for play
Greasing incorrectly in desert conditions creates dust traps.
5) Electrical and battery zone cleaning
Dust affects wiring and terminal connection quality.
Weekly:
clean battery terminals area
check tightness
inspect wiring insulation near engine heat
ensure connector covers are intact
This reduces false warnings and starting issues.
B. Monthly preventive maintenance plan (to prevent major failures)
Monthly inspections are where you catch long-term damage early. This also helps extend your rig life significantly.
1) Oil condition checks (engine + hydraulics)
Heat breaks oil down faster in the UAE. So monthly checks matter.
Best approach:
perform oil sampling if possible
check for metal particles, contamination, dust intrusion signs
inspect oil color and thickness trend
Oil sampling is one of the most cost-effective ways to prevent pump and engine damage.
2) Full hydraulic system health check
Monthly inspection should include:
hydraulic return filter inspection
suction strainer check (as per OEM schedule)
breather replacement if dust loaded
pump noise monitoring (unusual sounds often mean internal wear)
Hydraulic damage usually becomes expensive when it reaches pump stage, so early checking matters.
3) Cooling system full inspection
Monthly tasks:
flush radiator if needed (carefully)
check coolant concentration and quality
inspect radiator cap condition
check thermostat functioning (if accessible)
inspect for coolant hose softness or cracking
Small coolant hose weakness becomes overheating quickly in UAE heat.
4) Wear parts inspection (rig-specific)
Geotechnical rigs have heavy wear zones. Monthly inspection should cover:
drill head wear areas
clamps and carriage movement components
winch cables for fraying
pulleys and sheaves condition
mast bolts and structural areas for cracks
Dust and vibration loosen fasteners. Monthly tightening prevents structural issues.
5) Electrical sensor maintenance (only safe cleaning)
This step reduces false alarms and downtime.
Monthly:
clean sensor surfaces safely
inspect dust layers on sensor housings
check connector seals
use correct contact cleaner only when needed
Avoid water exposure here. Dry cleaning works better for desert electronics.
Desert maintenance rule that makes everything easier
If you follow a desert schedule, you prevent the usual UAE cycle:
Dust → clogging → overheating → oil breakdown → leaks → contamination → breakdown
So the purpose of daily/weekly/monthly maintenance is simple:
stop dust early
keep cooling efficient
keep oil clean
protect seals and hoses
avoid contamination in hydraulics
Wrap Up / Final Takeaway
Geotechnical rigs in the UAE don’t fail because they are weak. They fail because the desert is unforgiving. Heat, fine dust, strong winds, and constant sand exposure create damage every day, even when your rig seems to be running fine.
That’s why “normal maintenance” is not enough here. You need a desert-proof maintenance system built around prevention, not repair.
What Sections 3 and 4 clearly show is this:
Daily checks help you catch small problems before they become shutdowns.
Post-shift cleaning stops dust buildup that causes overheating and contamination.
Weekly inspections protect filters, hoses, cooling parts, and electrical zones.
Monthly preventive maintenance prevents expensive failures like hydraulic pump damage, seal breakdown, and repeated overheating.
When you follow this routine consistently, your rig stays:
cooler under heavy load
safer from dust contamination
stronger in hydraulic performance
more stable in electronics and sensors
less likely to face sudden breakdowns
Final point: In UAE desert work, maintenance is not a task you do when something breaks. It’s a discipline you follow daily. Teams that stay strict with these routines reduce downtime, avoid major repairs, and keep projects moving without delays.

When it comes to drilling rigs, safety and efficiency play an important role. Our drilling machines are specifically designed for the most demanding environments in the UAE. Whether you're working on construction sites, oil exploration, or foundation projects, our rigs are built to deliver top performance while keeping operators safe.
Built for Tough Job Sites
Our drilling rigs are made to withstand extreme heat, dust, and challenging terrains. They offer the reliability required for projects where other equipment might fail. Whether drilling for foundations or operating in oil fields, our rigs help you stay on schedule and within budget, ensuring smooth and safe operations every time.
Strong and Durable Machines
Each rig is made with durable materials that withstand harsh conditions, ensuring it lasts longer. With operator safety in mind, we incorporate features that protect the person in charge:
Guardrails and Covers: Critical moving parts like the winch, hoist, and mast are fully enclosed, protecting operators from possible injuries.
Non-slip Surfaces: Walkways and platforms feature non-slip surfaces, preventing falls on unstable ground.
Operator Shields: Our rigs come with shields that prevent exposure to moving parts or hazardous areas.
Easy to Operate
As you know, simplicity drives performance, so our rigs are user-friendly, with controls placed for quick access. We guarantee that the operator can keep the machine running smoothly without unnecessary complications. Other than this, visibility from the cabin is clear, making it easier to monitor the operation at all times.
Stability That You Can Trust
Stability is essential, especially when working on uneven surfaces. Our rigs feature:
Outriggers and Stabilizers: These features provide stability even on uneven surfaces. The rig remains steady, reducing the risk of tipping or failure.
Balanced Load Distribution: Proper weight distribution keeps the rig steady, ensuring optimal performance and safety.
How EN 16228 Helps Keep Drilling Machines Safe
At Meta Drill, safety is built into every step of our drilling machine design. The UAE’s tough working conditions require equipment that is not only powerful but also safe to operate. Here’s how we make sure our drilling machines meet the EN 16228 safety measures.
1. Protective Features for Operator Safety
One of the key parts of EN 16228 is making sure that the machine protects the operator so our rigs include:
Protective Guards: We cover moving parts like the winch and hoists to keep operators safe from any accidental contact.
Non-slip Surfaces: Walkways and ladders on our rigs have non-slip surfaces to prevent slips, even in tough conditions.
Operator Shields: Our rigs have clear barriers around the operator’s area to keep them away from moving parts that could be dangerous.
These features are designed to reduce the chances of accidents and make the workplace safer.
2. Better Visibility for the Operator
Clear visibility is crucial for safety. Our rigs are designed to give operators a full view of their surroundings:
360-Degree Visibility: The operator’s cabin is placed for the best sightlines of the worksite, making sure there are no blind spots.
Easy-to-Use Controls: All the controls are within easy reach, making the rig simple to operate and reducing the chance of human error.
These design choices help operators stay aware of the situation, improving their safety.
3. Hydraulic and Mechanical Safety
Our drilling machines use hydraulic systems that are critical for smooth operation. To ensure safety, we’ve included:
Hydraulic Pressure Control: We add overload protection to prevent excessive pressure, which could cause hydraulic failure.
Leak Detection: Our rigs have sensors to detect any hydraulic leaks, reducing the risk of fluid spills that could be dangerous.
These features make sure that the rig operates safely and efficiently at all times.
4. Emergency Features and Monitoring
Our drilling rigs are equipped with advanced monitoring systems to keep track of performance and handle emergencies:
Emergency Shutdown: In case something goes wrong, our rigs have a quick shutdown system that stops all operations immediately, keeping everyone safe.
Alarms: If something abnormal happens, like temperature or pressure changes, alarms will sound to warn the operator and prevent accidents.
These systems are there to act fast and reduce the chances of any serious issues.
5. Stability for Safe Operation
When working on uneven or soft ground, stability is key. Our rigs come with:
Outriggers and Stabilizers: These extend to make the rig more stable, even on challenging surfaces.
Load Distribution Systems: We make sure the rig’s weight is evenly spread, preventing stress on any one part of the machine.
These stability features help keep the rig balanced, preventing accidents and improving performance.
Why EN 16228 Matters for Drilling Machines in the UAE
The UAE presents unique challenges like high temperatures and rough terrains. By following EN 16228, we ensure that our rigs are built to handle these conditions. Here's why this standard matters:
Key Benefit | Description |
Compliance with Regulations | The UAE has strict safety laws for drilling equipment. Following EN 16228 ensures our rigs meet both international and local safety requirements. |
More Efficient Projects | Safety features reduce the chances of equipment failure and delays, making your project run more smoothly and on time. |
Confidence for Operators | Operators can work with peace of mind, knowing their rig is designed with safety in mind. This boosts their confidence and helps them work more efficiently. |
Conclusion: Your Reliable Partner for Safe Drilling Operations
At Meta Drill, we are dedicated to providing high-quality drilling rigs that fully adhere to EN 16228 standards. With a strong focus on safety by design, our rigs are built to ensure operator protection, reduce downtime, and enhance the efficiency of drilling operations in the UAE.
When you choose our rigs, you're choosing safety, reliability, and performance. Whether you're working on construction, oil exploration, or foundation projects, our machines are designed to meet your specific needs. Make the safe, smart choice and rely on Meta Drill for your next drilling project and experience the difference our rigs can make in achieving your goals.
You can also check: Soil Investigation UAE: Methods, Gear, Timelines That Work!
FAQs
1. What is EN 16228, and why is it important for drilling rigs in the UAE?
EN 16228 is a safety standard for drilling and foundation equipment. It ensures that rigs are built with safety features, protecting operators and reducing the risk of accidents. For drilling operations in the UAE, this standard ensures compliance with strict local and international safety regulations, making it essential for safe, efficient operations.
2. How does Meta Drill ensure EN 16228 compliance in its rigs?
Meta Drill follows EN 16228 by integrating key safety features into its rigs, such as protective guards around moving parts, ergonomic controls, hydraulic safety systems, emergency shutoffs, and enhanced stability measures. These elements work together to ensure operator safety and smooth operation.
3. Why should I choose Meta Drill rigs for my UAE drilling projects?
Choosing Meta Drill rigs guarantees that your project meets both international safety standards and local UAE regulations. Our rigs are designed for reliability, reducing downtime and ensuring efficient operations, even in challenging environments.
4. How does Meta Drill prioritize operator safety during drilling operations?
We design each rig to provide clear visibility, protective barriers, and ergonomic controls. Advanced hydraulic systems are also incorporated to reduce risks and enhance operator safety, ensuring smooth and secure operations.
5. Are Meta Drill rigs suitable for tough job sites in the UAE?
Yes, Meta Drill rigs are specifically built to handle the tough conditions of the UAE, such as uneven terrain and extreme weather. With features like load distribution systems and enhanced stability, our rigs perform reliably on any job site.
6. What are the main safety features of Meta Drill rigs?
Our rigs are equipped with several safety features, including overload protection, hydraulic leak detection, emergency shut-off mechanisms, alarms, and non-slip surfaces. These features ensure maximum safety and reduce the risk of operational issues.
7. How does Meta Drill’s focus on safety improve project efficiency?
By minimizing equipment malfunctions, reducing downtime, and preventing accidents, Meta Drill rigs ensure smoother operations, faster project completion, and increased productivity.

At Meta Drill, we know that a drilling rig must perform efficiently in harsh conditions. Be it extreme heat, challenging terrain, or long working hours, our rigs are built to handle it all. This commitment to reliable performance starts from the very beginning and continues all the way through deployment, ensuring each rig is fully prepared for the job.
1. The Design Process: Starting with CAD
The process begins with CAD (Computer-Aided Design), a tool that allows our engineers to plan every detail of the rig before anything is physically built. With CAD, we create accurate digital models that show exactly how every part of the rig will function together. This digital approach not only saves time but also ensures that the rig’s design meets all operational needs from the start.
Through CAD simulations, we test how the rig will behave in real-world conditions such as high temperatures, heavy loads, and uneven terrain. These tests help us identify potential issues and make necessary adjustments before any physical work begins. By spotting weaknesses early, we set up the rig to perform well in the most demanding environments.
2. Prototyping and Testing: Bringing the Design to Life
Once the design is finalized, we move on to creating the prototype, the first physical version of the rig. This prototype is built using the CAD model, ensuring that every component is made to exact specifications. After the prototype is constructed, we test it thoroughly in real-world conditions to see how it holds up.
We choose materials for the prototype that can withstand the heat, dust, and stress of environments like the UAE. For example, the materials must be durable enough to resist wear and tear, ensuring that the rig lasts over time. After we build the prototype, we test it for stability and evaluate the performance of the hydraulic systems. If any issues are found, we make the necessary adjustments, refining the rig before it moves to the next phase.
3. Assembly and Quality Control: Precision at Every Step
After the prototype passes testing, we move into full-scale production. At this stage, our skilled technicians carefully assemble the rig, ensuring every part fits together correctly and functions as expected. This process is critical because precision is key to making sure the rig operates smoothly when it reaches the job site.
Our quality control team conducts thorough inspections at every step of the assembly process. We check the structural integrity, hydraulic systems, and safety features to make sure everything meets our high standards. Each rig undergoes multiple checks to ensure it’s built to last and ready for any job.
4. On-Site Deployment: Getting the Rig Ready for Work
Once the rig is assembled and quality-checked, it’s transported to the job site for final setup. This step is essential because each job site has unique requirements, and the rig must be configured accordingly. We work closely with our clients during this phase to ensure everything is set up correctly.
Before the rig starts working, we run final on-site tests. This ensures that all systems, including hydraulic components and safety features, are functioning properly. If we encounter any issues, we resolve them immediately, making sure the rig is ready for full operation. By doing this, we ensure that the rig operates efficiently from day one.
5. Ongoing Support and Maintenance: Keeping Operations Smooth
Even after the rig is deployed, we provide ongoing support. Regular maintenance plays a crucial role in keeping the rig running smoothly over time. We recommend scheduled checkups to make sure everything is functioning well and to catch minor issues before they become major problems.
If any unexpected issues arise during operation, our team is ready to provide immediate support. We’re available to troubleshoot and make repairs, guaranteeing that the rig stays operational with minimal downtime. This proactive approach keeps your rig performing reliably throughout its life.
6. Learning from Feedback: Continuous Improvement
Once the rig is in use, we actively collect feedback from operators. This feedback is invaluable because it allows us to understand how the rig performs in real-world conditions. We use this input to identify any areas for improvement and refine future rig designs accordingly.
The feedback loop helps us make adjustments, ensuring that every new rig model is more efficient and reliable than the previous one. By listening to operators and learning from their experiences, we continuously improve the performance and functionality of our rigs to meet the evolving needs of our clients.
Summary Table: How Meta Drill Ensures Rig Performance
Stage | Key Focus | Action Taken |
CAD Design | Precision in planning | Simulate real-world conditions to identify potential issues early. |
Prototyping and Testing | Material durability and testing | Build prototype, test it under real-world conditions, and refine design. |
Assembly and Quality Control | Precision and quality checks | Ensure every part is fitted correctly and functions smoothly. |
On-Site Deployment | Site setup and final testing | Adjust rig for site-specific needs and ensure optimal performance. |
Ongoing Maintenance | Rig upkeep and performance | Routine checkups, troubleshooting, and repairs to keep the rig performing well. |
Feedback Loop | Continuous improvement | Gather operator feedback and refine rig design based on real-world usage. |
You can also check: Geotechnical Tooling Checklist: Bits, Rods, Fluids, Safety!
Conclusion: Building Rigs You Can Count On
From CAD design to on-site deployment, Meta Drill takes every step necessary to ensure the rigs are built for performance. We design our rigs to tackle the toughest job sites, offering machines that deliver efficiency and durability.
By carefully planning, testing, and providing ongoing support, we ensure that each rig we deliver is ready for the job. Whether you’re working on construction, oil exploration, or foundation projects, you can trust our rigs to meet your needs and deliver excellent performance every time.

When selecting the right drilling rig, you’re faced with multiple factors to consider. The MD600N and MD600X are both exceptional models, but the decision between the two depends on your specific needs. Are you after more torque, greater depth, or higher uptime? Let's break down these key features and help you choose the rig that aligns with your requirements.
Torque: Power to Drive Through Tough Materials
Drilling through tough materials requires a high level of torque. Torque determines how much force a rig can generate, making it crucial for penetrating hard surfaces. But not all drilling projects need the same amount of torque. Understanding the torque, you need is the first step in choosing the right rig.
MD600N Torque Capabilities
The MD600N is built to handle a wide range of drilling jobs with ease. Its torque is ideal for most medium-duty drilling tasks. From construction to standard oil drilling, this rig’s power is more than enough to get the job done without causing unnecessary strain. If you’re focused on jobs that involve typical soil conditions or soft rock, the MD600N provide sufficient torque to meet your needs.
MD600X Torque Capabilities
If your projects demand higher torque, the MD600X is the clear winner. This model is designed for tough conditions and deep drilling. The increased torque of the MD600X makes it suitable for high-demand drilling projects, such as deep-hole drilling or working with hard rock. For industries like geothermal drilling or deepwater drilling, the MD600X will consistently outperform the MD600N in terms of raw power.
Torque Comparison
In comparing the two, the MD600X’s enhanced torque capacity stands out. Whether you’re dealing with tougher materials or requiring high-torque performance on a regular basis, the MD600X will give you that extra push. If you're drilling into deep rock or need to push through difficult formations, the MD600X won’t let you down. But if your projects are lighter, the MD600N is a more cost-effective option without sacrificing power.
Depth: Digging Deeper with the Right Rig
Depth is a critical factor in many drilling operations, especially when you need to reach the deep reservoirs of resources. A deeper drill can mean accessing untapped potential, but the right equipment is essential to ensure success.
MD600N Depth Capabilities
The MD600N is well-suited for standard drilling depths. For typical oil drilling or construction projects, the MD600N can easily handle depths of up to 600 meters. This makes it perfect for projects that don’t require extreme penetration. Whether you’re working with shallow water wells or smaller-scale projects, the MD600N provides the ideal depth range without overwhelming your budget.
MD600X Depth Capabilities
If you’re aiming for deeper penetration, the MD600X excels. This model can easily handle depths far beyond what the MD600N can manage, making it the rig of choice for heavy-duty projects. Deep-sea drilling, deep oil exploration, and other high-depth projects will benefit from the MD600X’s extended reach. With its advanced design, the MD600X ensures stability and precision even at greater depths, helping you stay efficient and effective as you go deeper into the earth.
Depth Comparison
When it comes to depth, there’s a noticeable difference. The offers a significant advantage for projects that require deeper penetration. If depth is a top priority for your drilling needs, choosing the MD600X is a no-brainer. For typical depths, however, the MD600N is more than adequate and will be a more budget-friendly option.
Uptime: Maximizing Productivity with Minimal Downtime
Uptime is the heart of any drilling operation. More uptime means more productivity, and minimizing downtime helps reduce operational costs. No one wants their rig stuck in the shop for repairs when there’s work to be done.
MD600N Uptime and Maintenance
One of the standout features of the MD600N is its reliability. Designed for low-maintenance needs, this rig is built to keep running smoothly for longer. With simpler components and a focus on durability, the MD600N minimizes downtime between jobs. Whether you're working on short projects or need a rig that stays operational for days on end, the MD600N ensures that maintenance is infrequent and easy.
MD600X Uptime and Maintenance
The MD600X, while offering enhanced features, may require a bit more maintenance due to its advanced components. Its higher torque and deeper drilling capacity mean that it’s built to handle tougher tasks, but that extra power sometimes translates to a slightly higher need for upkeep. If your projects involve intense drilling conditions, be prepared for more frequent maintenance checks to ensure peak performance.
Uptime Comparison
Both rigs offer solid uptime, but the MD600N has the edge for those prioritizing low-maintenance and continuous productivity. The best MD600X, while more powerful, might require slightly more attention but delivers results in tougher conditions. Choosing between the two depends on your balance between uptime and the intensity of your drilling tasks.
Cost and ROI: Getting the Most for Your Investment
Cost always plays a significant role in the decision-making process. But it’s not just about the upfront cost; you need to consider the long-term return on investment (ROI). Choosing the right rig for the job will not only affect your current budget but also your future earnings.
Cost of the MD600N
The MD600N offers a cost-effective solution for most standard drilling tasks. It’s a more affordable option compared to the MD600X, making it ideal for businesses that need reliable performance without the added cost of advanced features. If your drilling operations are regular and don’t require extreme torque or depth, the MD600N will offer excellent value for money.
Cost of the MD600X
On the other hand, the MD600X comes at a higher price point. With its increased torque and depth capabilities, you’re paying for more power and versatility. While it’s a bigger investment upfront, the MD600X is a cost-effective choice for heavy-duty projects that require deep drilling or high-torque performance on a regular basis.
ROI Considerations
Consider your business's long-term needs. If your projects frequently demand high torque and depth, the MD600X offers a great ROI despite its higher initial cost. However, for more routine drilling jobs, the MD600N delivers exceptional value without requiring the additional investment. Evaluate your workload to decide which model maximizes ROI for your business.
You can also check: MD600N Comparison: Specs to Evaluate Before You Buy Today
Choosing Between MD600N and MD600X – Your Decision Guide
Choosing between the MD600N and MD600X doesn’t have to be difficult if you focus on your project’s specific needs. Here’s a quick guide:
Choose MD600N if your projects don’t require extreme torque or depth. It’s perfect for regular drilling jobs, offering great uptime, low maintenance, and cost-effectiveness.
Choose MD600X if your tasks demand extra power and depth. If your drilling operations are high-demand and require deep penetration or high torque, the MD600X ensures efficiency and performance.
Conclusion
The MD600N and MD600X both have their strengths, but the right choice depends on the nature of your drilling operations. For most businesses, the MD600N will offer everything you need without breaking the bank. However, if you regularly work on high-demand projects, the MD600X will provide the power and depth you need to stay ahead of the competition. Make sure to assess your project requirements before making a decision to ensure maximum productivity and return on investment.

Choosing the right powerhead settings matters because drilling conditions are never the same on every site. Soil, clay, gravel, and rock behave differently, and the powerhead needs to work with those conditions, not against them.
When RPM, torque, and feed are not matched to the ground, problems start quickly. Bits wear out faster, rods struggle to rotate, drilling slows down, and breakdowns become more likely. Costs increase, time is wasted, and the job becomes harder than it should be.
Correct matching does the opposite. Drilling becomes smoother, penetration improves, tools last longer, and the rig works efficiently. Performance comes from understanding the ground first, then setting the powerhead to suit that ground.
Powerhead matching is not about guesswork. It is simply about using the right speed, the right strength, and the right push for the material in front of the bit.
What the powerhead actually controls
The powerhead is the main driving unit of the drilling rig. Its job is to rotate the drill string and control how the bit engages with the ground. Three core functions decide how well drilling will perform: RPM, torque, and feed.
RPM (revolutions per minute) controls how fast the drill string spins. Higher RPM means faster rotation, while lower RPM means slower, steadier cutting. Different grounds need different rotation speeds to avoid overheating or slipping.
Torque is the twisting force that keeps the drill string turning when the ground pushes back. Higher torque is needed when formations are dense, sticky, or hard. Without enough torque, the drill may stall or rods may twist.
Feed refers to the downward pressure applied on the drill bit. Good feed keeps the bit cutting effectively. Too much feed can damage tools, while too little feed reduces penetration and wastes time.
These three powerhead controls must work together. Speed alone cannot solve tough ground. Torque alone cannot cut without movement. Feed alone cannot push through layers without proper support. Balanced control is what creates stable, efficient drilling.
Why ground conditions change everything
Ground conditions decide how the powerhead should perform. No two drilling locations behave exactly the same, even when they look similar on the surface. Layers change, moisture changes, and density shifts with depth, which means the same settings cannot work everywhere.
Soft soils behave differently from dense clay. Loose sand collapses if pushed too fast. Gravel grips the bit and creates vibration. Soft rock cuts more easily but still needs control. Hard rock demands strength and patience. Fractured rock cracks tools if pressure is applied the wrong way.
Ignoring these differences leads to overheating, tool wear, poor penetration, and unnecessary stress on the rig. Understanding the ground before setting RPM, torque, and feed gives the operator a clearer idea of how the bit should move.
Good drilling begins with soil awareness. Once the ground type is identified, powerhead adjustments become easier, safer, and more accurate.
Understanding RPM
RPM means revolutions per minute, or how fast the drill string spins. Speed helps the bit cut material, clear cuttings, and keep the hole moving forward. The right RPM depends on the ground, bit type, and hole size.
Higher RPM works better when the formation is softer and easier to cut. Faster rotation removes material smoothly and keeps cuttings moving out of the hole. Too much speed, though, can create friction, heat, and glazing on the bit.
Lower RPM becomes important when the ground turns harder or more compact. Slow rotation allows the bit to bite into the formation instead of sliding across it. Hard layers respond better when the bit rotates slower but maintains steady contact.
Wrong RPM creates problems such as:
overheating and burning the bit
polishing instead of cutting
vibration and chatter
unnecessary wear on tools
Correct RPM supports steady cutting rather than forcing progress. The goal is not to spin as fast as possible. The goal is to spin at a speed that matches resistance in the ground while keeping the bit stable and cool.
Understanding torque
Torque is the twisting force that keeps the drill string turning when the ground pushes back. Think of it as the “strength” behind rotation. When resistance increases, torque is what prevents the drill from stalling.
Higher torque becomes important in tougher formations. Dense clay, compact soil, gravel layers, and rock all need stronger twisting power so the bit can keep cutting without stopping. With enough torque, the bit stays engaged and progress remains steady.
Low torque creates risk on site. The drill may begin to slow, rods can twist, and rotation may stall completely. Stalling increases stress on the powerhead, damages threads, and raises the chance of tool failure.
Too much torque without control creates problems as well. Excessive force can snap components, damage bits, and place unnecessary load on the rig. Controlled torque works best when paired with the right RPM and feed.
Key signs torque is not set correctly include:
Rotation slows or stops under load
rods twist or feel strained
Vibration increases when pressure rises
Penetration drops even though the feed increases
Correct torque allows the bit to stay firm in the formation while cutting cleanly. The goal is steady, confident rotation, not brute force.
Understanding feed force
Feed force is the downward pressure applied to the drill bit. It controls how firmly the bit contacts the ground and how fast it moves into the formation. Good feed keeps the bit working, not slipping and not crushing material.
Too much feed creates problems quickly. Excess pressure forces the bit into the ground faster than it can cut. Heat builds up, cutters chip, and the drill may jam. Heavy feed also overloads the powerhead and shortens tool life.
Too little feed causes the opposite issue. The bit touches the ground but does not cut properly. Rotation becomes slippery, penetration slows, and vibration increases. Time, fuel, and effort are wasted because the bit is spinning without doing full work.
Balanced feed force means the bit is always cutting, not scraping. The sound of the rig, the feel of the rods, and the rate of penetration help the operator judge whether feed is correct.
Typical signs feed settings are wrong include:
bit smoking or overheating
sudden stalling when pressure increases
slow penetration even with high RPM
bouncing or vibration at the drill head
Correct feed force works together with RPM and torque. When these three settings stay balanced, drilling becomes smoother, safer, and more controlled.
How to match specs to real ground
Matching RPM, torque, and feed to real ground conditions becomes easier when it follows a simple process. This step by step guide helps operators set the powerhead with more confidence.
Step 1: Check ground conditions first
Start by gathering basic information about the site. Look at reports, previous jobs nearby, and any known layers such as sand, clay, gravel, or rock. Note if the ground is loose, sticky, compact, or fractured.
Step 2: Confirm tool type and hole size
Select the bit and drill string that will be used most on the project. Tool design, diameter, and cutting structure all influence the best RPM and torque range. Larger diameters and heavier tools usually need lower RPM and higher torque.
Step 3: Choose a starting RPM range
Set a safe starting RPM based on ground type:
Softer soils: higher RPM within the recommended range
Harder formations: lower RPM with more controlled rotation
Begin in the middle of the suggested range instead of at the extreme high end.
Step 4: Set torque for expected resistance
Increase torque to a level that can handle the hardest expected layer without constant stalling. Tough clay, gravel lenses, and rock sections need more torque support. Keep some margin so the powerhead does not work at its limit all the time.
Step 5: Apply moderate feed at the start
Begin drilling with moderate feed force rather than maximum pressure. Watch how the bit enters the ground. Penetration should be steady, not forced. Too fast movement at the start hides real ground behavior and creates early damage.
Step 6: Observe penetration and rig response
Monitor three things closely: rate of penetration, sound of the powerhead, and vibration in the rods. Smooth sound, stable rotation, and consistent progress indicate settings are close to correct. Sudden noise changes, heavy vibration, or sharp drops in speed signal that RPM, torque, or feed need adjustment.
Step 7: Fine-tune one setting at a time
Change only one control at a time so the result stays clear. For example:
If penetration is slow but the bit feels cool, increase feed slightly.
If heat rises quickly, reduce RPM or feed.
If rotation stalls, raise the torque or reduce feed a little.
Small changes reduce risk and help find the right combination.
Step 8: Record settings for each ground type
Keep a simple log of RPM, torque, and feed that worked well in different formations on that site. Notes from early holes help set up later holes faster and more safely. Future projects in similar ground also benefit from these records.
Checklist before choosing a powerhead
Choosing a powerhead becomes easier when the main decision points stay visible. This checklist helps confirm whether the rig, tooling, and ground conditions match correctly before work begins.
Here is a quick reference table you can review before every project:
Item to Check | What to Confirm | Why it Matters |
Ground type | Soil, clay, gravel, soft rock, hard rock | Different formations need different RPM and torque |
Moisture level | Dry, damp, or saturated | Moisture changes friction, cleaning, and drilling stability |
Hole size | Diameter and depth range | Bigger holes usually need more torque and lower RPM |
Tooling type | Bit style, cutting structure, wear condition | Wrong bit creates heat, vibration, and poor cutting |
Powerhead RPM range | Minimum and maximum available | Ensures rotation can slow down or speed up safely |
Available torque | Continuous and peak torque rating | Prevents stalling in tougher layers |
Feed control | Smooth, adjustable, not jerky | Keeps the bit cutting instead of crushing |
Rig capacity | Weight, mast, hydraulics, stability | Protects the machine and prevents overload |
Cooling and cleaning | Fluid or air systems working properly | Keeps the bit cool and clears cuttings |
Operator reference notes | Past jobs, settings, lessons learned | Reduces guesswork and improves consistency |
Use this checklist before committing to settings. Small confirmations here prevent bigger problems in the field.
Key questions to ask the team before starting:
Does the powerhead match the hardest expected ground?
Can RPM slow down enough for rock if needed?
Is torque strong enough to keep the rotation steady?
Does feed control allow smooth pressure, not sudden jumps?
Do tools have enough life left for the project?
Clear answers build confidence and help avoid surprises once drilling begins.
Common mistakes people make
Many drilling problems come from setup choices, not the ground itself. Understanding these mistakes helps prevent damage, downtime, and unnecessary costs.
Mistake 1: Using high RPM in tough ground
High speed looks productive, but hard or compact ground needs slower, controlled rotation. Fast spinning creates heat, glazing, and premature wear instead of real cutting.
Mistake 2: Relying on speed instead of torque
Some operators increase RPM when rotation slows, hoping to move faster. The real solution often requires more torque or reduced feed. Speed without strength causes slipping and vibration.
Mistake 3: Forcing heavy feed to “push through”
Extra downward pressure can feel like progress, but it often crushes cutters, jams the bit, and overloads the rig. Balanced feed always performs better than raw force.
Mistake 4: Ignoring changes in soil layers
Ground rarely stays consistent along the entire hole. Settings should change when sand turns to clay, or when clay turns to rock. Fixed settings lead to overheating, stalling, and tool failure.
Mistake 5: Running worn or wrong tooling
Using bits that are dull, cracked, or not suited for the formation slows drilling immediately. Wrong tooling forces operators to compensate with RPM and feed, which increases risk.
Mistake 6: Skipping inspection and monitoring
Good drilling requires constant observation. Heat, noise changes, vibration, and penetration rate all show whether the setup is correct. Ignoring these signs turns small issues into major breakdowns.
Mistake 7: No record of what worked
Jobs run smoother when settings are documented. Without notes, every new site starts from guesswork again, even when conditions are similar.
Reducing these mistakes improves productivity, protects equipment, and builds consistency across projects.
You can also check: How to Set Up a Geotechnical Drill Rig Correctly: MetaDrill’s Step-by-Step Guide for Reliable Operations
Conclusion: Why correct powerhead matching matters
The powerhead setup decides how well drilling will perform. When RPM, torque, and feed match the ground, the bit cuts cleaner, the rig works within limits, and tool life improves. When settings are chosen without considering conditions, problems show up fast through heat, vibration, slow penetration, and mechanical stress.
Correct RPM controls cutting speed without burning the bit.
Correct torque keeps the rotation steady when the resistance increases.
Correct feed maintains pressure that supports cutting instead of crushing.
Ground conditions will continue to change from loose soils to compact layers and into rock. Successful drilling depends on reading those changes and adjusting settings as work progresses. Guesswork creates downtime. Informed adjustments create stable results.

In GCC cities, the hardest part of geotechnical drilling is often not the ground. It is the site. Tight access, live traffic, nearby utilities, and noise rules can turn a simple borehole into a slow, risky job if you arrive without a clear plan. These case notes focus on what actually helps on urban sites, so your next mobilization runs smoother and your data stays consistent.
What makes urban drilling in the GCC different
Urban work has constraints that do not show up on open sites. Small gaps between buildings, restricted working hours, and high public visibility mean you have less room for error. Many geotechnical drilling companies underestimate how quickly “minor” delays stack up in cities.
Common urban constraints you should plan for
Narrow gate widths and limited turning space
Low overhead clearance from canopies, cables, and signage
Heavy pedestrian movement and delivery traffic
Strict limits on noise, vibration, and dust
Utility corridors with limited as built records
Access and setup: plan for the last 10 meters
Most delays happen right before the drilling point. The rig reaches the site, then you discover the final approach is blocked by kerbs, ramps, bollards, or soft pavers. In many city projects, a compact drill rig is not a nice to have. It is the difference between setting up on time and wasting half a shift.
Practical access checks to do before dispatch
Measure the narrowest entry point, not just the main gate
Confirm turning radius for the rig and support vehicle
Check overhead clearance along the full route to the point
Identify soft ground, ramps, and paver sections that need protection
Plan where spoil, water, and core boxes will be staged
Utilities and safety: treat unknowns as real risks
In dense areas, utility risk is never theoretical. Even when drawings exist, the field reality can differ. A clean workflow protects people and avoids shutdowns.
A simple utility safe start approach
Mark and fence the working area early
Use approved detection and confirm alignments before drilling
Keep a clear stop rule if unexpected material or voids appear
Maintain a visible hand signal system around the rig
Record any utility related observations in the daily log
This level of control is also what keeps your project team confident in the work.
Data quality in city conditions: protect the sample chain
Urban drilling has more interruptions, more handoffs, and more pressure to move fast. That is exactly when core and sample control can slip. Your best geotechnical drilling equipment can perform perfectly, but your results can still be questioned if labels, depths, and handoffs are inconsistent.
Field controls that keep data dependable
Label sample containers and core boxes immediately, not later
Take photos with depth markers visible before transport
Keep a basic chain of custody form for every handoff
Separate runs clearly and avoid mixing intervals
Store samples away from direct sun and heat where possible
Noise, dust, and public perception: manage it like a deliverable
In GCC cities, the public sees everything. If dust spreads or noise spikes, complaints can stop your operation even if the drilling is technically correct.
Controls that reduce complaints and interruptions
Use dust suppression based on site rules and wind direction
Keep hoses and drainage controlled so water does not spread
Schedule high noise activities inside allowed time windows
Maintain clean walkways and clear signage for safety
Assign one person to manage the perimeter and communication
The workflow that keeps urban drilling on schedule
A smooth urban operation is usually the result of structure, not speed. Good geotechnical drilling companies run the same steps every time so the team does not rely on memory under pressure.
A repeatable city drilling workflow
Pre check access, utilities, and staging plan
Confirm rig selection and support equipment before mobilization
Establish barriers, signage, and safe routes for people and vehicles
Drill with consistent logging and immediate labeling
Close out each hole with photos, notes, and clean demobilization
You can also check: Rig Mobility Math: Access, Footprint, and Faster UAE Setup with a Compact Drill Rig
Conclusion
Urban sites in the GCC reward teams that plan the details before the rig arrives. When geotechnical drilling is supported by disciplined access checks, tight safety control, and consistent sample handling, schedules stay stable and results remain defensible. Choosing the right compact drill rig can also remove the most common city bottleneck: slow, risky setup in tight spaces.

If your site loses a day, it rarely happens because the crew forgot how to drill. It happens because drilling rig equipment starts with bleeding pressure, running hot, or choking on dust. These three issues look small at first. Then they snowball into slow penetration, unsafe operation, and a shutdown that eats your schedule.
The smartest approach is simple. Catch the early signs, fix the root cause, and keep your rig running smoothly.
Why hydraulics cause the fastest downtime
Hydraulics are the muscles of the rig. When the system is not healthy, everything feels weaker and slower.
Early warning signs to watch
Oil weeping around hoses, fittings, or cylinders
Jerky movement on feed or rotation
Slow response when you load the system
Pressure that fluctuates under steady demand
Oil that smells burnt or looks dark
Practical early fixes
Tighten and replace worn fittings before a leak becomes a burst
Inspect hoses at bend points and clamp areas
Check filters and change them on time, not when the rig complains
Confirm correct oil grade for site temperature
Keep a simple log of pressure readings to spot drift early
When you treat hydraulics like a daily checklist, you avoid the kind of surprise failure that stops production.
Cooling problems that silently damage the rig
Heat is not just discomfort. Heat breaks oil down, weakens seals, and turns small issues into expensive repairs. Cooling failures often build slowly, so crews get used to the rig running warmer than normal.
Common heat causes on site
Radiator fins blocked by dust and debris
Low coolant or small leaks that get ignored
Fan belts loose or worn
Hydraulic oil cooler clogged
Working the rig hard without enough airflow
Simple cooling habits that work
Clean radiator and cooler surfaces at the start of every shift
Check coolant levels daily and look for signs of seepage
Watch temperature trends instead of only reacting to alarms
Keep vents clear and avoid parking where airflow is blocked
If cooling is maintained early, the rig stays consistent and your components last longer.
You can also check: Coring QA and QC: Sampling, Handoffs, and Data You Trust
Dust is a slow killer for performance and safety
Dust does not just make the rig dirty. It gets into filters, radiators, electrical connections, and moving parts. Over time, dust raises temperatures, increases wear, and creates nuisance faults that waste hours.
Where dust hits hardest
Air intake and engine filters
Cooling system fins and oil coolers
Electrical boxes, sensors, and connectors
Grease points and sliding surfaces
Cab controls and safety switches
Dust control steps you can apply now
Change and clean filters based on site conditions, not fixed dates
Blow out coolers gently and regularly
Seal and protect connectors and electrical panels
Store spare filters in clean sealed packaging
Use a quick end of shift wipe down on control areas
Good dust management also protects your crew because visibility and safe access improve.
A simple early maintenance routine that reduces downtime
A short routine is easier to follow than a complicated plan. The goal is consistency.
Daily checks
Walk around the rig and look for fresh leaks
Inspect hose condition and clamp security
Check coolant and oil levels
Clean visible dust builds up on coolers and intakes
Confirm basic temperatures and pressure readings
Weekly checks
Inspect drilling rig tools and equipment for abnormal wear
Test fan operation and inspect belt tension
Review filter condition and replace if needed
Check electrical connections for dust and looseness
When this routine becomes normal, you spend less time fixing emergencies and more time drilling.
Conclusion
Downtime is not bad luck. It is usually a predictable result of small warnings being ignored. When you maintain drilling rig equipment early and keep drill rig tools in healthy working conditions, you protect production, reduce repair costs, and keep the crew focused on safe progress.
You can drill the “perfect” hole and still end up with unusable results. Not because the ground changed, but because a sample got mixed, mislabeled, dried out, or handed over without the right notes. That is why coring QA and QC matters. In geotechnical drilling, the quality of your data starts long before the lab and ends only when everyone agrees that the sample history is clean, consistent, and traceable.
Why QA and QC in Coring Is Non-Negotiable
In geotechnical drilling, you are not just pulling rock or soil. You are collecting evidence. If that evidence is damaged, rushed, or poorly documented, your design team is forced to guess. Good QA (quality assurance) is the plan you follow. Good quality control) is the proof you did it correctly.
A practical coring QA/QC system should protect three things:
Sample integrity (no extra breakage, loss, contamination, or moisture change)
Traceability (every piece has a clear chain of custody)
Repeatability (the process works the same on every shift)
Sampling That Protects the Core and the Story
Your core is only valuable if it represents the ground exactly as it was. This is where the right geotechnical drilling equipment and habits make a visible difference.
Here’s a field sampling routine that reduces avoidable errors:
Core recovery check: Record recovery and RQD immediately while the run is fresh.
Correct core orientation: Keep top and bottom consistent; don’t “flip” pieces to make the box look neat.
Minimize handling: Excess handling increases fractures and changes the sample narrative.
Moisture discipline: Certain soils and weak rock change fast when exposed cover and protect them early.
Photo proof: Take photos per box and per run before transport, with labels visible.
This is the kind of discipline that separates “we drilled” from “we can defend the results.”
Labeling and Documentation: The Quiet Work That Saves Projects
Most coring mistakes are not drilling mistakes. They are admin mistakes. If you want data you trust, your labeling has to be boringly consistent—every time.
Minimum labeling set for each core box:
Project name + borehole ID
Run depth “from–to”
Date + shift/crew
Any losses, voids, or drilling issues
Sample condition notes (wet, friable, fractured, weathered zones)
Even if your crew uses the best geotechnical drill, the job fails if the box is missing one depth range, or the borehole ID is wrong.
Handoffs and Chain of Custody: Where Data Usually Breaks
The sample handoff is the most common failure point. A simple chain-of-custody process keeps everyone aligned—from driller to logger to courier to lab.
Use a handoff checklist that includes:
Box count confirmed (and numbered)
Depth intervals verified against the driller’s log
Photos captured and stored (date-stamped)
Seal/tape used for transport when needed
Sign-off recorded (who handed over, who received, time/date)
When this process is followed, the lab can trust what it receives, and engineers can trust what they interpret.
Field QC Checks You Can Run Every Day
You do not need complicated systems to run good QC. You need repeatable checks tied to your drilling rig tools and equipment and daily workflow.
Daily QC checks that catch problems early:
Verify the barrel, bit condition, and core lifters before first run
Confirm correct run length and consistent drilling parameters
Track core recovery trends (sudden drops usually mean a tooling or technique issue)
Cross-check depths (driller’s log vs. box labels vs. field logging sheet)
Reconfirm borehole ID on every box before it leaves the rig
These steps protect both productivity and credibility.
Common Mistakes That Ruin Good Coring Data
Even strong rigs and crews can lose data quality through avoidable habits:
“Fixing” core to look continuous instead of keeping it true
Skipping photos because the site is busy
Writing labels at the end of the shift from memory
Mixing runs in one box to save space
No handoff sign-off, so errors can’t be traced
All of these issues become expensive when design decisions rely on the wrong ground story.
You can also check: How to Deploy the MD150N Drill for Geotech Coring Ops Safely
Conclusion: Data You Trust Comes from Process, Not Luck
At the end of the day, reliable coring results are built in the field—not “fixed” later. In geotechnical drilling, QA and QC are what protect the core from avoidable damage, prevent mix-ups during handoffs, and make every depth interval traceable from rig to lab. When your crew follows a repeatable sampling routine, labels everything clearly, and uses geotechnical drilling equipment correctly, your geotechnical drill becomes a tool for trustworthy decision-making, not just progress on a daily log. Add simple daily checks using drilling rig tools and equipment, and you get the real outcome that matters: clean, defensible data that engineers can design on with confidence.
You can have the best crew in the UAE and still lose half a day before the first meter is drilled. Not because anyone is slow, but because the rig cannot get in cleanly, cannot sit safely, or needs too many “small” adjustments once it arrives. That is where rig mobility math matters, and it is exactly why choosing a compact drill rig is often the difference between a smooth setup and a messy one.
Start With Access Math Before You Mobilize a Compact Drill Rig
In the UAE, access is not just “Can the truck reach the site?” It is can the rig reach the exact drilling point without hitting a gate, clipping a kerb, or stopping under low overhead lines.
Here is the practical access checklist you should confirm before dispatch:
Gate width and turning space: Measure the narrowest pinch point, then confirm the turning radius for the carrier and trailer (if any).
Overhead clearance: Look for shade structures, signage, temporary lighting, and building canopies.
Ground conditions on the route: Loose sand, pavers, ramps, and soft shoulders change how safely you can move.
Traffic windows and delivery timing: Some sites restrict heavy movement during peak hours, especially in active commercial areas.
When access is tight, a drill rig for small spaces is not a “nice to have.” It is risk control. Fewer reversals, fewer spotters, fewer surprises.
Footprint Math: What “Fits” Is Not the Same as What “Works”
A rig can “fit” through an opening but still fails at the drilling point because it cannot operate properly once positioned. Footprint math is about the working envelope, not just the base size.
Confirm these on the drilling location:
Working footprint: Space for the rig, rod handling, tooling, spoil bins, and safe crew movement.
Mast raises and service clearance: Enough room to raise the mast and access service points without pushing the rig into unsafe angles.
Ground bearing and stability: uneven slabs, compacted fill, or soft sand can create tilt issues that slow alignment and increase wear.
This is where geotechnical drilling equipment planning matters. If your support gear is scattered, oversized, or arriving late, your “small” setup becomes a multi-step staging exercise.
Subheading: Drill Rig for Small Spaces Means Smarter Layout, Not Smaller Ambition
A tight site does not reduce your technical requirements. You still need clean alignment, stable rotation, safe rod handling, and consistent sampling. A true drill rig for small spaces helps you protect quality while reducing the site space you consume.
Faster UAE Setup with Modern Efficient Geotechnical Rigs
Speed is rarely about rushing. It is about removing friction points that repeat every job. Modern efficient geotechnical rigs typically help by simplifying transport, reducing manual handling, and standardizing routines.
To make setup faster on UAE sites, prep these in advance:
Pre-mobilization pack list: rods, bits, sampling tools, consumables, and safety gear checked as one kit
Tooling compatibility: confirm thread types, rod lengths, and chuck compatibility before arrival
Site readiness: confirm access approval, laydown area, and power/water needs if required
One-page setup sequence: a simple step orders the whole crew follows, every time
When your compact drill rig arrives with the right kit and a repeatable setup routine, you reduce “search time,” avoid rework, and start drilling sooner without compromising safety.
Quick Field Rule: Mobility Math in One Sentence
If the rig can enter with margin, operate with clearance, and stage geotechnical drilling equipment without congestion, setup becomes predictable.
You can also check: MD1000N Deep Coring: Plan Runs Protect Recovery, Hit Targets
Conclusion:
Rig mobility is not a theory. It is measurable: access width, overhead clearance, turning space, and operational footprint. Get those numbers right, and your compact drill rig becomes a real advantage for faster UAE setup, especially when you are working on tight plots and active developments.
If you want, share your typical site type (villa plot, roadside, industrial yard), and we will map a simple access-and-footprint checklist you can reuse on every job.
A clean setup is the fastest way to safer shifts, better samples, and fewer surprises. This guide shows your crew how to stage a geotechnical drill rig, verify controls, arrange tooling, and run checks so geotechnical drilling rigs hit target depth with defensible data, on urban pads or desert sites.
Why it matters in the UAE: Dubai Municipality recorded a 20% rise in building permit activity in H1 2025, a workload that rewards disciplined setups and documented field practice.
Step 1 — Start with Decisions, Then Write the Method Statement
List the design decisions the investigation must enable (foundation type/depth, dewatering, improvement). Tie each decision to a test. This keeps the geotechnical drill rig setup focused: holes, depths, and drilling rig tools are sized to purpose, not habit. Share the one-page intent with the designer and HSE before mobilization.
Step 2 — Survey, Services, and Pad Planning
Utilities & permits: Confirm buried-services clearances, traffic plans, and work permits.
Pad layout: Paint the rotation envelope and cone the rod-handling corridor.
Sightlines: Position mirrors or cameras on the geotechnical drilling rig to watch returns and the handler.
Housekeeping: Route hoses/cables, stage spill kits, and keep bins within reach—small frictions become safety risks.
Step 3 — Instrument and Prove the Machine
Before the first spin, make the drill rig prove it’s safe:
Guards & interlocks: Closed and functional; E-stops tested at panel and offsider stations.
Sensors & alarms: Verify RPM, torque, pressure, temperature—trendable and time-synced.
Cooling & cabinets: Back-flush the cooling stack; gaskets seated; dust caps on open ports.
These checks keep drilling rig equipment within spec when heat and dust climb.
Step 4 — Stage Tooling to the Ground Model
Build a shelf that fits the geology, not a brochure:
Bits/crowns matched to formations (clay, sand, cemented bands, soft/hard rock).
Barrels, liners, shoes test-fitted; spares at arm’s reach.
Rods/subs inspected for straightness and threads; apply compound correctly.
Fluids & LCM measured and labelled; mix out of wind to avoid contamination.
When drilling rig tools and equipment are ready where operators stand, crews avoid unsafe “lean-ins” and rushed choices.
Step 5 — Post Guardrails At the Panel
Agree the parameter window before running:
Rotation (RPM) within the crown’s band; don’t chase stalls with speed.
Torque / weight-on-bit sufficient to cut without overloading.
Feed & extraction steady to protect liners and preserve sample integrity.
Print the window and tape it to the geotechnical drilling rig panel; visible rules make geotechnical drilling rigs predictable.
Step 6 — Run Discipline: Rotation, Feed, Returns
Rotation: Start in-band; escalate slowly; never “free-spin” near hands.
Feed: Maintain contact, avoid chatter; adjust when returns change.
Returns: Watch density/color; adapt flushing before recovery dips.
This is where a well-set geotechnical drill rig earns clean boxes and fewer rod binds.
Step 7 — Sampling That Stands Up in Review
Label core boxes before the run; record recovery, RQD, refusals, and groundwater at the rig.
Photograph boxes with IDs visible; keep the chain-of-custody intact to the lab.
Retire damaged drilling rig tools immediately; polished jaws slip and overheat rods.
Do this every shift, and your geotechnical drilling rig delivers defensible data the first time.
Step 8 — Troubleshoot Quickly, Safely, and in Sequence
If penetration stalls: step down RPM, add weight carefully, or change crown; check fluid density/viscosity.
If vibration spikes: reduce RPM, refine feed, inspect crown wear, and confirm rod straightness.
If recovery drops: shorten runs; verify shoe/liner pairing; clean the barrel; recut the face before resuming.
These fixes protect drilling rig equipment and keep the drill rig inside its parameter window.
Step 9 — Close Out That Sets Tomorrow Up to Win
Wash and inspect drilling rig tools and equipment; retire rounded crowns early.
Spin a dummy joint to feel for thread damage; re-dope and cap rods.
Back up logs/photos; list issues and planned fixes in the morning brief.
A tidy close-out turns a good day into a reliable week.
UAE Field Context You Can’t Ignore
The National Centre of Meteorology confirmed the country’s heaviest 24-hour rainfall on record on 16 April 2024—254 mm at Khatm Al Shakla—events that change groundwater behavior and access conditions. Build weather contingencies into the plan and watch levels closely during and after storms.
Quick Pocket Checklist
Method statement aligned to decisions; permits and utilities clear ✔
Geotechnical drill rig guards/interlocks/E-stops tested ✔
Parameter guardrails posted; sensors trend clean ✔
Drilling rig tools staged; spare crowns/liners within reach ✔
Exclusion zones painted; single radio channel with repeat-back ✔
Sample labels ready; photo device charged; chain-of-custody forms ✔
You can also check: Geotechnical Tooling Checklist for Foundation Projects Guide
Concluding Remarks
Setups win shifts. When crews treat a geotechnical drill rig as a system—clear decisions, safe pad layout, proven controls, staged drilling rig tools, and posted guardrails, geotechnical drilling rigs stay inside spec and programs finish on time. Keep drilling rig equipment inspection-friendly, train crisp handovers, and document what happens downhole. Do that, and your geotechnical drilling rig becomes the most reliable drill rig on site, exactly what clients expect from MetaDrill drilling rigs across the region, and exactly why teams trust MetaDrill drilling rigs for repeatable, audit-ready results.
Great field results start with the right drilling rig tools and equipment and a disciplined checklist. For UAE sites, that means planning for tight pads, heat, and dust – then staging drilling rig equipment so sampling stays clean and shifts stay predictable. Use this practical list to prep, run, and close out confidently.
Why be strict? Dubai Municipality reported a 20% rise in building permit activity in H1 2025, signaling sustained site demand that rewards disciplined tooling and maintenance.
What This Checklist Covers
A focused bill of drilling rig tools and equipment for investigation and coring.
On-pad routines that protect samples and people around a geotechnical drilling rig.
Fast fixes that save a shift when conditions change.
Pre-Mobilization: Build The Tooling Set for Your Ground Model
Program & methods fit
Map expected strata/refusal; choose methods (SPT, Shelby, split spoon, wireline coring).
Match crowns/bit types to formation so your drilling rig tools protect core quality.
Inventory & spares
Bits/crowns for clays, sands, gravels, cemented bands, soft/hard rock.
Barrels, liners, shoe sets, subs; at least one spare string.
Rods and couplings: inspect threads, straightness, and protect with caps.
Critical drilling rig equipment: tongs, slips, rod spinner, elevators, breakout aids, wireline winch gear, calibrated gauges.
Fluids & consumables
Base fluid, polymers, viscosifiers, pH control, LCM; screens for mixing.
Label containers; plan shaded mixing to avoid wind-borne contamination.
Measurement & logging kit
Torque, pressure, flow, density, viscosity; water-level meter; calibrated tape/laser.
Sample labels and chain-of-custody forms are ready before the first spin.
On-Site Setup: Make Quality and Safety Visible
Pad layout and housekeeping
Cone and paint exclusion zones around rotation and rod handling.
Route hoses/cables; drip trays and spill kits staged.
Camera angles or mirrors focused on the rod handler and returns.
Tooling readiness
Inspect drilling rig tools: jaws, dies, tong pins; replace polished/slipping jaws.
Verify rod IDs/ODs and correct thread compound.
Stage alternative crowns and spare shoe sets within arm’s reach.
Rig controls & protections
Test E-stops and interlocks; verify guard switches on the geotechnical drilling rig.
Confirm parameter dashboard (RPM/torque/feed/pressure) is logging cleanly.
Run Discipline: Rotation, Feed, Returns
Hold the parameter window
Rotation: stay in the crown’s RPM band; don’t chase stalls with speed.
Feed: keep steady contact – no chatter; manage pullback to protect liners.
Returns: watch density/color; adjust flushing before recovery dips.
Sampling that stands up in review
Label core boxes before the run; record recovery, RQD, refusals, and groundwater.
Photograph boxes with IDs visible; maintain chain-of-custody.
Keep a small “anomalies” log; debrief after each hole.
Rod handling – hands out of the line of fire
Use mechanical aids; never freehand near rotation on any drill rig.
Torque connections to spec; check for galling and heat discoloration.
Troubleshooting: Fast Fixes That Save a Shift
If penetration stalls
Step down RPM; add weight carefully; change crown if needed.
Boost fluid viscosity or add LCM if loss is suspected.
If vibration spikes
Reduce RPM, tune feed, inspect crown wear, and confirm rod straightness.
Replace worn dies; slipping jaws, overheated rods, and shortened tool life.
If recovery drops
Shorten runs; verify shoe/liner pairing; clean the barrel.
Recut the face, reset parameters, then resume.
Heat and Dust: The Quiet Tooling Killers
Backflush the cooling stack daily; keep electrical cabinets closed and filtered.
Dust caps on every open port; wipe couplings before connecting.
Record ISO cleanliness codes when possible – clean oil keeps a geotechnical drilling rig within spec on long, hot days.
Regional reality: UAE stations regularly log dust-storm days in official climate statistics, underscoring the need for filtration, sealing, and clean handling on every pad. See NCM climate indicators (dust-storm days).
Shift-End Routine: Lock in Tomorrow’s Performance
Wash and inspect drilling rig tools and equipment; retire rounded crowns early.
Spin a dummy joint to feel for thread damage; re-dope and cap rods.
Reconcile consumables; restage drilling rig equipment for the next hole.
Back up logs/photos; note issues and fixes for the morning brief.
Pin-Worthy Master List
Bits/crowns by formation; spare sets staged
Barrels/liners/shoes – fit verified; labeled and clean
Rods/subs – straight, thread-protected; torque chart at panel
Handling aids – tongs, slips, spinner, elevators, slings, tag lines
Fluids/LCM – base, additives, pH control; mixing screens/buckets
Meters & gauges – torque, pressure, flow, density, viscosity; water-level meter
Safety & housekeeping – guards, interlocks, spill kits, eyewash, lighting
You can also check: Soil Investigation Planning: Methods, Gear and Timelines UAE
Conclusion
When drilling rig tools and equipment are matched to the ground model, staged within reach, and checked every shift, sample quality rises, and downtime falls. Keep drilling rig equipment inspection-friendly, enforce parameter discipline on the geotechnical drilling rig, and document what happens downhole. Do that, and your drilling rig tools will deliver clean, defensible results – hole after hole on any UAE pad.
Effective soil investigation UAE projects follow a simple chain: define decisions, choose methods that answer them, match gear to access and geology, then protect sample quality with tight timelines. Below is a practical, field-ready plan your team can adopt today, including methods, equipment, QA, and realistic scheduling.
Context for planners: Dubai Municipality reported a 20% rise in building permit activity in H1 2025, signaling sustained construction demand that relies on robust SI scopes.
Start With Decisions, Not Holes
What the report must enable
List the decisions first (foundation type/depth, dewatering, improvement). Tie each to a method. This keeps soil investigation services focused and prevents “extra tests” that don’t change design.
Team alignment
Share the one-page intent with your soil testing consultancy UAE partner and designer so drilling, logging, lab, and HSE pull in the same direction. That alignment is how a geotechnical investigation stays on time.
Methods That Answer Specific Questions
The core toolkit (when to use what)
Boreholes + sampling & monitoring
Use for: stratigraphy, groundwater levels, and lab specimens.
Pair with: standpipes/piezometers for trends.
Standard Penetration Test (SPT)
Use for: density/consistency correlations, bearing checks.
Cone Penetration Test (CPT/CPTu)
Use for: continuous profiling; fast trends in soft to medium soils.
Geophysics (MASW, refraction, GPR)
Use for: layer continuity, rippability, and pre-drill targeting.
Trial pits & plate load
Use for: near-surface conditions, utility conflicts, shallow bearing.
Combine geophysics to “see” the site, then ground-truth with boreholes. That mix makes a geotechnical investigation efficient and defensible.
Gear Matters: Match Rig and Tools to The Plan
Choosing the right geotechnical drilling rig
Tight urban pads: compact drill rig with quick rig-up and clean handling sightlines.
Mixed layers/cemented bands: torque-forward heads and steady feed prevent stalls.
Deeper cores: wireline-ready geotechnical drilling rig setups give continuous core and faster recovery cycles.
Rig-side essentials
Interlocked guards, tested E-stops, clean looms, and sealed cabinets.
Camera angles on rod handling and returns; parameter dashboard (RPM/torque/feed/pressure).
Staged drilling rig equipment (tongs, slips, rod spinner) and spare strings are ready.
Drilling tools that protect data
Crowns matched to formation; avoid over-aggressive bits that bruise the core.
Barrels, shoes, and liners checked for fit; label kits prepped before first spin.
Timelines That Survive Reality
Desk to report: a workable sequence
Desk study & recon (3–7 working days)
Collect prior SI, utilities, hydrology, and historical use; walk the site. This sets locations, depths, and H&S planning for site soil testing UAE.
Fieldwork (5–15 working days, site-dependent)
Mobilize geotechnical drilling rig crew and drill rig; execute boreholes, SPT/CPT; install monitoring wells. Keep daily logs for strata, N-values, and groundwater.
Lab testing (5–15 working days)
Classify and test for strength/compressibility; align test matrix to design decisions.
Monitoring (in parallel as needed)
Weekly groundwater checks for 2–4 weeks if dewatering is likely.
Reporting (5–10 working days)
Logs, lab tables, cross-sections, geotechnical model, and design parameters with limits. Keep the executive summary decision-oriented so non-specialists can act.
Quality Controls the Team Can Own
Field QC
Correct hole IDs/coordinates; RLs recorded.
Sample intervals and recovery captured; photo core boxes.
SPT energy corrections noted.
Chain-of-custody intact, non-negotiable for soil investigation services and soil testing consultancy UAE deliverables.
Lab & data QC
Equipment calibration current; reconcile logs with lab classifications.
Flag inconsistencies early; update the risk register after each hole.
Planning for Extremes
The National Centre of Meteorology confirmed the heaviest UAE rainfall on record on 16 April 2024, with 254 mm in <24 hours at Khatm Al Shakla, events that change groundwater and near-surface assumptions. Plan SI with those swings in mind.
Field Playbook
Before drilling
Permit/utility clearances in hand; exclusion zones painted.
Tooling staged; alternative crowns within reach.
Comms checked; one channel, repeat-back protocol.
During drilling
Hold RPM within crown spec; tune feed to avoid chatter.
Watch returns (density/color); adjust flushing before recovery drops.
Log groundwater observations in real time, vital for site soil testing UAE.
After drilling
Photograph core boxes with IDs; reconcile samples; hand off to lab.
Close permits; restore housekeeping; prep next day’s kit.
When to Call Specialists
Bring in a soil testing consultancy UAE when:
Geophysics suggests anomalies you can’t explain,
Groundwater behavior conflicts with expectations, or
Environmental indicators (odors/sheens) appear.
A seasoned partner ensures your soil investigation UAE scope stays aligned with design and schedule.
You can also check: MD1000N Deep Core Drilling: Capabilities and Use Cases Guide
Conclusion: A Plan Your Team Can Use Tomorrow
Treat soil investigation UAE as a decision engine, not a checkbox. Choose methods that answer design questions, size the geotechnical drilling rig to access and geology, stage reliable drilling rig equipment, and run disciplined QA from pad to lab. With tight timelines, clean documentation, and trusted soil investigation services, your geotechnical investigation will give designers what they need, data you can build on, delivered by a professional soil testing consultancy UAE that understands the region’s realities after recent extreme weather.
Remote operation lets experts supervise and guide a geotechnical drilling rig without crowding the pad. The result: fewer people in harm’s way, quicker troubleshooting, and better sample quality. Below is a practical blueprint, methods, and tools, along with timelines, to make remote workflows routine on any modern geotech drill rig.
What “Remote Ops” Really Means
A control room (on-site or off-site) monitors live parameters and video, coaches the crew, and, within guardrails, adjusts selected functions on the geotechnical drilling rig. For a drill rig running coring or SPT support, this typically spans visibility, advisory guidance, and limited supervised control on the rotation/feed envelope.
Why Do It in 2025?
Safety: fewer hands near rotating steel and pressurized lines.
Uptime: experts “drop in” across multiple pads to solve issues fast.
Quality: tighter control of RPM, torque, feed, and returns yields cleaner boxes, proof the geotechnical drill rig is delivering defendable data.
Consistency: parameter playbooks turn tribal knowledge into repeatable practice across your drilling rig equipment fleet.
Cross-industry evidence: a well-cited survey reported remote asset operations as the highest-ROI digital use case in oil & gas, an indicator that remote models compound value quickly.
The Three Tiers of Remote Operation
Tier 1: Remote visibility
Multi-angle CCTV on rig floor, rod handler, pumps, and returns
Live dashboards (RPM, torque, WOB, pullback, pump pressure/flow)
Data historian for trend review and post-run analysis on any drill rig
Tier 2: Remote advisory
Real-time coaching on bit selection, feed/flush adjustments, and mitigation of stick-slip or pack-off
Alarm rationalization so operators of a geotech drill rig see the few alerts that matter
Tier 3: Supervised control
Pre-set envelopes for rotation/feed
Automated tripping sequences and interlocks for safer rod handling
On-site lead retains the stop button; all changes are logged
The Tooling & Tech Stack That Makes It Work
Rig-side: instrument the machine
Sensors for torque/RPM/pressure/temp/vibration, time-synced
Clean wiring looms; sealed cabinets; dust caps on all ports
Interlocked guards and tested E-stops for the geotechnical drilling rig
Camera mounts aimed at the rod handler, returns, and drilling rig equipment
Edge & network
Hardened LTE/5G or fiber with QoS for control traffic
Edge buffer to keep data and rules alive if the link drops
Secure access (VPN, MFA, role-based rights) so your drilling tools data stays private
Control room HMI
Trends, alarms, and “last five minutes” replay
Event tags to mark stalls, vibration spikes, or recovery dips on any geotechnical drill rig
A 30-60-90 Day Rollout You Can Actually Run
Days 0–30: Visibility first
Fit CCTV and live dashboards; standardize tags across each geotech drill rig
Pilot on one shift; record baselines for RPM/torque/feed/returns
Dry-run handover: who speaks, who acts, who logs
Days 31–60: Advisory at scale
Expand to multiple rigs; tune alarms; add daily remote stand-ups (10 minutes)
Train crews on call-down etiquette and fail-safe states for the drill rig
Start a “good run vs bad run” library (video + parameters)
Days 61–90: Supervised control
Introduce guarded setpoints on one operation (e.g., feed ramp during coring)
Rehearse comms loss: prove the rig reverts to safe local control
Audit data quality; lock change management for drilling rig equipment
Field Habits That Protect People and Samples
Five non-negotiables on site
One radio channel for commands; repeat-back at critical steps
Exclusion zones painted and coned around the rotation and rod corridors
Camera hygiene, wipe lenses; eliminate blind spots on every geotechnical drilling rig
Parameter guardrails posted at the panel; log deviations with reason
Post-run review, clip video, export trends, refresh the playbook
Quality signals for the remote coach
Returns lose density or change color → adjust flushing before recovery falls
Vibration spikes → check crown wear and rod straightness; retune feed/RPM
Slipping jaws or hot rods → service drilling tools immediately
Safety Context You Can’t Ignore
Keeping people out of the line of fire is the point. In construction, there is a large number of struck-by fatalities involve heavy equipment, a reminder that de-manning the danger zone is meaningful risk reduction on any pad running a geotechnical drilling rig.
Common Pitfalls
Pitfall 1: Fancy data, fuzzy roles
Write a RACI: who watches, who advises, who commands the geotech drill rig.
Pitfall 2: Proprietary dead-ends
Pick systems that export open data; your drilling rig equipment should not trap operational history.
Pitfall 3: “We’ll automate everything”
Start small. Automate only where risk falls and core quality rises; keep the local authority clear on each geotechnical drill rig.
You can also check: Desert Maintenance Plans That Keep Rigs Working, UAE Guides
Conclusion: Make Remote Ops Your Everyday Edge
Remote workflows aren’t hype; they’re a practical way to reduce exposure, smooth performance, and defend results. Start with visibility, layer advisory coaching, and add supervised control where it’s justified. Instrument the geotechnical drilling rig, protect data paths, and train crisp handovers. Do that, and your geotech drill rig runs safer, fixes come faster, and your drilling tools produce cleaner, defendable boxes, shift after shift with modern drilling rig equipment.
Compact sites shouldn’t force compromises. The MD150N drill rig brings serious control and clean sampling to tight urban pads and remote approaches. This deep dive shows how the MD150N geotechnical drilling rig turns careful setup, smart parameters, and disciplined handling into reliable core recovery, run after run.
Why rigor matters: studies find large construction projects typically run 20% longer than planned and up to 80% over budget. Predictable fieldwork helps break that pattern.
What the MD150N Is Built For
Mission profile
The MD150N geotechnical drilling rig is a compact, wireline-ready platform for short to medium core runs where access, speed of rig-up, and sample quality decide success. As a nimble geotechnical drill rig, it balances torque, RPM control, and stable feed so crews can keep rotation alive without bruising the core.
Where it excels
Urban foundation checks and utilities corridors
Limited-access plots and short window night shifts
Mixed near-surface layers that punish sloppy parameter control
Anatomy of Control: How the MD150N Delivers
Head, feed, and returns
Rotation: Hold RPM within the crown’s sweet spot; avoid “chasing” stalls with speed.
Feed & pullback: Keep steady contact to reduce chatter and liner damage.
Returns: Watch fines/color changes and adjust flow before recovery dips.
Chassis & sightlines that help crews
A compact stance and thoughtful sightlines make this drill rig feel bigger than its footprint. Clear views of the rod handler and returns support safer decisions at the panel and faster coaching of new hands on Metadrill drilling rigs.
Tooling & Setup: Small Pad, Big Discipline
Stage the right stack
Bits/crowns matched to the formation to protect drilling tools and bit life.
Barrels, shoes, and liners pre-checked for fit; spare sets within arm’s reach.
Rod string inspected for straightness and threads, grit turns into heat fast.
Fluids & LCM ready and labelled; mix out of the wind to prevent contamination.
Panel-side routines that pay back
Test E-stops and interlocks before the first spin.
Record baseline torque/RPM/pressure; trend changes, don’t guess.
Keep drilling rig equipment (tongs, dies, slips) clean, polished jaws, slips, and scar rods.
Running the Hole: A Practical Playbook
Parameter window
MD150N drill rig runs are easiest to control when the team agrees on:
RPM bands for the chosen crown
Torque / WOB guardrails for hard spots
Feed rate that maintains contact without oscillation
Post those guardrails on the panel. The geotech drill rig stays predictable when rules are visible.
Rod handling without hand risk
Use mechanical aids; never freehand near rotating steel. Apply thread compound sparingly and torque to spec. This protects rods, preserves alignment, and extends the life of your drilling tools.
Sampling discipline that stands up in review
Label core boxes before the run; log recovery, RQD, refusals, and groundwater at the rig. Photograph boxes with IDs visible. Chain-of-custody is where Metadrill geotechnical drilling earns trust on client audits.
Troubleshooting on the Fly
If penetration stalls
Step down RPM; add weight carefully; change crown if needed.
Check fluid density/viscosity; adjust flushing before heat builds in the bit.
If vibration spikes
Reduce RPM, refine feed, inspect crown wear, and confirm rod straightness.
Replace worn dies; slipping jaws overheat and mark rods, then the string suffers.
If recovery drops
Shorten runs; verify shoe/liner pairing; clean the barrel.
Recut the face, reset parameters, and only then resume.
Site Factors: Make the Pad Work for You
Zones, comms, and housekeeping
Paint the rotation envelope; cone off the handling corridor. One radio channel, repeat-back commands. Route hoses and cables; use mats and drip trays. These habits keep drilling rig equipment reliable and the geotechnical drill rig within spec on tight schedules.
Heat and dust
Daily backflush of the cooling stack; sealed cabinets; dust caps on every open port. Clean oil and cool electronics keep a geotech drill rig consistent through hot UAE days, when inland temps can exceed 50°C.
Field-Ready Checklists
Start-of-shift Go/No-Go
Guards/interlocks live; E-stops tested
Sensors (RPM/torque/pressure) verified
Tooling staged (crowns, barrels, rods)
Core labels prepped; photo device ready
Core run discipline
Hands clear; mechanical aids only
Rotation/feed within target window
Returns are monitored and logged
Recovery, RQD, groundwater recorded
Why the MD150N Belongs in Your Fleet
Pair the MD150N geotechnical drilling rig with deeper units to cover both short urban checks and longer holes without overcommitting a single platform. In mixed portfolios of Metadrill drilling rigs, the MD150N is the agile specialist that makes small pads produce like big ones.
You can also check: GCC Safety and Compliance Standards for Geotech Drilling UAE
Conclusion
The MD150N drill rig proves that access limits don’t have to limit core quality. Plan a clear parameter window, stage the right drilling tools, and keep drilling rig equipment inspection-friendly. With disciplined handling and clean documentation, the MD150N geotechnical drilling rig turns short windows and tight pads into clean boxes and dependable schedules, exactly what decision-makers need from a modern geotechnical drill rig and geotech drill rig.
Deep programs succeed when planning meets the machine. The MD1000N drill rig pairs high torque with stable feed to keep core quality high across changing formations. This guide shows how to plan runs, stage tooling, and set parameters, so the MD1000N geotechnical drilling rig delivers predictable meters per shift.
What MD1000N is Built to Do
Mission profile
The MD1000N geotechnical drilling rig is designed for long wireline coring where recovery, not just footage, proves success. As a heavy-duty geotechnical drill rig, it combines torque headroom with smooth feed and reliable extraction, so crews keep rotation alive in hard, interbedded layers instead of stalling or damaging strings.
Where it earns its keep
Urban infrastructure investigations needing deep, defensible core
Exploration holes with cemented bands and abrupt hardness shifts
Programs where stable parameters protect bit life and sample integrity
Plan the Run Before You Spin
Ground model → run plan → parameter window
Start by mapping expected transitions and refusal depths. Convert that into a run plan for the MD1000N drill rig with three dials defined up front:
Rotation (RPM): match to crown spec to avoid glazing or chatter
Torque / Weight-on-bit: enough bite to keep cutting without overloading
Feed & extraction: steady advance that preserves liner and core
Tooling and consumables
Build a shelf for drilling tools that fits your ground model: alternative crowns, shoe sets, spare barrels, and a clean rod string. Keep thread compound, LCM, and fluids ready where crews can reach them without unsafe “lean-ins.” Well-staged drilling rig equipment prevents rushed decisions that ruin recovery.
Execute with Discipline
Rotation, feed, returns: the golden trio
Hold RPM in the crown’s sweet spot; do not chase stalls with speed
Tune feed to maintain contact without oscillation
Watch returns: fines or color shifts signal parameter changes or ground water effects
Rod handling without hand risk
Use mechanical aids on every connection. Clean jaws and slips; gritty contact turns into slippage and heat, risking rod damage. This is universal, whether you call it a geotech drill rig or a heavy drill rig, hands never chase rotating steel.
Sampling that stands up in review
Label core boxes before the run, record recovery and RQD at the rig, and photograph boxes with IDs visible. A compliant chain of custody makes the MD1000N geotechnical drilling rig not just productive, but defensible.
Troubleshooting on the Fly
If penetration stalls
Step down RPM; add weight carefully; change crown if needed
Check fluid density/viscosity; adjust flushing before heat builds in the bit
If vibration spikes
Reduce RPM, refine feed, inspect bit wear, and confirm rod straightness
Replace worn dies; polished jaws can scar rods and shorten the life of critical drilling tools
If recovery drops
Shorten core runs; verify shoe/liner pairing; clean the barrel
Recut the face, then resume inside the planned parameter window
Make The Site Help the Rig
Set the pad for quality and safety
Exclusion zones: paint the rotation envelope; one radio channel for commands
Housekeeping: mats, cable routing, spill control around drilling rig equipment
Sightlines: mirrors or cameras to watch the rod handler and returns
Cooling and contamination
Backflush the cooling stack daily, keep cabinets closed and filtered, and cap every hydraulic port. Clean oil and cool electronics keep a geotechnical drill rig within spec when days run hot.
Field-Proven Checklists
Start-of-shift
Guards/interlocks live; E-stops tested
Sensors (RPM, torque, pressure) verified
Tooling staged (crowns, barrels, rods)
Core labels prepped; camera ready for box photos
Core run discipline
Hands clear; aids only
Rotation/feed inside target window
Returns monitored and logged
Recovery, RQD, refusals recorded in real time
Why Deep-Coring Rigor Matters in the GCC
The GCC construction market reached USD 147.1B in 2024 and is projected to USD 226.2B by 2033 (4.9% CAGR), a pipeline that rewards rigs and teams that turn variable geology into consistent samples and schedules.
Quick Comparison: What MD1000N Brings to Your Program
Capabilities you’ll feel on site
High-torque rotation keeps cutting in tough transitions
Stable feed/extraction reduces stuck-rod events and protects liners
Rig control that scales with skill, new crews learn fast; experts can finesse
Fit with your fleet
Pairing the MD1000N drill rig with smaller site-access units lets you cover shallow checks and long holes without overcommitting a single platform. In mixed portfolios of MetaDrill geotechnical drilling equipment, the MD1000N is the dependable deep specialist.
You can also check: How to Deploy the MD150N Drill for Geotech Coring Ops Safely
Conclusion
Choose the MD1000N geotechnical drilling rig when your program demands long, defensible core runs through changing formations. Plan a parameter window, stage the right drilling tools, and keep drilling rig equipment inspection-friendly so shifts stay predictable. Whether you call it a geotech drill rig or simply the deep specialist of your fleet, the MD1000N drill rig turns run plans into clean boxes and schedules you can trust, shift after shift.
Deploy the MD150N with a safety-first playbook: standards-led setup, clean exclusion zones, disciplined rod handling, and documented sampling. Do that, and the MD150N drilling rig turns small urban pads into predictable core runs. This guide walks your crew through pre-mobilization, site setup, coring execution, and close-out, step by step. EN 16228 rig safety overview.
Early context: Struck-by hazards remain a top killer in construction, and about 75% of struck-by fatalities involve heavy equipment. Strong zones, signals, and controls save lives.
Build the Safety Frame Around the Machine
Anchor to Standards
EN 16228: guards, interlocks, emergency stops, and stability checks for every drill rig deployment.
ISO 22475-1: sampling principles so the core you collect on MetaDrill geotechnical drilling jobs is defensible, liner choice, preservation, and logging.
Why MD150N fits the brief
The MD150N drilling rig is a compact member of MetaDrill drilling rigs built for tight pads and quick rig-up. Its scale favors urban access while still delivering the control you need for clean, short core runs, ideal for foundation checks.
Pre-Mobilization: Make Problems Impossible to Miss
Paperwork and people
Method statement + risk assessment: include standards, utilities clearance, exclusion zones, and stop-work authority.
Crew roles: supervisor (permits), lead driller (panel), offsider (handling drilling tools), HSE (audits). Use repeat-back comms on critical steps.
MD150N pre-checks
Verify guards/interlocks (feed, rotation) and test all E-stops.
Inspect hydraulic lines; fit dust caps; clean breathers.
Calibrate RPM/torque/pressure sensors; record certificates in the rig file.
Confirm core barrels, liners, and shoe sets match the expected formation.
Site Setup: Turn a Small Pad Into a Safe Pad
Stage the work, then the hardware
Exclusion zones: paint the rotation envelope; cone off the rod-handling corridor.
Housekeeping: mats, drip trays, routed hoses; lighting for night work.
Sightlines: mount cameras or mirrors to watch the rod handler and returns.
Signals: one radio channel; hand signals posted at the panel, no mixed commands on MetaDrill geotechnical drilling shifts.
Tooling at arm’s reach
Stage alternative bit crowns, spare shoe sets, and a dummy joint. Keeping drilling tools in sequence reduces idle minutes and avoids unsafe reach-ins.
Execute the Core Run: Smooth, Guarded, Documented
Rotation, feed, and returns
Rotation: start within the bit spec; no “free-spinning” near hands.
Feed: maintain contact, avoid chatter; adjust when returns change.
Returns: watch for fines or color change; adapt flushing before recovery drops.
Rod handling without drama
Use mechanical aids; never free-hand near rotating steel.
Apply thread compound sparingly; torque to spec; check for galling.
Keep tongs, dies, and slips clean, grit turns them into pinch hazards on any drill rig.
Sampling discipline (ISO 22475-1)
Confirm liner ID and fit; label core boxes before the run.
Record recovery, RQD, refusals, and groundwater observations as you go.
Photograph boxes with visible IDs; maintain chain-of-custody, this is where MetaDrill drilling rigs earn trust.
Common Pit Stops: Fix It Fast, Fix It Safely
If penetration stalls
Downshift RPM, add weight carefully, or change crown; don’t “muscle through.”
Check fluid properties; add loss-control materials if seepage appears.
If vibration spikes
Reduce RPM, tune feed, inspect bit wear, and verify rod straightness.
Replace worn dies; polished jaws slip and overheat rods, damaging drilling tools.
If recovery drops
Shorten runs; verify shoe/liner pairing; clean the barrel.
Recut the face and reset parameters before resuming.
Close-Out: Leave the Next Shift Better Than You Found It
End-of-shift routine
Wash and inspect drilling tools; retire worn crowns early.
Reconcile rods/couplings; spin a dummy joint to feel for thread damage.
Update logs; back up photos and data; stage tomorrow’s kit.
Quick panel test: E-stops, alarms, and interlocks, again.
Hand injuries are persistent and costly; many stem from pinch points and poor glove discipline. Reinforce glove policy and tooling condition at every brief.
Micro-Checklist (Post on the Panel)
MD150N Go/No-Go
Guards closed, interlocks live
E-stops tested
Sensor readings verified
Exclusion zones marked, comms checked
Tooling staged, alternatives ready
Core Run Discipline
Hands clear, aids only
Rotation/feed within limits
Returns monitored, adjustments logged
Samples labelled, photos taken
You can also check: Drill Bits 101: PCD, TCI, Drag - When Each Bit Works Best 2025
Conclusion: Safe Deployment Is a System, Not a Speech
Treat the MD150N like a system: standards-led controls, visible zones, disciplined handling, and documented sampling. Do that, and the MD150N drilling rig will deliver clean boxes on small pads with less drama. With MetaDrill drilling rigs configured for access and control, and crews who respect the plan, your drill rig stays productive, your drilling tools stay healthy, and MetaDrill geotechnical drilling keeps site risk low while core quality stays high.
Safety in geotech drilling is not optional, it’s engineered. UAE and GCC projects expect geotechnical drilling rigs to meet machine-safety standards, follow sampling rules, and operate under local HSE controls. This guide maps the core standards, field practices, and documentation your team needs so every drill rig shift is compliant, consistent, and defensible.
BS EN 16228 (drilling & foundation equipment safety). BSI Knowledge
Construction accounts for about 30% of all occupational fatal injuries worldwide, a reminder that controls around people, machines, and methods truly matter.
Build on Standards, Not Assumptions
The big three you should know
BS EN 16228 (Parts 1–7): safety requirements for drilling/foundation machines, guards, interlocks, emergency stops, control systems, and stability. Use Part 1 with the machine-specific parts that apply to your geotechnical drilling rigs.
ISO 22475-1: technical principles for sampling soil/rock and groundwater; defines how you take, preserve, and document samples so data from drilling tools is defensible.
Abu Dhabi/QCC geotechnical guidance & OSH codes: risk-led investigation and drilling controls (e.g., codes for well construction; manuals on managing geotechnical risk) that project teams in the UAE should fold into method statements.
Machine Safety: What “Good” Looks Like on a Rig
Make the rig safe by design
Guarding & interlocks: Rotating parts, feed systems, and rod-handling zones on Metadrill drilling rigs should be guarded with interlocks that stop motion when opened (aligned to EN 16228).
Emergency stops & controls: E-stops reachable from operator and offsider positions; controls labelled and directionally consistent across your fleet of geotechnical drilling equipment.
Stability & setup: Level the drill rig, verify outrigger loads and ground bearing; record pre-shift stability checks in the TBT (toolbox talk) log.
Electrical & hydraulic discipline
Hydraulics: Color-coded Hose Tagging, spill plans, tagging, and pressure tests; secure lines on walkways; lock-out before cutting any circuits in Geotechnical drilling equipment.
Electrical Protection: IP-rated enclosures, dust control, GFCI/RCD security; cabinet doors locked with no wires ad-hoc.
People & Process: Control the Work, Not Just the Machine
Role clarity keeps crews safe
Supervisor (permit holder): owns the method statement and stop-work authority.
Lead driller: runs the panel, enforces exclusion zones on Metadrill geotechnical drilling sets.
Offsider: handles drilling tools, housekeeping, and sample chain-of-custody.
HSE: audits compliance with EN/ISO references and site rules.
Exclusion zones & communication
Paint and sign the rotation envelope; use spotters during rod moves.
One radio channel for commands; repeat-back protocol at every critical step on geotech drilling tasks.
Sampling & QA/QC: Compliance That Protects Your Data
Do the boring things right (ISO 22475-1)
Plan the sample set: depths, intervals, and types (SPT, Shelby, core) before mobilization.
Preserve and label: liner choice, temperature control, water-tight seals, and legible IDs; photograph core boxes.
Document everything: recovery, RQD, refusals, groundwater levels; maintain a chain-of-custody form that travels with the sample, non-negotiable on geotechnical drilling rigs.
Tooling that supports quality
Match bit/crown to formation; inspect barrels, shoes, and rods each run; retire damaged drilling tools promptly.
Calibrate torque, RPM, and pressure sensors; keep certificates in the rig QA folder.
Local Compliance: UAE/GCC Expectations in Plain English
Permits, permits, permits
Confirm work permits, buried-services clearances, and traffic plans before the first rod lifts.
In Abu Dhabi, align with OSH codes (e.g., well construction CoP) and geotechnical risk manuals; your geotechnical drilling company should reference these in method statements.
Environmental & community controls
Dust and noise management, fluid containment, and safe waste handling, especially on urban pads where Metadrill drilling rigs often operate.
Public interface plans: barriers, banksmen, and clear signage around the drill rig.
Practical Field Checklist (Shift-Ready)
Before you spin the rods
Pre-start with EN 16228 guard/interlock checks; verify E-stops.
Confirm sampling plan (ISO 22475-1) and label sets; stage spare drilling tools.
Test comms; brief exclusion zones; sign the TBT sheet.
During the run
Keep hands clear of rotating gear; use handling aids; maintain housekeeping.
Log parameters (RPM, torque, feed, pressure) and groundwater observations.
After the run
Photograph core; reconcile IDs; hand off to lab with intact paperwork.
Close out the permit and housekeeping; inspect guards and hoses for the next shift.
Why this rigor matters in 2025
The GCC construction market reached USD 147.1 billion in 2024 and is projected to hit USD 226.2 billion by 2033 (4.9% CAGR), a scale that demands consistent, standards-led site practice on every geotech drilling job.
You can also check: Rig Refurbishment Playbook: Extend Life and Cut Downtime ROI
Conclusion: Make Standards Your Competitive Edge
Treat standards as operating tools, not paperwork. Anchor machine safety to BS EN 16228 and sample integrity to ISO 22475-1; write local permits and risk controls into every method statement; and keep roles, zones, and documentation tight. Do that, and your geotechnical drilling rigs will run safer, your drilling tools will produce defensible data, and your clients will trust Metadrill geotechnical drilling as a partner. Standards-led geotech drilling turns risk into routine, shift after shift with Metadrill drilling rigs and compliant geotechnical drilling equipment.
Desert sites punish geotechnical drilling rigs. Heat, dust, and long moves push components to failure unless you run a preventive plan tailored to UAE conditions.This guide turns field reality into a checklist, what to service, how often, and how to keep geotechnical drills delivering predictable meters, week after week.
Why maintenance matters: More than 75% of hydraulic and lube-system failures trace to contamination; dust-heavy environments amplify the risk.
Build for the Desert, Not the Brochure
The UAE reality: heat + dust + duty cycle
High ambient temperatures, frequent pad relocations, and suspended dust mean filters load quickly and fluids degrade faster. A geotechnical drilling company should design service intervals around real sand load and summer peaks, not generic hour counts.
Your goal
Keep oil clean, electronics cool, and moving parts sealed, so geotechnical drilling equipment holds spec under 45–50°C days and dust events, and geotechnical drills stay safe and productive.
Service Architecture That Works in Sand
Three-layer plan (daily, shift, campaign)
Daily (operator-led)
Air & breathers: Tap-clean pre-filters; inspect main elements; replace when ΔP flags.
Hydraulics quick check: Sight-glass level, foam, color; wipe ports before coupling.
Rod handling zone: Decrease grips, check guards; sand builds create pinch hazards.
Electrical & sensors: Blow out cabinets gently; confirm fans and door gaskets.
Cooling stack: Radiator–CAC–oil cooler: backflush with low-pressure air; log temps.
Shift (technician support)
ISO 4406 cleanliness check (spot tests) to trend oil condition; schedule kidney-loop filtration when codes drift.
Grease points: Use desert-grade lubricants; verify seals around the rotary head.
Return-line filters: Swap on ΔP alarm or hours, sand eats margin fast on MetaDrill drilling rigs.
Fasteners & mounts: Heat cycling loosens hardware; re-torque critical points.
Campaign (weekly/biweekly)
Full fluid analysis: viscosity, TAN/TBN, water ppm, particle count.
Calibration sweep: torque, RPM, pressure transducers, temp probes.
Hoses & looms: Replace sun-brittled sleeves; re-route where sandblasting occurs.
Cabin HVAC & overpressure: Keep the operator micro-environment clean to reduce fatigue across long MetaDrill geotechnical drilling shifts.
Keep the Core Systems Alive
Hydraulics: defend the lifeblood
Stage desert-grade filtration: pre-filter socks on breathers, high-efficiency return filters, and dedicated kidney-loop carts for fast cleanup.
Wipe every connection, one gritty coupling can seed a failure chain in geotechnical drilling equipment.
Log ΔP, temps, and ISO code after each kidney-loop; trend, don’t guess.
Cooling: heat is the quiet killer
Clean the cooling stack daily; align louvers to reduce sand ingestion.
Verify coolant mix and cap pressure; inspect shrouds and fan balance.
Use non-contact thermometers to map hot spots on geotechnical drills after long pulls.
Electronics: keep brains cool and sealed
Positive-pressure cabinet kits and clean filters keep dust out.
Mount critical controllers away from radiant surfaces; verify fan direction and airflow.
Label and seal spare ports; desert intrusion starts in forgotten holes.
Desert-Proofing the Wear Parts
Rotary head and string
Track bit hours and swap crowns early when fines spike; it protects rods and barrels.
Use thread compound sparingly; sand + paste = lapping grit.
Inspect jaws, dies, and slips; sand-polished jaws, slips, overheat, and deform rods, avoid cascading damage to drilling rig tools and equipment.
Fluids & returns
Mix fluids away from wind; screen and cover tanks.
Record density/viscosity every 20–30 minutes in fine sands; adjust before returns thin out.
Add loss-control materials at the first sign of seepage to keep circulation stable.
Scheduling That Survives Summer
Plan around the thermometer, not the calendar
Shift heavy pulls to early mornings or nights.
Increase inspection frequency when forecast highs exceed 45°C (common inland).
Pre-stage filters, belts, and cooler fins before heat waves so MetaDrill drilling rigs don’t wait on parts.
UAE inland stations touched 51.8°C on Aug 1, 2025, near the all-time national record, proof that thermal stress planning isn’t optional.
Team Habits That Protect Uptime
Make it cultural
Clean-as-you-go: rags on every panel; dust caps used every time.
One-minute filter talk: at toolbox meetings, hours, and what’s due.
Red-tag bad actors: hoses, connectors, or fans that repeatedly fail.
Photo logs: cooling stack, filter swaps, cabinet interiors, evidence beats memory.
Partner with your builder: MetaDrill geotechnical drilling support can tailor intervals to your geology and duty cycle; your geotechnical drilling company should own that learning loop.
You can also check: Operator Training that Lifts Daily Production and Safety
Conclusion: Maintenance Is Your Desert Advantage
Run desert-specific routines, and the environment becomes manageable. Protect hydraulics from grit, keep electronics cool and sealed, and schedule work around heat, not hope. When geotechnical drilling rigs and drills are serviced in the UAE, backed by disciplined operators and responsive partners like a proven geotechnical drilling company, you turn sand, sun, and distance into steady production. Align with the MetaDrill drilling rigs service philosophy, keep MetaDrill geotechnical drilling documentation close, and your geotechnical drilling equipment will stay on-spec when the mercury spikes.
The MD1000N drill rig is built for deep, continuous core recovery when geology gets serious. This guide demonstrates how the MD1000N Geotechnical Drilling Rig can make difficult formations more predictable meters. Furthermore, this manual details what its intended purposes are as well as areas it excels. How you can select it as the appropriate geotech drill equipment is also addressed here.
Early context: The global geotechnical engineering market was USD 2.57B in 2023 and is projected to grow at 6.3% CAGR to 2030—steady demand for reliable deep-coring capability.
What the MD1000N Is Built For
Mission profile
The MD1000N geotechnical drilling rig was specifically designed to address deep wireline coring applications where core quality and footage per shift matter more than anything else. As a heavy-duty geotechnical drill rig, its balance of torque, pullback, and stable feed enables crew to push deeper without endangering either string or core.
Core idea in plain English
Torque to start and stay cutting: Keeps rotation in hard, interbedded layers.
Stable feed and extraction: Protects the core and reduces stuck-rod events.
Rig control that scales with skill: New operators can learn it; experienced hands can finesse it.
Key Capabilities You’ll Feel on Site
Powertrain and head control
High-torque rotation gives the drill rig the bite to maintain RPM in hard rock.
Smooth variable feed helps the bit stay on pattern, which extends drilling tools life and preserves core integrity.
Depth envelope & coring systems
Designed for deep wireline programs; the MD1000N drill rig maintains steady progress where lighter platforms stall.
Compatible with modern drilling tools stacks so you can switch configurations without rethinking the entire spread.
Chassis, stability, and setup
A stable stance that limits vibration transfer to the core barrel.
Site-friendly rig-up that respects small urban pads and constrained approaches typical of infrastructure projects.
Where the MD1000N Excels
Urban infrastructure investigations
Tight pads, noise limits, and variable access routes. The MD1000N geotechnical drilling rig brings compact discipline with the muscle to keep footage moving. Ideal for foundation checks, deep utilities, and transit corridors where every hour onsite is scrutinized.
Long exploration holes in mixed geology
When programs encounter cemented bands or sudden hardness changes, the geotech drill rig needs torque headroom and controlled feed. The MD1000N keeps rotation alive, reducing stop–start cycles that hurt weekly meters.
Case-like programs with strict QA/QC
Specs that demand high recovery ratios benefit from the rig’s stable feed and extraction profile. Clean core boxes and fewer re-drills mean defensible data and tighter timelines.
Decision Factors: Is MD1000N the Right Fit?
Match rig to reality
Ground model
Map expected hardness and transitions; confirm the torque window needed.
If your last program had frequent stalls or rod binds, a heavier geotechnical drill rig like MD1000N is usually the smarter choice.
Program cadence
Long continuous runs reward rigs with stable feed/extraction.
If you move sites often but drill deep each time, the MD1000N drill rig balances mobility with deep-hole discipline.
Tooling compatibility
Align bit series, core barrels, and rod strings with the rig’s torque/RPM sweet spot. This protects drilling rig equipment and extends drilling tools life.
Practical Checklist Before You Commit
Field-focused checks
Mobility & access
Verify narrowest gate, tightest corner, and deck load limits. A well-sized geotech drill rig avoids last-minute site changes.
Uptime plan
Confirm daily checks, spare assemblies, and operator training. Keeping drilling rig equipment inspection-friendly is the fastest path to predictable meters.
Pilot validation
If possible, run a representative test hole and track: meters/shift, stalls, recovery, rod pulls. Let data drive the final call on the MD1000N geotechnical drilling rig.
Why “Deep Core” Capability Matters Now
The regional project pipeline is healthy: the GCC construction market measured USD 147.1B in 2024 and is projected to reach USD 226.2B by 2033 (4.9% CAGR), momentum that rewards rigs delivering consistent footage and reliable samples.
You can also check: Hollow-Stem Augers & SPT: Essential Tools for 2025
Conclusion: When to Choose MD1000N
Pick the MD1000N drill rig when your program calls for deep, defensible core in changing formations—and you can’t afford stall-heavy days or damaged samples. As a heavy-duty geotech drill rig, it adds torque, feed stability, and service-friendly design that protect drilling rig equipment and extend drilling tools life. If your ground model demands longer wireline runs, fewer interruptions, and cleaner boxes, the MD1000N geotechnical drilling rig is the confident choice for your next deep-core campaign.
Share your ground model and depth targets. We’ll map the torque/RPM window and recommend a tooling stack that gets the most from MD1000N—so your meters per shift become predictable.
A solid soil investigation plan turns unknown ground into predictable decisions. For UAE projects, align scope, methods, and gear early with your geotechnical drilling company so the team collects the right data, first time. Below is a practical, field-ready guide, planning steps, methods, exploration drill rigs, tooling, and realistic timelines.
“Physical conditions were unforeseen” ranks among the top global dispute causes (16.6%)—a planning gap good SI can reduce.
Plan the Work, Then Work the Plan
Define Purpose, Decision Points, and Deliverables
Before fieldwork, write a one-page intent: what design decisions the Soil investigation must enable (foundation type, depth, dewatering, ground improvement). Tie every test to a decision. Share this with your geotechnical drilling company and designer so drilling, logging, and lab tests ladder up to those decisions.
Standards & Local Governance
Use recognised practice (e.g., BS 5930 / Eurocode 7 concepts) for desk study → reconnaissance → ground investigation → reporting. Dubai authorities require qualified geotechnical engineers to prepare and sign off SI/geo-design. Build these checkpoints into your plan.
Methods That Answer Specific Questions
Core Field Techniques and When to Use Them
Boreholes with sampling & monitoring
Best for: stratigraphy, groundwater, lab specimens.
Notes: pair with standpipes/piezometers for level tracking.
Standard Penetration Test (SPT)
Best for: relative density/consistency in sands/silts; correlations for bearing.
Cone Penetration Test (CPT/CPTu)
Best for: continuous profiling; soft to medium soils; quick density/strength trends.
Geophysics (MASW, seismic refraction, GPR)
Best for: layer continuity, rippability, anomalies before drilling.
Trial pits & plate load
Best for: near-surface conditions, utilities check, bearing at shallow depth.
Tip: Mix methods. Use geophysics to optimise borehole locations, then ground-truth with sampling—this saves time and raises confidence for exploration drilling decisions.
Gear & Tooling: Matching Rig to Program
Choosing exploration drill rigs for UAE Conditions
Urban access / small pads: compact rotary rigs with fast rig-up cut waiting time.
Mixed layers / cemented bands: torque-forward heads and stable feed reduce stalls, protecting the string.
Deep coring: wireline-ready exploration drill rigs give continuous core and quicker recovery cycles for exploration drilling programs.
Drilling rig equipment essentials
Reliable rotation + variable feed: keeps bit on pattern, preserves samples.
Breakout tools & safe rod handling: speed tripping with fewer incidents.
Fluids & recycling: manage fines and minimise mess on tight UAE sites.
Drilling tools that protect data
Bits matched to formation: avoid over-aggressive crowns that fracture core.
Appropriate rods/core barrels: maintain diameter and straightness to keep recovery high.
Clean sampling chain: labelled liners, coolers for temperature-sensitive soils.
Timelines That Survive Reality
From Desk to Report (typical sequence)
Desk Study & Recon (3–7 working days)
Collect prior SI, geology maps, utilities, hydrology, historical uses; walk the site. This phase shapes locations, depths, and the health & safety plan.
Fieldwork (5–15 working days, site-dependent)
Mobilise geotechnical drilling company crew and drill rig.
Drill/test per plan: boreholes, SPT/CPT, install monitoring wells.
Daily logs: strata, N-values, groundwater observations.
Lab Testing (5–15 working days)
Classify soils/rock, index tests (Atterberg limits, moisture), strength/compressibility (triaxial/Oedometer). Calibrate test matrix to design decisions.
Monitoring (parallel or extended)
Groundwater level checks (weekly for 2–4 weeks) if dewatering is likely. Data loggers help on longer programs.
Reporting (5–10 working days)
Drawings, logs, lab tables, cross-sections, geotechnical model, and design parameters with assumptions and limitations. Keep the executive summary decision-focused so non-specialists act fast.
Quality Controls the Team Can Own
Field QC (what to verify daily)
Correct hole IDs, coordinates, and reduced levels.
Sample intervals and recovery; photo core boxes.
SPT energy corrections captured in log notes.
Chain of custody for drilling tools and samples.
Lab & Data QC
Calibrate equipment; verify index/strength test coverage vs. design needs.
Reconcile logs with lab classifications; flag inconsistencies early.
Keep a living risk register—update after each hole for smarter Soil investigation choices.
Quick Decision Matrix (what to escalate)
Escalate to designer immediately if:
Unexpected groundwater inflow threatens excavation.
Refusal hit above expected depth (possible obstruction or harder stratum).
Contamination indicators appear (odour, sheen, PID spikes).
Geophysics suggests anomalies not captured by planned holes.
Why Planning Pays Off
Robust SI underpins schedule and safety. Industry research shows large projects frequently overrun; a classic benchmark found jobs take ~20% longer and run up to 80% over budget, disciplined SI helps de-risk both.
You can also check: Compact Rigs for Tight Sites: Power, Mobility & Productivity
Conclusion
Treat Soil investigation as a decision engine, not a checkbox. Start with purpose, select methods that answer specific questions, and match exploration drilling gear to ground risks. Coordinate early with your geotechnical drilling company so exploration drill rigs, drilling rig equipment, and drilling tools align with design needs and urban constraints. With clear timelines, disciplined QC, and standards-led reporting, your geotechnical drilling company delivers data you can build on—literally.
Share your desk-study findings and target decisions. We’ll map an SI scope that right-sizes methods and timeline for your site.
Great foundation work starts with the right geotechnical drilling tools and a disciplined checklist. This guide gives field teams a practical, UAE-ready geotechnical tooling playbook, what to prep, what to verify on site, and how to keep drilling rig tools and equipment working safely and consistently.
Poor ground intel drives disputes: “Physical conditions were unforeseen” accounts for 16.6% of major project claims worldwide. Good planning and the right tooling reduce that risk.
What This Checklist Covers
Scope
This guide focuses on the geotechnical drilling tools that underpin soil/rock investigation for foundations – bits, barrels, rods, handling aids, fluids, and measurement devices, plus the support geotechnical drilling equipment that keeps sampling clean and data defensible.
Goal
A short, repeatable geotechnical tooling checklist that helps crews produce predictable meters, high recovery, and safer pads, using drilling rig tools chosen for the actual ground model.
Pre-Mobilization: Build the Tooling Set to Your Ground Model
Desk prep (do this before the truck moves)
Programme & method fit
Map expected strata and refusal depths; pick sampling methods (SPT, Shelby, split spoon, wireline coring) and match the geotechnical drilling tools accordingly.
Cross-check against ISO 22475-1 principles for sampling/groundwater measurements to keep procedures standard-aligned.
Inventory and spares
Bits by formation (clay/sand/gravels/cemented bands/soft rock/hard rock).
Core barrels/liners, shoe sets, adapters; at least one full spare string.
Rods and coupling checks (threads, straightness).
Critical drilling rig tools and equipment: tongs, breakout/break-in aids, rod spinner, slips, wireline winch gear, lifting points.
Fluids & consumables
Base fluid, polymers, viscosifiers, LCM, lost-gel plugs, pH control, mixing screens.
Filtration and recycling equipment sized for the expected fines.
Measurement & logging kit
Calibrated tape/laser, water level meter, thermometers, densitometer/viscometer, torque gauge, pressure gauges, flow meters.
Clean, labelled sample containers; chain-of-custody forms.
On-Site Setup: Make Quality and Safety Visible
Pad layout and housekeeping
Segregate geotechnical drilling equipment zones: rotation envelope, rod handling, fluids, samples.
Rig mats, drip trays, spill kits; secure cable and hose runs.
Lighting for night shifts; camera angles if remote viewing is used.
Tooling readiness checks
Inspect drilling rig tools: jaws, dies, tong pins, sling integrity.
Verify rod length/ID/OD and thread compound application.
Check bit crown type vs. expected layer; stage alternatives within reach.
Test gauges and sensors; zero instruments; confirm flow and pressure alarms.
Operating Checklist: Keep the Core Clean and the String Alive
Rotation, feed, and circulation
Match rotation/torque to bit spec; avoid over-RPM that burns crowns.
Set feed for contact, not chatter; watch returns for cuttings change.
Maintain fluid properties; record density/viscosity at intervals.
Sampling & recovery discipline
For SPT: capture hammer energy corrections; log blows cleanly.
For cores: confirm liner fit, mark up core boxes, record recovery and RQD.
For soft soils: protect liner temperature; prevent sample disturbance.
Rod handling and tripping
Use mechanical aids where possible; never free-hand near rotation.
Apply thread compound correctly; torque to spec; check for galling.
Keep drilling rig tools and equipment staged to minimize pause time between joints.
Troubleshooting: Fast Fixes That Save a Shift
If penetration stalls
Downshift RPM, add weight carefully, swap to a more aggressive crown, or pre-drill with pilot.
Validate fluid; increase viscosity or add LCM if loss is suspected.
If vibration spikes
Reduce RPM, adjust feed, check bit wear, verify rod straightness.
Inspect breakout system; worn dies can introduce torsional shock to drilling rig tools.
If recovery drops
Slow feed; confirm shoe/liner compatibility; clean barrel.
Recut the face, shorten runs; change flushing strategy.
Unplanned equipment downtime often sits in the 20–30% range across the industry, primarily from weak preventive maintenance, tooling readiness is your best antidote.
Daily Close-Out: Lock In Tomorrow’s Performance Today
Shift-end ritual
Wash and inspect the geotechnical drilling tools set; retire worn bits.
Reconcile rods and couplings; spin a dummy joint to feel for thread damage.
Top up consumables; restage geotechnical drilling equipment and drilling rig tools for the next hole.
Data hygiene
Update logs (depths, runs, refusals, recovery, fluid properties).
Photograph core boxes with IDs visible; back up photos/data to cloud or drive.
Note anomalies and planned mitigations in the morning brief.
Short Master List: Bring-and-Check Essentials
Core tooling bundle (typical)
Bits: drag, PDC, impregnated diamond; crowns sized to ground model.
Barrels/liners/shoes: correct diameter series; spares on hand.
Rods & subs: straight, clean, thread-protected; torque chart onboard.
Handling: tongs, rod spinner, slips, elevators, lifting slings, tag lines.
Fluids: base, additives, LCM, pH control; mixing screens/buckets.
Measurement: torque, pressure, flow, density, viscosity; water level meter.
Safety: guards, interlocks, pinch-point signage, spill kits, eyewash.
You can also check: Drill Rig Rental vs Purchase: Cost, Safety, and Uptime in GCC
Conclusion:
Treat tooling as a system. When geotechnical drilling tools are matched to the ground model, verified each shift, and supported by maintained geotechnical drilling equipment, sample quality rises and downtime falls. Use this geotechnical tooling checklist to stage the right drilling rig tools and equipment, keep drilling rig tools ready, and document what happens downhole. That’s how investigation teams deliver dependable data for foundation design—on time, with fewer surprises.

Remote operation puts expert eyes and hands on the rig without crowding the pad. For the UAE’s busy sites, it means fewer people in harm’s way, faster diagnostics, and steadier meters. Here’s how Remote Operation in Drilling works – methods, tools, timelines—and how Metadrill drilling company customers can plan it into exploration drilling.
Early proof point: In a cross-industry “digital oilfield” survey, remote asset operations ranked as the highest-ROI use case, ahead of nine other applications, validation that remote models create tangible value.
What “Remote Operation in Drilling” Really Means
Running parts of your drilling workflow from a control room, nearby or off-site – using live data, two-way comms, and controlled intervention. For exploration drill rigs, it usually includes remote viewing, advisory control, and, where permitted, supervised automation of certain functions.
Why it matters in 2025
Safety: fewer bodies on the pad; lower exposure to rotating equipment and fluids.
Uptime: faster fault finding; experts can “drop in” virtually across multiple rigs.
Quality: consistent parameter control improves sample integrity in exploration drilling.
Core Methods You Can Deploy
Tiered remote operation model
Tier 1: Remote visibility (see everything)
Multi-angle CCTV and mast cams
On-rig dashboards (RPM, torque, WOB, pullback, pump pressure, flow)
Data logging to a central historian
Tier 2: Remote advisory (guide the crew)
Real-time coaching on bit selection, feed rates, and fluid management
Alarm management and trend interpretation from specialists
Tier 3: Supervised control (act with guardrails)
Preset envelopes for rotation/feed
Automated tripping sequences and interlocks
Exception handling routed to an on-site lead
Safety note: Tier 3 requires strong governance and clear “who owns the stop button” rules. Keep roles unambiguous and practice handover drills.
Tooling & Tech Stack
Sensing and data backbone
Sensors: torque, RPM, pressure, temperature, vibration—calibrated and timestamp-aligned.
Networking: hardened LTE/5G or site fiber; QoS for control traffic.
Edge compute: buffer data, run local rules if the link drops.
Cyber basics: VPN, MFA, role-based access, immutable logs.
Operator interface
Control room HMI: trends, alarms, replay, and “last 5 minutes” buffers.
Video wall: rig floor, rod handler, pumps, return line, site perimeter.
Playbooks: SOPs for stick-slip, pack-off, lost circulation, and refusals.
Rig-side upgrades for exploration drill rigs
Safe rod-handling aids and interlocked guards
Auto-lubrication and smart shutdowns
Remote-ready drilling rig equipment (actuators with feedback)
Planning & Timelines
30-60-90 day road map
Days 0–30: Baseline and quick wins
Map hazards and tasks worth “de-manning.”
Fit cameras and streaming dashboards; standardize tags.
Pilot Remote Operation in Drilling on one shift with observers.
Days 31–60: Advisory at scale
Expand to multi-rig support; add alarm rationalization.
Train crews on remote call-down etiquette and fail-safe states.
Start a daily “remote ops stand-up” (10 minutes, metrics + issues).
Days 61–90: Supervised control (selected steps)
Introduce guarded set-points for feed/rotation on candidate holes.
Dry-run emergency scenarios; validate stop-authority and comms.
Audit data quality; lock change management.
Field Playbook (How to Keep It Safe and Useful)
Five habits for rig teams
One channel for control: radio discipline; no conflicting commands.
Red team drills: simulate link loss and force a safe reversion.
Camera hygiene: keep lenses clean; inspect blind spots daily.
Parameter guardrails: publish max/min tables near the panel.
Post-run reviews: replay anomalies; update the playbook.
Quality for exploration drilling
Stabilize feed to protect core; watch return flow for cuttings changes.
Use replay to compare “good runs vs. bad runs” and tune drilling rig equipment.
Track bit hours and string health; let data lead drilling tools swaps.
Where Metadrill drilling company Fits In
What to expect from a rig partner
A rig builder should make remote-readiness practical: sensor-rich heads, clean data models, CCTV mounts, safe rod-handling, and documentation your HSE team can adopt. The Metadrill drilling company approach emphasizes site-ready upgrades for exploration drill rigs so you can scale remote practices without slowing the yard.
Procurement & Governance
Choose tech you can live with
Avoid proprietary dead-ends; demand open data exports.
Validate spares and service locally.
Confirm latency budgets for any supervised actions.
Roles, rights, and records
Write a RACI: who watches, who advises, who commands.
Keep a secure audit trail of set-point changes and overrides.
Align with client and regulator expectations before go-live.
Adoption momentum: the autonomous/remote equipment space in heavy industries is scaling, autonomous mining/drilling equipment alone is projected to grow from USD 4.48B (2024) to USD 11.86B by 2033 (11.6% CAGR), reflecting investment in safety and productivity tech.
You can also check: Wireline vs Conventional Coring: Choosing the Optimal System
Conclusion: Safer crews, steadier meters
Remote Operation in Drilling is not hype; it’s a practical way to reduce exposure, add expert coverage, and smooth performance in exploration drilling. Start with visibility (Tier 1), layer advisory (Tier 2), and add supervised control (Tier 3) where it’s justified. Choose exploration drill rigs and drilling rig equipment that are sensor-ready, write clear roles, and train handovers until they’re muscle memory. With the Metadrill drilling company as your build partner, you’ll turn remote capability into safer pads and more predictable weeks, one carefully instrumented rig at a time.
Choosing between MD600N for sale and MD600X for sale comes down to torque, depth envelope, ground conditions, mobility, and serviceability. This guide explains the practical specs crews feel on site, so you can pick the geotech drill rig that turns changing geology into predictable meters per shift.
Downtime is expensive: for many SMEs, a single hour can cost up to $150,000. Build your choice around reliability and maintainability.
What to Compare (and Why It Matters)
Productivity Anchors
Torque vs. RPM: Higher torque helps start and keep rotation in dense layers; smart RPM lets you manage bit life and vibration.
Depth Capacity (wireline): Match the rig’s rated N/H/PQ envelope to your drilling tools plan, not wishful thinking.
Feed/Extraction: Smooth feed speeds protect core quality; strong extraction saves hours when rods bind.
Mobility & Setup: Urban pads and variable access demand compact footprints and quick rig-up/down.
Serviceability: When drilling rig equipment is easy to inspect and maintain, you reduce unplanned stops.
MD600N vs MD600X: The Quick Read
Who Each Rig Best Fits
MD600N for sale: A balanced drill rig that crews learn fast—reliable “middleweight” for mixed ground and urban pads.
MD600X for sale: Built for tougher transitions (soft to hard) with added auger authority; ideal when you need more bite without upsizing the platform.
Torque & Cut Control
MD600N: Delivers the torque most geotech programs need, with steady control that protects drilling tools in fractured zones.
MD600X: Adds headroom for stubborn layers; operators can maintain rotation when the formation changes abruptly.
Depth & Coring Envelope
MD600N: Optimized for N-wireline programs with dependable progress toward deeper targets on compact sites.
MD600X: Similar depth class but tuned for higher load events; expect fewer stalls in interbedded or cemented horizons.
Mobility, Footprint, and Setup
MD600N: Compact footprint, easy transport, rapid setup—great for city access and small pads.
MD600X: Slightly more robust stance; still site-friendly, but designed to stay composed when the geology gets uneven.
Controls & Training Curve
MD600N: Intuitive controls that shorten onboarding; ideal if you rotate crews or scale quickly.
MD600X: Familiar layout with extra refinement for torque-heavy work; experienced hands will notice the added stability.
Uptime, Service & Monitoring
Both rigs benefit from straightforward daily checks; pairing with remote monitoring/CCTV (where available) speeds diagnosis and keeps drill rigs for sale productive after purchase.
Choose the model your maintenance team can service fastest—because reliability beats theoretical peak specs.
Spec-Driven Scenarios
Soft → Medium With Urban Constraints
Choose: MD600N for sale
Why: Smaller pads, shorter setup windows, frequent moves. You’ll value the nimble footprint and the forgiving control over drilling rig equipment.
Interbedded Layers, Occasional Cemented Bands
Choose: MD600X for sale
Why: Extra torque headroom cuts through transitions; fewer stalls means steadier meters and less wear on drilling tools.
Mixed Programs (SPT + Wireline Cores)
Choose: Start with MD600N for sale, step up to MD600X for sale if bind or stall events trend upward.
Tip: Track core runs, refusal events, and rod pulls; let data—not anecdotes—justify the upgrade.
Field Check: How to Validate Your Choice
A Simple Pre-Buy Checklist
Ground model: Map expected layers and refusal depths; match to rig torque and pullback.
Bit & string plan: Align drilling tools (bits/rods) to the rig’s torque/RPM sweet spot.
Mobility reality: Measure your narrowest gate, sharpest turn, and tallest obstruction.
Service plan: Confirm parts access, daily check routines, and training—before delivery.
Pilot day: If possible, test on a representative hole; log meters/shift, stalls, and recovery.
Demand backdrop is healthy: the GCC construction market was USD 147.1B in 2024 and is projected to reach USD 226.2B by 2033 (4.9% CAGR), steady activity that rewards rigs with consistent uptime.
You can also check: Geotechnical Drill Rigs: UAE Buyer’s 2025 Selection Overview
Decision Guide (One-Minute Wrap)
If You Need…
Compact agility + teachable controls: pick MD600N for sale.
Added bite through unpredictable layers: pick MD600X for sale.
Both are capable geotech drill rig options. Your winner is the one that minimizes non-productive time on your exact geology, protects drilling tools, and stays easy to service. That’s how a drill rig becomes a weekly footage machine—not just another entry in the catalog of drill rigs for sale.
Ready to Move?
If you’re choosing between MD600N for sale and MD600X for sale, we’ll map your ground model, validate the depth/torque envelope, and propose a maintenance-first setup so your drilling rig equipment stays drilling. Message us to match a rig to your next site and schedule a spec walk-through.
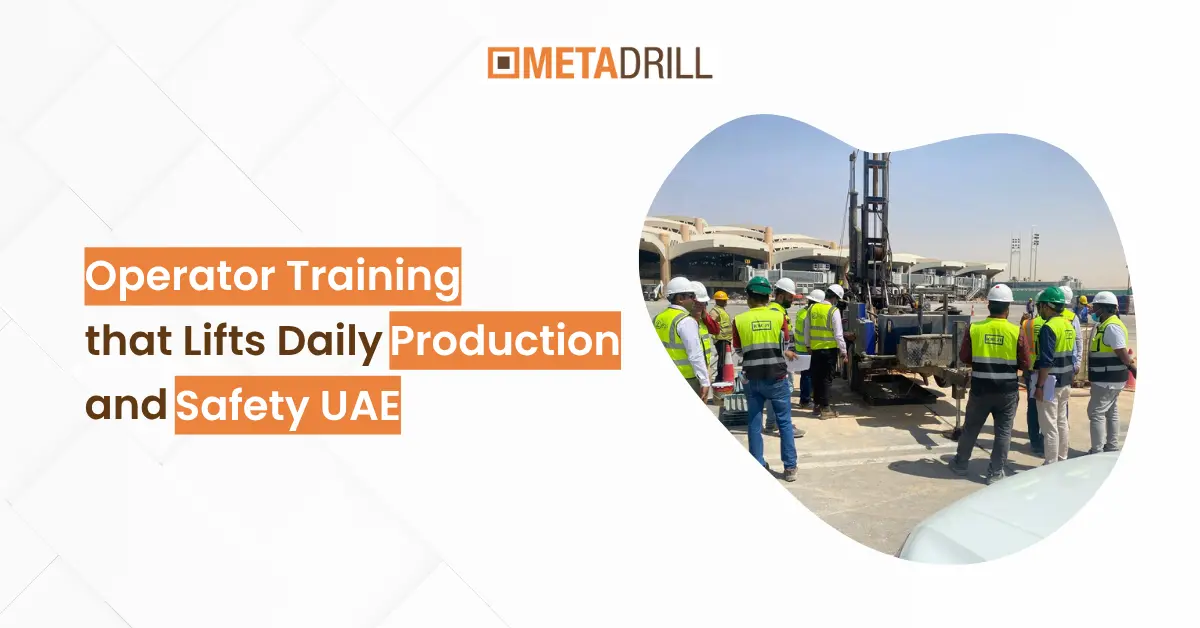
Your crew’s habits decide whether a good drill rig delivers full footage, or bleeds hours to retries, tool damage, and unsafe shortcuts. The business case is simple: across industry, unplanned downtime costs you a hell amount of money, and most organizations still face at least one unexpected hazard each month. Training that prevents errors and near-misses pays back fast in production and safety.
What “Operator Training” Means an A Working Site
Training isn’t a lecture; it’s a daily system that keeps a geotechnical drill rig stable, a water well bore straight, and people uninjured. In the UAE, that system should blend short toolbox sessions, hands-on drills, and model-specific coaching for platforms like the MD600N drill and MD600X drill. The goal: repeatable muscle memory that improves meters-per-shift and lowers incident rate, whether you’re running water well drilling rigs or a production drill rig for geotechnical sampling.
A Calm, Repeatable Curriculum
Stage 1, Pre-shift readiness
Walk-around ritual: fluids, hoses, clamps, pins, mast locks, emergency stops.
Bit & tool match: formation, diameter, torque window, and thread health for drilling rig tools; confirm spares for water well drilling rigs and the duty geotechnical drill rig.
Crew hand signals & comms: standardize voice/hand cues before the first spin.
Model focus: MD600-series checks, feed system, rotation limits, hydraulic temps, for both MD600N drill and MD600X drill.
Stage 2, Controls and stability
Stance & anchoring: rig leveling, pad placement, mast plumb check.
Controlled starts: step-up to RPM/flow in three stages; hold target values for 30 seconds.
Parameter ladder: show operators how to adjust WOB, RPM, and flush in small increments to avoid stick-slip and minimize bit glazing on any drill rig.
Stage 3, Drilling finesse
Signal-to-noise reading: feel for chatter vs. smooth penetration; use gauge pressure and sound to flag deviations on geotechnical drill rig operations.
Deviation control: micro-corrections to keep water well drilling rigs straight; when to pull back, re-center, and re-cut.
Tool change discipline: lock-out, thread care, torque sequence; quick visual NDT on subs and adapters.
Stage 4, Recovery and first-aid drills
Stuck string protocol: circulate, reverse rotation, and staged over-pull, no “yank and hope.”
Hot-work and pinch-point refresh: use real site photos to mark hazards and safe zones around the drill rig.
Model-specific emergencies: trip-out routines for MD600N drill/MD600X drill (hydraulic over-temp, pressure spikes, unexpected shutdown).
Operator Standards That Lift Production
“10-3-1” rule: after spudding, review gauges at 10 minutes, parameters at 3 minutes, and cuttings at 1 minute, keeps the drift small on any geotechnical drill rig.
Two-minute tools check: Before every connection, examine threads and slips, vital for water well drilling rigs longevity.
Clean handover: Use a whiteboard or app to pass depth, tooling, and any anomalies between shifts, especially when you rotate between MD600N drill and MD600X drill units or switch to water well rig rental support.
Model-specific Coaching (MD600-series)
MD600N drill: emphasize feed-to-rotation sync; demonstrate how small WOB changes stabilize vibration.
MD600X drill: highlight torque-rich starts and thermal watching; coach crews to ramp hydraulics gradually after pauses.
Cross-training operators on the MD600N drill and the MD600X drill avoids “only one person can run it” bottlenecks and keeps a standby water well rig rental asset productive the same day it arrives.
Water-Well Focus: Straight Holes, Clean Water, Safe Hands
For water well drilling rigs, teach “cuttings truth”; operators inspect returns every 1–2 meters to spot collapse risks early. Pair that with slow-is-fast tripping, proper swabbing technique, and documented disinfection steps. When crews master these basics on the primary drill rig, the same habits carry over if you supplement with a water well rig rental during peak demand.
Geotechnical Focus: Core Quality Beats Speed
In geotech programs, a geotechnical drill rig must protect sample integrity first. Train on low shock starts, controlled pulls, and core catcher handling. Use short video replays to compare good vs. bad recovery, then let operators practice under supervision on both the MD600N drill and the MD600X drill; production rises when re-drills drop.
Safety is a Production Strategy
Better habits reduce the interruptions that kill footage. That’s not soft talk; global evidence shows the scale of risk: the ILO estimates about 2.93 million work-related deaths each year and hundreds of millions of non-fatal injuries, underscoring why structured training matters on every drill rig and geotechnical drill rig.
A UAE-ready Weekly Cadence
Mon: 12-minute toolbox on one topic (e.g., stuck string), then 1 coach start on the MD600X drill.
Wed: 10-minute parameter ladder practice on the MD600N drill; record best-practice RPM/WOB pairs.
Fri: 15-minute recovery drill plus two clean tool-change reps for water well drilling rigs; inventory check for water well rig rental kits.
Daily: walk-around, thread care, housekeeping; note anomalies before first spinning on each drill rig.
You can also check: Compact Rigs for Tight Sites: Power, Mobility & Productivity
How to Measure the Win
Meters per shift and first-pass success (no re-drills).
Tool spend per 100 meters (threads, subs, adapters).
Near-miss count and corrective actions are closed.
Cross-qualified operators on both MD600N drill and MD600X drill.
Utilization of owned rigs vs. supplemental water well rig rental, training should push more work to owned assets before renting.
Bottom line
Training isn’t a cost, it's the control system for daily production and safety. Short, focused drills make an expert out of an average operator, whether they’re running water well drilling rigs, a geotech drill rig, or switching between MD600N drill and MD600X drill. Build the routine, coach the moments that matter, and your UAE sites will feel calmer, safer, and faster, day after day.
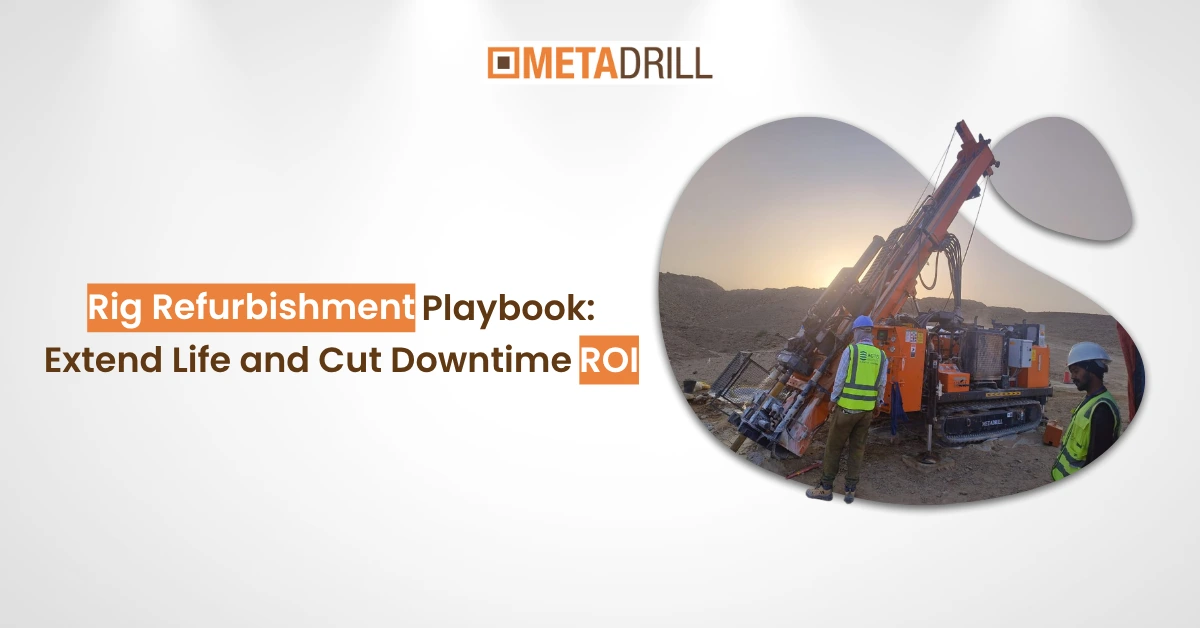
Unplanned stoppages destroy margins. A large reliability survey found that the typical industrial outage costs a lot, and most plants still experience at least one unplanned stop each month, proof that a preventive program outperforms “fix it when it breaks.”
What “Refurbishment” Means Here
Our program is a full reset of our own fleet; we only refurbish our own drills. That matters for standards and traceability. By controlling history, parts, and procedures end-to-end, we can run geotechnical drill rigs refurbishment with fewer unknowns, deliver consistent drilling rig refurbishment results, and keep every record tied to a known serial number. The same discipline powers geotechnical drilling equipment refurbishment across substructures, masts, rotary systems, hydraulics, electrics, and the small but critical drilling rig tools that make or break a shift.
The Five-Stage Flow
Scope & baseline
Pull lifetime logs, NDT history, torque curves, vibration trends.
Define the unit’s post-refit role (lead, support, training).
Lock the punch list for geotechnical drill rigs refurbishment, geotechnical drilling equipment refurbishment, and companion drilling rig tools.
Strip-down & inspection
Disassemble mast sections, rotary/top drive, gearboxes, pumps, and control panels.
Dimensional checks on wear faces; MPI/UT on high-stress welds and joints.
Drill string & accessories inspected as per defined standards (visual + periodic NDT on pipe, collars, stabilizers, subs).
Component overhaul
Gearboxes: bearings/seals replaced; backlash recorded.
Hydraulics: cylinder reseal; hose sets to spec; reliefs set and tagged.
Electrical/HMI: harness re-loom; corrosion points replaced; e-stop verification.
Drilling rig tools: reface/recut threads, install new slips/elevators as needed; torque devices are calibrated.
Rebuild & performance test
Reassemble to OEM torque values with color-tagged fasteners.
Dynamic mast load test; brake holding force check.
Rotary/top-drive RPM and torque validation; thermal and cavitation checks.
Certification & handover
Update as-built drawings, serial logs, NDT records, and maintenance plans.
Train crews on revised limits and inspection cadence.
Schedule 50/100-hour post-commission checks.
Upgrades That Move The Uptime Needle
Power & hydraulics
Variable-displacement pumps with load-sensing valving reduce heat and stabilize responses.
Case drains and high-beta filtration protect pumps and control blocks.
Structure & drive
Mast pin/bushing kits; lattice crack repairs with documented NDT sign-offs.
Rotary/top-drive shafts and bearings replaced; runout tolerances reset.
Controls & electrics
HMI alarm logic for RPM, pressure, temperature; CAN bus cleanup to remove phantom faults.
LED work lights, improved ingress protection, and proper earth bonding.
Drilling rig tools package
Recertified tongs; new slips/elevators as needed; torque-turn systems calibrated.
Re-hardfaced stabilizers; fresh subs/pup joints where wear exceeds tolerance.
These upgrades are baked into every drilling rig refurbishment we run and mirrored across geotechnical drill rigs refurbishment cycles so behavior is predictable from rig to rig. Companion geotechnical drilling equipment refurbishment ensures accessories don’t become the weak link, while healthy drilling rig tools keep threads, torque, and safety where they belong.
A Preventive Cadence That Keeps Gains Compounding
Daily: walk-downs, leak checks, fastener paint marks, and drilling rig tools inventory.
Weekly: grease schedule; strainers/screens; breather checks; belt/chain tension.
Monthly: vibe analysis on rotary/gearboxes; oil sample; brake-holding test; API-style drill string review.
Quarterly: alarm and e-stop function tests; hot-oil endurance checks.
Every task lives in our CMMS, so geotechnical drill rigs refurbishment benefits remain visible in uptime and footage/day. The same calendar governs geotechnical drilling equipment refurbishment and routine care for drilling rig tools.
ROI Focused
The return is obvious in time saved and schedules kept. Refurbishment removes failure modes, cuts emergency callouts, and stabilizes performance so planning sticks. Industry research consistently shows that predictive and preventive programs can cut unplanned downtime, the difference between finishing a program on time and slipping bids.
Pitfalls to Avoid
Paint-over “refurbs”: cosmetics without gearbox/hydraulic work just postpone failures.
Parts roulette: off-spec hoses and seals raise temps and leak rates, standardize BOMs.
Paper gaps: if NDT, torque records, or test curves aren’t logged, audits and pre-quals stall.
Tool blind spot: a rig can be refit perfectly and still lose hours if drilling rig tools are worn or out of calibration.
Shop-floor Checklist
Mast pins/bushings changed; crack NDT signed
Rotary/top-drive bearings & seals; runout recorded
Hydraulics resealed; reliefs set; oil sample baseline
Electrical looms rebuilt; HMI alarms verified
Drilling rig tools recertified; torque system calibrated
API-style drill string inspection log updated
50/100-hour post-refit inspections scheduled
You can also check: Hollow-Stem Augers & SPT: Essential Tools for 2025
Final word
If you want fewer surprises and steadier output, run a disciplined drilling rig refurbishment cycle on your own assets, then defend the baseline with a preventative cadence. Pair that with consistent geotechnical drill rigs refurbishment intervals, targeted geotechnical drilling equipment refurbishment, and vigilant care of drilling rig tools, and you’ll extend service life while cutting downtime risk. The data backs it up: outages are expensive, and structured maintenance can significantly reduce them.
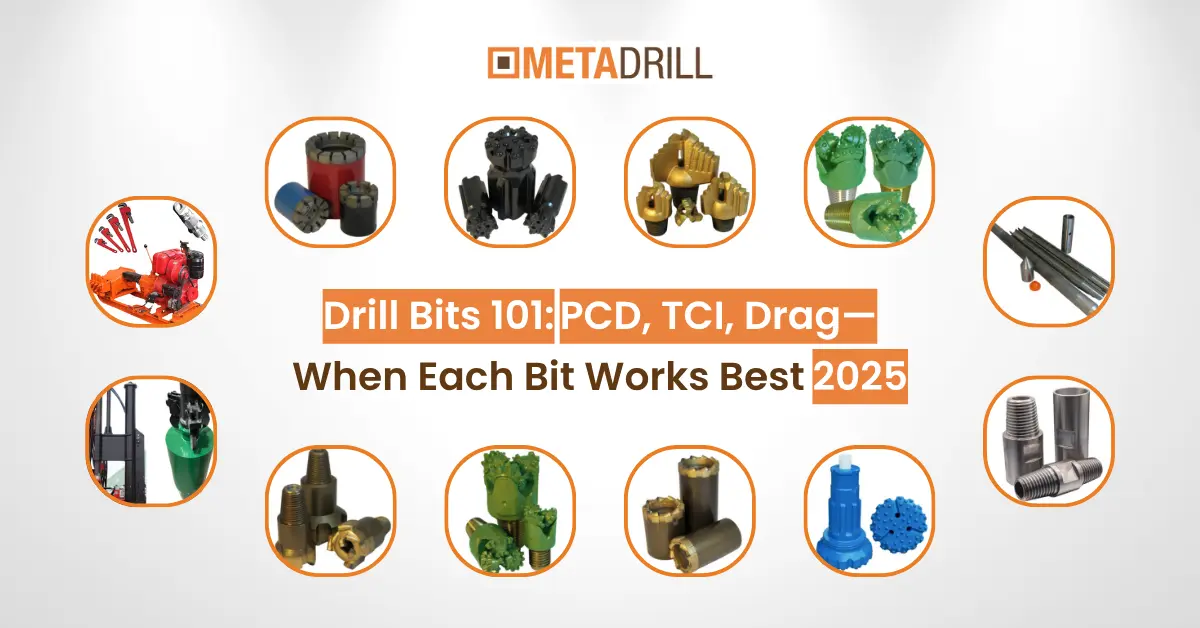
In geotechnical drilling, your project performance often depends on the drill bit you choose. So, picking the right drill bit can save time and improve the quality of your boreholes. In this blog, we’ll discuss PCD, TCI, and drag drill bits used in geotechnical and exploration drilling. Moreover, understanding them can help you make informed choices for your drilling operations in 2025.
PCD Drill Bits
Polycrystalline Diamond (PCD) bits are known because they are strong and long-lasting. PCD drill bits are made to drill sandstone, limestone, and cemented soils. Over time, these bits stay sharp, reducing the frequency of bit changes and delays.
Further, PCD bits are typically used in projects where surface finish is critical. Their strength makes them perfect for water boreholes in hard areas. Although PCD drill bits may cost more at first, their durability and long-term savings make them valuable.
TCI Drill Bits
Tungsten Carbide Insert (TCL) drill bits are known for their impact resistance and work well for medium to hard-rock formations. The carbide pieces provide strength and toughness, allowing the bit to easily drill hard rock.
These rigs are effective in geotechnical drilling rigs, where the ground has both soft soil and hard rock. They are popular with geotechnical drilling companies because of their versatility and reliability. Moreover, TCI bits are compatible with most drill rig tools and equipment, making them easy to use for everyday operations.
Drag Bits
Drag bits have a simple design and work best for clay, sand, and loose soil. Instead of breaking rock, they work by dragging material from the hole. These bits are most effective for shallow and small-diameter boreholes, such as exploration drilling or compact site projects.
Drag bits are easy to handle. They also require less rotational force compared to PCD or TCI bits and are often used on drill rigs or for exploration in small spaces. While they do not work for soft soil, they are ideal for geotechnical drill rigs.
Choosing the Right Drill Bit
Selecting the right drill depends on:
Formation Type: Hard, medium, or soft rock decides if a PCD, TCI, or Drag bit should be used.
Project Scope: For large-scale projects, strong and fast bits are critical. For small, shallow borings, simple drag bits are best.
Drilling Rig Compatibility: Check that the bit works with your drilling rig setup. Some need specific speed or torque.
Cost Efficiency: Weigh the upfront cost against long-term savings from fewer replacements and faster drilling.
You should also think about the tools and equipment available for the drill rig. High-quality bits with compatible tools minimize the risk of damaging the borehole.
How to use Drill Bits Correctly?
Regularly inspect parts for damage or wear prior to use in order to avoid any problems in the course of the project.
Proper Lubrication: Make sure the driller is using appropriate fluids or water in order to decrease the friction and increase heat.
The correct speed for rotation: Follow the manufacturer's instructions to prolong the lifespan of the bit.
Matching the Bit to the Material. The wrong bits, like hard rock bits in soft soil or soft bits found in hard rock, decrease efficiency and could increase the cost of production.
By following these tips, Drilling operators can prolong the lifespan of their bits as well as ensure the highest-quality drilling operation.
Conclusion
Understanding PCD, TCI, and Drag bits is essential for any geotechnical drilling project. Each bit has unique strengths for different project requirements. PCD bits perform best in hard abrasive layers, TCI bits work on mixed and medium-hard rock, and Drag bits are simple work fast in soft soils.
MetaDrill helps operators get the correct tools for every project. For anyone serious about geotechnical drilling in 2025,MetaDrill is the go-to solution.
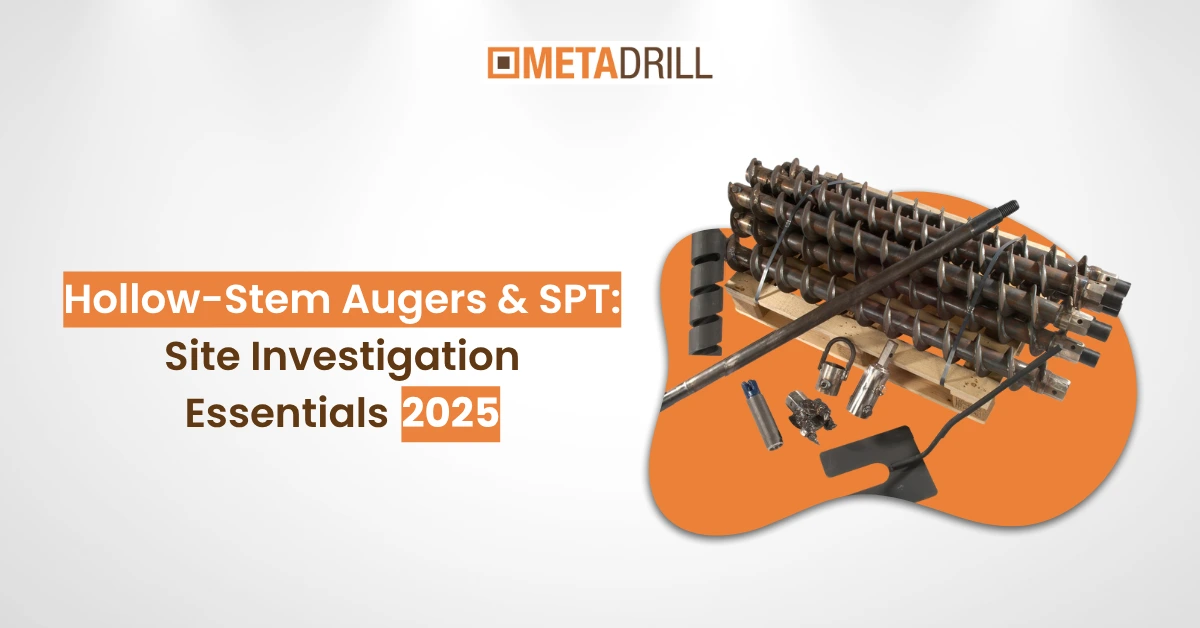
Site investigation is very important in 2025 for construction and infrastructure projects. Checking soil and groundwater before work can prevent building problems, foundation failures, and expensive delays.
A safe way to check the site is to use Hollow-Stem Augers and SPT together. Hollow-stem augers collect soil samples carefully, making it easier to study different soil layers and understand soil behavior. Studies show that over 68% of geotechnical projects in the U.S. use hollow-stem augers for shallow and medium checks (MarketsandMarkets Geotechnical Drilling Report 2025). They are faster and easier to handle than regular drilling.
MetaDrill provides advanced drills for smooth and safe drilling. Hollow-stem augers with SPT testing help engineers plan foundations and slopes. With strong drill rigs, engineers can follow safety rules and meet regulations. In this way, they save both time and money and get accurate results for every project.
Why Hollow-Stem Augers Are the Preferred Choice
Hollow-stem augers are widely used in modern site investigations because they have many practical benefits. They let engineers take soil samples without disturbing the surrounding soil. This gives more accurate SPT results. The hollow center of the auger lets engineers collect samples while drilling and saves up to 25% of the time than older methods.
These augers can handle clay, silt, sand, mixed soils, and are good for geotechnical drilling, water well drilling in Virginia, or urban construction sites where soil can change. Hollow-stem augers can go deeper than other drills and allow engineers to study soil layers. Modern geotechnical drill rigs let engineers control speed, depth, and samples with reliable results.
What is the Standard Penetration Test (SPT)?
An SPT is a common test to measure how hard the soil is. It tells engineers how strong the soil is, which is needed for building foundations, roads, bridges, walls, and other structures.
Projects that use SPT with hollow-stem augers get about 30% more accurate predictions of soil behavior compared to using only core sampling. SPT results are shown as blow counts, which are the number of hammer strikes needed to push a standard sampler for a set distance into the soil. High blow counts mean the soil is dense and hard, while low counts show soft soil. Modern MetaDrill rigs give consistent samples, reduce human error, and provide trustworthy results. This makes SPT an important part of any careful site investigation.
Choosing the Right Geotechnical Drilling Equipment
Picking the right equipment is important for safe site checks. The latest rigs have automatic controls, adjustable augers, and variable speeds so that engineers can drill fast. Whether you need small rigs for cities or big rigs for deep holes, modern equipment works for all projects.
Extra tools, such as drill attachments, improve efficiency when taking soil samples. Special rigs, such as spud barge geotechnical rigs in Virginia, let engineers drill in waterlogged or swampy areas, which would be hard with old-style rigs. Companies can also rent drill rigs or water well drilling rigs instead of buying them. This gives access to advanced machines without spending a lot of money. These rigs are stable and help engineers finish site investigations on time and within budget. Reports from engineering industry sources in the U.S. and Europe show these rigs reduce mistakes and improve overall project efficiency.
Benefits of Hollow-Stem Augers and SPT
Using hollow-stem augers with SPT testing has many clear advantages:
Speed: Projects finish faster, which lowers labor costs and delays.
Accuracy: Soil samples are reliable, which makes foundations safe.
Flexibility: Equipment can work with all soil types and sizes
Safety: Automated rigs are safe for workers and the environment.
Recent surveys show that 75% of geotechnical drilling companies using hollow-stem augers with SPT give better efficiency and fewer mistakes. This combination has become standard in geotechnical investigations worldwide because it is cost-effective, reliable, and versatile.
Why Engineers Rely on MetaDrill for Site Investigation
Using hollow-stem augers with the Standard Penetration Test is now important for fast, safe, and accurate site investigations. With MetaDrill’s advanced drilling equipment and experienced team,
projects can be finished on time while keeping the results high-quality.
MetaDrill offers flexible drilling rigs and tools for projects of all sizes, whether checking shallow soil layers or deep groundwater. Their services make sure every site investigation gives accurate data, reduces risks, and adds lasting value to construction and infrastructure projects. Worldwide engineers trust MetaDrill for accurate and reliable drilling.
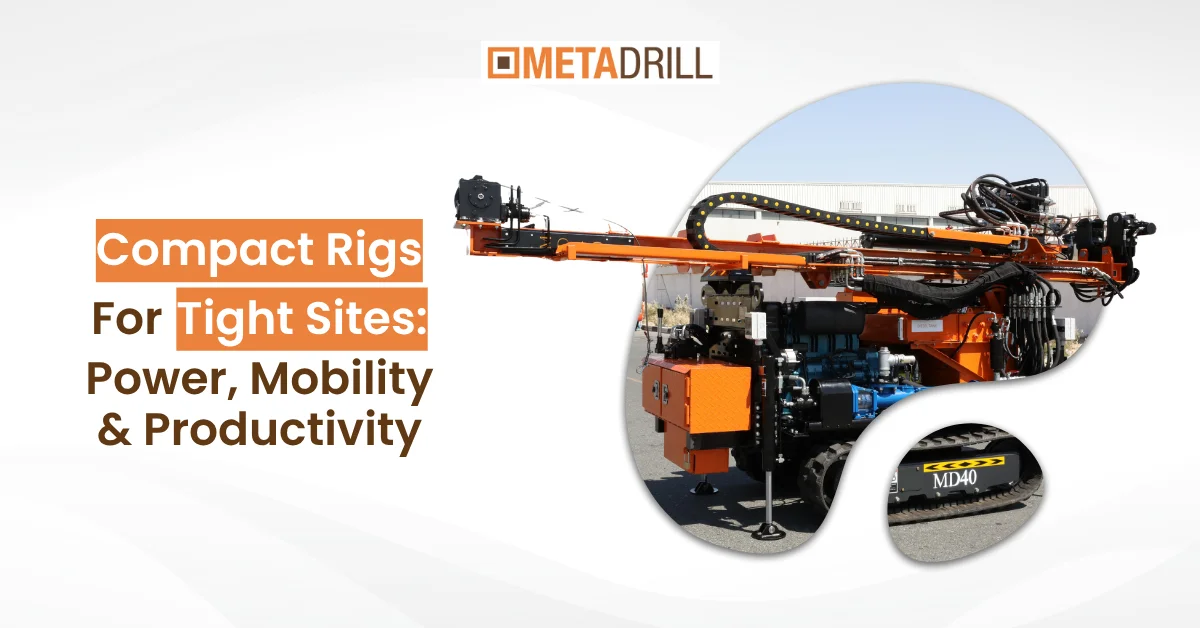
In urban areas and small spaces, drilling can be challenging without the right equipment. MetaDrill has identified a growing demand for compact drill rigs that combine power and flexibility. Recent industry data on geotechnical drilling show that nearly 35% of geotechnical drilling in the U.S. now occurs at sites where conventional rigs can’t work effectively. This highlights the importance of smaller rigs that work in tight spaces.
Compact drill rigs are designed for use in confined spaces. Unlike traditional rigs, these machines are quick and cause low disturbance. For shallow water well drilling, compact rigs save both time and money. Modern rigs now work like big machines, making them a reliable choice for engineers and drilling companies. The right compact rig ensures more work gets done with safety in tight spaces.
Moreover, modern compact drill rigs use smart monitoring systems that track drilling depth, torque, and performance instantly. This lets operators find issues quickly. Reports from Engineering News-Record (ENR) show that sites using smart compact rigs show up to 20% fewer equipment-related delays, further showing the value of these machines in small, busy sites.
Advantages of Compact Drill Rigs
Compact drilling rigs provide several benefits for tight-site projects:
Mobility and Accessibility
Moving machines in small areas is always a challenge. Compact drill rigs are small and tight, so they can reach areas where standard rigs can’t. For example, urban redevelopment projects report up to 40% faster setup times with compact rigs compared to traditional ones. Narrow streets, tight alleys, and small plot sizes are no longer obstacles when using compact rigs that move easily with minimal help.
Strong Performance in a Small Package
Even though they are smaller, compact drill rigs deliver impressive drilling results. Many rigs now offer similar torque and penetration rates as full-sized geotechnical drill rigs. This makes them perfect for shallow water well drilling, environmental sampling, and other geotechnical tasks without compromising the quality of work. For example, a compact rig can complete a 50-meter soil boring project in half the time it would take a conventional rig in a confined site.
Cost Savings
Small rigs need less work and fuel costs. Using a compact driller can lower costs by up to 25% per project, especially where larger rigs require more equipment or setup. Additionally, maintenance is easier and less expensive because these rigs have parts that can be changed quickly, so work stays on time.
Versatility for Different Tasks
From water wells to geotechnical surveys, they can do multiple jobs. They can be for sampling, exploration, or geotechnical work, and are a smart choice for contractors looking for value. Contractors use these rigs for site checks, groundwater monitoring, and small wells, proving that one rig can handle multiple projects.
Choosing the Right Compact Drill Rig
When selecting a compact rig, keep these points in mind:
Drilling Depth Needs: Shallow surveys use compact rigs, and the deep wells may need mid-sized rigs
Transport and Mobility: Check if the rig can go on a small trailer. Some models can even go through narrow streets.
Equipment Compatibility: Make sure the rig works with standard drilling tools and current geotechnical equipment.
Support and Service: Work with trusted geotechnical drilling companies like MetaDrill offer proper maintenance and fast technical support.
Popular models like the MD600N and other geotechnical drill rigs for sale give mobility, power, and durability. Many water well rigs are available for rent to save costs without buying.
Boosting Productivity on Tight Sites
Efficiency is key in small areas. Compact rigs reduce delays caused by restricted access. Contractors report that using compact drill rigs for sale or rental can save 15–20% project time on similar sites.
Modern rigs also have digital controls, torque sensors, and smart hydraulics. These features improve accuracy and create better boreholes. Also, compact rigs need fewer operators, which also lowers labor costs and safety risks in busy sites.
By combining mobility, performance, and smart operational design, compact drill rigs make hard sites easier to handle. So now, engineers can focus on results and work easily in small cities or sensitive areas.
Conclusion
Compact rigs changed geotechnical drilling. Their ability to navigate tight areas is making them key to today’s construction. Working with reliable drill rig manufacturers ensures operators get rigs for water wells or geotechnical work.
MetaDrill continues to lead the way with compact drilling solutions offering power, mobility, and efficiency. With the right rig, even the smallest sites can be drilled safely with good results.
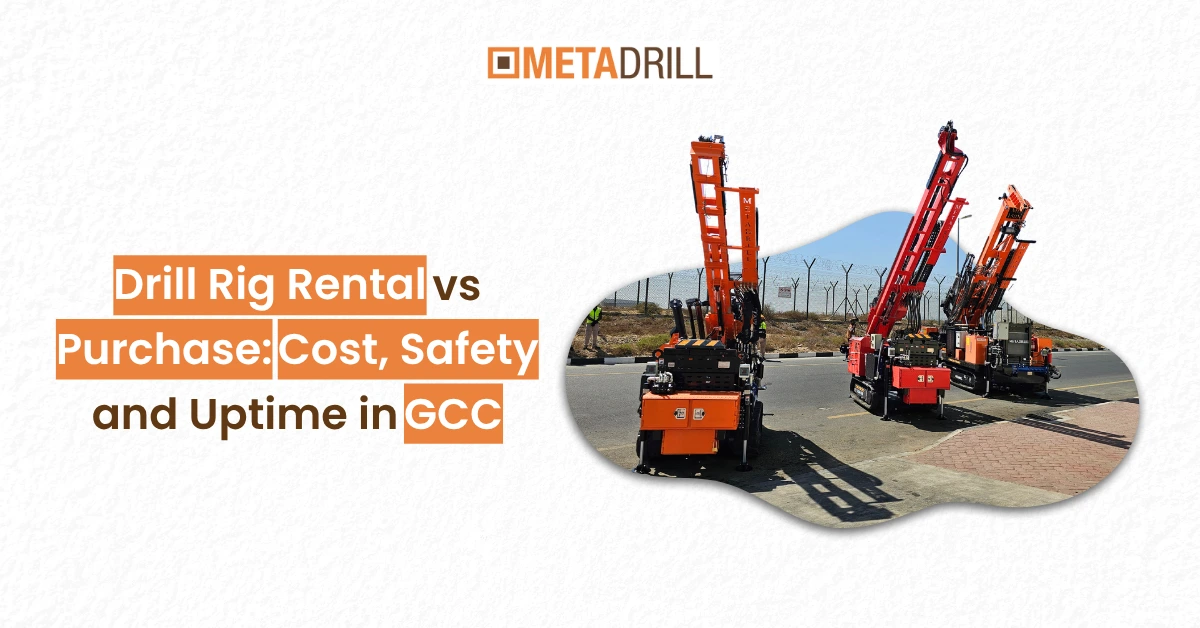
The geotechnical drilling market in the GCC is developing rapidly because of construction, infrastructure, and environmental projects. Companies usually have a dilemma: whether to rent a drill rig or purchase it. Both options have their advantages and disadvantages. Here, we’ll look at the main differences and help businesses make the right choice.
According to industry research on geotechnical drilling, demand for flexible, cost-efficient drilling options is increasing across the UAE. Here’s how:
Rental vs Purchase
A drill rig rental allows companies to rent a geotechnical drill rig without the commitment of ownership. Rental services include maintenance, delivery, and operator training, which is great for temporary projects.
Buying a geotechnical drill rig means you own it, either from MetaDrill or other trusted rig manufacturers. Ownership lets you manage it fully but includes higher upfront costs, maintenance responsibilities, and storage requirements.
Pros of Drill Rig Rental
1. Lower Upfront Cost
Renting a geotechnical drill rig lets you start without spending a lot at once. Companies can use their budget toward other operational expenses or hire more skilled workers.
2. Access to Modern Equipment
Rental services like MetaDrill ’s rig rentals often provide the latest drilling rig tools and equipment, offering the most advanced technology and the latest updates.
3. Flexible Project Support
Whether it’s a water well drilling rig rental or a compact drill rig for small spaces, rentals let companies pick the right rig for each project without owning it.
4. Maintenance Included
Most rental services come with maintenance, which reduces delays and reduces the workload for your team. This ensures your geotechnical drilling rigs for sale are always in good condition.
5. Test Before Purchase
Renting a rig lets companies evaluate performance, safety, and suitability before buying a drill rig for the long term.
Cons of Drill Rig Rental
1. Higher Long-Term Cost
If your projects are continuous, rental fees can accumulate and become higher than the cost of buying.
2. Availability Issues
Busy periods can make it tough to get the right model, especially special rigs like the MD600N for sale or compact drilling rigs.
3. Limited Customization
Rented rigs are uniform. Companies that need special drill rig tools or setups might find rentals too limited.
Pros of Purchasing a Drill Rig
1. Long-Term Cost Efficiency
Owning a rig becomes cost-effective if your company works on projects all the time. Buying a geotechnical drill rig one time can save you rental fees again and again.
2. Full Control
With ownership, you can customize equipment and schedule maintenance as per your project plan. Companies looking for drill rigs for small spaces or exploration drill rigs might face rental shortages.
3. Longer Running Time
No need to wait for availability means your operations continue without interruptions, which is crucial for multi-site projects.
4. Asset Value
A well-maintained rig keeps its resale value and is often in demand among companies.
Cons of Purchasing a Drill Rig
1. High Initial Investment
Purchasing a water well drilling rig involves a huge cost, including delivery, setup, and training.
2. Maintenance Responsibility
Owning a rig means regular maintenance, repairs, and safety checks to keep it running.
3. Storage and Transport
Large rigs, like cable tool drilling rigs for sale, require secure storage and transportation between sites, which can be hard to manage.
Applications and Considerations
For short-term projects and for areas with limited storage, drill rig rental is often the most cost-efficient option. On the other hand, companies engaged in ongoing projects save money by buying rigs.
In addition to this, safety matters the most. Renting from MetaDrill geotechnical drilling ensures safety standards and well-maintained equipment, while ownership requires a team to maintain operational safety.
Where to Get Drill Rigs in GCC
Now you have a choice of two options: rent from a reliable supplier or take MetaDrill which offers you both options – from portable rigs to geotech drill rigs for sale, complete with service assistance, spare parts, and warranty protection.
Conclusion
Renting or buying a drill rig is a decision that relies on the size of your project, budget, and future plans. Rentals offer flexibility, lower initial expenses, and maintenance assistance. Conversely, owning ownership and long-run cost savings. Based on your project requirements, safety, and affordability, your firm can pick up the appropriate geotechnical drilling success strategy for the GCC.
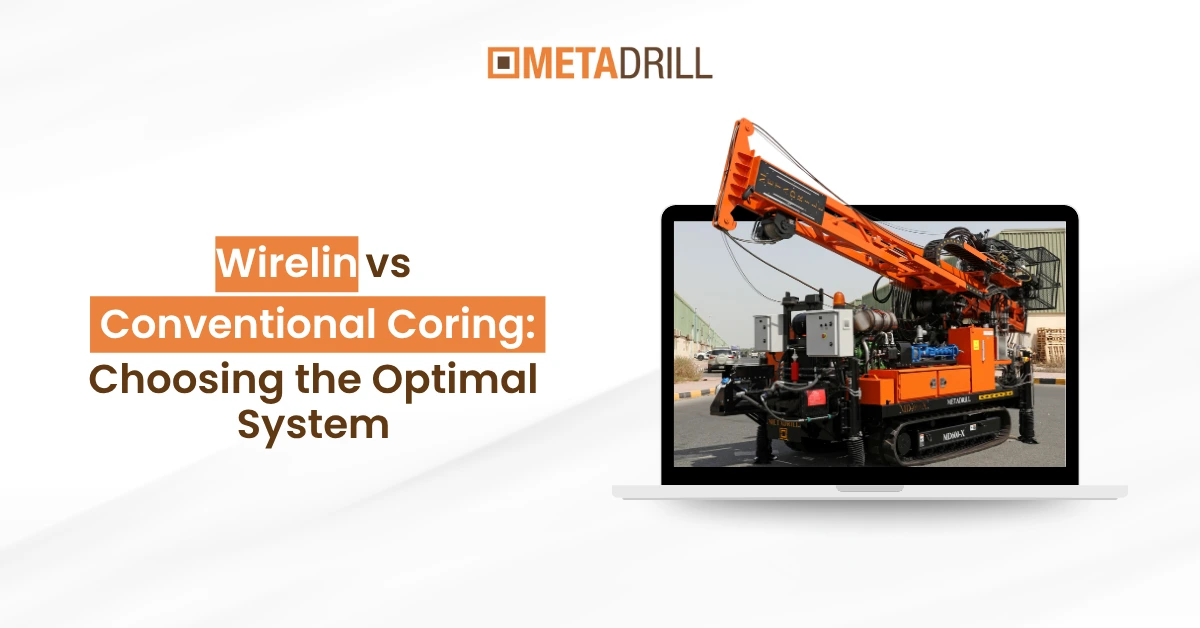
In geotechnical drilling, the right coring method and right drilling can determine a project's success. MetaDrill says picking the right drilling rig is crucial for success. Choosing wireline or conventional coring depends on efficiency, cost, and safety.
As per industry reports on geotechnical drilling 65% of deep geotechnical projects now use wireline coring because it is fast and requires less labor. However, conventional coring is still important when you need the best sample, particularly in shallow and moderate depths. While both methods give good core samples for studying rock, planning foundations, or exploring minerals, the way they work is different.
Engineers and geotechnical consultants must know these differences because incorrect coring decisions can increase project time by 20–30% and incur additional costs.
In Virginia, drilling studies can go up to 500 meters, and the choice of coring system directly affects project outcomes. Companies with advanced drill rigs now work faster and get better samples. Ultimately, knowing the benefits and limits of each coring system helps managers make better and cost-effective choices.
Conventional Coring: Reliable but Slower
Conventional coring has been the main method in geotechnical drilling for years. It works by turning a long drill pipe to take rock or soil samples. This coring is good when the sample must stay intact because it protects the sample. Studies show that conventional coring can recover up to 98% of the core in hard rock, making it ideal for studying soil, rock, and foundations.
However, conventional coring can take a lot of work. Each time a sample is collected, the whole drill pipe often has to be pulled out of the hole. This can delay the project. For big projects, each sample may take extra hours, especially when drilling deeper than 200 meters. Despite these problems, conventional coring is still widely used by companies that value sample quality over speed.
Wireline Coring: Faster and Safer
Wireline coring has changed geotechnical drilling because it allows core samples to be taken without pulling out the whole drill pipe. This method uses a special inner tube and wireline system. It is much faster than conventional coring. According to Geotechnical Engineering journal, wireline coring can save 40–50% of the time it usually takes to pull the drill pipe, which reduces costs and speeds up deep drilling projects.
Wireline coring is very helpful for deep projects. For example, in Virginia, spud barge drilling can go over 300 meters. Wireline coring is faster and easier on all machines, including small ones. It also improves safety and reduces the risk of accidents at the site.
Factors to Think About When Choosing a Coring Method
Picking the right coring system depends on:
Depth of Drilling: Shallow projects may still use conventional coring, while deep projects use wireline.
Project Budget: Wireline machines can cost more initially, but they often save money in the long run.
Core Quality: Both methods give good samples, but conventional coring keeps the sample complete.
Safety and Workload: Wireline coring reduces work and the risk of heavy drill pipes.
Equipment Availability: Having the right drill machines, for sale or rent, helps us finish the project on time.
By thinking about these points, managers can avoid delays and get the correct data for design and analysis.
The Role of Modern Geotechnical Drilling Equipment
Modern drill rigs are very important for good coring work. Companies like MetaDrill provide rigs that work for both conventional and wireline coring. These rigs come with reliable tools and can handle different types of soil and rock.
There are small compact rigs for tight spaces and bigger rigs for large projects. Modern rigs make drilling faster while keeping the sample quality high.
Companies also offer rigs for rent or sell used geotechnical rigs. This allows smaller projects to get good drilling machines without spending too much money. With the right rig, projects get better sample recovery, less downtime, and safer work conditions.
You can also check: Rig Health in Real Time: The Sensors, You Didn’t Know You Needed
Conclusion
Picking Wireline or Conventional Coring depends on the project, its depth, and budget. Use conventional coring for shallow projects, and wireline for faster and safer drilling.
MetaDrill provides modern rigs and reliable geotechnical drilling services. Their machines help collect accurate samples and complete projects efficiently. Working with a trusted drilling company saves time, reduces costs, and gives accurate subsurface data for projects.
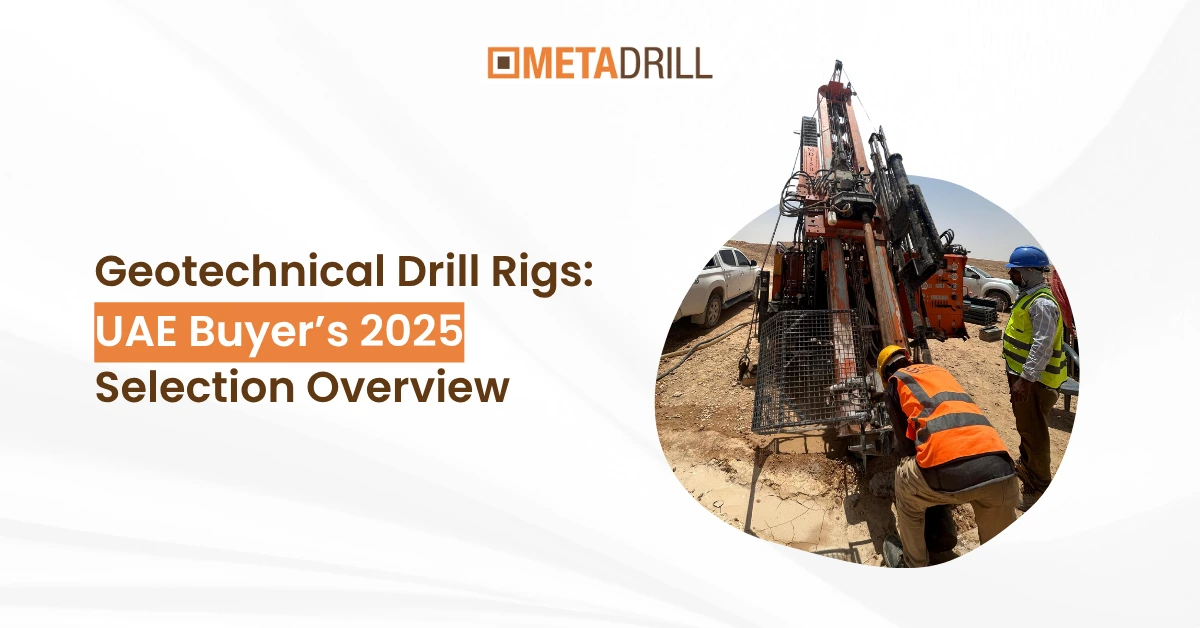
The growth in construction in the United Arab Emirates continues to grow and will not slow down until 2025, regardless of whether they're ports or new highways. Before they can start these projects, engineers must know the factors that drive growth. This is where geotechnical drill rigs are used. They are powerful machines that inspect soil and rock to ensure every project's foundation is strong.
The global geotechnical drilling equipment industry achieved about USD 1.4 billion in 2024. The sector is expected to increase by more than 6 percent annually until 2030. In the United Arab Emirates, the growth is due to new buildings in the cities of Dubai, Abu Dhabi, and Sharjah. As new projects begin on various lands, Geotechnical drilling equipment has increased in strength than it has ever before.
So, in this situation, choosing the right rig can make a major difference. This 2025 overview by MetaDrill will guide you through smart buying strategies, including used geotechnical drill rigs for sale in the UAE.
Top Manufacturers to Trust in 2025
The first step is to find dependable geotechnical drilling rig manufacturers. The best rigs are built by companies that build good machines and give good service. Top brands across the world, such as Geoprobe, Simco, TMG Manufacturing, Mobile Drill, and Diedrich, lead the market for their strong performance and durability.
Many of these brands work with local sellers in the UAE who offer equipment sales and technical support. So when you buy, you get good service and fast access to spare parts. MetaDrill says you should choose a reliable company with:
A history of good work in the UAE and GCC soil conditions.
Fast access to parts and repair services.
Strong, clear warranty and training programs for operators.
The right partner can help you avoid work delays and help your drilling run without problems in the UAE’s challenging climate.
Types of Geotechnical Drill Rigs for UAE Projects
UAE’s changing land condition requires more accurate drilling. Here are the main types of geotechnical drill rigs used in 2025:
Truck-Mounted Rigs: Works well for projects that need to work at multiple sites
Crawler-Mounted Rigs: Help the rig stay strong on rough or soft surfaces.
Trailer-Mounted Rigs: Good for small to medium projects.
Core and Rotary Rigs: Perfect for deep foundation and testing rock samples.
Today, rigs now use hydraulic systems, digital controls, and safety automation. These changes make work more accurate and keep operators less tired. They can also lower fuel use by up to 20% – two key things for 2025 UAE builders.
New vs Used: Which Option Fits Well?
When looking at geotechnical drilling rigs for sale, UAE buyers can pick new or used equipment. Each option has its own benefits depending on your budget and project needs.
Buying New:
New rigs have the latest features, such as full warranty coverage and long-term reliability. They are best for big construction firms that require continuous use.
Buying Used:
Many small and medium drilling companies choose used geotechnical drill rigs for sale because they can cost 40% less than new rigs. Used rigs in good condition can still perform well if inspected properly.
Before getting a used rig, check its service history and hydraulic systems. Working with a good dealer makes sure you get a rig you can trust.
MetaDrill Buyer Tips for 2025
With years of industry experience, MetaDrill offers these key tips for UAE buyers:
Match the rig to your project depth and soil type: Don’t pay for more power that you won’t need.
Choose the right mobility setup: Truck rigs are easy to transport. While crawler rigs work better on rough ground.
Prioritize after-sales support: In the UAE, good service can make a big difference.
Look for fuel-efficient rigs: New rigs can help reduce your expenses by 15%.
Go digital. Rigs that collect drilling data automatically offer higher accuracy and safer operation.
A smart purchase is one that balances cost, performance, and service.
The Rise of Geotechnical Drilling Companies in the UAE
During the last five years, drilling companies in the UAE have increased by nearly 25%. These are very important for soil testing, sampling, and foundation design for big projects.
Many of them are now buying their own to take on more projects and offer faster results. Due to new construction rules, the demand for professional drilling services won’t stop.
Partnering with a skilled geotechnical drilling company ensures you get good data, quicker permits, and follow UAE building rules. This partnership can also help you reduce project costs.
Market Outlook: A Solid Decade Ahead
The UAE construction market is expanding, and the demand is for geotechnical drilling equipment. Analysts predict 30% growth in demand for regional services in 2030. The reason is the development of new roads as well as clean energy projects and smart urban plans.
As building methods go green, efficient rigs are becoming more popular. Investing in quality geotechnical drilling equipment helps your business stand against competitors. The UAE’s strong economy makes now the time to upgrade your rigs.
You can also check: Noise and Vibration Control: Making Drilling Possible in Crowded Areas
Conclusion
Every good project begins with a strong foundation and a reliable geotechnical drill rig. Choosing the right means safer foundations, quicker work, and more money.
So with the right help and equipment, UAE contractors can meet any challenge the future brings. As the UAE continues to grow, your drilling technology should keep up. With MetaDrill, you can achieve results that will last forever.
We know that proactive drilling maintenance keeps drilling rig equipment working well and reliable. Whether you run a single drill rig for exploration drilling or a group of exploration drill rigs, proper care stops problems before they happen and keeps machines performing. When you look at drill rigs for sale or compare drill rig manufacturers, choosing the right machine is just the start—taking care of it keeps it valuable for a long time.
Why Do We Advocate Preventive Maintenance?
At MetaDrill, we have seen what happens when companies ignore preventive care. A breakdown does more than slow work—it stops it, costs more money, and can put workers at risk. That is why we tell our partners to focus on proactive drilling maintenance.
Good maintenance helps drilling rig equipment last longer, reduces downtime, and keeps work running smoothly. A well-kept drill rig uses less fuel, works better, and is safer. For us, maintenance is not just about protecting machines—it is about protecting your business.
What Happens Without Maintenance?
We have helped many clients who had big problems because their rigs were not cared for. Things like hydraulic leaks, engines that overheat, or broken pumps happen when exploration drilling rigs are not maintained. Sometimes, companies even had to replace whole exploration drill rigs sooner than planned.
Problems are not just about money. Safety is important at MetaDrill. Loose parts, cracked masts, or broken rotary systems can cause accidents. That is why we say proactive drilling maintenance is important—not optional.
Our Focus Areas in Preventive Maintenance
Over the years, we have found the most major areas to take care of on a drill rig:
1. Engines and Power Systems
Engines are the most important part of any drilling rig equipment. At MetaDrill, we tell clients to check oil, fuel filters, and cooling systems regularly to avoid breakdowns.
2. Hydraulic Systems
Most exploration drill rigs use hydraulics to work well. Checking hoses, fluid levels, and filters keeps machines from breaking and costs too much to fix.
3. Structural Integrity
The mast, beams, and frame of a drill rig must stay strong. We train operators to look for cracks, rust, or loose bolts that could make exploration drilling unsafe.
4. Electrical Systems
Modern rigs use advanced electronics. Our proactive drilling maintenance includes checking sensors, wires, and batteries to prevent sudden problems.
5. Drill Bits and Wear Parts
We remind clients to change worn drill bits on time. This saves money, protects other drilling rig equipment, and keeps drilling running smoothly.
How Our Clients Benefit?
Clients who follow our preventive plans get many benefits:
Longer life for exploration drill rigs
Lower costs compared to emergency repairs
Safer work during exploration drilling
Better performance from every drill rig
Higher value when selling drill rigs for sale
At MetaDrill, we measure success by how safely and efficiently our clients’ rigs work.
How We Guide Maintenance Programs
When clients work with us, we help them make maintenance programs:
Maintenance Scheduling – We follow advice from top drill rig manufacturers and make easy schedules.
Daily Inspections – We give checklists to check oil, filters, and safety points every day.
Operator Training – Operators learn to spot small problems and support proactive drilling maintenance.
Record Keeping – We keep track of repairs to plan future maintenance.
Quality Parts – We recommend genuine parts from trusted drill rig manufacturers to keep equipment safe.
Smart Maintenance with Technology
At MetaDrill, we use recent technology to help with maintenance. Sensors track temperature, vibration, and pressure in real time. This shows problems before they cause downtime.
For companies with many exploration drill rigs, we suggest digital tools that send reminders for services. Technology makes proactive drilling maintenance easier and more accurate.
Choosing the Right Rig with Maintenance in Mind
When clients ask about drill rigs for sale, we guide them to machines that are strong and easy to maintain. Some rigs let you reach parts quickly, saving time on service. Leading drill rig manufacturers, like MetaDrill, build rigs with monitoring systems to make maintenance easier.
Our clients trust us because we provide durable drilling rig equipment and show them how to care for it.
Maintenance in Extreme Conditions
Many clients work in tough places like deserts, offshore sites, or mountains. These areas are hard on drilling rig equipment. At MetaDrill, we help clients adjust proactive drilling maintenance to fit these conditions.
For example, in sandy deserts, air filters may need daily cleaning. In humid places, hydraulic hoses need more care. We give advice to protect exploration drill rigs from environmental damage.
The Real Cost of Ignoring Maintenance
Some companies skip maintenance to save money—but this usually causes bigger costs later. Ignoring proactive drilling maintenance leads to expensive repairs, lost drilling days, and early replacement of rigs.
We have seen drill rig fleets lose half their life because of poor care. Some rigs that could last ten years needed replacing in five. This means unplanned buying of new drill rigs for sale, which adds financial pressure.
You can also check: How Smart Sensors Are Turning Rigs into Real-Time Data Hubs
Final Thoughts
At MetaDrill, we see proactive drilling maintenance as an investment, not an expense. It prevents problems, saves money, and makes every drill rig last longer. From engines and hydraulics to sensors and drill bits, every part of your rig needs attention.
For companies doing exploration drilling, preventive maintenance makes work safer, drilling rig equipment lasts longer, and costs lower. When clients look at drill rigs for sale or compare drill rig manufacturers, we remind them that buying the right rig is just the first step—taking care of it properly protects its future.
MetaDrill is dedicated to guiding clients at every step. With the right maintenance, your rigs will perform better and keep giving results for many years.

Drilling safety regulations are changing geotechnical drilling by making work safer and more effective. With modern drilling rig tools and equipment, MetaDrill helps companies follow these new rules while still reaching strong results. From crowded city sites to big exploration projects, safety is now the top priority in every drilling job.
These rules explain how workers should use drilling tools and how rigs should be serviced. Following drilling safety regulations lowers accidents, protects workers, and keeps projects on time.
Why Do Drilling Safety Regulations Matter?
Drilling safety regulations are designed to protect both people and machines. Geotechnical drilling uses heavy rigs, high pressure, and detailed work. Mistakes in this process can be very risky. The right drilling rig equipment makes it easier to stay safe.
New safety features such as automatic shutoffs, overload sensors, and real-time monitoring can stop accidents before they happen. MetaDrill goes beyond just following rules. They use advanced drilling tools and train workers. This lowers risks and improves results. For companies searching for a Geotech drill rig for sale, this means rigs that are both safe and high performing.
How MetaDrill Implements Safety?
MetaDrill builds rigs with drilling rig tools and equipment made to meet strict safety standards. Every rig includes emergency stop systems, automatic pressure monitoring, and stronger designs. These features match the newest drilling safety regulations, so operators can focus on drilling with less worry about danger.
Training is just as important as equipment. We give workers hands-on lessons to use drilling rig equipment safely. When operators know how to handle drilling tools properly, accidents are avoided and rigs last longer. By combining safe machines with skilled people, we set a high safety level in geotechnical drilling.
Benefits of Compliance
Following drilling safety regulations brings many benefits. First, it reduces injuries and cuts downtime. Second, it helps geotechnical drilling projects meet legal and industry standards. Third, caring for drilling tools and drilling rig equipment lowers repair costs and makes rigs work longer.
Our Geotech drill rigs for sale are built with these benefits in mind. The rigs are strong, safe, and already include the newest safety features. This makes them a smart investment for companies that want both safety and efficiency.
Innovations in Drilling Equipment
New rules have encouraged many changes in drilling rig tools and equipment. Today’s rigs come with designs that reduce worker strain, remote operation, vibration sensors, and overload controls. These make it easier to follow drilling safety regulations while still finishing work quickly.
MetaDrill updates its drilling tools often to keep up with new safety needs. From torque limit systems to automatic warning alerts, every upgrade helps operators work with more confidence. Companies using our rigs benefit from drilling rig equipment designed for safety as well as high performance.
Choosing the Right Geotech Drill Rig
Choosing the right Geotech drill rig for sale is key to safe and effective work. The best rigs have emergency shut-offs, real-time monitoring, and automatic stabilization. We offer rigs with all of these, helping companies follow drilling safety regulations while reaching their goals.
Good support from drill rig manufacturers is also important. We provide after-sales service, spare parts, and training to keep rigs safe and compliant for years. This dedicated support makes MetaDrill different from other providers.
Training and Operational Practices
Having the right rigs is not enough. Skilled workers are needed to follow drilling safety regulations correctly. We train operators to use drilling tools and drilling rig equipment the right way. Training includes emergency steps, regular checks, and proper maintenance. These steps lower risks and keep machines working well.
Safety drills and inspections are part of MetaDrill’s approach. These habits build a culture of safety at the site. Projects finish on time, workers feel safe, and rigs last much longer.
The Future of Safe Geotechnical Drilling
Drilling safety regulations will keep changing in the future. This will push companies to use even more advanced drilling rig tools and equipment. Features like predictive maintenance, remote monitoring, and more automation will become common. MetaDrill invests in research to make sure its rigs are ready for these changes.
Companies that use these innovations will work more safely and faster. With the right Geotech drill rig for sale, including built-in safety features, businesses can follow the rules, lower risks, and improve productivity.
You can also check: Drilling Fluids 2.0: Boosting Borehole Stability with Next-Gen Chemistry
Final Thoughts
Stricter drilling safety regulations are reshaping the way geotechnical drilling is done. MetaDrill is leading this change by offering safe and advanced drilling rig equipment and drilling tools. Their Geotech drill rigs for sale combine compliance, reliability, and impressive performance, helping companies avoid accidents and work more efficiently.
Buying from trusted drill rig manufacturers like MetaDrill is not only about following the law. It also protects workers, keeps projects safe, and improves results. With safety now at the center, geotechnical drilling has become more secure and dependable than ever before.
Operator skill development is the key to safe and productive drilling. Whether using a geotechnical drill in cities or working on large exploration sites, trained operators make the biggest difference. We believe investing in people is just as important as investing in modern drilling rig equipment. That is why we have created special training programs in the Middle East to improve industry standards and give operators more confidence.
Why Operator Training Matters Today?
The drilling industry is changing quickly with new rigs, smarter machines, and stricter safety rules. Without training, operators may not use advanced rigs properly. This can waste time, raise costs, and even cause accidents. Operator skill development helps every operator use modern rigs, solve problems fast, and deliver accurate results.
For companies working with a Geotech drill rig in cities or exploration drill rigs in remote areas, skilled operators reduce downtime and improve performance. Training has become a smart business choice, not just an option.
MetaDrill’s Commitment to Operator Skill Development
We do more than design and supply strong drill rigs. We make sure the people using them are ready. Our training programs focus on three primary areas:
Hands-on learning with real rigs in safe conditions.
Safety-first training that follows international rules.
Regular updates match modern technology and standards.
We mix classroom knowledge with real practice. This way, operators learn not only how to drill but also why each step is important.
Training Programs Designed for the Middle East
The Middle East has unique drilling challenges. From busy city areas to desert sites, each project needs flexibility and skill. Our training programs are built to match these conditions, focusing on operator skill development in real situations.
Urban Projects: Operators learn how to use compact Geotech drill rigs in small spaces with less noise and less disruption.
Exploration Sites: Teams working with exploration drill rigs learn mobility, borehole safety, and advanced drilling methods.
Cross-Border Projects: Operators learn how to follow different safety laws and international standards.
The Role of Technology in Training
Modern drill rig manufacturers are making machines that are smarter and more automated. This means operators need new skills. MetaDrill training uses technology such as:
Simulators for safe practice without risks.
Remote monitoring tools to show operators how to track rig performance.
Data tools to help identify and fix problems quickly.
With these tools, operator skill development becomes easier, more interesting, and better suited to modern work.
Safety at the Core of Every Session
Drilling is dangerous if operators are not trained well. Safety is the most important part of our training. We focus on:
How to start and stop rigs safely.
Using drilling rig equipment in different ground conditions.
Emergency actions and preventing accidents.
Trained operators protect themselves and their teams. They also make projects more reliable. This focus on safety also helps companies that invest in new drill rigs for sale lower their risks.
Benefits for Companies and Operators
Our training programs bring great benefits for both businesses and operators.
For Companies
Better results from rigs and faster return on investment.
Lower repair and service costs due to correct use.
Stronger company image for safety and quality.
For Operators
Career growth with certified training.
Confidence in using geotechnical drill rigs.
More job security in a competitive market.
By combining strong rigs with focused operator skill development, we deliver long-term value.
Real-World Success Stories
Across the Middle East, we have seen the clear results of training. Operators who once struggled now run Geotech drill rigs with ease. Exploration teams report fewer breakdowns thanks to better knowledge of drilling rig equipment.
In one UAE project, drilling speed improved by 30% after operators joined our advanced training program. This shows how skilled operators can turn good rigs into excellent performance.
Continuous Learning for a Growing Industry
The drilling industry never stops moving. Every year, new exploration drill rigs arrive, rules change, and technology advances. We keep its training programs updated so operators can stay ahead.
Our idea of operator skill development is not just one certificate. It is about building a habit of constant learning. Whether you are new or experienced, there is always more to learn.
Why Choose MetaDrill for Training?
As one of the top drill rig manufacturers in the region, we know rigs inside and out. This makes our training special—we teach operators how to use rigs and explain how they are designed and why each feature matters.
When companies choose MetaDrill, they do not just get rigs. They also get:
Customized rigs.
Field support.
Long-term training for operators.
This full support ensures every drill rig performs its best.
The Future of Operator Development in the Middle East
The Middle East is growing fast in construction, energy, and resource exploration. This creates high demand for operators who can manage complex rigs responsibly. Companies that invest in operator skill development now will enjoy safer, faster, and more successful projects.
MetaDrill is proud to lead this growth by offering training that combines safety, technology, and practice. Together, we are not only building better rigs—we are building better operators.
You can also check: Electrified Rigs: Reducing Carbon Footprints While Increasing Output
Final Thoughts
Operator skill development is more than training. It is an investment in people, safety, and performance. With programs designed for the Middle East, MetaDrill helps operators master geotechnical drills, exploration drill rigs, and all kinds of drilling rig equipment.
As trusted drill rig manufacturers, we know the future of drilling belongs to skilled operators who can balance human knowledge with modern machines. That is why our work goes beyond supplying rigs—we are committed to empowering the people who run them.
High-risk drilling safety is always our focus when we work near power lines, underground utilities, or other hidden risks. Whether you are using a Geotech drill rig for sale or advanced drilling rig tools and equipment, it is important to follow safety rules. Every drilling site has its own risks, and our job is to make sure that superior performance never comes at the cost of protection.
Why Is High-Risk Drilling Safety Essential?
Urban and industrial areas are full of hidden dangers. Many geotechnical drilling sites have water pipelines, gas pipes, or electrical cables under the ground. Overhead, high-voltage power lines add another danger. Without safe drilling rig equipment and the right safety steps, accidents can cause injuries, damage, and costly delays.
As one of the reliable drill rig manufacturers, we give our clients machines and drilling tools that are built with safety in mind. Projects need to move fast, but safety is what keeps everything successful overall.
Identifying Hazards Before Drilling
Every safety project starts with finding dangers. For strong high-risk drilling safety, operators must look for hazards before starting. Utility surveys using modern maps and ground-penetrating radar can help locate underground pipelines and cables. Depending only on old records is not safe.
In today’s geotechnical drilling, technology gives better results. This is why we advise contractors to use digital scanning together with official records, so the risks are reduced.
Staying Safe Near Electrical Wires
Overhead wires are some of the most dangerous risks at any drilling site. Direct contact with power lines can cause death and big blackouts. To improve high-risk drilling safety, operators should:
Keep a distance between rigs and overhead wires.
Use spotters to guide rigs under or close to wires.
Follow clearance rules that change based on voltage levels.
Keeping drilling rig tools and equipment away from electrical hazards is not good practice—it is the law and the best way to protect lives.
Protecting Underground Utilities
Underground utilities are as dangerous as overhead wires. Hitting a gas line during geotechnical drilling can cause explosions, while damaging a water line may flood the site and stop work.
Good high-risk drilling safety means:
Using locator devices before drilling.
Marking utility lines clearly.
Drilling slowly and carefully near danger zones.
Modern drilling rig equipment includes systems that let operators control drilling depth and angle. These features help prevent damage to underground infrastructure.
Skilled Operators, Safer Projects
Even the best drilling rig tools and equipment cannot replace skilled people. Trained operators are the key to high-risk drilling safety.
They must know how to:
Use emergency shut-off systems.
Handle electrical and hydraulic parts safely.
Adjust their work when drilling near hazards.
To make sure every Geotech drill rig for sale is used safely, our training programs give operators the right skills for better performance.
Choosing the Right Rig and Tools
Each project is different, and choosing the right rig is important. Small rigs are best for city sites, while big exploration projects need heavy machines.
Good drill rig manufacturers know that safety and performance go together. Strong drilling tools and reliable drilling rig equipment reduce accidents, save money, and avoid downtime.
Our rigs are made to meet safety rules around the world, giving contractors both protection and efficiency.
Being Prepared for Emergencies
Planning is not enough on its own. Emergencies can still happen. A big part of high-risk drilling safety is being ready for them. Drilling teams must have:
Emergency training for workers.
Communication systems are always ready.
Clear evacuation plans.
These steps keep workers safe and reduce risks if something goes wrong.
Safety Through Innovation
Technology is making high-risk drilling safety better. New systems give operators real-time data, detect underground hazards, and even stop rigs automatically when danger is closed.
Some examples of these innovations are:
Smart sensors in drilling rig equipment.
Automatic shut-off systems in drilling tools.
GPS maps to find underground utilities.
These are not just new features—they are the future of geotechnical drilling safety.
Setting Standards in Safety
Top drill rig manufacturers are raising safety standards every year. Today’s rigs come with strong guards, emergency stop buttons, and insulated parts that protect against electricity.
We make sure that every Geotech drill rig for sale is built with safety at its core. By combining strength, precision, and protection, our rigs help projects succeed with lower risk and higher performance.
Building a Safety-First Culture
Machines are important, but people create a true culture of safety. Companies that succeed in high-risk drilling safety make safety part of everyday work.
This means:
Asking workers to report hazards.
Rewarding safe actions.
Updating safety rules regularly.
When safety becomes normal practice, projects are not only safer but also more productive.
You can also check: First Drill Rig from the Middle East in the US
Final Thoughts
High-risk drilling safety is the base of every successful project. Staying clear of wires, protecting underground utilities, training workers, and using the right rigs all help reduce risks.
By working with trusted drill rig manufacturers, contractors can depend on quality drilling rig tools and equipment, modern drilling tools, and advanced drilling rig equipment that keep people safe.
MetaDrill continues to improve safety in geotechnical drilling, offering rigs and solutions that make every project both safe and efficient.
Today, eco-friendly drilling manufacturing is the new normal. Companies now want drilling rig tools and equipment that are green and safe for nature. We make strong rigs that lower the harm of geotechnical drilling. If you need a Geotech drill rig for sale or accessories, we make sure every product is sustainable.
Why Sustainability Matters in Drilling?
In the past, drilling used too much fuel, produced pollution, and created waste. Now, companies and drill rig manufacturers use greener methods. Eco-friendly drilling manufacturing saves energy, cuts waste and builds trust with clients and regulators.
It also saves money. A good rig uses less fuel, lasts longer, and breaks less. This means owners spend less and protect nature at the same time. For those who depend on geotechnical drilling, both performance and sustainability are important.
Modern Approaches to Eco-Friendly Rig Design
We start with design. Our rigs have lighter frames, fuel-saving engines, and smart hydraulic systems. These updates lower emissions and make rigs easier to move. When drilling rig equipment is efficient, it works better and is safer for the environment.
Examples of design updates:
Hybrid or fuel-saving engines
Recyclable materials to reduce waste
Small rigs that disturb less land
With these changes, eco-friendly drilling manufacturing is creating the rigs of the future.
Sustainable Production in Rig Manufacturing
Making rigs takes a lot of energy, but greener production is possible. Welding, assembly, and material sourcing now create fewer emissions. MetaDrill works with suppliers who share green values.
We use steel that is strong but light. This reduces raw material and makes rigs last longer. Cleaner parts for drilling tools and other equipment also protect nature and improve performance.
Energy Efficiency in Operations
How a rig is used matters as much as how it is built. Old rigs waste fuel, but modern rigs save it. With smart drilling rig tools and equipment, operators can reduce idle time and use less fuel.
Features like digital controls and telematics help managers track fuel in real time. This saves money and meets green rules. For anyone looking for a Geotech drill rig for sale, fuel-saving features are now a top need.
Waste Reduction in Geotechnical Drilling
Waste is a big issue in geotechnical drilling. Soil, rock, and fluids must be handled safely. New rigs prevent spills and recycle fluids.
We support water-based drilling fluids instead of oil-based ones. They break down faster and are safer for nature. With modern drilling tools, drilling becomes cleaner and safer.
Recycling and Reuse of Rig Components
Sustainability does not stop when rigs are old. Many drill rig manufacturers recycle rigs and spare parts. Steel frames, engines, and hydraulics can be reused or fixed.
This reduces waste and cuts the need for new raw materials. For companies with many rigs, recycling programs are smart and eco-friendly.
Training and Awareness for Operators
Even the best rigs need trained operators to stay green. Training teaches how to use rigs well, care for drilling rig tools and equipment, and reduce waste.
At MetaDrill, we support training in saving fuel, safe fluid use, and tool care. Skilled teams protect the planet, work safely, and finish jobs faster.
Digital Technology and Smart Rigs
Technology makes eco-friendly drilling manufacturing better. Tools like sensors, automation, and AI help rigs use less fuel. Predictive maintenance fixes parts before they break, saving time and reducing waste.
Remote monitoring lets teams check rigs without extra travel. With smart tech and modern drilling rig equipment, companies save money and protect nature.
The Role of Drill Rig Manufacturers in a Green Future
Drill rig manufacturers have a crucial role in protecting the planet. They create rigs with clean energy, smart designs, and recycling options. We build rigs that are strong, modern, and safe for nature.
If you buy a Geotech drill rig for sale from a green company, you are not only getting a rig—you are also helping the environment. Every eco-friendly rig is a step toward a cleaner world.
Why Choose MetaDrill for Eco-Friendly Rigs?
MetaDrill is trusted in geotechnical drilling. We make rigs that work well and save the planet. Our drilling rig equipment is designed for long use, low fuel, and less waste.
We also guide clients to use drilling tools and rigs in a green way. With MetaDrill, companies get strong results and protect nature at the same time.
You can also check: Bespoke Tools for Niche Projects: The New Era of Drill Customization
Final Thoughts
The future of drilling is green. With eco-friendly drilling manufacturing, companies save money, reduce waste, and meet new rules. Smart drilling rig tools and equipment, and recycling make drilling cleaner.
At MetaDrill, we do not just sell rigs—we help build a safe and green future. Whether you need drilling tools or a Geotech drill rig for sale, we give you strong rigs with full care for the planet.
Borehole support systems are important for safe drilling. Whether you use a geotechnical drill for soil testing or large exploration rigs for deep projects, keeping the borehole stable is the key to success. Thanks to modern drill rig manufacturers, drillers today have smarter ways to keep boreholes safe and working well.
Why Borehole Stability Matters?
A borehole is not just a hole in the ground—it is the main path for your project. If the borehole collapses or fails, everything is at risk: safety, accuracy, and progress. Borehole support systems help hold the walls of the hole, stop soil from falling, and prevent tools from getting stuck.
This is important when using an exploration drill rig in difficult or changing ground. Drilling is expensive, and every meter counts. If a borehole collapses, time and money are lost. This is why every driller needs to know simple hacks to keep boreholes stable.
Hack #1: Choose the Right Casing for the Job
Casing is one of the easiest and strongest ways to stabilize a borehole. The right casing keeps the hole from falling in and protects the walls from pressure changes. When used with good drilling rig equipment, casing makes drilling smoother and safer.
Modern Geotech drill rigs make it easier to install casing even in small or complex areas. Instead of doing heavy manual work, drillers can use rigs that handle casing with speed and accuracy. This saves time and reduces operator fatigue.
Hack #2: Use Drilling Fluids Smartly
Drilling fluids are important for borehole stability. They balance pressure, carry cuttings to the surface, and make the walls of the borehole stronger. But the trick is not to use more fluid—it’s to use the right fluid in the right way.
With new drilling rig equipment, drillers can check fluid flow and thickness in real time. For sandy soil, a thicker fluid is best. For rocky ground, lighter fluid is better. When drilling fluids are used with borehole support systems, drillers get maximum control and stability.
Hack #3: Don’t Underestimate Grouting
Grouting is another strong way to stabilize boreholes. By filling weak areas with cement or polymer grout, drillers can lock loose zones in place. This is especially helpful when using an exploration drill rig in broken rock where collapse is more likely.
Modern grouting machines used with drill rigs work faster and give better results. Grouting provides both support and safety in drilling projects where accuracy is critical.
Hack #4: Match Support Systems with Soil Conditions
Not every type of ground is the same. A borehole in clay will behave differently from one in sand or rock. Using the same method everywhere can cause collapse. That is why smart drillers adjust borehole support systems based on the type of soil.
Examples:
Clay-rich soils: Casing plus light fluids often work well.
Sandy soils: Thicker fluids give better wall support.
Rocky formations: Grouting is usually the best option.
Today’s geotechnical drill rigs allow drillers to test soil quickly and change methods right at the site.
Hack #5: Keep Your Rig in Top Shape
Even the best borehole support systems cannot work if your rig is not in good condition. Regular maintenance of drilling rig equipment keeps projects smooth and avoids breakdowns.
Now, many drill rig manufacturers make rigs with built-in systems that show early warnings of problems. This helps operators repair parts before they fail. Keeping rigs healthy is as important as choosing the right support system.
Hack #6: Plan for Long-Term Borehole Integrity
Some boreholes need to stay open for weeks. In this case, short-term fixes like fluids are not enough. Long-term stability needs casing, liners, or stronger borehole support systems to keep the hole open.
This is critical in deep drilling with exploration drill rigs, where collapse risks are higher. Good planning avoids the cost and danger of re-drilling failed sections.
Hack #7: Invest in Training and Technology
Stabilization depends on both tools and people. Drillers must understand soil, fluids, and support systems to make the right choices on site.
Modern Geotech drill rigs also help by using smart technology. These rigs have automatic settings and safety alerts that make drilling easier and safer. When technology and skilled operators work together, boreholes stay stable.
The Future of Borehole Support Systems
The future of borehole support systems is smarter and greener. Eco-friendly fluids, recyclable casing, and rigs powered by AI are already being developed. These reduce environmental damage and improve efficiency at the same time.
Top drill rig manufacturers like MetaDrill are leading the way with rigs and drilling rig equipment that already include support features. This makes stability part of the rig itself, not just an extra step.
You can also check: Turning Drilling Data into Gold: Insights from Core Samples
Final Thoughts
Borehole stability is the difference between success and failure in drilling. With smart borehole support systems, strong casing, good fluids, grouting, and well-kept rigs, drillers can protect boreholes and finish projects with confidence.
Whether you use a geotechnical drill for testing or large exploration drill rigs for deeper work, these hacks will help you stay safe, efficient, and reliable. By working with modern drill rig manufacturers and taking care of your drill rig, you can lead the drilling industry.
At MetaDrill, we believe strong knowledge and strong tools go together. That is why our drilling rig equipment is designed to deliver steady borehole performance every time. With the right support systems, you are not just drilling—you are building a safe foundation for success.
Predictive drilling monitoring is no longer something from the future—it is here now, and it is changing how companies do geotechnical drilling. In the past, contractors depended on routine checks and basic drilling rig tools and equipment to find problems. Today, with smart sensors, rigs can check their own health in real time and warn operators before issues happen.
Why Predictive Drilling Monitoring Matters?
The main idea of predictive drilling monitoring is simple: fix problems before they cause downtime. Instead of waiting for a part to break, sensors track things like vibration, heat, and pressure on important parts. With this data, operators can prevent breakdowns, improve performance, and make their drilling rig equipment last longer.
For companies buying a Geotech drill rig for sale, adding predictive monitoring gives more value and a longer working life. It changes rigs from normal machines into smart assets that work better and last longer.
The Technology Behind Rig Health Sensors
Modern predictive drilling monitoring uses tough IoT sensors placed on various parts of the rig. These sensors measure hydraulic flow, engine load, and drill string tension. If the data shows unusual patterns, predictive software alerts the operator before a small issue becomes a big, expensive problem.
This technology helps safety and improves drilling accuracy. With exact data, operators can adjust drilling tools in real time. This means less wasted effort and more reliable results from boreholes.
Benefits for Geotechnical Drilling Projects
Geotechnical drilling is often done in difficult and changing environments. From crowded cities to faraway exploration sites, every job has risks. Predictive drill monitoring gives operators a clear picture of rig health.
Less Downtime: Problems are found early, so breakdowns do not stop work.
Lower Costs: Repairs are done when needed, not by guesswork.
More Safety: Operators get warnings before dangerous situations happen.
Better Work Quality: Real-time data helps improve drilling accuracy.
Many drill rig manufacturers now add smart monitoring systems to their new rigs. Companies that use these systems gain an advantage in the market.
A Shift in Maintenance Strategy
In the past, there were only two ways to do maintenance: preventive (scheduled checks) or reactive (fixing after failure). Predictive drilling monitoring adds a new way—maintenance based on the real condition of the rig.
This is helpful for both drill rig manufacturers and contractors. Manufacturers can build rigs with sensors included, while contractors can get the most from the rigs they already own. This live connection between rig and operator builds trust in every project.
How Predictive Monitoring Improves ROI?
A Geotech drill rig for sale is a big investment. Owners want it to last for years. Predictive drilling monitoring protects that investment by reducing downtime and making parts last longer.
Think of a project delayed two weeks because of a broken hydraulic part. The cost of the delay is often more than the price of adding sensors. With predictive systems, operators save money and protect their good name—two important things in today’s competitive drilling industry.
Real-World Use Cases
Urban Sites: Small rigs with predictive sensors work safely in tight areas, reducing accidents.
Exploration Drilling: In remote areas, predictive alerts help teams prepare spare parts early, avoiding supply delays.
Heavy Projects: Large rigs face heavy loads; predictive monitoring keeps engines and drill strings working safely.
These examples show predictive drilling monitoring is not only for advanced rigs. It can be used with all levels of drilling rig tools and equipment.
Integration with Existing Drilling Tools
Contractors often ask: Can predictive monitoring be added to old rigs? The answer is yes. Many sensor systems can be fitted later. Whether upgrading old drilling tools or adding sensors to a new rig, the system can be adjusted to fit.
MetaDrill, as a trusted drill rig manufacturer, knows that clients cannot replace their whole fleet at once. That is why retrofit solutions are becoming popular and widely used.
The Future of Predictive Monitoring
Predictive drilling monitoring will keep getting better. Sensors will become smaller, smarter, and use less power. Artificial intelligence will also help rigs learn from old projects and adjust drilling strategies on their own.
In the future, every Geotech drill rig for sale may come with built-in monitoring. Operators will see maintenance logs, performance details, and predictive data on a mobile app, giving them more control.
Sustainability and Predictive Monitoring
Sustainability is now important in geotechnical drilling. Rigs that work efficiently use less fuel, reduce waste, and cause less damage to the environment. Predictive drilling monitoring supports this by keeping rigs working at their best.
For example, sensors that measure fuel use can show where energy is wasted. Operators can then improve drilling techniques or replace worn parts. This lowers costs and cuts emissions, helping meet global green goals.
Why Contractors Should Act Now?
Some people think predictive drilling monitoring is optional. But industry leaders say it is now necessary. Clients want fast results, safe work, and lower costs. Contractors who do not use predictive technology risk being left behind.
MetaDrill provides modern drilling rig equipment built for the future. From smart rigs to flexible drilling tools, the aim is to give contractors reliable solutions for every project.
You can also check: Diamond Core in Frost Zones
Final Thoughts
The time of guessing when a rig will break is gone. Predictive drilling monitoring brings safety, clarity, and efficiency to drilling. With the right drilling rig tools and equipment, companies can protect their investment, finish projects on time, and stay ahead of competitors.
Whether you are checking a Geotech drill rig for sale or upgrading old drilling rig equipment, the future is clear—smart monitoring is no longer an option. It is now the standard for success in geotechnical drilling.
Quiet drilling rigs for urban areas are no longer a choice—they are necessary. As cities grow, construction and geotechnical drilling projects now happen in crowded places, near homes, offices, and hospitals. But old-style rigs with noisy engines and heavy vibrations do not work well in these areas. That is why modern drilling rig tools and equipment are now made to control both noise and vibration.
Why Noise and Vibration Matter in Urban Drilling?
In busy neighborhoods, loud noise upsets people, while vibration can harm nearby buildings. A tall tower project, for example, may get complaints if the rigs disturb shops or offices. Hospitals cannot allow strong vibration near medical machines. Schools need quiet work, so students are not distracted.
This is where quiet drilling rigs for urban areas make a big difference. These rigs are built to lower noise and reduce ground movement. By using advanced drilling rig equipment and special sound-blocking systems, they allow safe drilling in even the busiest city streets.
Technology Behind Quiet Drilling
The technology in quiet drilling rigs for urban areas is much more advanced today. Many rigs now use hydraulic systems instead of loud diesel engines. Hydraulic rigs are smoother and quieter, and they create less vibration.
Also, drilling tools are now designed with materials that absorb vibration. Extra mats, special mounts, and casing systems help block the movement that would otherwise spread into the ground. All these updates let projects move ahead with fewer interruptions.
For companies searching for a Geotech drill rig for sale, it is smart to choose one that has both noise and vibration control. This helps them follow city rules, win more contracts, and work in locations that were not possible before.
Benefits of Noise and Vibration Control
Using quiet drilling rigs for urban areas has many benefits, not just rule-following:
Better Relations with People – Fewer complaints from residents, offices, and local authorities.
Safety for Buildings – Low vibration reduces the chance of cracks or damage to nearby structures.
More Work Hours – Crews can work longer in sensitive places without breaking city noise laws.
Eco-Friendly – Energy-efficient rigs cut down both sound and harmful emissions.
With the right drilling rig tools and equipment, contractors can finish work on time and avoid costly noise-related stoppages.
How MetaDrill Responds to the Challenge?
As one of the trusted drill rig manufacturers, MetaDrill leads in making rigs for crowded city projects. Our rigs have strong drilling power but still work quietly.
For example, MetaDrill rigs use hydraulic drives, noise shields, and advanced vibration systems. They can perform deep geotechnical drilling while staying within noise and vibration limits. These rigs are perfect for metro projects, school foundations, and construction in high-traffic areas.
When a company looks for a Geotech drill rig for sale, MetaDrill gives them more than just a rig. We provide drilling rig equipment built for the real needs of modern cities.
Real-World Applications
Quiet drilling rigs for urban areas are already used in many projects:
Subway Systems – Cities like Dubai, London, and Tokyo use low-noise rigs for underground metro expansions.
Building Foundations – Contractors use rigs with modern drilling tools to put piles in place without damaging old buildings nearby.
Infrastructure Projects – Road and bridge work in busy zones depend on rigs that cause less vibration to avoid closing roads.
In each case, rigs with quiet features allow projects that would otherwise be stopped by city restrictions.
Choosing the Right Rig for Urban Projects
Contractors looking for quiet drilling rigs for urban areas should check a few things:
Noise Levels – Compare decibel ratings with city rules.
Vibration Control – Look for rigs with strong vibration dampening systems.
Fuel and Energy Use – Hydraulic rigs save fuel and make less noise.
Tool Options – The rig should work with many drilling tools and parts.
Trusted Brand – Buy only from proven drill rig manufacturers that know city project needs.
MetaDrill gives contractors solutions that cover all these needs.
Future of Quiet Drilling
The future of quiet drilling rigs for urban areas will depend on smart technology. Soon, rigs will have sensors that monitor noise and vibration in real time, warning operators before limits are crossed.
Hybrid and electric rigs are also coming. They will make even less sound, moving drilling closer to silent work.
With tighter city rules ahead, demand for advanced drilling rig tools and equipment will continue to rise. Contractors who choose these rigs now will be more competitive in winning projects.
Why MetaDrill Stands Out?
MetaDrill is more than just another drill rig manufacturer. Our focus on innovation and service makes us different. We offer:
Custom rigs built for specific city projects.
Advanced drilling rig equipment that reduces downtime.
Training to help crews use rigs effectively.
A global supply of Geotech drill rigs for sale options for both small and large projects.
We mix reliability with recent technology, so clients succeed, even in tough conditions.
You can also check: AI Meets the Drill: Smart Automation in Modern Rigs
Final Thoughts
Cities will keep growing, and drilling in crowded areas will keep rising. Quiet drilling rigs for urban areas are the only way forward. They lower noise, reduce vibration, and protect both people and buildings while keeping projects on track. With better drilling rig tools and equipment, contractors do not need to choose between safety and performance.
MetaDrill is proud to lead among drill rig manufacturers, offering the latest rigs, drilling tools, and drilling rig equipment for city projects. Whether you need a Geotech drill rig for sale or tools to upgrade your fleet, MetaDrill provides solutions designed for urban life.
With noise and vibration control at the heart, the future of geotechnical drilling in cities will be smoother, safer, and more sustainable.
AI-assisted drilling equipment is changing how drilling works. It makes drilling faster, safer, and easier. Modern geotechnical drill operations now use smart machines that adjust by themselves. This reduces mistakes and saves time. These machines use sensors, data, and automation to drill accurately.
How AI-Assisted Drilling Equipment Improves Accuracy
AI-assisted drilling equipment helps keep boreholes straight and correct. Traditional Geotech drill rigs can go off track in hard soil. AI checks the soil and adjusts torque, speed, and pressure automatically. This helps the drill rig stay on track and get correct samples for construction and geotechnical work.
AI also helps operators avoid mistakes that cost money. For exploration drill rigs or foundation work, AI keeps drilling accurate, saves time, and reduces wasted materials.
Real-Time Data Analysis
AI-assisted drilling equipment uses sensors on the drilling rig equipment. Sensors check vibration, speed, and rotation. The AI uses this data to make drilling better. If the soil changes from soft clay to hard sand, the AI changes the drilling settings right away. This protects the drill rig.
Operators also get reports after drilling. Reports help plan future projects, track equipment, and make better decisions. Many drill rig manufacturers now add AI tools in new rigs to make them last longer.
Predictive Maintenance
Maintenance is very important for geotechnical drill work. If drilling rig equipment breaks, work can stop for days. AI-assisted drilling equipment can tell when parts are wearing out before they break. Early warning reduces downtime and saves money.
This keeps the Geotech drill rig in good condition. It lasts longer and keeps projects on time. Predictive maintenance is one of the biggest benefits of AI in drilling.
Safety Improvements
Safety is very important on drilling sites. Old drilling can be risky. Equipment may fail, or soil may fall. AI-assisted drilling equipment improves safety. It detects danger and adjusts automatically.
Some exploration drill rigs stop drilling if the vibration is too high. Others avoid hitting pipes or buildings. AI drill rigs protect workers and make sites safer.
Cost Efficiency and Productivity
AI-assisted drilling equipment saves money and time. Automatic controls reduce wear on drilling rig equipment. Less material is wasted. Predictive maintenance cuts repair costs. AI also reduces mistakes that need fixing.
These rigs can work all the time with little help. Companies using geotechnical drills and exploration drill rigs can finish projects faster and work more efficiently.
Versatility of AI-Assisted Drill Rigs
Modern AI-assisted drilling equipment is very flexible. It works for shallow environmental tests and deep geotechnical projects. Many drill rig manufacturers now make rigs where you can change sensors, drill heads, and software while keeping AI working.
One rig can do many jobs and stay accurate. This is better than older Geotech drill rigs.
Real-World Applications
Many drill rig manufacturers use AI-assisted rigs with great results. In city construction, AI-assisted drilling equipment reduced borehole mistakes by 30%. In exploration, AI-guided exploration drill rigs drilled faster on hard rock, cutting time by 20%.
This shows AI works in real projects. It makes drilling faster, safer, and more accurate.
Environmental Benefits
AI-assisted drilling equipment is better for the environment. It uses less energy and makes less waste. AI makes sure holes are drilled well and soil is disturbed less.
This is important in sensitive areas. AI drill rigs help companies drill correctly and protect nature.
The Future of AI in Drilling
The future of AI-assisted drilling equipment is bright. AI may soon predict soil and rock before drilling. Remote monitoring may let operators watch many rigs from one place.
In the future, AI may drill on its own. Humans would just supervise. This will make drilling faster, safer, and cheaper.
Choosing the Right AI-Assisted Drill
When you buy AI-assisted drilling equipment, choose a drill rig manufacturer you can trust. Look for good sensors, easy-to-read data tools, maintenance alerts, and safety features.
Train the people who will use the rig. AI can help, but it cannot do everything alone. Using geotechnical drills and exploration drill rigs the right way makes work faster, safer, and better.
You can also check: Understanding Drilling Fluids: Choosing the Right Mix for Every Scenario
Final Thoughts
AI-assisted drilling equipment is changing how drilling is done. It makes drilling more accurate, safer, faster, and cheaper. AI is the future of Geotech drill rigs and exploration drill rigs.
Companies using AI can finish work faster, keep workers safe, and protect the environment. With new tools from drill rig manufacturers, AI-assisted rigs are becoming the standard for all geotechnical and exploration drilling.
Cold region drilling solutions are very important when drilling in frost or permafrost zones. The ground stays frozen all year. Using a Geotech drill rig here needs strong machines and careful methods. Drillers must handle very cold weather, ice layers, and unstable soil. Drilling in cold places is not just about power. You need careful planning, precise tools, and strong equipment.
Why Is Cold Region Drilling Different?
Drilling in normal places is already hard. Frozen areas are even harder. Frost can go many meters deep. It creates layers of ice, soil, and rock. This makes drilling rig equipment work harder. Drilling is slower and uses more fuel.
A drill rig in cold places must work in low temperatures. Fluids, engines, and parts must not freeze. Without this, machines break easily, and repairs cost a lot.
The Role of Diamond Core Drilling in Frost Zones
Diamond core drilling is very good for frozen ground. The diamond drill bit can cut ice and rock carefully. It collects good core samples. These samples help engineers and scientists know the ground before mining or building.
Companies use exploration drill rigs with diamond core systems. These rigs work fast and give accurate results. Diamond core drilling also disturbs the ground less than other methods. This is important in cold and sensitive areas.
Lessons Learned from Cold-Climate Projects
Prepare Equipment for Extreme Cold
A geotechnical drill must be ready for winter. Fluids must stay good in the cold. Seals must not freeze.
Energy Efficiency Matters
Engines in Geotech drill rigs use more fuel in frost zones. Efficient engines save fuel and let rigs work longer.
Adaptable Drilling Strategies
Cold areas have different ground layers. One layer may be ice. Another may be hard rock. Using flexible exploration drill rigs makes drilling easier.
Operator Training Is Essential
Even the best drill rig manufacturers say operators are very important. Trained crews who know the machines and the cold work safely and better.
Cold-Region Drilling Solutions in Practice
In Canada, Alaska, and Siberia, companies use cold region drilling solutions to reach minerals under frozen ground. These projects show that strong machines and good planning are needed.
Modern drilling rig equipment has heated cabins, insulated fuel systems, and strong frames. These features keep machines working even at -40°C.
In Greenland, diamond core drilling found important minerals and protected the environment. Exploration drill rigs with sensors gave real-time data. This reduced extra drilling and saved the environment.
Choosing the Right Equipment for Frost Zones
When picking machines for frost zones, companies need to consider:
Durability: A drill rig must survive snow, ice, and heavy pressure.
Efficiency: Fuel-efficient engines and systems let rigs work longer in remote areas.
Adaptability: Flexible Geotech drill rigs can drill in many ways.
Manufacturer Support: Good drill rig manufacturers provide parts, training, and technical help.
Innovation in Cold-Region Drilling
The need for better cold region drilling solutions made manufacturers create new tools:
Heated Drill Strings: Stop ice from blocking the pipes.
Automated Controls: Make it easy to change drilling speed and pressure.
Compact Exploration Rigs: Small rigs are easier to move on ice.
Eco-Friendly Systems: Quiet rigs with low pollution help the environment.
These improvements show that drilling in cold places is not just about surviving—it is about working smart.
Challenges That Remain
Even with new machines, drilling in frost zones is hard. Moving rigs over ice and snow is risky. Repairs are harder in freezing weather. Even small problems can stop work.
Protecting the environment is also important. Using geotechnical drill systems in permafrost must be careful. Companies must follow rules and plans to avoid damage.
Why MetaDrill Leads the Way?
MetaDrill has years of experience making Geotech drill rigs and exploration drill rigs for cold climates. Our strong design, safe machines, and reliable drilling rig equipment help clients work in frost zones.
Unlike many drill rig manufacturers, MetaDrill gives more than machines. We provide training, technical support, and ongoing help. Whether for mineral exploration, geotechnical studies, or core sampling, our cold region drilling solutions give good results.
You can also check: The MD600X Rig – Built for North America’s Climate and Standards
Final Thoughts
Drilling in frost zones needs more than normal machines. You need strong machines, trained operators, and careful planning. Diamond core drilling shows that frozen ground can be drilled safely and well with the right methods and machines.
As projects grow in northern and high-altitude areas, cold region drilling solutions will remain important. With trusted partners like MetaDrill offering Geotech drill rigs, exploration drill rigs, and strong drilling rig equipment, companies can drill even in the toughest frost zones.

Geotechnical data analytics is changing how companies plan and work in geotechnical drilling. Every borehole gives a story, and every core sample holds important data. This data helps engineers, miners, and researchers build safer and better projects. With the right drilling rig tools and equipment, this information is not just numbers—it becomes a clear guide for success.
Why Are Core Samples More Than Just Rock?
At first, a core sample may look like just soil or rock. But it is much more. It shows a record of the Earth’s history over millions of years. Engineers study samples to learn about soil strength, water, minerals, and many hidden details. Here, geotechnical data analytics turns raw samples into clear and useful insights.
Without this study, projects face big risks. Weak ground can make buildings sink, bridges tilt, or tunnels break. With modern drilling rig equipment, companies can find these problems early and fix them before they cause failures.
The Role of Technology in Modern Drilling
In the past, drilling was based only on skill and guesswork. Today, advanced drilling rig tools and sensors gather live data. They record pressure, drilling speed, and vibration while drilling.
This data is later studied with geotechnical data analytics. It gives a full picture of the ground below—something people could not do before.
Modern rigs also use smart drilling tools that improve safety and save time. They can check temperature, density, and porosity while drilling. This helps teams decide faster instead of waiting for long lab tests.
From Field to Lab: How Data Flows
The journey of a core sample from the ground to a useful report has clear steps:
Extraction – Drillers use drilling rig tools and equipment to take samples from the ground.
Recording – Each sample is marked with depth, place, and time.
Analysis – Experts test it using geotechnical data analytics to learn about its properties.
Reporting – The findings are turned into charts and reports for engineers and project managers.
This system makes sure no small detail is lost. Even slight changes in soil density can affect whether a project is safe or not.
Why Do Geotechnical Data Analytics Matters?
The main value of geotechnical data analytics is reducing risks and surprises. Every project—whether in mining, construction, or exploration—has challenges. Weak soil, hidden water, or unexpected rock can stop work and increase costs.
By checking the data early, teams can adjust plans. For example, if soft soil is found, engineers may change the foundation design. With smart drilling rig equipment, these changes can be made before real construction begins.
Better Projects Through Smarter Tools
MetaDrill is a leader in developing strong drilling tools and advanced rigs. Its equipment is built to give correct samples, less ground disturbance, and fast data. This ensures results from geotechnical drilling are not just accurate but also useful.
With special drilling rig tools, MetaDrill rigs can handle soft clay, hard rock, or mixed soil. They collect good samples without breaking them. Combined with geotechnical data analytics, these samples help engineers design safe tunnels, roadbeds, and foundations.
The Environmental Advantage
Geotechnical data analytics also helps protect the environment. When drilling teams know where to drill, they save energy and reduce waste.
Smart drilling rig equipment prevents over-drilling and keeps nearby land safe. Accurate data lets drillers focus only on the right zones instead of guessing. This supports modern goals of greener projects and responsible use of resources.
The Future of Drilling: Data-Driven Decisions
The future of geotechnical data analytics looks even brighter. AI and machine learning are already helping predict ground conditions before drilling starts.
MetaDrill is building new drilling rig tools that connect with digital systems. This allows real-time sharing of data between field teams and office engineers. With this, decisions can be made in minutes instead of days.
The future of geotechnical drilling is not only about stronger rigs—it is about smarter decisions.
Choosing the Right Partner
Not all equipment is the same. Success depends on good drilling tools, reliable rigs, and strong data. Working with MetaDrill means getting both high-quality drilling rig equipment and advanced data solutions.
By combining machines with analysis, MetaDrill makes sure geotechnical data analytics gives true results. This makes projects safer, easier to manage, and more cost-effective.
You can also check: Training & Safety Culture for Drillers
Final Thoughts
Core samples may look like simple soil or rock, but with geotechnical data analytics, they turn into powerful tools for decisions. With advanced drilling rig tools and equipment, they lower risks, improve results, and shape the future of engineering.
From smart sensors to strong drilling tools, the journey from drilling to data is what makes modern projects work. With MetaDrill’s focus on geotechnical drilling, the future is clear—turning drilling data into gold.
Custom drilling accessories are changing how the drilling industry works on tough projects. From geotechnical drilling to energy projects, these tools are no longer just “nice to have”—they are now necessary. As projects get harder, companies use customization to drill with more accuracy, speed, and safety.
Why Customization Matters in Drilling?
The drilling industry is growing fast and facing recent problems. Standard drilling rig tools and equipment cannot always handle the special needs of each project. That is why custom accessories are important. They give solutions that fit the project instead of using the same tool for everything.
Custom designs help reduce delays, make tools last longer, and improve results. In geotechnical drilling, the right equipment makes it easier to adjust to different soil types, ground types, or drilling depths. This can decide if a project goes smoothly or runs into problems.
The Rise of Custom Drilling Accessories
In the last 10 years, more industries have started using custom drilling accessories. Construction, mining, and energy companies now see the benefits. These tools are made to fit the project’s exact needs, so operators do not have to compromise.
Why demand is growing:
Complex ground conditions: Many projects face mixed or hard ground.
Efficiency needs: Custom drilling rig tools are made to work faster and easier.
Sustainability goals: Stronger, longer-lasting tools reduce waste and meet environmental rules.
How Custom Drilling Accessories Improve Performance?
Custom tools make drilling projects perform much better. For example:
Adapted bit designs: Special drill bits work better in hard rock or soft soil.
Stronger durability: Reinforced tools take more stress and need fewer repairs.
Better accuracy: Custom drilling rig equipment makes sure holes match the right depth, width, and angle.
In geotechnical drilling, where accuracy is important, the right tool helps engineers collect better soil data and keep the project on track.
Emerging Innovations in Drill Customization
Technology is pushing customization further. New materials and digital processes make drilling tools stronger and smarter.
Some new innovations include:
3D-printed prototypes: Faster design testing and quicker delivery of custom parts.
Smart sensors: Tools that show real-time data like pressure and torque.
Hybrid alloys: Lightweight but durable metals that make drilling rig tools and equipment last longer.
These updates give project managers more control, balancing budget, speed, and performance.
Applications Across Industries
Custom drilling accessories are now used in many industries:
1. Construction and Infrastructure
Building foundations requires precision. Custom drilling tools make sure boreholes are the right size, reducing future risks.
2. Energy and Resources
From oil and gas projects to renewable energy, specialized drilling rig equipment helps operators follow strict safety and environmental rules.
3. Geotechnical Engineering
In geotechnical drilling, custom tools give accurate soil data and reduce contamination in core samples.
4. Mining Operations
Custom-made attachments allow rigs to work better in diverse types of mineral formations.
The Cost vs. Value of Custom Accessories
Some companies worry that custom drilling accessories cost more than standard tools. While the initial price is higher, customization often saves money overall.
The benefits include:
Fewer repairs and replacements
Faster project completion due to higher efficiency
Safer working conditions in tough environments
For large or long projects, these savings often outweigh the upfront costs.
Customization Trends Shaping the Future
The future of drilling rig tools will depend on technology and smart design. Current trends include:
Digital twin modeling: Testing tools virtually before they are built.
AI-driven optimization: Using software to design tools for specific conditions.
Modular systems: Easy-to-swap parts for drilling rig equipment, allowing quick adjustments.
These trends will help companies stay competitive by working faster, safer, and more sustainably.
Safety and Environmental Impact
Custom drilling accessories make drilling safer. Tools made for a specific job are less likely to break. This lowers the risk for workers.
Custom drilling rig tools and equipment also help the environment. They use less energy and cause less damage to the ground. In geotechnical drilling, these tools protect soil and water in sensitive areas.
How to Choose the Right Custom Accessories?
Picking the right drilling tools needs simple planning:
Check project needs: Know the soil type, drilling depth, and rock hardness.
Work with experts: Choose providers who understand drilling rig equipment and can design the right tools.
Choose quality: Strong tools last longer and give better results.
Check fit: Make sure new accessories match your current rigs.
MetaDrill’s Role in the Customization Era
At MetaDrill, we know one-size-fits-all does not work anymore. We make custom drilling accessories designed for today’s tough projects. Our tools help improve performance, cut costs, and keep workers safe.
From custom drill bits to modular drilling rig tools, we provide exactly what each client needs. Whether it is geotechnical drilling in cities or exploration in remote areas, MetaDrill is a trusted partner.
You can also check: Why Monitoring Matters in Drilling?
Final Thoughts
The era of custom drilling accessories has already begun, and industries are changing because of it. With the right drilling rig tools and equipment, companies get more accuracy, strength, and efficiency. For geotechnical drilling, mining, construction, or energy projects, customization is now essential.
MetaDrill is leading this change by offering the right solutions for every project. The future of drilling is customization, and the companies that adopt it early will stay ahead.
Multi-functional drilling machines are changing how geotechnical projects are done across the world. With the right drilling rig tools and equipment, contractors can handle many types of ground using just one system. Now, with the MD600N entering the United States—the first drill rig from the Middle East to arrive here—contractors gain new levels of efficiency, flexibility, and safety.
ANew Chapter in Geotechnical Drilling
The MD600N is not just another rig. It offers a modern way to do geotechnical drilling by combining many functions in one compact, user-friendly design. Instead of needing separate rigs for rotary drilling, coring, or SPT testing, contractors can complete all tasks with one rig.
This saves time, lowers costs, and avoids the problem of moving different rigs to one site. For companies searching for a Geotech drill rig for sale that is durable and advanced, the MD600N is a strong option. It also shows why multi-functional drilling machines are the smarter choice.
Rotary Drilling: Power Meets Precision
Rotary drilling is one of the most important methods in site investigations and foundation work. The MD600N’s rotary system drills through different soils and rocks with ease. Its high torque allows clean, fast drilling, while speed controls make it accurate in sensitive conditions.
By combining quality drilling rig equipment with a powerful rotary drive, the MD600N reduces stress on drilling tools and improves work speed. For contractors looking for multi-functional drilling machines, this feature provides both speed and accuracy.
Coring Capabilities for Accurate Sampling
Coring is trusted for collecting subsurface samples. The MD600N makes coring smooth and dependable. Its hydraulic system limits vibrations so samples stay intact and accurate.
Engineers depend on these samples to decide on soil conditions and foundation design. With advanced drilling tools, the MD600N proves how multi-functional drilling machines improve reliability and accuracy in data collection.
SPT Testing Made Simple
Standard Penetration Testing (SPT) is vital for most projects. In the past, it required separate rigs or slow manual setups. The MD600N solves this by including an automated SPT system.
This makes the process faster and safer with less manual effort. For project owners and contractors who want drill rig manufacturers focused on safety, the MD600N is a clear choice. It also shows why multi-functional drilling machines are replacing single-purpose rigs.
Augering Versatility for Challenging Sites
Augering is often needed in soft or loose soil. The MD600N offers augering options that suit many ground conditions. Its auger system works with both hollow-stem and solid-stem augers, giving contractors flexibility.
This is especially helpful in small city jobsites where space is limited. Instead of using several rigs, multi-functional drilling machines like the MD600N do it all, cutting costs and making work more efficient.
Why Multi-Functional Drilling Machines Are the Future?
Contractors now face tight budgets, short deadlines, and strict safety rules. That is why multi-functional drilling machines like the MD600N are in demand. They let companies do more with fewer rigs and save money without reducing performance.
The MD600N handles rotary drilling, coring, SPT, and augering—all in one. This gives companies an advantage. For those exploring modern drilling rig tools and equipment, the MD600N is a smart choice.
Built with Contractors in Mind
The MD600N is designed for ease of use. Its controls are simple to reach, and it allows quick changes of drilling tools. Its compact design makes it easy to move into small spaces, while its strong frame ensures long service life.
For contractors comparing multi-functional drilling machines, the MD600N gives one of the best mixes of power and flexibility on the US market.
Backed by Proven Drill Rig Manufacturers
Contractors need strong support from drill rig manufacturers. The MD600N comes from a company with years of success in supplying reliable drilling rig equipment in the Middle East, Africa, and Asia.
Entering the US market shows their confidence in the MD600N. With spare parts, training, and service available, contractors know they will have full support. This makes multi-functional drilling machines like the MD600N a secure, long-term investment.
Environmental and Safety Advantages
Today’s projects require rigs that are safe and eco-friendly. The MD600N is built with fuel-efficient engines, lower noise output, and hydraulic systems that help prevent leaks.
By combining safety with sustainability, multi-functional drilling machines like the MD600N allow contractors to meet project and environmental standards at the same time.
Cost-Efficiency and ROI
Contractors always ask how quickly a rig can pay for itself. The MD600N gives a fast return on investment because it replaces several rigs. This lowers operator and maintenance costs. Its versatility also allows contractors to take on more types of projects.
This makes the MD600N one of the best investments in geotechnical drilling. For contractors, multi-functional drilling machines mean savings today and growth in the future.
The Future of Drilling Starts Here
The MD600N is the first rig from the Middle East to arrive in the US. It shows that innovation has no borders. With rotary drilling, coring, SPT, and augering all in one platform, it sets a high standard for multi-functional drilling machines.
With its modern design, easy controls, and backing from experienced drill rig manufacturers, the MD600N is more than just equipment—it is a new chapter for geotechnical drilling in the US.
You can also check: Roles & Responsibilities in a Geotechnical Drilling Team with MetaDrill Rigs
Final Thoughts
The launch of the MD600N is a major step for contractors and engineers working on site investigations and foundation jobs. It combines the best drilling rig tools and equipment into one reliable system.
For firms looking for a Geotech drill rig for sale, the MD600N is a unique opportunity: a rig that meets all needs. As part of the next generation of multi-functional drilling machines, it brings four systems together in one design, helping contractors handle both today’s work and tomorrow’s challenges.
Electric-powered drilling equipment is already changing drilling today. The world wants cleaner and greener ways of working. Many drill rig manufacturers now build rigs that use less fuel, make less pollution, and save energy. At the same time, companies looking for a Geotech drill rig for sale can find modern rigs that work faster and are safer for the environment.
Why Industry Is Moving Toward Electrification?
For many years, drilling companies used diesel rigs. These rigs are strong but cost a lot to run, are noisy, and harm the planet. Electric-powered drilling equipment is different. It is quieter, cleaner, and easier to care for.
Energy savings are another reason for the change. Electric rigs use smart systems to give power only when needed. Old rigs waste energy as heat or when sitting idle. Electric rigs stop this waste, making them more efficient and reliable.
The Benefits of Electric-Powered Drilling Equipment
Using electric-powered drilling equipment brings many benefits, not just for the environment. Companies in mining and geotechnical drilling are already seeing big improvements in their work.
Lower fuel costs: Electricity is cheaper than diesel, and prices do not change as much.
Less maintenance: With fewer moving parts, drilling rig equipment, and drilling tools last longer.
Cleaner projects: Electric rigs prevent oil leaks and reduce harmful exhaust.
Better compliance: Governments want greener practices, and electric rigs meet these rules.
These benefits show that electrification helps both the environment and business growth.
How Electrified Rigs Improve Geotechnical Drilling?
The field of geotechnical drilling benefits a lot from electrification. Projects in cities, where noise and air pollution are tightly controlled, need rigs that are both clean and quiet.
Electric rigs also support advanced drilling rig tools and equipment that require steady power. For example, automated drill heads and computer systems perform better with electric power. This makes soil testing more accurate and project completion faster.
Contractors looking for a Geotech drill rig for sale often choose electric rigs because they deliver high-quality results while meeting environmental rules.
The Role of Drilling Rig Tools and Equipment
A rig works best when paired with the right tools. Modern drilling rig tools and equipment are now built to work smoothly with electric rigs.
Examples include:
Hydraulic-free systems: Replaced by electric parts that use less fluid.
Smart drilling tools: Tools with sensors that send real-time performance data.
Electric winches: Use less power and give smoother control.
Together, these tools improve drilling performance while also reducing the negative impact on the environment.
Advances from Drill Rig Manufacturers
Top drill rig manufacturers are leading the move to electric rigs. Many now sell hybrid rigs that can work with both diesel and electric power. This is helpful in places where electricity is not always available.
Some companies are making fully electric rigs with big batteries. These rigs can run for 8–10 hours before they need charging. A few can even use solar power, making them almost free from carbon emissions.
Manufacturers are also building rigs that can be upgraded. This lets companies with older rigs change some parts and turn them into electric-powered drilling equipment without buying a whole new machine.
Comparing Traditional vs. Electric Rigs
Here is a simple look at diesel rigs compared to electric-powered drilling equipment:
Factor | Diesel-Powered Rigs | Electric-Powered Rigs |
Fuel cost | Expensive and changes a lot | Cheaper and steady |
Maintenance | High (needs oil, filters, engine repairs) | Low (fewer parts to fix) |
Noise level | Very loud | Quiet, good for cities |
Emissions | High CO₂ and NOx | Almost zero |
Productivity | Depends on fuel and site | Better with smart power systems |
For companies searching for a Geotech drill rig for sale, these differences show why electric rigs are the better option.
Overcoming Challenges in Electrification
Moving to electric-powered drilling equipment has some challenges. New rigs can be costly, and charging stations may not be found in every work area.
However, many governments now provide financial help to businesses that use clean technology. Portable charging systems and hybrid rigs are also solving some of these problems.
Battery technology is improving quickly, meaning electric rigs can now last longer and perform better than before.
The Future of Electric-Powered Drilling
The future of electric-powered drilling equipment looks bright. Better batteries, renewable power, and smart systems will make electric rigs common across mining and geotechnical drilling.
New rigs may even use AI to adjust drilling tools during drilling. This will make projects safer, faster, and more accurate.
Drill rig manufacturers will also continue to improve rigs, creating special models for geothermal energy, offshore projects, and large construction foundations.
Why MetaDrill Leads the Way?
At MetaDrill, we know that electrification is the future of drilling. Our drilling rig equipment is built with modern designs that are strong and eco-friendly.
If you are looking for a Geotech drill rig for sale, upgrading your drilling rig tools and equipment, or learning about the latest in geotechnical drilling, MetaDrill is here to help.
By choosing electric-powered drilling equipment, companies can lower pollution and also show leadership in new technology.
You can also check: Drilling Fluids and Borehole Stabilization: How MetaDrill Rigs Deliver Reliable Results
Final Thoughts
Electrification is changing drilling everywhere. With lower costs, cleaner work, and better results, electric-powered drilling equipment is now the smart choice. Supported by advanced drilling tools, modern drilling rig equipment, and forward-thinking drill rig manufacturers, the industry is moving toward a greener future.
For companies ready to change, buying a Geotech drill rig for sale that meets today’s needs is the first step toward long-term success.
Advanced drilling fluids are not just support material anymore. They are now the main part of borehole stability, efficiency, and safety for the environment. In a Geotech drill rig for soil tests or in large exploration drill rigs, drilling fluid chemistry has improved a lot in the last ten years. These new fluids lower risks, protect drilling rig equipment, and give accurate results even in hard ground.
The Evolution of Drilling Fluids
In the past, drilling fluids—also called “mud”—were mostly used to cool and lubricate drill rig equipment. Old water-based or oil-based fluids worked but had limits. They often failed to move cuttings, got contaminated, or could not keep boreholes stable in weak clays.
As drill rig manufacturers built stronger and greener machines, drilling fluids also needed to improve. This created advanced drilling fluids, made for different rocks, weather, and drilling jobs.
What Makes Advanced Drilling Fluids “Advanced”?
These fluids are advanced because of their smart chemical design. Their key features are:
Rheology Control: Keeping the same thickness under heat and pressure.
Borehole Stability: Stopping walls from collapsing.
Lubrication & Cooling: Protecting geotechnical drill bits and helping drilling rig equipment last longer.
Environmental Compatibility: Using safe and biodegradable materials.
Adaptive Performance: Changing with real-time conditions through sensors on drill rig systems.
Why Borehole Stability Matters?
Unstable boreholes are a big problem. They can collapse, trap tools, or cause lengthy delays. Advanced drilling fluids fix this by:
Making a thin layer that seals porous rock.
Balancing pressure inside the hole.
Reducing chemical reactions with clays.
For large projects with Geotech drill rig systems—like tunnels, dams, or foundations—stability keeps samples safe, and data correct.
Applications Across Drilling Rigs
Advanced drilling fluids can be used with many kinds of rigs. They make drilling safer, protect machines, and keep boreholes stable. With the right fluids, drilling becomes faster, cleaner, and less costly.
1. Geotechnical Drill Rigs
These rigs are small and used to test soil and rock. In cities or crowded areas, fluids must stay clean, be safe for the environment, and keep the boreholes open for clear samples. They also help reduce dust and noise during drilling. For engineers, this means they can collect better core samples and get more accurate data for buildings, tunnels, and roads. Using advanced drilling fluids saves time and stops samples from being damaged.
2. Exploration Drill Rigs
These rigs are used in mining to drill very deep. Advanced fluids stop pipes from getting stuck and protect delicate ore samples. They also help drill faster by cooling and lubricating the bits. This is important because mining projects need strong and undamaged samples for testing minerals. With exploration drill rigs, the right fluids reduce downtime, save money, and keep the equipment working for longer.
3. General Drill Rig Equipment
Fluids protect pumps, pipes, and drill bits from wearing out. Without good fluids, equipment breaks down quickly and becomes expensive to repair. Advanced drilling fluids carry cuttings smoothly to the surface and stop blockages inside the system. This means drilling can continue for longer periods without problems, making the work more efficient and reliable.
4. Custom Solutions from Drill Rig Manufacturers
Some drill rig manufacturers work with chemical companies to make fluids designed for their own rigs. These custom fluids are made for different ground types, such as hard rock, clay, or sandy soil. Many rigs now also use smart systems that check the fluids during drilling and show real-time data. This teamwork between the rig and the fluids helps projects finish faster, safer, and with lower costs.
New Chemistry Driving Fluid Innovation
New science has made drilling fluids stronger and smarter:
Nanoparticle Additives: Small particles that block cracks.
Smart Polymers: Change thickness with heat or pressure.
Biodegradable Surfactants: Give better lubrication but stay safe for nature.
Hybrid Systems: Mix water-based and synthetic fluids for tough conditions.
This makes advanced drilling fluids flexible and useful without costly stops.
Sustainability and Environmental Compliance
Today, drilling must follow strict rules, especially when drilling rig equipment works near people or nature. Old oil-based muds were hard to manage. Now, advanced drilling fluids:
Break down naturally.
Use safe materials for water and soil.
Reduce waste by moving cuttings better.
This helps companies follow rules and allows drill rig manufacturers to show they are eco-friendly.
The Role of Data and Monitoring
Digital tools make fluids smarter. Sensors on Geotech drill rigs check fluid thickness, weight, and heat while drilling. This ensures advanced drilling fluids work well, and changes can be made instantly if needed.
The Future: Drilling Fluids 2.0
The future of fluids looks exciting. Companies are working on:
AI-designed blends that find the best fluid before drilling.
Self-healing fluids that close cracks on their own.
Fluids for autonomous drill rigs that support drilling and send data at the same time.
As drill rig manufacturers add more automation, fluids will stay central for safe and fast drilling.
You can also check: Smart Extraction: Techniques & Tools to Recover Stuck Drill Rods in Geotechnical Investigations
Final Thoughts
Advanced drilling fluids are not just for support. They are key to stable boreholes, lower costs, and safe drilling. From a Geotech drill rig in a city to an exploration drill rig deep in mining areas, the right fluid makes the job successful.
At MetaDrill, we focus on new drilling solutions. By using next-gen fluid chemistry with modern drill rig equipment, we help clients finish projects faster, safer, and greener. For all drilling teams, one fact is clear: the future of drilling is fluid.

Smart drilling technology is changing drilling from old manual methods to modern, sensor-based systems. Now, rigs do not just dig—they collect data and help operators make better choices. From a geotechnical drill project to big resource exploration jobs, rigs are becoming smart machines that improve safety, save time, and work more efficiently.
What Is Smart Drilling Technology?
At its core, smart drilling technology means using digital sensors, analytics, and AI tools to make drilling better. Older rigs depended on manual notes and guesswork. Modern rigs place sensors inside drilling rig equipment to track torque, pressure, vibration, and drilling speed in real time.
The data is sent to dashboards where engineers can act immediately. For example:
Detecting rock hardness before the drill bit breaks.
Spotting sudden pressure could be dangerous.
Changing drilling speed to save time and reduce wear.
These tools turn a normal drill rig into a smart digital machine.
Why Smart Technology Matters in Drilling?
The drilling industry faces stricter rules, higher safety needs, and cost pressures. Old rigs cannot always meet these demands.
Smart drilling technology offers clear benefits:
Accurate Data Collection – Sensors record small details about soil and rock, far more precisely than manual methods.
Better Safety – Sensors track vibration, stress, and pressure to prevent accidents.
Less Downtime – Predictive tools show when drilling rig equipment needs repair before it fails.
Lower Costs – Efficient drilling saves energy and extends the life of geotechnical drill bits and rigs.
Geotechnical Applications
In civil engineering, geotechnical drill projects need very accurate results. These projects support skyscrapers, bridges, and tunnels, where mistakes can be costly or unsafe.
A Geotech drill rig with smart sensors can:
Monitor soil strength to predict ground settlement.
Track drilling depth and angle to stay within design rules.
Report groundwater levels instantly for better water control.
These features help engineers build faster, safer, and more reliably.
Exploration Drill Rigs and Resource Development
Mining and resource projects depend on exploration drill rigs, but underground layers can be hard to predict. Errors in drilling can cost a lot of money.
With smart drilling technology, companies can:
Make geological maps in real time instead of waiting for lab results.
Adjust drilling quickly when new ground layers are found.
Use less energy, lowering costs for fuel and equipment.
This is especially useful in remote locations, where every mistake is expensive.
The Role of Drilling Rig Equipment in Smart Operations
Today, most drilling rig equipment can include sensors. Drill bits, pumps, and rotary systems all send real-time data to operators.
For example:
Rotary systems can show an imbalance before a failure.
Drill bits can report how fast they are wearing down.
Pressure sensors can prevent leaks in hydraulic systems.
With these smart upgrades, a drill rig becomes a machine that can check itself and adjust while working.
The Manufacturing Shift Toward Smart Rigs
Modern drill rig manufacturers are designing rigs that are smart from the start. They meet the demand for machines that not only drill but also deliver data.
New innovations include:
Sensors that are easy to install and upgrade.
Hybrid power systems to reduce environmental impact.
AI dashboards that give predictive drilling advice.
Today, manufacturers compete to build exploration drill rigs and Geotech drill rig systems that fit into modern digital construction and mining.
Real-Time Data as a Strategic Asset
One of the biggest advantages of smart drilling technology is real-time data. Rigs no longer just perform drilling—they create useful information.
Engineers use the data to design better structures.
Project managers track costs, timelines, and productivity.
Regulators use digital logs to ensure safety and compliance.
Data is not just a byproduct anymore—it is a valuable resource.
Challenges in Adopting Smart Drilling
Adopting smart drilling technology also has some challenges:
High Costs – Adding IoT and sensors to rigs can be expensive.
Training Needs – Crews must learn how to read dashboards and data.
Connectivity Issues – Remote drilling areas may lack good internet access.
Even with these problems, the long-term gains—safety, efficiency, and lower costs—make smart rigs worth it.
Future Outlook: Smart Rigs and AI
In the future, smart drilling technology will connect closely with artificial intelligence. AI will study large amounts of drilling data and guide rigs automatically.
Smart rigs could:
Change drilling angles by themselves for better results.
Predict underground surprises before they happen.
Create digital twins of sites for planning and simulations.
This means every geotechnical drill and exploration drill rig could act like a smart partner instead of just a tool.
You can also check: Breaking Habits: How to Avoid the 10 Most Costly Mistakes in Diamond Core Drilling
Final Thoughts
Drilling is no longer only about strength and manual notes. With smart drilling technology, rigs are now smart and connected. They collect and use data in real time. From small geotechnical drill projects to large exploration work, modern drill rig equipment helps companies stay safe, save time, and work better.
As drill rig manufacturers improve their designs, the gap between normal machines and smart systems is getting smaller. For businesses that adapt, rigs will not just be tools—they will be important assets that change how we dig, build, and manage the ground below us.
Diamond core drilling mistakes can cause problems, even for good exploration drilling teams. You might use strong drilling rig equipment like the MD600 or MD1000 but still face issues. Success depends on daily habits, smart work, and using the right drilling rig tools and equipment.
Let’s look at 10 common diamond core drilling mistakes and how you can avoid them.
1. Rushing the Process
A common diamond core drilling mistake is drilling too fast. Crews often rush to finish quickly. But this can break bits, damage rods, and give poor core samples.
MetaDrill rigs help control drilling speed. They let you drill slowly and safely. This saves tools and gives better results.
2. Poor Lubrication Practices
Not adding grease or using the wrong grease wears down your drilling rig tools and equipment.
MetaDrill rigs make it easy to add grease. Use high-quality grease and thread compound. This protects your drilling tools and helps them last longer.
3. Ignoring Log Keeping
Some drillers forget to write notes or logs. This leads to repeated mistakes and confusion.
Use a digital logging system with MetaDrill rigs. It helps keep track of work and makes exploration drilling easier and more organized.
4. Skipping Preventive Maintenance
Not checking your machine daily can cause big problems later. A loose bolt or small leak can stop the whole rig.
MetaDrill rigs are made for easy checks and repairs. Check your rig every day and every week to avoid breakdowns.
5. Neglecting Borehole Care
A weak borehole can collapse. This often happens in soft or broken ground. Poor flushing or wrong fluids can make it worse.
MetaDrill rigs come with strong mud pumps. These pumps keep the borehole clean and safe. Use bentonite, polymers, or foam to help the hole stay stable.
6. Over-Torquing Drill Rod Threads
Tightening drill rods too much can damage the threads. Then, it becomes hard to remove them later. This is a serious diamond core drilling mistake.
MetaDrill rigs let you control how much torque is used. First, tighten by hand, then apply proper torque. This protects your drilling tools.
7. Misusing Thread Compound
Some crews use grease instead of the right compound. This causes thread damage and weak connections.
Always use zinc-based pipe dope. MetaDrill also gives training in using the right materials. This keeps your drilling rig equipment in good shape.
8. Not Listening to the Rig
Your rig gives signs when something is wrong—like strange sounds or vibrations. Ignoring them can lead to big problems.
MetaDrill rigs run quietly and smoothly. This helps you hear and feel any problem early. Fixing small issues early saves time and money.
9. Inadequate Bit Flushing
Flushing helps keep the bit cool. Without enough water or fluid, the bit overheats and gets damaged. This is one of the top diamond core drilling mistakes.
MetaDrill rigs have strong pumps for flushing. Always check fluid flow before starting to drill.
10. Choosing Wrong Speed or Pressure
If the drilling speed (RPM) or pressure (WOB) is wrong, tools wear out fast. Different ground types need different settings.
MetaDrill rigs let you change speed and pressure during drilling. This helps your tools last longer and makes exploration drilling better.
How to Drill Smarter with MetaDrill
You do not need to work harder. You need to work smarter. Here are easy tips to avoid diamond core drilling mistakes:
Plan: Know the ground type and hole depth before drilling.
Lubricate Daily: Add grease and thread compound every day.
Keep Logs: Write notes or use digital logs to track work.
Inspect Daily: Check your rig every day to spot problems early.
Use the Right Compound: Never use grease instead of thread dope.
Pay Attention: Listen to your rig and fix small issues quickly.
Flush Well: Make sure water or fluid is flowing before you drill.
Adjust Settings: Change speed and pressure as needed using MetaDrill controls.
You can also check: Cost-Effective Drilling Tools for Long-Term Reliability
Final Notes: Small Habits, Big Results
Avoiding diamond core drilling mistakes means working safely and smartly. Good habits, training, and proper equipment help you save time and money.
MetaDrill rigs are made to help drillers work better. Whether you want a Geotech drill rig for sale, better drilling rig tools and equipment, or just want to avoid mistakes, MetaDrill can help.
Let your drilling work be remembered for good results—not for problems.
Recover stuck drill rods with confidence using MetaDrill’s advanced drilling rig tools and equipment. Built for performance in geotechnical and exploration drilling, our MD600 and MD1000 rigs help save time, reduce equipment damage, and make recovery easier on-site.
Why Do Drill Rods Get Stuck?
To solve the problem, we first need to know why it happens. The most common reasons rods get stuck are:
Differential sticking: When fluid from the ground pushes the rod against the borehole wall.
Clay swelling or sand collapse: Soils like kaolin can swell or fall in, trapping the rod.
Hole caving or bridging: The borehole becomes unstable and blocks rod movement.
Mechanical damage: Rods may bend or get damaged, making them hard to pull out.
Improper fluid circulation: If the drilling fluid is not strong enough, debris can collect and jam the system.
To recover stuck drill rods, it is important to stop these problems before they happen—and have a good recovery plan if they do.
Prevention Is Better Than Cure
Stopping rods from getting stuck is always better than trying to fix the issue later. MetaDrill rigs come with smart fluid systems and tools to help you avoid rod-sticking problems.
1. Flush & Wash-Over Techniques
Wash-over pipes or doughnut wash heads move debris away from the rods and clean the boreholes. This method works well in soft soils that can collapse. These tools are simple and usually part of quality drilling rig tools and equipment kits.
2. Fluid Circulation & Conditioning
Drilling fluids do more than just cool the drill—they keep the borehole stable. A mix of super foam and liquid polymer can help reduce friction, lift debris, and free stuck rods. This method is popular in exploration drilling, especially in loose ground.
Rigs like the MD1000 include advanced mud pumps that make this easier and more effective, lowering the risk of getting rods stuck.
Tools to Recover Stuck Drill Rods
If rods do get stuck, do not worry—there are many tools to help get them out safely.
1. Overshot & Spears
These are common tools for recovery:
Internal spears go inside the rod and grip it.
External overshot grabs the outside of the rod.
Both tools let you recover stuck drill rods without breaking or damaging them.
2. Junk Baskets & Magnets
Broken bits, metal pieces, or other trash in the hole can block rod movement. Junk baskets and magnets help remove this debris to clear the way.
3. Die Collars & Taper Taps
Die collars grab broken rods from the outside. Taper taps screw into them from the inside. These are useful when other tools do not work.
Advanced Recovery: Shock & Sonic Systems
In tough cases, stronger methods are needed to recover stuck drill rods.
1. Mechanical or Hydraulic Jars
These tools send strong shock waves down the drill rod. The shock can help release the stuck section. Hydraulic jars work well in deep holes where mechanical energy is not enough.
2. Surface Resonant Vibrators
These are used with a Geotech drill rig for sale. They send vibrations down the road to reduce friction and loosen it. They work great in sticky soils or deep drilling.
Last Resort Methods: Separation & Cutting
If nothing works, you may have to separate the stuck part and recover only the free section.
1. Back-Off Tools (String-Shot)
A small explosive inside the rod loosens a joint so the top part can be pulled out. This method is used when other ways to recover stuck drill rods do not work.
2. Cutting Tools
These include:
Chemical cutters: Use a chemical reaction to cut the rod.
Jet cutters: Use strong water pressure to cut it.
RCT (Radial Cutting Torch): Uses hot plasma to slice through.
These are used in special exploration drilling jobs where it is important to save the rest of the equipment.
Step-by-Step Retrieval Workflow
Here is a simple plan to follow when recovering rods:
Make sure the rig is safe and stable.
Use a tool to find where the rod is stuck.
Try flushing with fluid or wash-over tools.
Use fishing tools like overshot or spears.
If it is still stuck, use jars or vibration tools.
If nothing works, use string-shot or cutting tools.
Comparison Table of Tools & Methods
Tool / Technique | Purpose | Benefit |
Wash-over Pipes | Clear cuttings | Prevent sticking |
Polymer Flush | Lift debris | Useful in sandy soils |
Internal Spear | Grip inside pipe | Non-destructive |
Overshot | Grip pipe exterior | Secure hold |
Junk Baskets | Debris removal | Keeps borehole clean |
Mechanical Jar | Apply force | Breaks resistance |
Sonic Vibrator | Reduce friction | Effective at depth |
String-Shot | Detach pipe | Recovers free section |
Chemical Cutters | Cut pipe | Clean separation |
You can also check: How to Choose the Right Drilling Rig for Rent?
Final Thoughts
At MetaDrill, we do not just sell drilling rig equipment—we offer smart solutions. Our rigs have advanced hydraulic systems, user-friendly controls, and strong rod-handling designs for real jobsite conditions.
Whether you use the small MD40 for light work or the strong MD1000 for tough exploration drilling, our machines help you recover stuck drill rods more easily and safely.
Plus, we provide training, support, and servicing to make sure your team is ready for any challenge.
Looking for a Geotech drill rig for sale? Go with the brand that designs with real-world drilling in mind—MetaDrill.
Need help on-site or want to upgrade your rig? Contact MetaDrill today.
Borehole stabilization with drilling fluids is very important in geotechnical and exploration drilling. At MetaDrill, we make strong hydraulic drill rig systems that work well with diverse types of fluids. This helps drilling teams work safely and get good results in all kinds of soil and rock.
Why Is Borehole Stabilization with Drilling Fluids Important?
Borehole stabilization with drilling fluids keeps the hole open and safe during drilling. If the hole is not stable, it can fall in, lose fluids, or damage tools. Drilling fluids help cool and grease the tools, but they also protect the hole from falling in.
What Drilling Fluids Do:
Stabilize Borehole Walls: Stop the hole from falling in.
Control Water Loss: Stop water from leaking into the ground.
Reduce Vibrations: Help tools last longer and drill better.
Carry Cuttings: Bring soil and rock to the top for checking.
Cool and Grease Tools: Make tools work better and last longer.
MetaDrill’s drill rig systems like the MD600 and MD1000 are made to use fluids the right way and keep drilling safe.
Types of Drilling Fluids Used with MetaDrill Rigs
To get good borehole stabilization with drilling fluids, you must choose the right fluid. The right fluid depends on the type of ground and how deep you need to drill. MetaDrill rigs work with many kinds of fluids and add-ons.
1. Water-Based Fluids
Clear Water: Good for shallow holes in strong ground.
Bentonite Slurry: Used a lot in exploration drilling. Bentonite mixed with water makes a thick fluid that supports the hole and stops leaks. MetaDrill rigs work well with bentonite.
Polymer Fluids: Work well in sand or soft ground. This helps stop clay from swelling and makes drilling easier.
2. Additives for Water Loss Control
MetaDrill rigs have strong mud pumps and controls to use special materials:
Fibrous and Granular Materials: Block cracks and help with borehole stabilization with drilling fluids.
Polymer Blends: Make a seal inside the hole to stop leaks and help drilling.
3. Foam and Air Drilling Options
In dry places with little water, MetaDrill rigs can use foam or air instead of lots of water. These ways still keep the borehole stabilization strong and save water.
Using MetaDrill Rigs in Real Drilling Work
MetaDrill rigs can work in many places—from cities to faraway sites for exploration drilling. They are very good in hard ground where the hole might fall in.
Thanks to good hydraulics and pressure control, MetaDrill rigs can:
Reduce Vibrations: Keep the tools safe and the hole steady.
Make Work Safer: Strong holes protect workers and tools.
Help Get Good Samples: Good samples of soil and rock are needed for testing and planning.
In very soft or broken ground, MetaDrill rigs can use two fluids together (like bentonite and polymer) or use casings to keep the hole strong.
Extra Ways to Keep the Borehole Stable
Sometimes, borehole stabilization with drilling fluids is not enough. Some soil needs extra help. MetaDrill rigs work with other ways to keep holes safe.
Other Methods That Work with MetaDrill Rigs:
Temporary Casing: Using pipes to hold the hole open during drilling.
Drill-in Casing Systems: Drilling and putting the pipe in at the same time. Good for very soft soil.
Grouting Solutions: Filling holes or cracks after drilling to stop collapse or leaks.
When these are used with drilling rig equipment like the MD600, the hole stays strong, and the job goes well.
The MetaDrill Advantage
MetaDrill makes more than just drill rig machines. We build full systems that help drilling teams work better. Everything—from the pump to the control system—is made to work with fluids safely and easily.
Why People Choose MetaDrill:
Custom Systems: Use with bentonite, polymers, or foam.
Proven Strength: Works in hard jobs and tough places for exploration drilling.
Support After Purchase: We help with setup, use, and fluid advice.
If you are looking for drill rigs for sale or need help with drilling, MetaDrill is a smart and safe choice.
Final Thoughts
As expert drill rig manufacturers, we know every drilling job is different. MetaDrill rigs are tested, strong, and ready for all kinds of work.
By focusing on borehole stabilization with drilling fluids, we help contractors do big and hard jobs safely and correctly.
Whether you are drilling in a city or the desert, MetaDrill exploration drill rigs help you drill deeper, safer, and smarter.
Need a new rig? MetaDrill has high-quality drill rigs for sale for all projects—from small tests to deep exploration drilling. Talk to us today and see how our strong drilling rig equipment can help your work.
MetaDrill — Trusted drill rig manufacturers for today’s geotechnical world.
Geotechnical drilling team roles are important to get the right information about the ground before building anything. Every team member has a job that helps check the soil and rocks. With MetaDrill’s modern drilling rig equipment, the team can work better, faster, and more safely. MetaDrill is one of the top drill rig manufacturers, and their machines help with both shallow drilling and deep exploration drill rigs.
1. Geologist – The Ground Expert
The geologist is the scientist on the site. This is one of the most important geotechnical drilling team roles.
Main tasks:
Planning: The geologist decides where and how deep to drill holes. MetaDrill rigs help drill in the exact spots needed.
Studying Soil and Rock: After drilling, the geologist looks at the soil and rock samples. MetaDrill exploration drill rigs help collect good-quality samples.
Sample Checks: The geologist makes sure the samples are labelled and saved the right way for lab tests.
Testing on Site: Some tests (like SPT and CPT) are done using MetaDrill’s drilling rig equipment to understand the soil better.
Drafting Reports: The geologist writes down what they find, like water levels and soil types.
Safety: Makes sure all work follows safety rules.
MetaDrill rigs help geologists get clean samples and better data.
2. Driller – The Machine Operator
The driller runs the drilling machine. It is one of the key geotechnical drilling team roles.
Main tasks:
Using the Rig: MetaDrill’s rigs are strong and easy to use. The driller controls speed and power depending on the ground.
Picking Tools: The driller picks the right drilling tools, like drill bits and casings, for each job.
Drilling the Holes: The driller follows the plan and changes methods if needed.
Checking the Rig: The driller checks and takes care of the MetaDrill rig daily.
Staying Safe: The driller keeps the team and machine safe during work.
MetaDrill rigs are comfortable to use and help the driller work with more accuracy.
3. Drilling Assistant – The Helper
The assistant helps the driller and keeps the site running smoothly.
Main tasks:
Handling Rods: Helps add or remove rods. MetaDrill rigs make this job easier and safer.
Handling Samples: Helps the geologist clean and label samples collected using exploration drill rigs.
Setting Up the Site: Helps set up and pack up the drilling site.
Helping with Maintenance: Assists in cleaning and checking the rig.
Following Safety Rules: Uses drilling tools carefully and helps during emergencies.
The assistant helps the team stay organized and work faster.
4. Surveyor – The Measurement Expert (Optional Role)
In some projects, a surveyor helps place the drill holes in the right spots.
Main tasks:
Marking the Site: Uses GPS to show where to drill.
Measuring Heights: Checks how deep to drill and marks water levels.
Surveyors help the team be more exact. MetaDrill rigs are easy to move to the right position.
5. Site Engineer – The Team Manager (On Big Projects)
The site engineer leads the work and makes sure everything goes as planned.
Main tasks:
Managing Work: Keeps drilling on time and within budget.
Connecting the Team: Talks with the geologist, driller, and other managers.
Checking Work: Makes sure samples and reports are correct.
MetaDrill rigs help site engineers by working without many delays or problems.
Why MetaDrill Rigs Are Great for Drilling Teams
MetaDrill is one of the best drill rig manufacturers. Their exploration drill rigs, like MD40, MD75, MD600, and MD1000, are built for different drilling jobs.
Why teams love MetaDrill:
Easy Controls: The rigs are smooth to use and collect good samples.
Tool Friendly: MetaDrill rigs work with many kinds of drilling tools.
Tough Machines: Their drilling rig equipment works well in all types of soil and rock.
Made for Workers: The rigs are designed to keep the crew safe and help them work faster.
With MetaDrill, teams can do better work with fewer problems.
You can also check: Why Soil Investigation Matters Before You Build?
Final Thoughts
Understanding the geotechnical drilling team roles gives a clearer picture of how complex and coordinated site investigations really are. Every person—from geologist to driller to assistant—has an important job. But the right equipment also matters. That is why many teams trust MetaDrill.
MetaDrill’s strong drilling rig equipment and advanced exploration drill rigs help teams finish work on time and get good data. With the right people and the right drilling tools, your drilling project is ready for success.
MetaDrill: Helping you explore the ground, one borehole at a time.
Drilling monitoring is very important in today’s drilling work. Whether the job is in a faraway area or a busy city, real-time monitoring helps teams make faster decisions and stay safe. MetaDrill includes CCTV systems and GPS in every exploration drill rig to improve productivity, safety, and transparency on the job site.
Why Monitoring Is Critical in Drilling Operations?
Whether you are using exploration drill rigs or advanced geotechnical rigs, drilling monitoring gives site supervisors and client engineers a clear view of what is happening. Here is why it is important:
1. Ensuring Safety Compliance
Drilling is a risky job. There are heavy machines, moving parts, pressure systems, and difficult ground conditions. Drilling monitoring using CCTV helps supervisors check if workers are wearing safety gear, following safety rules, and ready for emergencies.
2. Maintaining Workflow Transparency
Sometimes, clients are far away from the site or in another country. Live video and GPS data help them see what is happening without being there. This builds trust and makes teamwork easier.
3. Speeding Troubleshooting and Decision-Making
If something goes wrong, every second matters. Drilling monitoring lets supervisors quickly see what caused the problem. If a drill rod gets stuck or a tool is used the wrong way, video helps fix it fast without stopping the whole job.
MetaDrill’s Four-Camera System: Strategic Coverage for Smarter Oversight
Most drill rig manufacturers do not offer full monitoring systems, but MetaDrill does. Each of our exploration drill rigs has four cameras for better visibility:
Mast Cameras (x2): These are on top of the mast and show a full 360° view of the site. They capture how the rig moves, how materials are handled, and what is happening around the rig.
Control Panel Camera: This shows what the driller is doing with the controls. It helps check if they are working safely and correctly.
Rotary Head Table Camera: This focuses on the main drilling area. It shows how deep the rig is drilling, how core samples are taken, and how tools are used.
With all four cameras, drilling monitoring becomes an active part of daily work—not just something to watch later.
Core Benefits to Clients
Here’s how MetaDrill’s monitoring system helps clients, supervisors, and drilling contractors:
1. Live Supervision & Remote Oversight
Using the internet and GPS, project managers and engineers can watch drilling live from anywhere. This saves time and travel costs and keeps work on track.
2. Recorded Documentation & Traceability
All videos are recorded, time-stamped, and saved. These videos help with:
Daily reports
Solving problems
Checking progress
Investigating incidents
These builds trust with clients who work with drill rig manufacturers like MetaDrill.
3. Enhanced Safety & Accountability
Cameras help everyone follow the rules. Workers know they are being recorded, which makes them act more safely. Supervisors can also use videos to train staff and give feedback.
4. Integration with GPS and Telemetry
The cameras are part of a bigger system. With GPS and remote power checks, MetaDrill rigs show everything: location, active time, downtime, performance, and video—all in one place.
Real-World Value on Site
✅ Efficiency Gains
Recorded video is great for improving how the team works. Managers can find:
Time lost during rod handling
Wrong setup of drilling tools
Delays in tool changes
Poor teamwork
Watching the footage helps improve training and daily work routines.
✅ Training Advantages
New drillers learn faster by watching real job videos. Trainers can show mistakes without stopping real work. This saves time and money and keeps everyone safe.
✅ Risk Mitigation
If something unexpected happens—like gas leaks, flooding, or shifting ground—drilling monitoring helps figure out what caused it. This helps in planning and insurance claims.
✅ Boosting Client Trust
Clients like seeing proof of progress. MetaDrill lets them watch live or review past videos. This kind of openness builds strong client relationships.
Why MetaDrill’s Drilling Monitoring System Stands Out?
Most drill rig manufacturers charge extra for monitoring systems. MetaDrill includes them because we believe drilling monitoring is necessary for modern jobs.
Factory-Integrated, Not Retrofit
Our system is already built into the rig when you buy it. No extra setup or wiring needed. It is safer and more reliable this way.
Industrial-Grade Components
We use strong cameras that can handle dust, mud, and vibration. They are made for real job sites—not just for clean indoor use.
Smart Storage and Access
Footage is:
Automatically time-stamped
Sorted by activity
Easy to access from a dashboard
No need to scroll through hours of video. You get what you need, fast.
The Future of Smart Drilling
When you combine great drilling rig equipment, GPS, live video, and performance data, you get smarter drilling. Drilling monitoring helps reduce accidents and costs while improving results.
MetaDrill is proud to be a leader in this field. By adding monitoring to every rig, we help teams and clients work more safely and more efficiently.
If you want a rig that does more than just drill—one that gives you full control and clear insight—MetaDrill is the answer.
You can also check: What Makes MetaDrill Rigs Ideal for Harsh Environments?
Final Thoughts
Drilling monitoring is more than just watching videos—it is a way to manage your site, your safety, your team, and your client relationships. MetaDrill rigs come ready with smart tools to give you this control from day one.
Whether you are buying drilling tools, looking at drill rig manufacturers, or adding to your fleet of exploration drill rigs, do not miss the power of full visibility. With MetaDrill, you do not just drill—you manage the whole operation with confidence.
Driller safety training is the heart of MetaDrill’s mission. We do not just build drilling rig equipment—we build skilled and safety-focused teams. Our training helps drillers use exploration drill rigs with confidence, care, and accuracy.
Why Driller Safety Training is Important?
Driller safety training is not just about following rules. It is necessary for safe and smooth work. If workers are not trained well, it can lead to accidents, damage to rigs, and time loss.
At MetaDrill, every training session helps drillers understand how rigs work, how to stay safe, and how to use the equipment properly.
1. Understanding Equipment Limits
Drillers must know the limits of their drilling rig equipment. In our driller safety training, they learn about hydraulic pressure, torque, and balance. This helps them avoid damage and accidents.
2. Boosting Safety Awareness
Our training includes lessons on:
Areas to avoid during work (exclusion zones)
Locking and unlocking hydraulic parts safely
Using PPE (personal protective equipment)
Emergency stop actions
This training reduces the chance of injury.
3. Improving Operator Performance
Bad posture, tiredness, and wrong handling of rods can slow down work. Our driller safety training teaches drillers how to work in a better way. This saves time and energy.
MetaDrill’s Core Training Program
Our training follows global safety rules and fits the real needs of fieldwork. It includes:
✅ Maintenance Protocols
Drillers learn to do:
Daily, weekly, and monthly rig checks
Write logs for engine, hydraulics, safety systems, and feed systems
Regular checks find problems early and help rigs last longer.
✅ Emergency Simulations
Drillers practice real problems like:
Stuck rods or tool jams
Tilted masts
Leaks in hydraulic systems
These drills improve quick thinking—a key part of driller safety training.
✅ Site & Tool Ergonomics
We teach safe ways to use drilling tools like rods, hammers, and winches. Operators learn how to handle tools and control panels properly, lowering the risk of injury and tool damage.
The Bigger Impact: Safer Rigs, Better Results
When companies take driller safety training seriously, they see many benefits:
Less Downtime & Lower Risk
Trained drillers avoid mistakes, which means fewer accidents and less lost time.
Longer Rig Life
Clients who focus on training have lower repair costs. Their crews avoid overusing engines or pushing exploration drill rigs too far.
Better Drilling Quality
Good training means better drilling, fewer mistakes, and cleaner samples. Trained workers adjust quickly to different ground conditions.
Stronger Compliance & Trust
Today, many clients look for certified and safe teams. Our driller safety training helps companies meet these expectations and earn trust.
Designed for Safety, Built for Performance
MetaDrill does not add safety later—we design it into every rig. As experienced drill rig manufacturers, we make rigs that are easy to use and safe to operate.
Telemetry, CCTV & Remote Checks
Our rigs have smart systems to watch rig performance. CCTV allows teams to review incidents and improve safety.
Easy Maintenance Points
Our rigs have simple layouts. This makes it easy for operators to inspect and maintain rigs. Combined with training, this prevents problems and passes safety checks.
On-Site Coaching & Technical Help
Besides classroom lessons, our engineers visit your site. They help drillers learn how to use rigs in real conditions.
Training That Grows with Your Team
Whether your team uses light exploration drill rigs or heavy drilling rig equipment, we can make a training program that fits your needs.
Our team will:
Check your team’s current skills
Suggest the right driller safety training
Offer refresher lessons
Help track safety and performance
This ongoing training builds strong internal teams and helps your company grow safely.
Real Results from the Field
MetaDrill’s training has helped clients in over 18 countries lower risks and improve rig performance.
A client in Saudi Arabia saw 28% less downtime in just six months after starting our driller safety training.
Another mining client said new workers could:
Log equipment checks
Do pre-use inspections
Fix hydraulic issues
— all without needing extra help, and within 60 days of hiring.
This is proof that expert training and quality rigs from trusted drill rig manufacturers make a real difference.
Final Thoughts: More Than Just Safety
Driller safety training is not just about stopping accidents. It helps workers become skilled and confident. It also helps your business by supporting:
Longer-lasting drilling tools
Fewer injuries and machine failures
Higher project success
A strong safety culture
When your team knows how to use rigs the right way, you protect your people and your investment.
Whether you manage one rig or many, MetaDrill is ready to help with the best training, equipment, and results.
Ready to Train Your Team?
Do you want your team to use MetaDrill rigs safely and efficiently? Reach out now to learn about our driller safety training programs, built for your rigs and your work.
Contact us to schedule a training session or talk to our experts.
MD600X rig for North American drilling is made to handle cold weather, strict rules, and far-away geotechnical drilling sites. This strong and smart drill rig is built from real experience and feedback from drilling experts in North America. With its powerful design, smart controls, and high reliability, this rig for North American drilling is ready for the toughest jobs.
Designed by the Field, for the Field
MetaDrill started making the MD600X rig for North American drilling after talking to many operators, supervisors, and engineers. They shared important feedback:
Drilling sites often have freezing cold weather, like in Canada, or muddy, wet conditions like in the Midwest.
Most drillers prefer auger-style geotechnical drilling, which needs strong torque and stable support.
Both U.S. and Canadian rules require the use of certified drilling rig equipment that meets emission standards.
Instead of just updating an old rig, MetaDrill designed a new one. The MD600X rig was built from scratch using the newest technology to meet these needs.
Thermostatic & Cold-Ready Systems
One of the most important features of the MD600X rig for North American drilling is that it works well in cold weather.
It uses thermal valves to keep the oil in the machine at the right temperature. This stops it from freezing or overheating.
Cold-rated filters help the engine work even when the weather is freezing.
Smart engine controls help the machine run for a long time, even in high mountains or during cold seasons.
Whether you are drilling in cold areas like Alberta or snowy places like Minnesota, the MD600X rig keeps working without problems.
Integrated Remote Systems & Smart Monitoring
Today’s drilling sites need smart features—and MetaDrill delivers.
The MD600X rig for North American drilling includes smart features first seen in the MD600N:
A 4-camera CCTV system gives a full view around the rig. You can see the mast, the drill head, and the operator’s actions—helping supervisors monitor the site from a safe distance.
A radio remote allows starting and stopping the engine or adjusting speed without standing near the rig.
GPS and remote tracking help you know where the rig is, how it is being used, and when it needs maintenance.
These smart systems reduce delays, improve safety, and offer more control—something you do not often see with regular drilling rig tools and equipment.
Built for Auger Drilling with Mechanical Precision
In North America, many drilling jobs use augers because of the different soil types and depth needs. That is why the MD600X rig includes helpful upgrades:
A slide-based feed system gives more power and makes long drilling cycles easier.
Stronger alignment keeps the drilling rig tools and equipment steady, even when drilling deep or at angles.
With added visibility from cameras and remote controls, operators can work faster and with better accuracy.
For geotechnical drilling companies, this means better results, less wear on the rig, and less tired workers.
Engineered for Environmental & Safety Compliance
Any drill rig used in North America must follow strict rules about the environment and worker safety. The MD600X rig is built to follow and go beyond those rules:
The engine meets EPA Tier 4 Final and Canada’s CEPA emission standards.
All-important drilling rig equipment is approved for use on risky job sites.
The CCTV and GPS systems create video and data logs, which are useful for safety checks and insurance.
Thanks to MetaDrill’s focus on safety and following the rules, customers can use the MD600X rig for North American drilling with confidence.
The MetaDrill Advantage
If you are a government contractor, private company, or utility firm, here is what the MD600X rig for North American drilling brings to the table:
1. Weather Resilience
Thanks to its thermal systems and cold-proof parts, the MD600X rig works smoothly even in bad weather—so your projects stay on schedule.
2. Remote Oversight & Productivity
Smart cameras and remote controls help teams watch and manage drilling in real time—even on faraway job sites.
3. Regulatory Confidence
Every part of the MD600X rig is made to meet U.S. and Canadian rules.
4. Operator-Centered Design
Its mechanical design, slide-base feed, and solid structure make work easier and safer for the crew.
The MD600X in Action
The MD600X rig for North American drilling is already proving itself in places like:
Highway soil tests in Montana
Deep groundwater drilling in Saskatchewan
Foundation drilling in remote parts of Alaska
Thanks to its smart drilling tools, solid design, and reliable performance, this rig is becoming the top choice for modern geotechnical drilling projects.
Partner with the Leading Drill Rig Manufacturer
As a trusted drill rig manufacturer, MetaDrill builds machines based on what the industry really needs—not just fancy designs. We understand that drilling rig tools and equipment need to be performed in the field. That is why the MD600X rig for North American drilling has been tested, improved with user input, and prepared for the future.
Our customers rely on us for more than just equipment—they count on our support, custom solutions, and help in growing their fleet.
You can also check: Geotechnical Drilling Equipment That Delivers Results in the Field
Final Thoughts
The MD600X rig for North American drilling is more than just a product—it shows MetaDrill’s promise to lead in innovation, safety, and jobsite performance. Every feature—from cold-weather systems to remote monitoring—was made to help North American drillers do better work with less risk.
Want to see the full specs of the MD600X rig for North American drilling? Need client reviews or pricing info? Contact MetaDrill today—we are here to help.
MetaDrill: Built for the Field. Trusted Around the World.
Geotechnical drilling fluids are important for safe and successful drilling. These fluids help keep the hole stable, move broken rock (cuttings) out of the hole, and cool the drill bit. At MetaDrill, our drilling rig equipment is made to work with many kinds of fluids—from bentonite mud to new, eco-friendly fluids. This helps us drill in many types of soil and ground conditions.
What Are Geotechnical Drilling Fluids?
Geotechnical drilling fluids are special liquids used during drilling. They can be made with water or oil. These fluids help keep the hole from collapsing, move broken pieces (cuttings) out of the hole, and make drilling smoother and safer. Choosing the right fluid is important for exploration drilling and building projects.
Let’s look at the diverse types of fluids and when to use them.
1. Bentonite-Based Mud: A Common Choice
Bentonite is one of the most used geotechnical drilling fluids. When mixed with water, it swells and creates a thin layer along the whole walls. This layer helps keep pressure and stops the hole from falling in.
Good for:
Normal drilling in stable ground
Long drilling jobs
Projects that need strong fluid control
Not good for:
Takes time to mix
Does not work well in shale
Hard to clean the heavy solids
Our drill rig systems at MetaDrill are made to work well with bentonite, helping teams control the fluid easily.
2. Polymer & Biopolymer Fluids: For Special Conditions
Some geotechnical drilling fluids use special materials called polymers (like xanthan gum, PHPA, PAC, CMC). These work well with less solid material, which is good for weak or soft ground.
Benefits:
Hold cuttings in the fluid
PHPA stops shale from breaking
PAC and CMC control fluid loss
Great for places with less clean water
Used for:
Drilling in soft shale
Areas with limited water
Projects that care about the environment
Our drilling rig equipment is built with pumps that handle these fluids easily.
3. Guar Gum Systems: Fast and Natural
Guar gum comes from a plant. It mixes fast in both clean and salty water. It is great for shallow or top parts of drilling, like in exploration drilling or water wells.
Advantages:
Mixes quickly
Works in salty water
Safe for the environment
Limitations:
Breaks down in 24 hours if not treated
Not strong for long jobs
Cannot handle high heat or pH
MetaDrill teams often use guar gum for short jobs that need quick cleaning.
4. Natural Additives & Eco-Friendly Fluids
Today, people are using natural materials like date seed powder, cassava starch, and potato starch to help or replace old geotechnical drilling fluids. These are cheaper and better for the environment.
Good points:
Mixtures like 7% bentonite and 3.5% date seed can close cracks
Lower cost and better for nature
Work in hot places (up to 90°C)
As a leading drill rig manufacturer, MetaDrill makes sure our rigs work with these new, green fluids.
5. What Fluid to Use for Each Job
Drilling Situation | Best Fluid | Why |
Normal soil, stable ground | Bentonite-based mud | Keeps hole stable, controls fluid well |
Soft clay or shale | Polymer fluids | Holds cuttings, controls shale |
Top of the hole or water wells | Guar gum sweeps | Easy, fast, safe for the environment |
Fractures or green zones | Starch or biopolymer blends | Seals cracks, good for the environment |
Picking the right fluid for each job helps make drilling safe, fast, and cheaper. Our exploration drill rigs are ready for all these situations.
Why MetaDrill Rigs Are the Best for Fluids?
MetaDrill is more than a drill rig manufacturer. We build smart, flexible machines. Our rigs have:
Strong mixing systems
Pumps that work with thick or thin fluids
Real-time monitors for fluids
Parts that you can change for any fluid
No matter where you are drilling—desert, shale, or water—MetaDrill has drill rigs for sale that can handle it.
Key Points to Remember
The right geotechnical drilling fluids are just as important as the right drill rig. Each fluid—bentonite, PHPA, xanthan gum, guar gum, or starch—has different uses. What works in one place may not work in another.
At MetaDrill, we do not just sell exploration drill rigs. We offer full drilling solutions. Our rigs are tested with old and new fluid systems so you can finish jobs quickly, safely, and responsibly
You can also check: How MetaDrill Rigs Help You Drill Smarter & Faster?
Final Thoughts
Before you start your next geotechnical or exploration drilling job, think carefully about which fluid to use. The right geotechnical drilling fluids can make your work easier, faster, safer, and more cost-effective.
With MetaDrill’s expert team and strong drilling rig equipment, you will be ready for any ground condition—with the right fluid for the job.
Not sure which fluid to choose? Looking for drill rigs for sale? MetaDrill is here to help—your global partner in drilling solutions.

Geotechnical investigations form a significant part of infrastructure development, and for such purposes, a geotechnical drilling company becomes vital in determining the subsurface conditions. MetaDrill brings the best-suited and highest-class solution for project needs.
The Role of a Geotechnical Drilling Company
A geotechnical company specializes in drilling and sampling techniques to check subsurface conditions. Subsurface conditions are of prime importance in identifying characteristics of soil and rock, groundwater levels, and many other geotechnical properties in the design and construction of foundations, tunnels, bridges, and many other structures.
MetaDrill is the industry leader. It uses high-tech equipment and a team of highly skilled individuals to arrive at the correct and accurate results. Joining a geotechnical drilling company like MetaDrill reduces risk, assures compliance with regulations, and optimizes the project timeline.
Advanced Drilling Technologies
Modern geotechnical drilling relies on the latest technological advancements to deliver accurate and efficient results. MetaDrill uses state-of-the-art geotechnical drill rigs capable of operating under different environmental and geological conditions. The rigs are designed to optimize intricate drilling operations so that high-quality samples meant for analysis are retrieved.
From its fleet, MetaDrill offers geotechnical drill rigs in various varieties that are customized depending on the requirements of a given project. In this case, MetaDrill offers light to heavy machines meant for drilling with the minimum possible environmental impact, which comes after using innovative technology.
Why Choose MetaDrill for Your Geotechnical Needs?
MetaDrill is a geotechnical drilling rig manufacturer that holds itself to a stringent quality and innovative behavior. Here are some of the most essential reasons why MetaDrill stands as the preferred choice for clients across the world:
Comprehensive Solutions: We cover everything, from first-site investigations to detailed reporting, thus ensuring that each project's requirements are treated with precision and care.
Advanced technological equipment: All Meta rigs developed are strong, efficient, and versatile. Their high resolutions support efficient and accurate drilling processes.
Skilled personnel: Our personnel comprise skilled geotechnical engineers and experienced drill operators. This assurance ensures that the result obtained will be dependent no matter the kind of project involved.
Customized Solutions: We know that all projects are not the same. Because of this, we develop customized solutions to cater to specific needs. This becomes a bespoke way of accomplishing optimal success for clients from diversified industries.
International Reach: With a solid footing in many regions, we have reached clients worldwide. It provides reliable standardization of field conditions for different geographical locations. Its international ability makes it a name known and trusted in geotechnical drilling.
Applications of Geotechnical Drilling
Two significant applications comprise the services provided by the geotechnical drilling company, including but not limited to;
Foundation Design: Soil and rock data are essential for the safe and stable foundation design of buildings, bridges, and other architectural structures.
Infrastructure Development: Geotechnical drilling enables detailed subsurface information to construct roads, railways, tunnels, and dams.
Environmental studies: Drilling operations help evaluate the degree of groundwater contamination, soil stability, and other environmental conditions.
Mining Exploration: Geotechnical drilling analyzes subsurface conditions to help identify mineral deposits and assess their feasibility for extraction.
MetaDrill's expertise spans all these applications, ensuring clients receive reliable data to inform their decision-making processes.
Quality Equipment and its Importance
Quality drilling equipment is essential for a geotechnical operation's success. MetaDrill's proprietary Meta Drill rigs are the best and most perfect machinery, demonstrating quality. No other drill can match MetaDrill's performance and reliability in modern geotechnical investigations.
The list of geotechnical drilling rig manufacturers begins with MetaDrill. This company is always looking for ways to innovate to strive for industry trend leadership. Its drilling rig equipment features automation control, real-time data logging, and better safety features that enable effortless operation and precise results. MetaDrill has solutions that deliver much more than expected, from urban sites to complex geographies requiring powerful machines.
Geotechnical Drilling Sustainability
MetaDrill embraces sustainability in all its approaches. It maintains the lowest possible footprints on its environment through resource-saving practices, machinery, and equipment. From the design approach to the geotechnical drill rigs, MetaDrill ensures that there is efficient and effective machinery with a low level of emissions and even higher energy savings. Sustainable ways help the company support the customers in achieving their environmental goals without any performance sacrifices.
Partner With MetaDrill for Success
Choosing the right geotechnical drilling company is one of the most critical success factors for any construction or infrastructure project. MetaDrill has unparalleled expertise, innovative equipment, and a client-centric approach, making it a trusted geotechnical investigation partner.
With its proprietary Meta Drill drilling rigs and pursuit of innovation, MetaDrill offers its clients reliable and accurate data so they can make the right decisions for guaranteed success projects. MetaDrill is the leader in the manufacturing of geotechnical drilling rigs and leads in new developments of industry standards and improvements.
Final Thoughts
Geotechnical investigations are the bedrock of safe and efficient construction projects. The work of a trusted geotechnical drilling company should never be underrated. MetaDrill consists of an expert team, high-end geotechnical drill rigs, and innovative practices that assure the best results for its clients worldwide.
MetaDrill is not an investment in service but a partnership with a committed team to excel in all areas of geotechnical drilling. We continue to take the lead: one of the most trusted manufacturers of geotechnical drilling rigs, with our innovative drilling rigs and commitment to sustainability.

Compact drilling rig MD40 by MetaDrill delivers power, precision, and reliability for demanding terrain. Discover how this geotechnical solution, supported by next-generation drilling rig equipment and tools, sets industry standards higher.
What is MD40?
The MD40 is MetaDrill's technologically most advanced compact drill rig to date, which is specifically suited for small to medium-depth geotechnical applications. It is a blend of power and precision, featuring hydraulic controls, high torque rotary heads, and an optimized feed system to enhance drilling efficiency.
Engineered for use in all types of applications, the MD40 can handle any drilling rig tool, including SPT hammers, casing systems, and core barrels. It is universal for use in rotary, and coring operations, making it well-suited for a wide range of surface investigations.
Key Features of MetaDrill's Flagship Drilling Rig – The MD40
Efficient Power Unit
The MD40 includes a small-output diesel motor with a heavy-duty hydraulic system. This allows reliable performance in distant or hostile environments.
Advanced Drilling Control Panel
MetaDrill has included a reliable control system, allowing drillers to have direct access to various functions and drilling parameters.
Modular Configuration
From moving to a compact city site to drilling in hostile environments, the MD40's modular design allows for quick setup, haulage, and reconfiguration to accommodate job needs.
Safety Always
The compact drilling rig has a variety of safety features, including emergency stop switches and protective covers for moving parts.
MetaDrill Drilling Rigs: The MD40 and Beyond
While the MD40 represents the company's smallest product within the MetaDrill drilling rigs product family, the firm also offers a broad portfolio of rigs adapted to specific industries and uses. MetaDrill covers the full range of geotechnical drilling equipment.
Every model is designed to be compatible with MetaDrill's premium line of drilling rig tools and equipment, with the same level of performance delivered in every type of job.
Drilling Rig Tools and Equipment That Drive Performance
Any flagship drilling rig is only as powerful as the reliable drilling rig tools it is equipped with. MetaDrill provides a complete set of tools, including:
Augers: Solid and hollow stem varieties for various soil types.
Casing Advancers: For improved borehole stability.
SPT Hammer Assemblies: For accurate testing of soil resistance.
Core Barrels & Diamond Bits: For rock coring and mineral sampling.
DTH Hammers: For hard rock.
These drilling rig tools, and equipment are subjected to testing for use and compatibility with MetaDrill machines, specifically the MD40.
Real-World Applications: Where the MD40 Excels
The MD40 is not just strong—it is proven. The following are some examples of where this drilling rig has delivered top performance:
Urban Infrastructure Projects: With its compact module dimensions, the MD40 can enter confined-access areas for soil testing before road or tunnel construction.
Remote Mining Sites: Its medium torque & speed configuration allow it to push into hard geological strata, assisting in coring jobs.
Environmental Monitoring: The rig is designed to be used with NW drill rods and supports wireline systems such as HQ core size.
Training, Support & After-Sales Service
MetaDrill supports every drilling rig that it delivers. When you purchase or lease the MD40, you are entitled to:
Comprehensive operator training programs
Technical support 24/7
Preventive maintenance schedules
Spare parts availability
On-site commissioning
These services aim to reduce downtime for machines and increase ROI for customers relying on MetaDrill drilling rigs every day.
Why the MD40 Is the Ideal Choice for You?
Choosing the ideal compact drilling rig is a decision that impacts safety, efficiency, and project success. The MD40 shines for:
Its robust build and premium features
Ease of use and budget friendly
Accessibility in the form of drilling equipment rental or acquisition
Consistent performance in actual field conditions
Whether contractor, consultant, or equipment dealer, the MD40 provides long-term value, field-tested reliability, and unmatched drilling versatility.
Final Thought
The MD40 is not just a machine—it is the result of MetaDrill's commitment to quality, innovation, and leadership in the industry. As the company's compact drilling rig, it reflects everything MetaDrill stands for: engineering excellence, customer service, and vision.
Combined with premium drilling rig equipment and tools and supported by flexible drill rig rental and drilling equipment rental services, the MD40 is an intelligent addition to any geotechnical project.
Whether you are ready to upgrade to improved equipment or are looking at the possibilities of MetaDrill drilling rigs, the MD40 is the best place to start.

Geotechnical drilling applications must be accurate and reliable. MetaDrill delivers just that in the form of better rigs and equipment to handle real-world problems—soil testing to core drilling.
1. Geotechnical Drilling Applications: The Backbone of Infrastructure Projects
It begins underground. Whether you are building a skyscraper or an underground dam, accurate surface information is critical. That is why geotechnical drilling applications are now a requirement in the engineering, construction, and environmental fields.
MetaDrill provides a versatile line of compact drill rig systems engineered for subsurface exploration, soil sampling, and in-place testing. The rigs are engineered to provide high torque and controlled penetration in challenging soils.
Some actual examples of geotechnical drilling applications in the real world include:
Foundation testing before high-rise construction
Slope stability assessment in mountainous regions
Bridge pier examination for highways
Groundwater monitoring in flood zones
Engineers can get accurate data to apply to design, decrease risk, and meet requirements by using MetaDrill's innovative drilling rig equipment.
2. The Compact Drill Rig's Place in Urban and Restricted Environments
When space is limited, traditional rigs simply will not work. Urban areas usually have limitations in the dimensions of space, access, and noise. That is where MetaDrill's compact drill rig
MetaDrill's small units are perfect for high-performance drilling in tight or sensitive environments — rooftops, basements, sidewalks, and city building sites. Their lightweight frames and modular designs enable them to be shipped and set up easily without sacrificing power and function.
The key advantages of MetaDrill's small drill rig product line are:
Simple setup and minimal site disruption
Low noise emissions, ideal for residential sites
High mobility, even on uneven terrain
Remote control operability for increased safety
For city geotechnical drilling applications, mini rigs allow critical site exploration to continue unhampered without logistical issues.
3. Subsurface Exploration: Mining & Resources Exploration Drill Rigs
Accuracy and speed are key to mineral exploration and resource development. MetaDrill surface exploration drill rigs are built for deep sampling, core recovery, and geological interpretation — critical functionalities in the project's early stages of a mining or oil exploration venture.
These rigs support rotary drilling, and core drilling techniques to respond to diverse geological requirements. Fitted with advanced drilling rig tools such as wireline systems, diamond drill bits, and hydraulic systems, MetaDrill rigs are ready to conquer the toughest conditions.
Some of the most common geotechnical drilling applications in resource exploration include:
Core sampling in areas of mineral exploration
Hydrocarbon surveys for oil and gas operators
Lithology mapping in remote mountainous areas
Ground exploration for rare earth metals
4. Drilling Rig Equipment That Improves Performance and Safety
A drill rig is only as good as the tools it uses. That is why MetaDrill does not simply sell rigs; it also sells a complete suite of high-performance drilling rig tools designed for geotechnical, environmental, and exploration uses.
From drill bits and drill rods to sampling accessories and casing advancers, every single item is precision-made with longevity in mind. MetaDrill tools can be used with most standard systems and are rigorously tested to meet international performance and safety standards.
Why do experts prefer MetaDrill's drilling rig tools?
More tool life, even in abrasive formations
Improved sample recovery rates
Effective quick-change designs to reduce downtime
High compatibility with other rig models
Whether you are operating a compact drill rig or an elaborate scoring system, MetaDrill's toolkits ensure your operation runs smoothly from start to finish.
5. Heavy-Duty Drilling Rig Equipment for Tough Environments
MetaDrill rigs are designed to accomplish more than conventional soil sampling. They are designed to excel in harsh environments — from icy Tundra's to arid deserts and stone mountains.
With modular frames, adaptive drill heads, and aggressive construction, MetaDrill drilling rig equipment can successfully execute most varieties of geotechnical drilling applications, such as:
Drilling in sand and gravel borings
Rock core retrieval
Borehole stabilization in clay soils
The MetaDrill drilling rig gear capacity for change allows field crews to switch between techniques like SPT, auger drilling, and rotary drilling — all from one platform.
6. MetaDrill Advantage: Reliable Among Drill Rig Fabricators
Among the world's top drill rig manufacturers, MetaDrill distinguishes itself by innovation, customization, and full support. Our mission is more than rig sales — we are partners to facilitate engineers, geologists, and drilling contractors worldwide.
What makes MetaDrill superior:
Custom-made solutions for your unique drilling needs
Global logistics assistance and on-site training
Spare parts availability and after-sales assistance
From conception to operation, MetaDrill ensures that drilling rig gear is engineered for success in real-world geotechnical drilling operations.
7. Future of Geotechnical Drill Rigs: Smarter, Greener, Stronger
With advancing technology in the drilling business, the requirements for geotechnical drill rigs have also changed. Automated systems, environmentally friendly power systems, and remote monitoring are increasingly desired.
MetaDrill is at the forefront of this transition. We are currently developing next-generation rigs powered by hybrid systems, smart data collection modules, and AI-driven control units — innovations that will reshape geotechnical drilling applications in the coming decade.
Our R&D commitment means that our geotechnical drill rigs are not only capable of the job today but also prepared for tomorrow.
Final Thoughts
From soil testing in the inner city to core drilling in the backcountry, the effects of MetaDrill's rigs in the real world cannot be debated. Our high-end series of geotechnical drill rigs, drilling rig equipment, and exploration drill rigs allow professionals across all industries to dig deeper, smarter, and safer.
When it comes to reliable and versatile solutions for geotechnical drilling applications, MetaDrill is not just a provider — we are your drilling partner.
Ready to elevate your drilling operations? Contact MetaDrill today to learn more about our world-class rigs and tools.

Safety standards for drill rigs are not optional—do they must be. At MetaDrill, we pair innovative geotechnical drilling equipment with stringent safety procedures to safeguard operators and achieve successful operations.
1. Pre-Operational Safety Checks
Prior to any drilling operation, operators should conduct a thorough safety inspection. There are no exceptions. Some of the most important aspects of pre-operation inspection are:
Checking the structural condition of the drilling rig equipment
Checking the drilling rig tools, ensuring that they are calibrated and in place
Checking hydraulic systems, cables, and electrical wiring for signs of wear or damage
Checking the brakes and stability measures—particularly on compact drill rigs
By combining these practices, drill rig manufacturers such as MetaDrill reduce the likelihood of mechanical breakdown during field operations.
2. Rig Setup and Site Preparation
Inaccurate setup of a geotechnical drill rig is one of the primary causes of workplace accidents. To avoid this, the ground should be leveled and cleared of any rubbish. The rig should also be stationed on firm soil or platform to prevent slippage.
Operators should:
Use outriggers or chocks to stabilize mobile rigs
Provide clear access for emergency response
Mark all underground utilities prior to drilling
Adhering to safety standards for drill rigs while setting up drastically minimizes risks and provides a more secure working environment for all on-site.
3. Operator Certification and Training
One of the most important safety principles that are often neglected is human error. Regardless of how sophisticated your exploration drill rig may be, it is only as safe as the operator who handles it.
MetaDrill mandates that every user of its drilling rig equipment attends certified training programs.
These courses are as follows:
Hands-on exercises with compact drill rigs and large geotechnical drill rigs
Learning rig control panels and monitoring systems
Emergency shutdown and fire suppression procedures
General acquaintance with PPE (Personal Protective Equipment) protocols
Certified operators are not better trained—they are safer, more productive, and can identify early warning signs of failure.
4. Load and Pressure Management
Drill rigs, particularly those drilling deep, must sustain enormous torque and hydraulic pressure. Overrecommended levels can cause severe injury or machine failure.
To ensure safety standards for drill rigs, operators should:
Adhere to MetaDrill's load limit recommendations for every drill rig model
Regularly check hydraulic pressure gauges
Utilize only authorized accessories and drilling rig tools for every operation.
All MetaDrill's rigs have built-in safety sensors that send an alarm when parameters are reached. This forward-thinking technique of load management is vital in high-risk operations.
5. Emergency Shutdown Protocols
Oops, accidents occur, but someone must be ready. Each drilling rig operator needs to be well-versed in MetaDrill's emergency shutdown procedures. These differ according to model but usually involve:
Instant power disengagement
Hydraulic release or lockout
Securing drill rods and other moving components
Activating on-rig fire suppression systems (where required)
Safety standards for drill rigs require that all these processes be accomplished in seconds to avoid injury or damage to equipment.
6. Maintenance and Calibration Logs
Maintenance is not optional—it is a legal and operating mandate. Maintaining comprehensive logs ensures that the equipment functions reliably and within safety margins.
MetaDrill recommends that users keep a digital maintenance log that monitors the following:
Usage hours on each drilling rig tool
Replacement cycles for wearable parts
Pressure and depth sensor calibration dates
Warning system activations or incident reports
This not only complies with international safety standards for drill rigs but also maximizes the usage lifetime of your equipment.
7. Handling of Drilling Rods and Accessories Safely
One of the most underappreciated hazards is manual handling. Pinched fingers, back strains, or even worse, can happen to operators if proper guidelines are not being practiced.
Safety procedures cover:
Utilizing rod handlers or robotic loaders (where possible)
Packing anti-slip gloves and protective equipment
Utilizing the appropriate rod for the job—particularly when handling geotechnical drill rigs
Each drilling rig manufacturer, including MetaDrill, advises utilizing original accessories for a proper fit and to secure safe operation.
8. Environmental and Noise Safety Compliance
Compact drill rigs are usually applied in urban or environmentally sensitive locations. Thus, operators must comply with environmental regulations and noise safety legislation.
It entails:
Implementing sound-dampening systems
Storing and disposing of drilling fluids in a proper manner
Preventing soil contamination by handling spills
Employing biodegradable lubricants when necessary
Compliance with these environmental safety standards for drill rigs safeguards the earth and also your company's reputation.
9. Communication Protocols and Site Supervision
No rig must ever be deployed alone. There must be communication between rig supervisors, safety officers, and operators.
MetaDrill suggests:
Two-way radios or portable communication units
Safety briefings daily prior to the operation
Visual and audio emergency signal protocols
Having a supervisor watch every rig's performance in real-time
Excellent communication is in line with international safety standards for drill rigs and minimizes the likelihood of a slow response during an emergency.
10. Selecting the Right Rig for the Task
One of the most important safety choices occurs prior to the drilling process: choosing the proper rig. Utilizing improper rigs can cause inefficient performance or unsafe conditions.
Companies that make drill rigs, such as MetaDrill, offer customized solutions, including:
Small drill rigs for city or space-limited settings
Exploration drill rigs for deep mineral drilling
Geotechnical drill rigs for soil sampling and site inspection
Every rig has safety features particular to its use. Using the proper model will help you stay up to date with the current safety standards for drill rigs.
Final Thought
Safety is not a box to tick off once—it is a continuous commitment. Both as an experienced operator or a beginner, understanding and following the proper safety guidelines for drill rigs is crucial.
MetaDrill is proud to be more than a drill rig manufacturer—we are a safety-first partner to thousands of drilling professionals worldwide.
By investing in MetaDrill's series of high-performance drilling rig equipment, adhering to training programs, and enforcing stringent safety protocols, you are not only protecting lives and property—you are setting the gold standard for the entire drilling industry.
Remember: safety is not just smart. It is essential.

Drilling equipment supplier MetaDrill distinguishes itself by providing more than high-performance drilling rig equipment and drilling rig tools. Focused on after-sales service, MetaDrill educates distributors with professional support, on-site training, and adaptable drilling equipment rental options—bringing long-term success after the sale.
Setting the Standard as a Drilling Equipment Supplier
MetaDrill is more than a drilling equipment supplier—it is a solutions provider. The company offers a wide range of geotechnical drill rig models, precision-engineered drilling rig tools, and specialized drilling tools tailored to diverse soil conditions and field applications.
Through close cooperation with drill rig manufacturers, MetaDrill ensures that its products are harmonious with global standards and changing project requirements. This technical congruence provides distributors with assurance that they can promote and sell the products with a complete guarantee of quality and flexibility.
Why After-Sales Service is a Game Changer
Though numerous firms sell drilling equipment and rig tools, few compared to MetaDrill's commitment to long-term care. MetaDrill's after-sales service strategy is founded upon one simple motto: making distributors and their customers successful in every stage of drilling operations.
1. Training & Product Familiarization
Distributors and their customers frequently work in intricate environments where errors are expensive. MetaDrill closes the gap of knowledge with the following:
Comprehensive training programs for new gear
Know How Videos for Operators
Service Videos & Supporting documentation
On-site operational assistance
These programs are tailored to increase technical confidence and minimize downtime in the field.
2. Exclusive Technical Support
MetaDrill provides exclusive technical consultants who help with the following:
Mechanical or hydraulic fault troubleshooting
Choosing the optimal drilling tools for geotechnical conditions
This technical level improves the distributor's capability to serve their local markets effectively.
3. Genuine Spare Parts Supply
Meta. Drill keeps in stock and delivers authentic parts for its entire range of geotechnical drill rigs and drilling equipment, so clients will not have to experience downtime because of missing parts. Hydraulic systems, pumps, gear sets & hydro motors – all parts are guaranteed to meet original specifications.
Customization and Local Adaptation
As an experienced drilling equipment supplier, MetaDrill is aware of the varied requirements of international markets. Profiles of soil, climatic conditions, and drilling targets differ enormously. That is why MetaDrill provides customization facilities such as:
Torque modification in drill heads
Adjustment of mast height
Adaptability with region-specific drilling rig tools
Distributors can collaborate closely with MetaDrill's design team to develop region-optimized rigs that provide maximum efficiency under regional conditions.
Inventory Management & Forecasting Tools
To ensure distributors never run out of essential drilling rig equipment, MetaDrill provides digital forecasting tools for inventory. With these, distributors can:
Monitor usage trends
Forecast demand for best-selling drilling tools
Reorder frequent-use parts and components automatically
Taking a proactive step avoids equipment shortages and enhances the distributor's credibility in the market.
Environmental & Safety Compliance
MetaDrill also assists its partners by making sure drilling rig tools and equipment meet local and international environmental and safety standards. These include:
Emission control standards
Noise level certifications
Safety manuals and inspection checklists
This provides added value to the distributor's product, particularly when handling government or environmentally related projects.
Technical Documentation and Remote Access
MetaDrill's cloud support system provides distributors with 24/7 access to:
Product manuals
Maintenance videos
Assembly manuals for all drilling equipment types
Even in outlying areas, technicians will have access to real-time troubleshooting manuals, lessening reliance on factory travel.
Establishing Trust with Reliability
MetaDrill's mission as a drilling equipment supplier is one partnership and sustained success at its foundation. While others might be strictly sales-oriented, MetaDrill's emphasis on service, training, and rental adaptability keeps them ahead.
This reliability has made MetaDrill a go-to supplier for organizations looking for a reliable partner to supply geotechnical drill rigs, drilling rig tools, and extensive after-sales support.
Final Thoughts
In this competitive day and age, distributors require more than one product—specifically; they need a drilling equipment supplier that is interested in their success. MetaDrill answers that call by offering not only top-of-the-line drilling tools and drilling rig tools and equipment but also a complete array of services that enable performance in the field.
From rental solutions for drill rigs to predictive parts delivery, MetaDrill equips its distribution chain with the tools necessary to succeed. If you are a distributor interested in widening your reach with a reliable product and support platform, joining forces with MetaDrill may be the best business decision for you.

Tools for soil sampling are vital for accurate geotechnical work. At MetaDrill, we provide high-quality drilling rig tools and equipment—from augers to bits—built for tough field conditions. This blog covers must-have tools, their uses, and tips for choosing or renting the right gear.
Why Tools for Soil Sampling Matter?
Utilizing appropriate tools for soil sampling guarantees reliable geotechnical information, which is essential in the design of foundations, retaining walls, tunnels, and others. Faulty samples result in subpar decision-making and expensive outcomes during construction.
Soil sampling requires boring into the ground with a geotechnical drill rig, taking samples at multiple levels, and testing their characteristics in a laboratory. For such drilling to be effective, your drilling rig equipment should be pressure-resistant, function effectively across diverse types of soil, and be simple to carry and assemble.
Must-Have Drilling Tools in a Soil Sampling Kit
1. Augers
Augers are the heart of many tools for soil sampling setups. They are used to extract soil from boreholes and can be broken down into hand augers or powered augers based on the project scale. Helical augers are suited for loose and soft soils, while bucket augers perform optimally in clay or cohesive soils.
2. Sampling Rods
These connect your auger or sampler to the drive head or handle. High-quality rods must offer a tight connection, resist bending, and transmit torque effectively. For deep soil testing, longer rods that maintain strength and alignment are crucial.
3. Bits and Cutting Heads
The type of bits you use will significantly affect the efficiency of your sampling process. Carbide-tipped bits can cut through dense soils or even soft rock. These bits are often interchangeable depending on the formation being drilled, making them a versatile choice for your drilling rig tools and equipment.
4. Split Spoon Samplers
Split spoon samplers are commonly used for Standard Penetration Testing (SPT). They provide disturbed samples that are useful for basic soil classification and geotechnical engineering analysis. The tool is driven into the ground with a hammer, and soil is collected within a split barrel.
5. Shelby Tubes
For more delicate sampling, Shelby tubes are used to retrieve undisturbed soil samples. These are crucial when analyzing clay soils, as they allow engineers to study the soil's true structure and water content.
6. Core Barrels
When dealing with harder soils or rock, core barrels become essential. They cut and retrieve cylindrical samples which are intact and can be used for advanced lab testing. Their robust design is a staple in many drill rig manufacturers' catalogues.
7. Adapters and Connectors
A reliable set of adapters allows for flexibility between different drilling tools and rigs. This becomes especially useful when you are using a drill rig rental or switching between brands or tool types.
8. Hammer Systems
Manual or automatic hammers are used for driving samplers to the ground. The type of hammer and energy applied can affect the accuracy of tests like SPT. It is vital that your drilling rig tools include a hammer that is both reliable and calibrated.
Factors to Consider When Choosing Tools for Soil Sampling
1. Soil Type
Sandy, silty, clayey, or rocky soils all demand specific drilling tools. Sandy soils, for example, may demand split spoons and hollow-stem augers, whereas rocky locations could demand coring tools.
2. Depth of Sampling
The deeper the borehole, the stronger and more effective your drilling rig tools, and equipment must be. Think about thread strength, tool size, and rig compatibility.
3. Drilling Method
Direct push, rotary, and percussion methods all have their ideal equipment. Ensure your kit is compatible with your chosen sampling method and geotechnical drill rig.
4. Equipment Compatibility
Utilization of equipment that is compatible with your drill rig suppliers' recommendations is essential. Incompatibility can result in equipment malfunction or improper sampling.
5. Rental vs. Purchase
If your project is a specialty or short-term, equipment rental for drilling will be a good option. For regular geotechnical activities, however, buying your own drilling rig equipment and tools will be more cost-effective and convenient eventually.
Why Choose MetaDrill for Your Soil Sampling Tools?
Being a top drill rig manufacturer, MetaDrill provides more than rigs. We provide a large variety of tools for soil sampling, designed for real-world field applications, and built for performance and longevity.
Maintenance Tips for Soil Sampling Tools
To maintain your drilling rig equipment in its most efficient state:
Clean between uses to avoid rust and wear.
Check for damage or excessive wear of threads and connections.
Store the tools in dry conditions to avoid corrosion.
Lubricate the moving parts for long-term efficiency.
Regular maintenance not only prolongs the lifespan of your geotechnical exploration equipment but also provides safety and reliability in your geotechnical exploration.
Final Thoughts
Choosing the appropriate tools for soil sampling is a supremely important decision that will make your geotechnical project more precise, expensive, or successful. From rods and augers to hammers and core barrels, they all have their applications.
MetaDrill remains the industry expert's go-to partner, providing premium drilling equipment, bespoke kits, and field-portable drilling equipment rental packages—all designed to make your soil sampling quicker, wiser, and more dependable.
Soil sampling gear is not an afterthought—it is the foundation of successful site investigations. Give your team the best. Select MetaDrill.

Reliable drilling equipment is the foundation of geotechnical success. MetaDrill provides innovative tools, rigs, and rental options to solve real-site problems with performance you can rely on.
Why Is Reliable Drilling Equipment Important?
Conditions in the field cannot be relied on. You are drilling clay one day and up against hard bedrock the next, face to face. That is why rugged drilling equipment is not just an option but the only choice. Equipment breakdown not only postpones projects but also puts safety, accuracy, and trust with the client at risk.
MetaDrill drilling rigs are designed with that in mind. Our systems are durability tested, constructed using the finest materials, and backed by continued innovation. You can rely on us when you are in the field to keep your operation going smoothly.
Understanding Geotechnical Drilling Equipment
Geotechnical drilling equipment is employed to drill through different soils and rocks to collect core samples, perform stability tests, and find underground conditions. Geotechnical drilling equipment is essential to the construction, mining, and environmental sectors.
Common equipment consists of:
Drilling rig equipment like core barrels, augers, and casing systems
Trailer and portable-mounted drilling rigs
Power units—electric motors, hydraulic, or diesel engines
Measurement devices for resisting soil and sample integrity
Our range of rugged drill equipment is designed to respond to many geotechnical challenges. From tight urban sites to far-flung remote areas, MetaDrill performs.
The MetaDrill Advantage
As a leader in geotechnical machinery, MetaDrill does not just manufacture equipment—we offer solutions. Every piece of our reliable drilling equipment is backed by deep engineering expertise and field-tested innovations.
1. Rugged and Field-Proven
Our MetaDrill drilling rigs are built with industrial-grade frames, corrosion-resistant components, and versatile torque settings. They are compact enough for tight sites yet powerful enough to handle hard rock formations.
2. Easy Maintenance and Support
Downtime is expensive. That is why our drilling rig tools, and equipment are designed for quick maintenance with easy-to-replace parts. Our customer support team is always ready with technical guidance and spare parts dispatch.
3. Scalable Solutions
Whether you are an independent contractor or a multinational firm, we provide drilling equipment rental services tailored to your project's scope and duration. Our drill rig rental fleet includes lightweight, portable rigs, mid-sized track-mounted units, and heavy-duty deep drilling machines.
Our Equipment Range
At MetaDrill, we offer a comprehensive suite of geotechnical drilling equipment designed for performance and reliability.
Track-Mounted Rigs
Ideal for challenging landscapes, these rigs offer enhanced mobility and torque. Our clients frequently choose these models when searching for reliable drilling equipment for hillside or marshland drilling.
Truck-Mounted Units
Need something mobile with more power? Our truck-mounted MetaDrill drilling rigs come with integrated systems that save time on setup and teardown.
Trailer-Mounted Rigs
Offering a great balance between portability and performance, trailer-mounted rigs are easy to tow and quick to deploy. They’re a popular choice for teams working across multiple remote sites with limited space for maneuvering.
Skid-Mounted Rigs
Built for stationary or platform-based operations, skid-mounted rigs are robust and easy to position with lifting equipment. Ideal for tight job sites, barges, or industrial facilities where mobility isn't a priority but durability is essential.
Drill Rig Rental Options
Not every project needs a permanent rig. That is where our drill rig rental services come in. We offer short-term and long-term drilling equipment rental plans with flexible rates and maintenance support. This allows clients to scale operations without the capital burden of owning heavy machinery.
Our drilling equipment rental service includes:
On-demand technical inspections
On-site training for operators
Transportation and logistics support
Emergency replacements within 24 hours
Whether you are just starting out or expanding your fleet temporarily, our reliable drilling equipment is ready when and where you need it.
Applications Across Industries
Our geotechnical drilling equipment is used in a wide variety of applications:
Construction: Pre-foundation soil testing, slope stability analysis
Mining: Core sample extraction and overburden removal
Environmental: Groundwater monitoring, pollution analysis
Infrastructure: Roadway and bridge inspections, tunnel boring assessments
No matter your industry, we guarantee reliable drilling equipment that is ready for action.
Innovation in Every Detail
We innovate constantly at MetaDrill with feedback from the field. Our R&D is constantly supported by geotechnical engineers to enhance the efficiency and usability of our drilling rig tools.
Global Reach, Local Service
We provide clients in the Middle East, Asia, and Africa with localized inventory as well as global shipping. With partnerships with qualified service centers worldwide, your dependable drilling gear will always be covered—regardless of location.
Why Choose MetaDrill?
100% focus on geotechnical drilling equipment
In-house R&D and custom fabrication
On-site demos and operator training
Flexible drill rig rental packages
Technical support and fast part replacements
Trusted by industry leaders, including ACTS, Saudi Labs, and Saudi Tech Group
Final Thoughts
The margin between project success and delay is frequently just a component—quality drilling equipment. At MetaDrill, we recognize that your business reputation and success are in line with the equipment you operate. That is why our entire product range—from drilling rig tools and equipment to flexible drilling equipment rental programs—is designed for performance, reliability, and confidence.
In a world where efficiency and accuracy are more crucial than ever, MetaDrill drilling rigs give you the advantage you require to remain in compliance and ahead of the pack. Do not accept outmoded or unremittingly faulty equipment—take your field performance to the next level with MetaDrill today.

Efficient geotechnical rigs are necessary for precise rock and soil analysis in the speedy projects of today. MetaDrill provides high-performance rigs designed to be fast, safe, and results reliant.
The Need for Speed and Accuracy in Geotechnical Drilling
The geotechnical industry today finds itself under greater pressure to deliver studies in a timely manner with tighter project timelines, urbanization, and environmental regulations. Older drilling technologies and inferior rigs create bottlenecks, ensure safety hazards, and compromise sampling performance. That is where modern efficient geotechnical rigs make the difference — enabling faster setups, quicker penetration rates, and minimal downtime while never compromising on the accuracy that engineers and geologists rely on.
MetaDrill: The Innovation Behind the Speed
MetaDrill is not just another name among drill rig manufacturers; we are a solution partner. Our focus on innovative design, high-quality materials, and operator-friendly technology ensures that our rigs outperform outdated models in every key metric — speed, accuracy, fuel efficiency, and versatility.
Whether you are involved in core sampling, surface exploration, Standard Penetration Testing (SPT), or monitoring boreholes, MetaDrill geotechnical drilling equipment is built for fast deployment and high endurance.
Key Features of MetaDrill’s Fast Geotechnical Rigs
Quick Setup & Breakdown
Our rigs are designed with modular frames that allow for fast assembly and disassembly. This means crews spend less time on setup and more time drilling.
Advanced Drilling Power
Using powerful engines and optimized torque settings, MetaDrill drilling rigs achieve faster penetration rates even in tough formations — a major asset in rock-heavy or mixed soil terrains.
Compact & Mobile Designs
Many of our geotechnical drill rig models are compact enough like the MD40 for tight urban sites, yet powerful enough for fieldwork. Mobility increases productivity across project types.
Multi-Functional Capability
From auger and rotary drilling to coring and SPT, our rigs can be equipped with multiple attachments. This reduces the need to switch equipment between jobs.
Smart Control Systems
Some models feature digital monitoring systems that help operators track pressure, depth, and RPM in real-time. This boosts safety and enhances decision-making during operations.
Benefits of Drilling Smarter with MetaDrill
Choosing MetaDrill is not speed — it is about drilling efficiently and faster. Here is how our rigs contribute to operational excellence:
Higher Productivity
Projects that once took weeks can now be completed in days, thanks to the unmatched efficiency of our fast geotechnical rigs
Lower Operating Costs
Faster drilling cycles mean reduced fuel, labor, and overhead costs. Over time, this leads to significant savings for clients and operators.
Greater Accuracy
Precision is essential in geotechnical analysis. Our rigs provide cleaner samples and stable boreholes, improving data quality for engineers.
Improved Site Safety
Automated features and ergonomic designs reduce the risk of operator fatigue and onsite accidents.
Serving All Your Geotechnical Needs: Manufacturing to Rental
MetaDrill supports both purchase and rental models, making our solutions accessible to companies of all sizes. Whether you are looking for long-term ownership or short-term deployment, we have you covered.
Drill Rig Manufacturers You Can Trust
As trusted drill rig manufacturers, we do not just sell rigs — we design and build them based on years of industry experience and feedback from field professionals. Our manufacturing facility uses precision engineering and durable materials to ensure every rig meets international standards.
Drill Rig Rental Options
Need a rig for a specific project or temporary job? Our drill rig rental service offers a cost-effective solution. You get access to high-performance rigs without long-term investment or maintenance responsibility.
Applications of MetaDrill Geotechnical Drilling Equipment
Our rigs are used in a wide range of geotechnical and environmental applications:
Soil and rock sampling
Foundation design investigations
Groundwater monitoring
Site classification
Environmental remediation
Surface Exploration
Thanks to our efficient geotechnical rigs, field teams can complete boreholes quickly and safely, even in the most demanding locations.
Customer-Centric Support & Custom Solutions
What sets MetaDrill apart from all the other drill rig manufacturers is our strong focus on customer requirements. From the first consultation to support after sales, we are by your side to ensure you get the best out of your investment.
Looking for a custom geotechnical drill rig for a specific type of ground? We work with customers to design rigs that meet their operational goals, site conditions, and budget.
Real Results from Real Clients
Across the Middle East, Africa, and Southeast Asia, MetaDrill drilling rigs are used by engineering consultants, testing labs, and government contractors. Our clients report:
30% faster drilling cycles
Lower maintenance downtime
Consistently high sample quality
Improved transportation and logistics with our two-speed tracked undercarriage.
Our reputation in the industry comes not only from the quality of the machines, but from providing quick geotechnical rigs that work reliably, all the time.
Final Thoughts
If you are still using slow, old mechanical rigs that bog down your project schedules, it is time to move up. MetaDrill geotechnical drilling rigs are designed for the speed of today's construction and infrastructure needs. We know that in this business, time equals money — and information equals everything. That is why we are dedicated to delivering efficient geotechnical rigs that enable you to drill smarter and quicker.
Whether you need a permanent solution from reliable drill rig manufacturers or are looking into drill rig rental for temporary requirements, MetaDrill is the right equipment for the task. Our complete range of drilling equipment rental and rig models is supported by experienced services and tested in the field.
Explore the future of drilling — with MetaDrill.

Hydraulic geotechnical drilling rigs are safer, smarter, and more productive. Find out why operators are making the move, how geotechnical drilling rig manufacturers are taking the lead, and why drill rig tools today are more robust than ever.
1. The Revolution in Geotechnical Drilling Technology
The next generation of drill rigs is undoubtedly hydraulic. As the industry continues to evolve, manufacturers are focusing on hydraulic systems as the foundation for future advancements due to their precision, power, and adaptability. In the very near future, these rigs are expected to become fully or partially electrified, reducing emissions and operational noise while increasing energy efficiency. Additionally, integration with advanced technologies such as sonic drill heads is becoming more common, enabling faster and cleaner drilling in challenging formations. These innovations are setting new standards in drilling performance, positioning hydraulic and electrified systems as the future of geotechnical and environmental drilling.
2. Why Next-Gen Rigs Are the Future
Why are companies investing in Next-generation geotechnical drilling rigs more than ever?
a. Automation & Smart Controls
Advanced control systems enable users to make real-time adjustments to drilling conditions, providing them with more precise borehole data. Touchscreen terminals and onboard monitoring equipment, new rigs minimize errors, decrease learning curves, and increase productivity.
b. Compact Drilling Capabilities
Yesterday's heavy drill rigs were no longer necessary today. Modern compact drill rigs are light, portable, and ideal for thick city centers or challenging ground. No longer must businesses utilize enormous footprints to perform geotechnical exploration—one of the greatest benefits of field operations today.
c. Safety First
Next-generation geotechnical drilling rigs arrive with safety interlocks, emergency shutdowns, and remote monitoring systems that minimize the possibility of accidents during the job by half. Not only is the workforce safer, but regulatory compliance also improves.
d. Environmentally Friendly Design
With reduced noise, lower emissions, and energy-efficient hydraulics, the next-generation drilling rig is on par with international standards of sustainability. They also minimize ground disturbance—a requirement for sensitive projects.
3. Role of Geotechnical Drilling Rig Manufacturers
Top geotechnical drilling rig manufacturers like MetaDrill are at the forefront of this technological leap. We have dedicated years to engineering rigs that meet today’s challenges while anticipating tomorrow’s needs.
Whether constructing rigs with modular mast assemblies or incorporating smart data systems, manufacturers today are tasked with redefining the way companies drill, test, and make decisions.
As one of the world's top manufacturers of geotechnical drilling rigs, our goal is to equip drillers with robust, smart, and dynamic rigs that not only work to specifications—but beyond.
4. Smart Drill Rig Tools: The Unsung Workhorses
Equipping next-gen drilling rigs also involves using better drilling rig tools to get more performance, precision, and longevity.
Drill Rig Tool Latest Advances:
High-Speed Core Barrels: Facilitating quicker recovery in mixed soils.
Wireline Systems: For seamless sample recovery with minimal disruption.
Advanced Bits & Augers: Robust to withstand abrasive formations and long life.
Integrated Tool Racks: Constructed on rigs for better organization and quick change.
It is not an add-on; drill rig tools constitute the new rig setup. Better tools prevent wear and tear, lowering operational costs in the long term.
5. Cost Efficiency Through Innovation
Certain companies are slow to adapt at first because of the cost, but the ultimate cost advantage of next-generation geotechnical drilling rigs cannot be ignored.
This is how companies are making their money:
Less fuel and oil usage
Less maintenance on account of intelligent components
Less labour expense with semi-autonomous capability
Less project downtime resulting from real-time diagnostic checks
Environmentally friendly
And do not forget the worth of quicker completion time and contented customers.
6. Sustaining the Whole Ecosystem: Drilling Tools & Accessories
In addition to high-technology rigs, contemporary drilling companies depend on equally sophisticated drilling tools and accessories to bring their equipment to fruition.
MetaDrill provides the complete range of:
Soil sampling kits
Cone penetration gear
Heavy-duty augers
Tricone bits for deep drilling
Casing and grouting gear
Our equipment is specifically designed to integrate invisibly into geotechnical drill rigs of all sizes. That translates into quicker setups, improved results, and more versatility.
By offering end-to-end solutions—from the geotechnical drill rig to every necessary tool—we ensure that customers are not buying equipment; they are investing in a higher standard of operation.
7. What to Look for in a Next-Generation Rig
If your company is considering the upgrade, make sure to seek out:
Rig Mobility: Road-towable or track-mounted for harsh environments?
Depth Capabilities: Does it have room for your typical project requirements?
Tool Compatibility: Does it suit your current drill rig equipment?
Data Integration: Does it gather, process, and display results in real time?
After-Sales Support: Are spare parts, tools, and maintenance readily available?
We help customers during the selection process to allow them to choose the appropriate next-generation geotechnical drilling rigs for their application and budget.
8. To the Future: The Future of Drilling
As more countries invest in smart cities, clean energy, and infrastructure, there will be a growing need for smarter geotechnical solutions. More automation, AI-based borehole analysis, and even remote-operated electrified rigs are on the agenda for the next few years.
Drilling is no longer just spudding on the ground—it is finding it quicker, smarter, and more responsibly. The future comes with next-generation geotechnical drilling rigs.
Final Thought
Preparing for the next generation is no longer a choice. It is a matter of safe operation, improved performance, and investing in security. As contractor, developer, or engineering consultant, the rigs—and results—they deliver are louder than words.
With state-of-the-art geotechnical drilling rig manufacturers such as MetaDrill, your operators now have access to high-quality tools, custom-designed drilling rig parts, and full drilling systems designed for the real world.
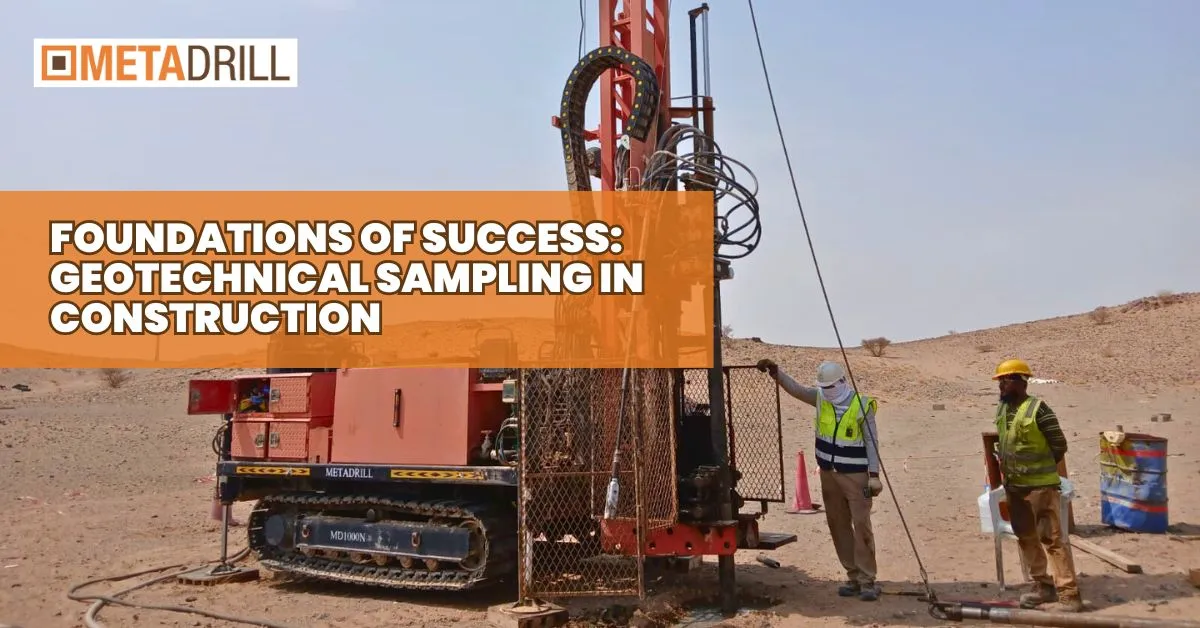
Construction success starts with what is beneath—the ground. Soil analysis for construction is imperative. MetaDrill ensures safe and precise drilling through capable and efficient geotech drill rigs.
The Importance of Testing Construction Soil
Soil testing for construction is not merely a standard practice; it is a technical examination of how the earth's material will behave in a proposed site. Through testing the physical and chemical properties of the soil, engineers can determine its load-bearing capacity, permeability, compressibility, and possibility of expanding or shrinking.
Surprising soil issues can lead to structural collapse, delay, or even the necessity of totally redesigning the project. That is why leading developers and contractors hire companies to perform precise and credible soil analysis for construction prior to excavation.
How Geotechnical Sampling Works?
Geotechnical sampling is comprised of collecting the soil and rock samples at the site level and performing the tests in laboratories using those samples. Sub-surface conditions and the foundation and basement designs, along with other structural elements, are used to design decision-making based on the obtained samples.
The process usually begins with exploratory drilling, where these drilling rigs drill through various layers of soil and recover core samples. Drilling is executed at planned borehole positions, typically with variations in depths, so as to entirely detail the profile of the soil.
The samples, once gathered, undergo the following tests:
Moisture content
Grain size distribution
Shear strength
Plasticity
Density and compaction characteristics
All these conditions decide whether a shallow foundation can be done or a deep foundation system, such as piles or caissons, needs to be used.
Role of Exploration Drill Rigs in Sampling
Exploration drill rigs are powerful devices used for drilling deep into the earth. They can serve a varied array of geologic conditions, from sandy terrain to hard rock. We own advanced exploration drill rigs that allow for rapid and safe sampling even in challenging geologies.
The choice of geotechnical drilling differs depending on site conditions and analysis experience. Auger drills are preferred when drilling soft soils, while rotary drills are used for deeper and more complex sites. The flexibility and adaptability of our exploration drilling methods mean that no underground condition is too difficult to explore.
Innovation Through Advanced Drilling Rig Equipment
High-quality drilling rig equipment is critical to efficiency and accuracy in geotechnical sampling. MetaDrill manufactures drill rigs that meet international standards of safety and performance. Our rigs incorporate the latest technology, including:
Real-time data logging systems
CCTV Camera system for drilling work remote monitoring and recording
GPS and fleet monitoring
Environmentally friendly emission engines Tier 4F/Stage V for US and Europe.
Choosing the Best Drill Rig Manufacturers
Not all drill rig manufacturers are the same. Choosing the best ensures the equipment's longevity and productivity in the field. MetaDrill manufactures drill rigs characterized by innovation, safety, and long-term durability.
Through strategic alliances with leading suppliers, we offer better results for our customers—accurate sampling, faster project turnaround, and decreased site risk.
Exploration Drilling: More Than the Fundamentals
Though exploration drilling is mostly linked with mineral and oil prospecting, its application in construction has become ever more critical. In urban settings, subsurface conditions tend to be uncertain owing to past land use, buried infrastructure, or irregular fill materials.
Through exploration drilling, the engineers can detect anomalies that would otherwise remain concealed, e.g., voids in the ground, contamination, or unstable strata. That enables more informed decisions during design and potential savings in the range of millions in costly retrofits or litigation down the line.
You can also check: The Challenges of Drilling in Sensitive Environments
Sustainability and Safety in Every Sample
With increased environmental legislation comes the necessity to ensure sustainable construction of drill rigs. We integrate sustainability into every phase, from waste reduction in manufacturing to low-emission exploration drill rigs to
In addition, our team follows strict safety and safety protocols, which ensure the well-being of our staff and the public. We invest in continuous training, equipment maintenance, and hazard reports.
Final Thoughts
Soil analysis for construction is not just a technical necessity,it is a strategic benefit. With Our advanced exploration and geotechnical drill rigs, you do not just drill but you receive confidence and precise results.
Invest in the right equipment. Invest in MetaDrill drill rigs.
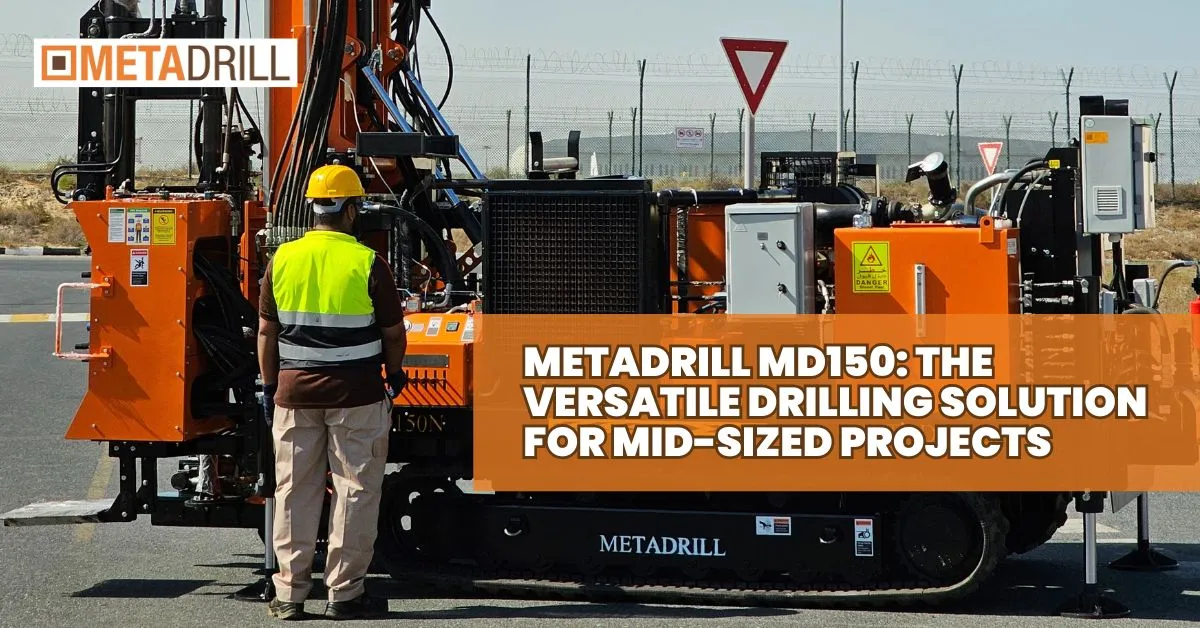
MetaDrill MD150 is a powerful unit in a compact package and the ultimate versatile drilling solution for medium-sized applications. It assures precision, performance, and versatility for geotechnical, construction, and exploration drilling.
Compact Power with Maximum Performance
Designed for applications where space and precision matter, the MD150 is a compact-drilling dynamo. It offers high-output performance in a tiny footprint, which suits well for city, far-off, and difficult-to-reach places. Light in weight and easy to transport, you can mobilize quickly and start operating with reduced downtime.
Being one of the most versatile drill rig models in existence today, the MD150 establishes new benchmarks for what a versatile drilling solution can and ought to be—powerful, compact, and technologically advanced.
Advanced Specifications of MetaDrill MD150
The MetaDrill MD150 is not just compact—it is power-packed and precision-engineered. As a true versatile drilling solution, its specifications meet the ambitious standards of modern drill rig manufacturers and on-site professionals alike:
Drilling Depth Capacities:
Rotary Drilling: NW up to 114 m
Core Drilling: N Wireline – 150 m, H – 100 m, P – 60 m
Drill Pipe Compatibility: 114 mm (4.5 in) OD Drill Pipe – 45 m range
Engine Options: Tier IIIA / Stage V (FPT, John Deere, or Kubota) – 87 kW (116 HP)
Diesel Tank: 120L (36 gallons)
Ignition System: 12V
Pullback Force: 5,000 daN (11,020 lbs)
Pulldown Force: 3,750 daN (8,260 lbs)
Feeding Stroke: 3.4 m (optional 2.1 m)
Feed Speeds:
Down: 0–15 m/min
Up: 0–10 m/min
Rotation System: Four-speed gearbox with variable displacement motor
Torque and Speed Settings
Max Speed: 1,250 RPM
Max Torque: 4,500 Nm (3,300 lb-ft)
High Torque Mode:
Gear 1: 41 RPM / 4,500 Nm
Gear 2: 82 RPM / 2,248 Nm
Gear 3: 146 RPM / 1,260 Nm
Gear 4: 257 RPM / 720 Nm
High Speed Mode:
Gear 1: 198 RPM / 930 Nm
Gear 2: 400 RPM / 460 Nm
Gear 3: 712 RPM / 260 Nm
Gear 4: 1,250 RPM / 148 Nm
Additional Features:
High-Capacity Winch: 2,700 kg, 0–40 m/min
Wireline Winch: 1,000 kg, 165 m cable capacity
Mud Pump: Progressive cavity type, 140 L/min, 18 bar (265 PSI)
Rod Clamp Range: 50–150 mm with clamping force up to 23,000 daN
Breakout Torque Assembly: 30,000 Nm
Automatic SPT Hammer: 63.5 kg, up to 50 blows/min
Dimensions & Mobility:
Base Weight: 4,000 kg (skid rig)
Total Weight: 5,500 kg (with crawler)
Length: 6,450 mm
Width: 2,550 mm
Height: 3,010 mm
Optional Add-ons:
Triplex Mud Pump
Mast Extension
Remote Control Unit
CCTV Monitoring System (4 Cameras + Recording)
Digital Recording & Transmission of Drilling Parameters
With this exceptional toolkit, the MD150 delivers a full-spectrum drill rig experience tailored to modern needs.
Ideal for Exploration and Geotechnical Drilling
The MD150 is particularly effective for exploration drilling, where varying subsurface conditions require flexible, reliable machines. Its high-torque rotation settings and mast angle adjustment (0–55 degrees) enable operators to achieve precise angular boreholes with unmatched control. Whether you are working on soil sampling, core extraction, or groundwater assessment, this versatile drilling solution adapts to your mission.
Compatible Drilling Rig Tools and Equipment
One of the major advantages of the MD150 is its compatibility with a broad range of drilling rig tools and equipment. The system supports various drilling tools like augers, core barrels, and down-the-hole (DTH) hammers. With robust rod clamps and high breakout torque, you can switch between tools quickly and safely minimizing downtime and increasing daily productivity.
Built for Today’s Demands
Designed by one of the industry’s most trusted drill rig manufacturers, the MD150 is built to support sustainable, safe, and effective operations. It uses clean diesel engines that are compliant with environmental regulations and includes features like automatic shutoffs and real-time system diagnostics.
From compact drilling on urban construction sites to deep-core exploration drilling in rugged terrains, the MD150 delivers a consistent edge. Its modular options also make it future-ready, letting businesses scale up without replacing the entire unit.
Why MetaDrill MD150 Is the Best Versatile Drilling Solution?
Here’s why businesses are turning to the MD150 as their go-to versatile drilling solution:
Mobility: Easy to transport and manoeuvre.
Power: High torque with adjustable RPM to tackle any terrain.
Flexibility: Angular drilling from 0 to 55 degrees.
Precision: Smart monitoring and control options.
Adaptability: Wide compatibility with drilling rig tools and equipment.
Efficiency: Quick change-outs of drilling tools and minimal fuel usage.
In short, it is more than a machine—it is an investment in drilling excellence.
You can also check: Understanding Geotechnical Drilling Rigs
Final Thoughts
If your project requires a smart, powerful, and adaptable versatile drilling solution, the MetaDrill MD150 checks every box. With innovative features, a compact yet commanding structure, and full compatibility with modern drill rig equipment, it is no surprise this model has become a trusted choice for drilling professionals across sectors.
MetaDrill has reimagined mid-sized drilling with the MD150—blending performance, innovation, and reliability into one groundbreaking rig. It is time to drill smarter, faster, and with greater confidence.
Choose MetaDrill MD150—your ultimate versatile drilling solution.
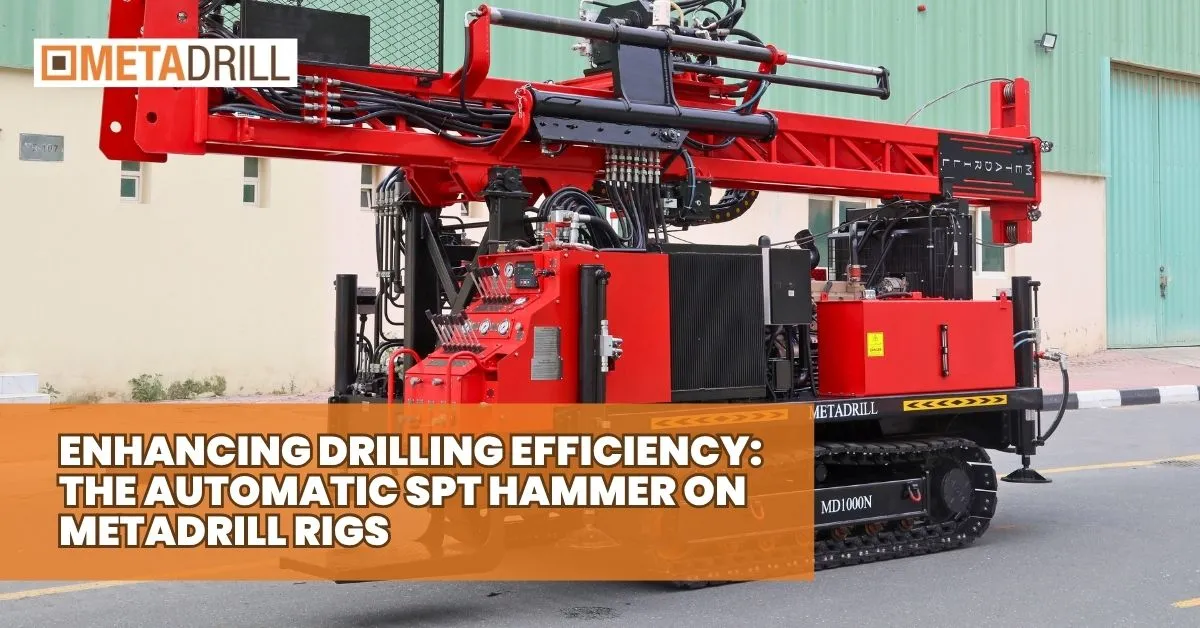
MetaDrill’s automatic SPT hammer boosts drilling efficiency with precision and reliability. We follow strict SOPs and regular calibration to ensure accurate geotechnical test results.
What is an Automatic SPT Hammer?
A standard penetration test (SPT) is a necessary site test during geotechnical exploration to help determine soil parameters. In the past, SPT was done with manual or semi-automatic hammers, creating variations in energy transfer. The automatic SPT hammer, nevertheless, automates energy transfer such that it is executed evenly and accurately.
MetaDrill's automated SPT hammer reduces the potential for human error, streamlines the testing process, and optimizes overall drilling efficiency. By adding this equipment to our Geotech drill rig fleet, we offer unprecedented reliability with all geotechnical investigations.
Standard Operating Procedures for Conducting SPT Tests
To obtain meaningful data from an SPT, it is essential to follow strict standard operating procedures (SOPs). Here are the key steps involved:
Drill to the Test Depth: Using a geotechnical drilling rig, bore a hole to the required depth.
Set the Sampler: Lower the standard split-spoon sampler to the test depth.
Apply the Hammer: Use the SPT system to drive the sampler into the soil, recording the number of blows required for each 6-inch increment until 18 inches of penetration are achieved.
Record the Blow Count: The sum of the last two increments gives the N-value, which is crucial for soil strength analysis.
Maintain Equipment Integrity: Frequent maintenance of the compact drill rig and hammer is essential to provide consistent results.
Adhering to these SOPs ensures that the SPT results are reproducible, comparable, and reliable across various sites and conditions. MetaDrill insists on strict compliance with these protocols in all our projects.
Why is an Automatic SPT Hammer a Game-Changer?
When using a manual system, variations in operator technique can lead to inconsistent energy application, affecting the test results. Our automated SPT hammer eliminates these variables by delivering a uniform energy output every time.
Here is why an automated SPT hammer is crucial for drilling efficiency:
Consistency: The machine process ensures that the same level of energy is transferred with every strike, and this enhances the data consistency acquired.
Speed: Conserves time to conduct SPTs, allowing more tests to be conducted daily.
Safety: Avoids operator injury or fatigue, improving work environment safety on geotechnical drill rigs.
Cost-Effectiveness: Quick testing means lower labor charges and faster project completion.
Excellence is our policy, and this is reflected in our fitting out all our affordable geotechnical drill rigs with high-tech hammers.
Importance of Regular Calibration
Even the most advanced SPT hammer can drift out of specification over time. Regular calibration ensures the hammer continues to deliver the correct energy levels needed for accurate SPT results.
Benefits of calibration include:
Precision: Calibration guarantees the hammer is operating within specified energy delivery tolerances.
Compliance: Meets industry standards and client specifications for geotechnical reports.
Data Integrity: Accurate energy measurements lead to better soil profiling and foundation design.
We use certified calibration facilities and maintain detailed records to ensure transparency and trust in our results.
MetaDrill's High-Tech Geotechnical Drill Rigs
Every drill rig is created to drill efficiently in varying soils, from soft sand to hard clays.
Key features of our geotechnical drill rigs include:
Modular Design: Easily adaptable to different drilling methods and site conditions.
Compact Footprint: Our compact drill rig models are perfect for urban environments with limited access.
High Mobility: Rapid mobilization and demobilization to save valuable project time.
Integrated Technology: Equipped with SPT system and data logging systems for real-time monitoring.
By combining these features, we ensure that our clients receive the highest quality results from every geotechnical drilling project.
Applications of Automatic SPT Hammer in Geotechnical Drilling
The use of the automatic SPT hammer extends across various geotechnical applications, including:
Site Investigations: For commercial, residential, and infrastructure developments.
Foundation Design: Providing critical soil strength data to engineers.
Environmental Assessments: Sampling soils for contamination testing.
Seismic Studies: Understanding subsurface behavior under seismic loads.
Every time a geotechnical drilling project requires reliable soil data, our drilling rigs are equipped with an automated SPT hammer to deliver the results that clients depend on.
Why Choose MetaDrill?
We are unique as a manufacturer of geotechnical drilling rigs by virtue of our dedication to technological advancement and customer satisfaction. Our commitment to the latest automatic SPT hammer technology reflects our priority on precision, safety, and efficiency.
Clients trust MetaDrill because:
We maintain rigorous SOPs and calibration schedules.
Our fleet of Geotech drill rigs is constantly equipped with the newest technology.
We provide precise, prompt, and affordable geotechnical solutions.
Our experienced crew ensures efficient operation and maintenance of all equipment, including the SPT hammer with automatic hammering.
Final Thoughts
The integration of the automatic SPT hammer in MetaDrill's operations has significantly improved the precision, security, and effectiveness of geotechnical drilling operations.
Whether you need a heavy-duty Geotech drill rig, a highly mobile compact drill rig, MetaDrill provides better solutions for your project requirements.
Reliability in equipment is critical in geotechnical and exploration drilling, particularly in harsh climates. MetaDrill’s drilling rigs for harsh environments ensure reliable performance in extreme heat or cold.
Designed for the Heat: Performance in the GCC Climate
Gulf Cooperation Council countries have brutal climatic conditions. Summer temperatures consistently exceed 50°C, while ground temperatures rise even further. Such environments make serious hazards out of traditional drilling rig equipment and particularly out of hydraulic systems prone to overheating.
Most hydraulic systems start to break down in extreme temperatures. Oil viscosity decreases, pressure systems lose stability, and hoses or fittings can deteriorate with use. MetaDrill's engineering team faced it head-on, aware that conventional rigs would not last long-term operations in these areas.
The MetaDrill Solution
Each piece of MetaDrill's drilling rigs for harsh environments is thoughtfully chosen for high-heat durability:
Properly Sized Oil Coolers: Engineered to dissipate heat effectively, these coolers avoid thermal breakdown in high-pressure systems.
Correctly Sized Oil Tanks: Bigger tanks stabilize oil temperature by minimizing sudden thermal changes, providing smoother and safer operations.
Premium Hoses and Pipes: Heat-resistant materials provide integrity and flexibility at both 20°C and 55°C, providing reliable fluid transfer under any external conditions.
MetaDrill builds drilling rigs specifically for heat tolerance. From the building site of Sharjah to remote desert locations in KSA, MetaDrill's geotechnical drill rigs operate without fail.
Cold Climate Adaptation: North America's Icy Challenges
While others of MetaDrill's rigs are kept busy coping with the searing desert heat, others experience the total opposite: below-zero temperatures down to -15°C, frequently in the backcountry of Canada and northern USA. Here, metal brittleness, iced fluids, and sluggish starts can freeze operations.
MetaDrill's engineering department foresaw these difficulties and incorporated cold-weather modifications into its drilling rigs for harsh environments. Materials, system flow, and energy efficiency were all given special consideration.
Cold-Proof Engineering
To fight the cold, MetaDrill employs:
Special Steel Grades: These steels are structurally sound without cracking or losing flexibility, even in extreme freezes.
Hydraulic Heating Systems: Controlled integration of heat control systems and that ensures hydraulic, and gear oil is at the perfect temperature, eliminating lag and wear on equipment.
Flow Management: Our systems provide a consistent oil flow no matter what the temperature is outside, thanks to precisely engineered circuit design and pump timing.
This cold-climate durability distinguishes MetaDrill from most drill rig manufacturers who use general-purpose rigs. Icy soil sampling or frozen ground excavation, MetaDrill rigs are prepared.
Designed by Experts, Built for the Field
Behind every MetaDrill machine is a multi-disciplinary team of mechanical engineers, hydraulic engineers, and field operators. We believe genuine innovation happens through collaboration—and real-world experience.
Our Engineering Process
MetaDrill's rig design goes beyond CAD. Here are why our geotechnical drill rigs stand out:
In-House Design Capabilities: All rigs are designed from scratch, enabling complete customization according to client and climatic needs.
Feedback Loop from Field Teams: Feedback from operators throughout the UAE, North America, and Asia assists in refining and enhancing designs over time.
Stress Testing Across Climates: Our rigs are tested in simulated extreme conditions to ensure that all models are classified as real-world drilling rigs for harsh environments.
This dedication to excellence guarantees that MetaDrill's rigs will be able to withstand whatever nature has in store.
Why Choose MetaDrill?
When shopping for drill rigs for sale, it is easy to go with the cheapest or most recognized name. But pressure performance—both literal and metaphorical—is where MetaDrill rigs really shine.
Tailor-Made for Regional Conditions: Whether it is the sweltering GCC climate or the frozen North, our rigs perform where others do not.
Field-Proven Equipment: Our exploration drilling rigs are deployed on government, real estate, and infrastructure projects globally.
Trusted by Contractors: MetaDrill is not just a manufacturer—we are a long-term partner in your success.
With access to leading-edge drilling rig equipment and unmatched customization capabilities, MetaDrill empowers you to work smarter and safer under any condition.
Sustainability Meets Performance
MetaDrill is also dedicated to environmentally responsible operations. Our energy-saving cooling systems lower emissions while increasing machinery lifespan. Lower maintenance cycles and sustainable material sourcing reduce the overall environmental footprint without decreasing strength or ability.
By investing in MetaDrill's drilling rigs for harsh environments, you are not simply purchasing machinery—you are gaining a long-term strategy designed to deliver performance, durability, and eco-awareness.
Final Thoughts
In situations where failure is not acceptable, MetaDrill performs. Our rigs for extreme environments are designed to a high level of precision, rigorously tested for durability, and supported by personnel who appreciate the harsh realities of the jobsite. Whatever your location -- whether in the heat of the Middle East or the cold of North America -- have confidence that MetaDrill will keep your moving.
Explore our range of drill rigs for sale or contact us to learn more about how our region-specific rig solutions can enhance your project’s success. From geotechnical drill rigs to custom-built drilling rig equipment, MetaDrill stands ready—no matter the climate.
MetaDrill launches its next-gen drilling training in the Middle East with NDA to raise industry standards. The first 3-day session will soon begin in KSA and will feature hands-on demos and expert-led certification.
A Major Milestone for Drillers in the Middle East
With the increasing demand for high-performance exploration drill rigs, geotechnical drill rigs, and lightweight drill rigs in the Middle East, increasingly more competent drillers, supervisors, and site engineers need to be upskilled. MetaDrill's state-of-the-art drilling training program meets this requirement by providing improved techniques and instrumentation in accordance with international standards.
The training will cover a broad spectrum of drilling operations, including safety, operational efficiency, and incrasing productivity. It is not a program—it is a movement toward the development of a certified, safety-conscious, and highly professional drilling force.
What to Expect from the Training?
This comprehensive next-gen drilling training will feature both theoretical sessions and on-site demonstrations with the latest drilling rig equipment. The NDA-backed certification ensures that participants gain internationally recognized credentials, improving their credibility and employability across borders.
Key focus areas include:
Drilling Safety and Operations
Fishing Tools and Techniques
Core Recovery
Sampling and Sample Shifting Techniques
Standard Penetration Test (SPT)
Proper Handling of Drill Rods and Casings
Maintenance of exploration drilling and geotechnical drilling rig equipment
The participants get to interact directly with advanced exploration drill rigs, geotechnical drill rigs, and compact drill rigs in the practical sessions. This is especially useful for those who are running drill rig rentals or searching for drill rigs for sale in the local market since they get to experience the mechanics and functionality of different machines under real-world conditions.
Why is This Training a Game Changer?
Unlike traditional training programs, MetaDrill’s next-gen drilling training takes a holistic approach. It blends new technologies, international safety protocols, and the practical nuances of drilling in varied terrains, especially relevant to the Gulf’s geological conditions.
The inclusion of drilling rig equipment maintenance and troubleshooting as part of the syllabus ensures participants can operate efficiently and safely. This is crucial for companies relying on drill rig rental services, as it minimizes machine downtime and field risks.
Furthermore, understanding tools like fishing devices and mastering core recovery techniques can significantly reduce material loss and enhance operational outcomes. The emphasis on accurate sampling and shifting practices also ensures higher success rates in exploration drilling and soil analysis.
Strategic Collaboration with NDA
By partnering with the National Drilling Association, MetaDrill guarantees a globally competitive edge. The NDA brings a legacy of knowledge, setting standards for training, ethical drilling, and machinery operation.
Their involvement adds credibility and rigor to the certification, making it an invaluable asset for drillers aiming to work with major international firms or government projects. This partnership also means that the next-gen drilling training curriculum is constantly updated to reflect technological advancements and global safety trends.
The First Chapter: Live in KSA
The inaugural training session is set to kick off soon in KSA, where participants will experience the full 3-day training cycle. From classroom instruction to real-time demonstrations on geotechnical drill rigs, every moment of the training is engineered to boost productivity and operational confidence.
Participants will interact with live rigs—some available for drill rig rental or demonstration from geotechnical drilling rig manufacturers—and perform practical assessments under expert guidance. This setting allows learners to gain exposure to diverse types of rigs, including compact drill rigs ideal for urban or confined projects and high-capacity exploration drill rigs for remote locations.
Benefits for Employers and Contractors
For companies seeking drill rigs for sale or those engaged in exploration drilling, investing in employee training ensures optimal use of their drilling rig equipment. Certified employees not only improve job site safety but also reduce costs associated with errors, accidents, or machinery misuse.
Construction companies, government infrastructure projects, and real estate developers stand to gain immensely by having MetaDrill-certified professionals on board. Their proficiency in SPT, core logging, sampling, and rig maintenance translates directly to fewer project delays and more accurate data collection.
Future Plans: Scaling Across the GCC
Following the success of the KSA launch, MetaDrill intends to roll out its next-generation drilling training program to the UAE, Qatar, and Oman in the coming months. Every chapter will be region-specific, using site-relevant case studies and geological knowledge.
There are also intentions to invite prominent geotechnical drilling rig manufacturers to future events, with the intention that participants can get up close with the latest advancements in drilling rig equipment and even test or review available drill rigs for sale on the spot.
You can also check: Exploration Drilling: Unlocking New Resources with Metadrill
Final Thoughts
MetaDrill’s next-gen drilling training and certification program is set to revolutionize the drilling sector in the Middle East. By merging world-class expertise, innovative machinery, and industry-backed credentials, MetaDrill is not just teaching skills—it is building a smarter, safer, and more capable drilling community.
Whether you are a seasoned contractor, a junior driller, or someone looking into drill rig rental options, this training is your chance to elevate your knowledge, sharpen your skills, and take your career to the next level.
Ready to upgrade your drilling career?
Register now for MetaDrill’s upcoming training session in KSA and be among the first to experience the future of next-gen drilling training in the Middle East.
MetaDrill’s smart CCTV for drilling brings real-time visibility and safety to exploration and geotechnical drilling projects operations. This innovative tech on our drill rigs redefines supervision with next-gen innovation.
The Power of Smart Surveillance in Drilling
MetaDrill's smart CCTV for drilling is not merely a camera—it is an intelligent surveillance solution that revolutionizes the way site activities are controlled. Fit directly onto our surface drilling rigs; this system gives supervisors constant live monitoring and recording capacity from various views of the drilling area.
Whether it is monitoring rig operations or monitoring crew movements, the system enables remote monitoring from anywhere globally. By combining surveillance with performance analytics, we guarantee that all aspects of exploration drilling are constantly and securely monitored.
Real-Time Monitoring from Anywhere
The core advantage of using smart CCTV for drilling is real-time visibility. Supervisors no longer need to be physically present at the drilling site to understand what is happening. With high-resolution live feeds accessible from any device, decision-makers can monitor:
Driller safety protocols
Machine performance
Ground conditions
Unexpected downtime or hazards
This level of remote monitoring minimizes the requirement for on-site visits and optimizes response times for technical or safety-related problems. For businesses looking for remote drilling monitoring, MetaDrill's innovation is a strong solution.
Data Recording and Remote Access
Another important aspect of our smart CCTV for drilling is that it can record and store data for future purposes. This adds to transparency and accountability at every phase of the drilling process.
Video is securely stored and remotely accessible.
Time-stamped photographs aid in training and quality control.
Historical data aids in auditing and incident investigation.
Such smart monitoring is particularly well worth it for extended exploration drilling campaigns where precision record-keeping and performance monitoring are of paramount importance.
Enhancing Safety and Compliance
Safety is at the top of our mind, and our CCTV for drilling is an asset that promotes high safety standards. Real-time video and prompt notifications allow managers to detect unsafe practices or equipment failure instantly.
The system supports proactive safety management by:
Detecting unauthorized access
Identifying slip, trip, or fall risks
Monitoring the proper use of drilling rig equipment
It is an innovation that not only protects workers but also ensures full compliance with local and international drilling regulations.
Seamless Integration with MetaDrill's Fleet
All our surface drilling rigs, and exploration drill rigs are fitted with this innovative surveillance solution. The smart CCTV for the drilling system is specifically designed to be integrated easily with our equipment, whether it is a rental unit or a full-scale rig deployment.
Whether you choose to invest in drill rigs for sale or prefer drill rig rental, this intelligent monitoring system is a value-added feature—one that further expands the functionality and management of your drilling operations.
A Breakthrough in Surface Drilling Technology
The integration of smart CCTV for drilling is part of our broader mission to bring breakthrough innovations to surface drilling technology. Unlike traditional CCTV setups, our system leverages smart features such as:
Night vision visibility
Zoom and pan control for targeted monitoring
Cloud-based access for global reach
These enhancements create a smart ecosystem that transforms your drilling site into a fully observable and manageable environment, especially critical for remote drilling operations in rugged terrains.
You can also check: Affordable Geotechnical Drilling Rigs: A Buyer’s Guide
Adaptable Surveillance for Any Project
We understand that every drilling project is different. That is why we offer adaptable smart CCTV for drilling. Depending on the size and complexity of your site, we can install a single or multi-camera system that is customized to give you the exact coverage you need.
This is particularly useful when operating multiple exploration drill rigs or across geographically remote locations. We provide the supervisors with complete autonomy over what they can view and how they wish to respond—no compromise.
Facilitating Efficiency and Cost-Effectiveness
In an industry where downtimes and delays are expensive, the capacity to monitor operations closely with smart CCTV for the drilling system can result in great cost savings. Rapid error detection, quicker communication, and decision-making on the move minimize idle time and redundant maintenance.
This translates to better ROI, especially when you are using drill rig rental services, every minute of uptime counts.
Our smart CCTV for drilling is just one of the many features that differentiate us in the market.
We are not just offering drill rigs for sale—we are offering a smarter way to drill.
Future-Proofing Your Drilling Operations
As the industry moves toward digital transformation, integrating technologies like smart CCTV for drilling is no longer optional—it is essential. With growing demand for transparency, safety, and remote accessibility, our surveillance solutions give businesses a competitive edge.
We are not just responding to industry trends—we are setting them.
Final Thoughts
From enabling managers to monitor every inch of the drilling job with remote access, our smart CCTV for drilling is the future of operational management. Whether you oversee exploration or geotechnical drill rigs, our brilliant systems guarantee safety, efficiency, and total control.
With this groundbreaking innovation, MetaDrill once again demonstrates why it is a reliable leader in exploration and geotechnical drilling and drilling rig equipment—eyes on the ground, wherever you are.
MetaDrill leads excellence in UAE drilling equipment production, combining business-facilitating policy and accessibility to international markets. As a leading drill rig manufacturer, we supply world-class drilling rig equipment in the UAE from the nation's hub.
Why the UAE?
When MetaDrill began planning its move into geotechnical drill rigs and other drilling rig machinery, the firm understood that it required a location that fostered innovation, productivity, and international trade. The UAE was the choice of the company because it provides an irresistible combination of tax-free allowances, duty-free trade, and an internationally thriving business climate.
We are closely based in a UAE-free zone, no import duty or export duty. In doing this, MetaDrill enjoys the cheapest possible cost of UAE drilling equipment production yet remains committed to the highest world standards.
Minimum Tax and Duty-Free Benefits
Free zone working in the UAE offers MetaDrill the benefit of zero taxation of individuals and minimum for companies. Furthermore, duty-free exports and imports minimize the overall cost of production. Therefore, clients searching for a drill rig for sale can find access to industry-leading geotechnical drilling solutions at less expensive prices relative to the balance of the world.
Minimum Tax allows us to reinvest its savings in research, development, and quality enhancements of all our exploration drill rigs and drilling rig equipment. The benefits are paid because our customers receive first-class products at not-a-premium prices.
Less Labor Costs, More Excellence
The UAE labor market is also a critical aspect that accentuates the success of MetaDrill. The nation offers access to an enormous, well-educated, and inexpensive labor. Lower labor costs are a focus in UAE drilling machinery production cost-effectiveness without compromising on quality.
We invest heavily in continuous training programs to ensure all staff, from engineers to assembly workers, are at international manufacturing standards. The quality focus has helped us become a respected brand among drill rig manufacturers worldwide.
Thriving International Trade Hub
The UAE is geographically well-placed to be an East-West connectivity hub, enabling seamless global trade. Sophisticated seaports, airports, and logistics hubs enable us to move exploration drill rigs and drilling rig equipment to customers globally with ease.
Whether our customers are based in Africa, Asia, Europe, or the Americas, our dedication to trouble-free shipping assures us that our for-sale drill rigs safely reach their destination within time and at a fair price.
Brutal Competition, Sweet Prices
Another significant feature of the UAE market is the fierce competition among suppliers. the competition enables Metadrill to continuously optimize its manufacturing and supply chain, providing some of the lowest competitive prices in the world for drilling rig equipment.
Competition is not something to fear for MetaDrill; it is a driving force for excellence. Our customers gain access to world-class exploration and genotechnical drilling products that ensure performance, reliability, and value.
Greatest Quality in UAE Drilling Equipment Production
We do not think low costs need to come at the expense of quality. Our UAE drilling equipment production units are technology-fitted and have strict quality control in place. Each exploration drill rig is stringently tested to deliver performance in the most difficult drilling conditions on the planet.
From lightweight exploration drill rigs for mineral exploration to heavy-duty drilling rig equipment for oilfield use, our product range addresses a broad range of industry needs.
Local Advantage, Global Standards
With operations in the UAE, MetaDrill is well-positioned to leverage local manufacturing benefits while adhering to global standards. We utilize ISO-certified processes and work with international engineering professionals to continually enhance our designs.
With the combination of low-cost UAE drill rig manufacturing and the best world-class engineering, MetaDrill is dedicated to the best for its customers who are buying drill rigs anywhere in the world.
Sustainability and Innovation
MetaDrill is also dedicated to greener production methods. Working in a nation where greening is the priority, we place orders for eco-friendly procedures to reduce carbon print.
Our innovation does not stop with product design. From reducing waste to energy-saving production lines, we ensure its UAE drilling equipment production is coordinated with the needs of a cleaner world.
Final Thoughts
Selecting the UAE as its production hub was a sound strategic choice that has been very lucrative for MetaDrill. With duty-free, minimum tax settings, cheap labor, good international trade, and intense competition, we can ship superior exploration drill rigs and drilling rig equipment to the globe at unbeatable prices.
Today, MetaDrill stands proud as a shining example of how UAE drilling equipment production can set a global benchmark for quality, affordability, and innovation. MetaDrill is your trusted partner for success.
Discover the MetaDrill advantage — where local manufacturing meets global standards.

Site investigation for construction for stability and safety is our priority at MetaDrill. High-tech geotechnical drilling and exploration drill rigs are the core of safer projects.
What is Site Investigation for Construction?
Site investigation for Construction involves the collection and interpretation of site conditions, including soil, rock, groundwater, and other site conditions, before any construction. Our mission at MetaDrill is to help you locate problems early and develop solutions that suit your site's specific conditions.
Through a thorough construction site investigation, we can assess load capacities, detect contamination, determine water table levels, and control geological hazards. Pre-construction planning is not only important for housing developments but also for commercial buildings, roads, bridges, and infrastructural works. Skipping or shortening the process leaves you vulnerable to developing structural cracks, subsidence, or even complete collapse — risks we eliminate for you.
Our Expertise in Geotechnical Drilling
A cornerstone of effective site investigation for construction is geotechnical drilling — and at MetaDrill, we excel at it. Using specialized Geotech drill rigs, we extract soil and rock samples at various depths to analyze underground conditions precisely.
Through our geotechnical drilling services, we help identify:
- Soil composition and strength
- Depth to bedrock
- Groundwater conditions
- The presence of voids or unstable material
By understanding these factors early, we can adapt your construction designs, decide on appropriate foundations, and address issues like soil liquefaction or erosion before they become costly problems.
How Our Geotech Drill Rigs and Gear Make a Difference?
Our Geotech drill rigs, in addition to specialized drilling rig tools and equipment, are specifically engineered to manage varied terrains — from soft clay to granite rock. We take care to provide precision, efficiency, and safety during soil testing and sampling.
- Augers for soft ground drilling
- Core barrels for extracting rock samples
- SPT hammers for standard penetration testing
At MetaDrill, the best drilling rig manufacturers, we invest in high-quality Geotech drill rigs and drilling rig tools and equipment to ensure that every site investigation for construction we undertake meets the highest standards of quality and accuracy.
Using Exploration Drill Rigs for Deeper Insights
While geotechnical drilling is essential for surface and near-surface conditions, our exploration drill rigs allow us to go deeper when necessary — particularly for large-scale projects like tunnels, bridges, or energy facilities.
Our exploration drill rigs are designed to:
- Reach greater depths
- Retrieve continuous core samples for detailed analysis
- Operate efficiently in challenging terrains
By applying exploration drilling techniques where needed, we provide an even broader understanding of deep soil layers and rock formations, giving your project the strongest possible start.
Why Trust MetaDrill’s Equipment and Expertise?
The success of any site investigation for construction is reliant on the quality of the equipment used and the experience of the team. We at MetaDrill trust only premium OEM manufacturers to provide parts and assemblies so that our Geotech drill rigs, exploration drill rigs, and drilling rig tools and equipment are the most technologically advanced in the market.
By choosing to work with us, you have the benefit of:
- Customizable Geotech drill rigs for different project needs
- Advanced safety features to protect all stakeholders
- Environmentally responsible equipment options
- Ongoing support and maintenance services
Our partnership with leading drill rig manufacturers ensures that your site investigation for construction is conducted with the highest precision and reliability.
Risks You Avoid by Conducting Soil Investigation Drilling Works
Skipping a professional site investigation for construction can have devastating consequences:
- Foundation Failure: Caused by inadequate soil support or unforeseen groundwater conditions.
- Increased Costs: Resulting from unexpected site conditions requiring redesign or repairs.
- Environmental Hazards: Undetected contamination leading to health risks and penalties.
- Project Delays: Due to issues discovered during mid-construction,
MetaDrill’s drill rigs are your partner through site investigation for construction services, eliminating risks of poor quality of drilling equipment before they can impact your project.
You can also check: How to Choose the Right Drilling Rig for Rent?
Building on a Foundation of Knowledge
At MetaDrill, we believe certainty is the foundation of every successful construction project. Through our reliable Geotech drill rigs, efficient drilling rig tools and equipment, and robust exploration drill rigs, we ensure that your projects are built on the strongest and safest ground possible.
MetaDrill, headquartered in the UAE, provides unmatchable value for price in the drilling industry through low-cost drill rig rental and high-quality equipment. We utilize the strategic location of the UAE to provide superior quality and value for any drilling requirement.
Competing with Industry Leaders Through Innovation
Despite the sheer dominance of long-standing firms with more than 100 years of experience in the drilling market, MetaDrill has shown that we can play on an even level. The fast growth the world has experienced, particularly after the COVID-19 pandemic, has been a key driver in making the playing field even.
With information now more readily available than ever, the global supply chain has grown, and intelligence is accessible to all. MetaDrill has capitalized on this trend by embracing the latest technologies and new manufacturing processes. This flexibility enables us to accommodate the evolving needs of customers seeking value for price in the drilling industry, as well as water well drilling rigs for rent.
Embracing Global Supply Chains for Affordable Solutions
The supply chain networks developed over recent years, alongside the growing use of online connectivity, have allowed companies such as MetaDrill to drive down costs and streamline operations.
By accessing these wider networks, MetaDrill can maximize production efficiency, acquire the best materials, and provide affordable hydraulic drilling rigs to our clients. Whether drill rig rental or permanent installation, our value for price in the drilling industry guarantees reliability and performance.
Our capacity to respond rapidly to industry trends and customer requirements separates us from big, established drill rig manufacturers. It allows us to provide contemporary, high-performance rigs at affordable prices.
High Performance Without Compromising Affordability
Although MetaDrill may not be the lowest cost in terms of drilling rig prices, we pride ourselves on offering rigs that are cost-effective without compromise. Our focus on manufacturing quality, rigorous quality inspection, and simplified supply chain control ensures our rigs deliver enhanced performance, reliability, and longevity.
The value for price in the drilling industry offered by MetaDrill meets the needs of customers seeking quality and value at the highest level—whether buying or leasing water well drilling rigs.
The MetaDrill Promise: Value-Driven Performance
In a world where quality and cost often conflict, MetaDrill exemplifies how excellent value can be obtained without compromise. By selecting MetaDrill, our clients place their investment in a reliable, high-performance drilling solution that is unrivaled in terms of value for price in the drilling industry.
Our dedication to high-end value for price in the drilling industry, along with versatile alternatives such as drill rig rental, keeps clients coming back from all corners of the globe. For renters and buyers alike, MetaDrill balances durability, innovation, and affordability.
Final Thoughts
MetaDrill is not only a manufacturer—but a progressive industry leader that comprehends the true requirements of today's drilling market. Whether customers are browsing water well drilling rigs for hire, comparing drill rig manufacturers, or looking for budget-friendly solutions with high-end value for price in the drilling industry, MetaDrill performs on all levels.
Positioned strategically, highly efficient, and driven by a passion for innovation, MetaDrill is prepared to serve the future of drilling—one high-performing rig at a time.
Renting a drilling rig comes in a wide variety of sizes and can be operated on diverse terrain. It is best to take your project parameters—drilling depth, geology, and budget—and choose the ideal rig for UAE drilling conditions.
Key Factors to Consider When Renting a Drilling Rig
Selecting the right equipment begins with aligning your project requirements with the appropriate drilling solution. MetaDrill keeps you from wasting money and time by offering top-quality equipment and expert advice.
Project Specifications and Requirements
To begin with, determine your technical requirements. Consider the ground condition, drill depth, and objectives of the project. For instance, soft ground projects call for light rigs, whereas deep excavation requires high-torque models.
MetaDrill has a broad range of rigs made for different ground conditions to deliver maximum performance for any ground. Our experts make sure that the manufacturer's specifications fit your project site conditions to the last detail.
Budget Considerations for Drill Rig Rental
Rental costs depend on the equipment and duration. Key expenses include:
- Base rental fees (daily/monthly).
- Operator labor and training.
- Additional costs: fuel, maintenance, and insurance.
MetaDrill provides transparent pricing and flexible rental plans. We encourage clients to compare quotes from various suppliers to secure the best price without compromising on quality.
Rental Duration and Availability
Timing is crucial. The UAE's booming construction industry can make rigs scarce during peak seasons. MetaDrill ensures flexible rental terms, allowing extensions or early returns. We also offer discounts for long-term rentals, helping businesses balance costs and access to premium equipment.
Leading Drill Rig Manufacturers in the UAE Market
MetaDrill collaborates with leading manufacturers such as Atlas Copco and Sandvik to provide secure drilling rigs. The presence of the company locally provides the immediate availability of spare parts and technical assistance, upholding the project schedule.
Types of Drilling Rigs for Rent Available at MetaDrill
MetaDrill provides a variety of drill rigs tailored to different project requirements:
Rotary Drilling Rigs
Suitable for massive structures such as road building and oil drilling. Our rotary rigs can drill through dense UAE rock formations such as sandstone and limestone.
Water Well Drilling Rigs
For the extraction of groundwater, our rigs serve agricultural and residential water needs. MetaDrill makes sure these rigs are designed for desert conditions, delivering efficient, good construction.
Miniature Drilling Rigs
Suited for city development, these rigs are compact and easily moveable. Our miniature drilling rigs, including Terex Drott units, are utilized in the big cities of UAE to execute efficient drilling in small spaces.
Renting a drilling rig with MetaDrill ensures efficiency. Compact drill rigs are best for city environments, while heavy rigs suit larger projects. MetaDrill goes out of its way to ensure that all rigs are well-suited for the unique demands of UAE projects.
The Process of Renting a Drilling Rig: Step-by-Step Guide with MetaDrill
Renting a drilling rig requires careful planning and trusted suppliers. MetaDrill simplifies the process for you.
Researching and Identifying Reputable Rental Companies
- Manufacturer-certified equipment.
- Equipment availability for specialized tasks (e.g., geotechnical surveys).
- Compliance with UAE safety regulations.
Technical Assessment and Equipment Inspection
- Maintenance records and certifications.
- Tooling options for geotechnical applications.
- Manufacturer warranties for added security.
Understanding Rental Agreements and Insurance Requirements
- Comprehensive insurance for geotechnical drilling operations.
- Permit requirements for UAE project sites.
- Clear dispute resolution policies.
Delivery, Setup, and Operational Support
- Coordination support in line with UAE traffic regulations.
- Installation guidance for geotechnical drill rigs.
- On-site help during setup and operation.
Maximizing Value When Renting Drilling Equipment
Success in the UAE comes from aligning equipment with project goals. MetaDrill offers adaptable solutions for cost-effective operations. Smart negotiations secure better deals and long-term rental benefits. Clear contracts prevent unexpected costs, keeping projects on track. Strong vendor relationships ensure access to advanced technology and optimized equipment selection.
MetaDrill gives the highest priority to drilling rig safety standards to safeguard workers, equipment, and the environment. Strict safety practices guarantee efficiency and accident avoidance, whether with compact drill rig, a Geotech drill rig, or a drill rig rental.
Top Drilling Rig Safety Standards You Can't Ignore
Drilling rig safety standards are terms used to define rules and procedures aimed at reducing risks involved with drilling activities. They are established by regulatory authorities like the Occupational Safety and Health Administration (OSHA) and the International Association of Drilling Contractors (IADC). Consistent operation with the same is the most key factor in attaining workplace safety along with preventing legal consequences.
Proper Training and Certification
Certified workers must be certified prior to operating a Geotech drill rig or any drilling machinery. Schemes of certification guarantee that operators are aware of the following:
- Safe handling of compact drill rig machines.
- Proper use of personal protective equipment (PPE).
- Emergency response procedures.
- Troubleshooting and maintenance procedures.
Regular training is assured at MetaDrill to ensure that workers know the current drilling rig safety standards.
Compliance with Personal Protective Equipment (PPE)
Drilling rig staff must use PPE, which includes:
- Hard hats
- Safety glasses
- Fire-resistant coverall
- Steel-toed boots
- Hearing protection
- Gloves
PPE compliance is at the core of drilling rig safety standards because it avoids accidents from flying debris fragments, noise, and chemical spills.
Daily Equipment Inspection
Drill rig operators must check the equipment daily. Forcing or owning a drill rig, these must be done:
- Checking the wear and tear on the drilling parts.
- Checking hydraulic systems for leak-free.
- Testing emergency shutdown devices.
- Inspection of electrical connections for compliance with safety regulations.
Regular checks conform to drilling rig safety norms and increase the lifespan of machinery. We deliver detailed maintenance protocols for our drilling rigs to make them operate optimally.
Site Safety and Hazard Appraisal
Prior to starting any drilling operation, proper risk appraisal must be undertaken. This includes:
- Identification of potential future hazards like unfirm ground, unfavorable weather, and hidden utilities.
- Control measure implementation to avert or avoid risks.
- Alerting by placing warning signs across danger zones.
A well-planned site decreases the possibility of accidents and enforces compliance with drilling rig safety standards.
Emergency Response Planning
Regardless of proper precautions, emergencies could still take place. Every drilling site needs an efficient emergency response plan with the following:
- Fire protection mechanisms.
- Spill control protocols.
- First-aid materials and personnel.
- Evacuation protocols.
Operators of compact drill rigs or heavy-duty drilling machinery should be trained to handle emergencies properly to avoid damage and injuries. We provide full emergency training packages to help groups prepare.
Handling Hazardous Substances
Most drilling operations come with hazardous chemicals and material handling. Drilling rig safety standards demand:
- Adequate fuel, lubricant, and drilling fluid storage.
- Usage of appropriate containment systems to avoid spills.
- Appropriate disposal of waste materials.
- Training of workers in handling hazardous materials.
These steps keep staff and the environment safe from contamination and injury.
Compact Drilling Rig Safe Operation
Compact drill rigs are used extensively owing to their convenience in compact spaces. They do, however, demand some safety precautions:
- Ensuring solid ground prior to operation.
- Having a clear working space.
- Daily inspection of hydraulic and electrical systems.
Small drilling rig machinery must conform to drilling rig safety standards to avoid hazards in the workplace. For general security, internal security features are embedded in miniature drilling systems within MetaDrill.
Reliable Drill Rig Manufacturer Selection
Contracting well-established drill rig manufacturers guarantees adherence to the safety code of practice when purchasing or hiring machinery. Costly rigs have the following:
- Embedded security controls such as automatic cut-off devices.
- Harsher building materials.
- Proper user guides and coaching assistance.
We are proud to be among the foremost drill rig companies with industry-grade, safety-approved drill rigs to supply the industry.
Maintaining Correct Site Communication
Effective communication between members of a drill crew is necessary to avoid accidents. Best practices are:
- Adoption of standard hand signals and radio.
- Holding morning safety briefs.
- Creation of a chain of command for hazard reporting.
Effective communication facilitates cooperation and compliance with drilling rig safety laws.
Routine Safety Audits and Compliance Inspections
Routine auditing helps maintain compliance with drilling rig safety laws. These include:
- Ensuring compliance with operating procedures
- Keeping up with the most current safety training programs
- Immediate resolution of non-compliance
We conduct routine safety audits to ensure that all operations are in accordance with the latest industry laws.
Final Thoughts
Safety is the foundation of any drilling process. Following drilling rig safety standards prevents accidents, protects equipment, and ensures compliance. Safety is the top priority when using a Geotech drill rig, drill rig rental, or compact drill rig. Working with well-known drill rig manufacturers like MetaDrill and conducting regular checks enhances security. Stay vigilant, encourage safety, and keep operations streamlined and risk-free.
Maintaining a drilling rig requires essential drilling rig equipment to ensure efficiency, safety, and performance. Whether you're looking for the best tools for upgrading drilling rigs, reliable spare parts for drilling rigs, or affordable accessories for rig maintenance, having high-quality components is crucial for smooth operations.
Investing in durable and well-maintained equipment helps prevent downtime and extends the lifespan of your rig. At Metadrill, we provide top-tier solutions to keep your drilling projects running efficiently, offering a comprehensive range of equipment, tools, and spare parts to meet your needs.
Why Get Preventative Maintenance for Essential Drilling Rig Equipment?
Industry professionals know all about preventative maintenance and machine inspections. Nothing else can do better to manage costs, reduce risk, and maintain productivity and compliance on a jobsite than keeping essential drilling rig equipment on hand.
Interconnected systems and components, mechanical or otherwise, for land and underground drilling equipment should be monitored according to their pre-scheduled servicing and repairs so that the idle time is reduced, and the chance of machine overhaul is mitigated.
Types of Maintenance for Essential Drilling Rig Equipment
To maintain a smooth-running rig toolbox, you need essential drilling rig equipment. It is important to understand the types of maintenance. One such maintenance is preventive maintenance. It entails scheduled inspections, cleaning, and part replacement before the failure occurs. Preventive maintenance is your first line of defense against unexpected issues.
Predictive Maintenance
This type of essential drilling rig equipment maintenance works by monitoring data through which you will be able to predict when a tool is due for maintenance, knowing its usage and performance pattern. This approach is useful in addressing problems just in time as the downtime is reduced.
Reactive Maintenance
This type of essential drilling rig equipment maintenance is done after a breakdown or run-to-failure maintenance strategy where repairs or replacements are performed only after equipment has failed or malfunctioned.
Essential Drilling Rig Equipment for Maintenance and Upgrades
Power Unit
The power unit of the drill is truly the heart of the rig. It's critical for ensuring smooth operations and preventing downtime. Proper preventive maintenance is key to keeping it running efficiently. Regular inspections, lubrication, and timely replacement of parts can significantly extend its lifespan and reliability.
Sensors and Gauges
Sensors and gauges are essential drilling rig equipments. These affordable accessories for rig maintenance are measurement tools that calculate various physical features of your drilling system, from pressure to flow rate, and temperature, through torque and vibrational characteristics.
Top Drive System
A top drive system eliminates the necessity of manual handling of the pipe and reduces wear on the drill string components; more importantly, it reduces the risk of human error.
Mud Pumps
Well-maintained mud pumps help eliminate circulation system blockage, which cuts down on lost time due to fluid loss or uneven pressure. Advanced pumps equipped with automated monitoring can quickly notice any drops in pressure.
Rotary Table or Kelly Drive
A well-kept rotary table or Kelly drive prevents differential rotation that contributes to wear and tear on the drill string. Electronic control of these systems limits mechanical wear and tear, therefore fewer repairs in the equipment.
Drill Pipe and Collars
Routine non-destructive testing of drill pipes and collars can detect wear and fatigue before failures occur. High-strength alloys or coated drill pipes reduce corrosion, thereby lowering maintenance frequency.
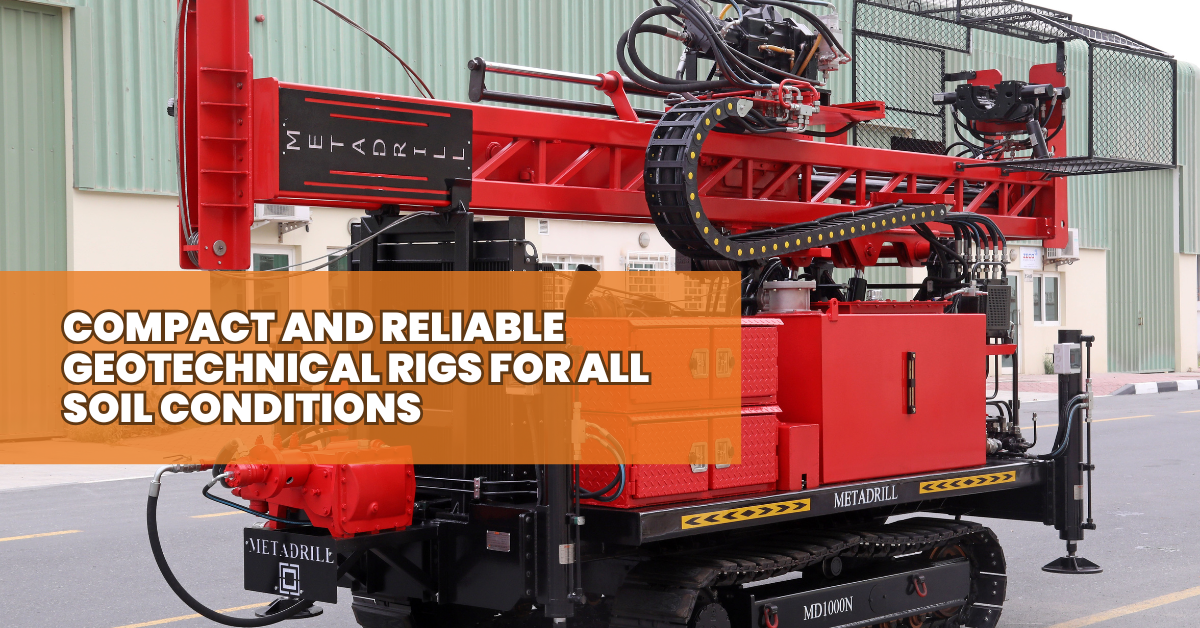
When it comes to geotechnical drilling, having the right equipment can make all the difference. Whether you're working in loose sand, clay, or solid rock, compact geotechnical rigs for tough soil provide the efficiency and reliability needed to complete projects successfully. These rigs offer the perfect combination of power, portability, and durability, making them an essential investment for contractors. In this blog, we’ll explore why compact rigs are ideal for geotechnical projects, how they perform in different soil conditions, and what features to look for when choosing the right rig.
Why Compact Geotechnical Rigs Are Ideal for All Soil Conditions
Geotechnical drilling often takes place across uncertain terrains and requires tools designed to work well across most of the soil types. Hole drilling rigs for all soil conditions ensure flexibility and versatility, leading to performance for your operations irrespective of the softness of the soil or abundance of loose soils and however dense the rock formations might be.
Compact rigs are especially helpful because they:
- Operate in areas inaccessible to bigger rigs.
- Allow for maximum maneuverability on urban and remote drilling sites.
- Occupy less operational space with great performance.
Benefits of Compact Geotechnical Rigs for Hard Soil
Drilling in challenging soil conditions necessitates specific machinery. Some benefits of compact geotechnical rigs for hard soil include:
- Portability – These light rigs are handy and easy to transport, easily deployed to varied job sites for immediate operation.
- Efficiency – Though more compact, mini rigs offer greater drilling power on geotechnical investigations.
- Cost Effectiveness – More fuel efficient as well as the cost of servicing is relatively reduced.
- Versatility - Suitable for work in various kinds of soils and rock formations like clay, gravel, or any rocky formations.
For contractors looking to maximize productivity without overspending, compact rigs from Metadrill provide an excellent solution.
Choosing the Right Compact Geotechnical Rigs for Tough Soil
With multiple options available, selecting the right rig for your needs is crucial. Here’s how to make the right choice:
- Identify Your Soil Conditions – Consider the primary soil types in your drilling projects to choose the most suitable rig.
- Rig Power Evaluation - Determine rigs with a sufficient amount of torque and penetration power for denser or rockier soils.
- Mobility Features: Portable geotechnical rigs on sale should make transportation easier and faster.
- Maintenance Requirements Evaluation - Choose rigs that are easy to maintain, and which have easily available spare parts.
Metadrill offers a range of reliable rigs for geotechnical projects. You will definitely find the right one for your drilling needs.
Compact Geotechnical Rigs for Tough Soil: Performance in Different Soil Types
Every drilling project has unique challenges depending on the soil composition. Compact geotechnical rigs perform well in different conditions:
- Soft Soils (Sand & Clay) – Auger and rotary drilling rigs with stable penetration.
- Dense Soils (Gravel & Silt) – High-torque rigs with drill bits that ensure easy drilling.
- Hard Rock Formations – Reliable rigs for geotechnical projects using DTH (Down-the-Hole) hammers for rock penetration.
Top Features to Look for When Buying Compact Geotechnical Rigs for Toughest Ground
Compact rigs can easily be adapted to these conditions with minimal loss of productivity and precision. Must-have features when investing in a compact geotechnical rig:
- Drilling Depth & Torque: Ensure that the rig meets the size of your projects: depth and power.
- Mobility & Transportability: Lighter crawlers or crawler mounted, as well as track mounted rigs, improve access.
- Power Source – Diesel-powered rigs are more torque and quieter than the electric option that is environmentally friendly.
- Durability & Build Quality – Rugged construction for longevity in the toughest of conditions.
Compact Geotechnical Rigs for Tough Soil: A Cost-Effective Solution for Contractors
Budget is one of the most important considerations for many contractors when it comes to selecting drilling equipment. Compact rigs are more economical because they:
- Consume less fuel and maintenance compared to bigger rigs.
- Are easier to transport, which means that logistics costs will be reduced.
- Require a lower initial investment, which makes them suitable for small businesses.
Whether you’re an independent contractor or a growing firm, investing in drilling rigs for all soil conditions from Metadrill ensures maximum return on investment.
Maximizing Performance with Compact Geotechnical Rigs for Tough Soil
To get the best results from your drilling rigs, follow these performance-enhancing tips:
- Regular Maintenance – Keep your rig in top condition by scheduling routine inspections.
- Use the Right Tooling – Choose the right drill bits and accessories for each soil type.
- Train Your Team – Proper operator training ensures safe and efficient rig operation.
Metadrill offers expert support to help contractors maximize the efficiency of their reliable rigs for geotechnical projects.
Compact Geotechnical Rigs for Tough Soil: Durability and Reliability
The most important factor in choosing compact geotechnical rigs for tough soil is durability. Metadrill's rigs are designed to be long-lasting and reliable, with features such as:
- Heavy-duty steel frames for increased strength.
- High-quality components that will wear less and last longer.
- Advanced hydraulic systems for consistent power delivery.
A Metadrill compact geotechnical rig will provide contractors with long-lasting performance and minimal downtime. Getting a compact geotechnical rig would be the very best choice towards the success of your projects: portable, efficient, and worth every penny to get the project done.
Therefore, these have been a perfect game-changer for geotechnical drilling - powerful rigs from Metadrill for rock, mobile solutions designed for urban, and so many more for almost all soil types. Explore our range of portable geotechnical rigs for sale and find the perfect rig to boost your productivity today!

When it comes to cost-effective drilling tools for long-term reliability, contractors often find themselves balancing the need for high-quality equipment within the constraints of their budgets. Fortunately, there are cost-effective drilling tools for contractors offered by Metadrill that can provide long-lasting reliability and performance.
In this blog, we’ll explore affordable options that are ideal for geotechnical drilling, tough projects, and long-term drilling operations.
Define Your Goals Before Buying Cost-Effective Drilling Tools for Contractors
You will need to set specific goals before getting cost-effective drilling tools for contractors and then move towards purchasing affordable drilling tools. Are these affordable drilling tools for tough projects employed for soft soil or rocky grounds? Could they be used in confined space drilling?
Knowing the nature of the job will help guide you along the correct path in getting long-lasting tools for drilling operations without unnecessary costs. A clear outline of what you want will allow you to make the investment worthwhile and productive for your specific needs.
Explore Different Options Before Buying Cost-Effective Drilling Tools for Contractors
Within the market of cost-effective drilling tools for contractors working on the hardest projects at any affordable cost; reliable tools for geotechnical drilling range from crawler-mounted rigs, rotary drill bits, based on durability, cost, and performance.
Some of the factors to consider in making a choice for cost-effective drilling tools for contractors include the type of formation to be drilled through, the soil conditions, and the depth to be reached in drilling. This will enable informed choices and reliable tools to be selected for geotechnical drilling.
Analyze the Cost of Buying Cost-Effective Drilling Tools for Contractors
The initial cost of affordable drilling tools for tough projects is a matter of importance, but the overall cost of ownership for the tools is also something to be evaluated. The cost of maintenance and operational costs over time and how long the reliable tools for geotechnical drilling last are crucial factors. Therefore, by selecting reliable tools for geotechnical drilling that will last longer, you can drastically reduce the total cost of the drilling operations and make them cheaper in the long run.
Monitor and Optimize the Performance Before Buying Cost-Effective Drilling Tools for Contractors
Once you have spent your money on cost-effective drilling tools for contractors, you should check on them regularly and optimize their performance. This helps to ensure that long-lasting tools for drilling operations can keep up with reliability. Optimizing promises higher efficiency with reduced downtime, which further cuts down costs. With your tools in good condition, you can ensure reliability and cost-effectiveness in the longest projects.
5 Budget-Friendly Options to Consider Before Buying Cost-Effective Drilling Tools for Contractors
These are five cost-effective drilling tools for contractors offering long-lasting performance without making holes in your pocket:
- Rotary Drill Bits: Rotary drill bits have been rated among the most significant drilling tools and can be chosen in any form like tricone bits and PDC (polycrystalline diamond) bits. These are able to withstand rugged conditions while maintaining their operations for a long time. So, they serve as a value-for-money form of alternative in the drilling business which needs accuracy and hardness.
- Augers: Augers are the cheapest option for shallow drilling work. Augers can handle both soft and hard soil effectively and thus are often preferred for various drilling activities. They are also easy to maintain; thus, they form a solid and cheap alternative for contractors in their quest for tools that are reliable for geotechnical drilling operations.
- DTH (Down-the-Hole) Hammers: DTH hammers are very economical in hard drilling environments, especially in hard rock formations. The hammers have a high impact force that will ensure quick drilling at a lower cost compared to other hammer systems. Contractors will appreciate the efficiency of DTH hammers, especially when working with difficult terrain.
- Drilling Fluids: Drilling fluids are important in optimizing the performance of drilling tools while reducing operational costs. Non-toxic, biodegradable options can be used for geotechnical drilling, minimizing the need for frequent replacements. Using cost-effective drilling fluids can help maintain optimal tool performance and reduce overall costs.
- Crawler-Mounted Drilling Rigs: Being crawler-mounted, they provide a stable and mobile and very cost-effective rig compared to larger rigs. For confined space operations, this rig is within the scale of small to medium-scale drilling operations without any loss of performance. The costs are less expensive; their capabilities more versatile and thus set up as a safe and inexpensive bet for budget-conscious operators.
Conclusion
Finding cost-effective drilling tools for contractors will help stay within budget without compromising on quality or reliability. You can make the right decisions that will save you money while ensuring long-term performance by evaluating your project's objectives, comparing different options, and considering the total cost of ownership.
Whether you have rotary drill bits, augers, or crawler-mounted rigs, these tools come with affordability and reliability, ideal for contractors in optimizing their drilling operations. At Metadrill, we make sure to deliver quality and low-cost drilling for contractors. Using our wide collection of reliable geotechnical drilling tools, your projects will always be completed effectively and within your budget.
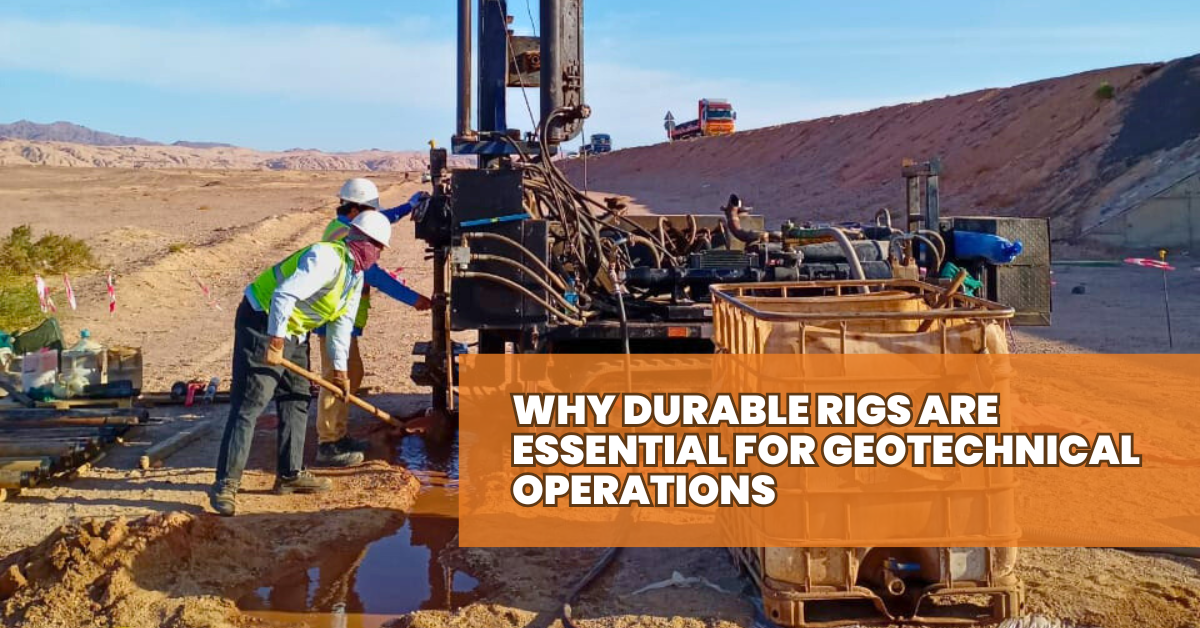
Geotechnical drilling is an application-intensive sector. Its nature means the soil and rock could range from very soft clay to extremely hard solid rock. Hence, it makes great sense to make durable rigs play a huge role in drilling for geotechnical operations for ensuring efficiency, safety, and value for the contractors. Making such long-term investment in durable rigs not only prevents more frequent downtimes but also maximizes success in conducting the soil investigations.
We are going to see in this blog why durability is essential in geotechnical drilling rigs, key features to look out for, and how reliable rigs for soil investigations can add operational efficiency to a project.
Importance of Durability in Durable Rigs for Geotechnical Drilling Operations
One of the most important factors when selecting a drilling rig is its durability. A long-lasting geotechnical drilling rig will have to be resistant to harsh conditions, extreme temperatures, and continuous use without frequent breakdowns.
For geotechnical contractors, this means:
- Fewer breakdowns than usual
- Lower maintenance costs
- Constant performance in demanding soil
- Increased equipment lifespan
Metadrill's long-lasting rigs for soil investigations are designed to last long and give the contractor a solid basis for drilling needs.
How Long-Lasting Geotechnical Drilling Rigs Make Operations More Efficient
The performance of geotechnical drilling equipment directly determines the efficiency of such operations. The longer the equipment lasts, the less downtime contractors will have in completing their projects on time and on budget.
- Higher drilling rate: Specially built to easily penetrate through harder soils
- Less frequent repairing: With less frequency of interruptions and costly delays
- Higher precision: Reliable soil investigation data
- Portable: Favorable to all terrains without it clogging and tearing
At Metadrill, we aim for long-lasting geotechnical drilling rigs that produce much more with excellent performance.
Challenges of Durable Rigs for Geotechnical Drilling Operations and the Need for Sturdy Equipment
Geotechnical drilling faces several challenges as follows:
- Challenging terrain conditions: Some soil types, such as rocky ground, demand powerful rigs.
- Heavy use: Full-time operation of drilling equipment puts a lot of stress on the elements.
- Severe weather: Heat, cold, and moisture accelerate wear on equipment.
- Rig mobility: Translocating from one site to another requires strong frames and high-quality hydraulic systems.
Why rig durability is important is obvious: if the equipment is not tough enough, then the contractors will be breaking down rather frequently and operational costs will get too high, too quickly. Metadrill rigs do not buckle under these conditions.
Keystone Features of Durable Geotechnical Drilling Rigs for Operation
A long-lasting geotechnical drilling rig must possess the following central features:
- Heavy-duty frame: Reinforced steel for added strength
- High-power drilling system: Efficient penetration in hard soils
- Hydraulic efficiency: Smooth running with minimum wear
- Advanced cooling systems: Avoid overheating in long hours of drilling
- Corrosion-resistant materials: Protection against environmental damage
Metadrill's reliable rigs for soil investigations are designed with these key features, ensuring durability and high performance in every drilling operation.
Tough Rigs Effects on Geotechnical Drilling Operations in the Context of Downtime
Equipment breakdown brings a lot of downtime and time delay to any project. More so, to a geotechnical drilling operations contractor, more downtimes signify the following consequences:
- Decreased downtimes: Rigs work for much longer with low repairs.
- Fewer breakdowns: Durable parts guarantee fewer mechanical breaks.
- Higher return on investment: Durable rigs are cost-effective in the long run.
By using Metadrill's durable geotechnical drilling rigs, organizations can increase efficiency and reduce surprises in their operations.
Maintenance Tips to Extend the Life of Your Durable Rigs for Geotechnical Drilling Operations
Proper maintenance is necessary to maximize the lifespan of your reliable rigs for soil investigations. Follow these best practices:
- Regular Inspections: Wear and tear on critical parts.
- Lubrication: Lubricate moving parts to prevent friction damage.
- Filter Replacement: Hydraulic and fuel filters should be changed according to the manufacturer's schedule.
- Bolt Tightening: All bolts and fasteners must be tightened to prevent structural damage.
- Monitor Cooling Systems: Overheating can cause major damage; always check coolant levels.
Metadrill offers specialized consultancy and support to assist contractors in ensuring that their drilling rigs for geotechnical operations remain in good condition for extended periods.
Safety is the Greatest Consideration in Drilling Geotechnical
Safe rigs for geotechnical drilling activities benefit from the following reasons:
- Reduced mechanical failure: Which serves to exclude sudden breakdowns that often result in accidents.
- Structural stability: Strong frames avoid tipping or collapsing.
- Enhanced control systems: Modern rigs feature improved safety capabilities.
- Reduced worker fatigue: Efficient rigs require less human intervention, therefore less stress on the operators.
Metadrill's soil investigation rigs are designed with safety at the forefront, ensuring secure and smooth operations on every project.
Conclusion
For a contractor who may desire reliability, efficiency, and long-term cost savings, investing in durable rigs is crucial. Where durability matters in drilling rigs is evident in how it reduces downtime, improves safety, and enhances overall drilling performance.
Metadrill makes geotechnical drilling rigs last very long in performance under the toughest conditions, providing unmatched reliability for soil investigations. Looking for reliable rigs for soil investigations? Explore Metadrill's high-performance rigs today and take your drilling operations to the next level!

For a geotechnical drilling project, one should select the right rig. For most small contractors, the most important factor is price. But here is the silver lining: cheap, affordable geotechnical drilling rigs are plentiful and price with performance. In this buyer's guide, you will learn important considerations in choosing the best geotechnical rigs for small contractors and cost-effective soil testing strategies.
Cheap Geotechnical Drilling Rigs: When is Drilling Required?
You would require geotechnical drilling if you want to know the properties of soil, rock, or other subsurface materials. Geotechnical drilling can gather critical data in construction projects such as foundations, roads, and tunnels. When you do soil testing or geotechnical site investigations, it is a guarantee that with affordable geotechnical drilling rigs, you are getting the right equipment to get the job done in an efficient manner without overspending.
How to Choose Affordable Geotechnical Drilling Rigs?
The right rig is not determined by price alone. Of course, a contractor has to look beyond that: what type of drilling he would need, the terrain, and what he really needs. Here's how to narrow down the options:
- Know your needs: What is the purpose of drilling? Is it for soil testing, geotechnical investigations, or perhaps a construction site? Knowing what you need helps you choose the right rig that is designed for your type of project.
- Mobility and Size: You may need smaller, portable rigs for tight spaces while larger rigs may be needed for bigger or deeper drilling operations.
- Compare Sources of Power: Diesel or electric-powered rigs differ in performance and cost-effectiveness. Choose one that fits your place.
- Budget: Performance always goes with affordability. Do not sacrifice important features like reliability and durability for cheap costs.
What Affordable Geotechnical Drilling Rigs Types Should You Go For?
Any one would have to determine the type of rig needed before coming down to purchasing the cheapest geotechnical drilling rig. In this regard, the most commonly found types include:
- Truck Mounted Rigs: Such a rig is so great for movement for projects as they can reach both urban areas or tight space and are often used in many instances. So, they seem typically cost effective for soil testing as well as small-to-medium-sized geotechnical jobs.
- Crawler-Mounted Rigs: These are very stable. This will be ideal for more hostile ground and the durability of crawler will not make it break even with tough conditions while drilling. Therefore, crawler is very great for contractors handling hard sites.
- Track Mounted Rigs: These are the high mobility rigs which have a great mobility on rough terrains. Its stability is very good and used mainly on deep drilling operations. These rigs might be a great value for a more versatile drilling rig needed by contracting companies.
What is the Best Affordable Geotechnical Drilling Rigs Technology?
Technology will play a big role in the performance and efficiency of your rig. A few options are as follows:
- Rotary Drilling Technology: This is one of the most effective drilling technologies in the case of drilling through hard rock and consolidated formations. It would be ideal for the contractors looking for a powerful, cost-effective drilling rig for more challenging environments.
- Auger Drilling Technology: Auger rigs are cost-effective options in softer soils or shallow drilling projects. They are less complicated to maintain and operate, making them ideal for small contractors working on less demanding projects.
- DTH (Down-the-Hole) Hammers: When working on rock formations, it may be an effective budget-friendly choice for the DTH hammers since they can penetrate through tough material using high impact forces.
Affordable Geotechnical Drilling Rigs Size and Capacity
Size and capacity for your rig: consider depth and scale of jobs you tend to work with. Smaller contractors need to find a balance between the size of their rig and the size of the projects they are expecting to work with. The advantage of bigger rigs is that they offer more power but then again, are usually more expensive to operate. These rigs are smaller in size, less expensive, and are more portable, making them great for small-scale space or budgets but perhaps not as efficient in large-scale drilling.
Economical Geotechnical Drilling Rigs Power Source and Mobility
Among the significant factors influencing both cost and performance are sources of power and mobility of the rig.
- Diesel Rigs: These are the most widely used. These can deliver all the power necessary for even the most extreme drilling conditions. They are usually pricier up front but more than pay off in the long run.
- Electric Rigs: These are less expensive and environmental friendly. They are quieter, produce fewer emissions, and operate cheaper, which makes them perfect for urban or indoor drilling projects.
Mobility is also a critical factor to consider. Portable rigs are often the most cost-effective solution for small contractors, especially if you’re working in varied terrains or confined spaces.
Affordable Geotechnical Drilling Rigs: Understanding Your Drilling Needs
This understanding of drilling needs helps decide which rig will best fit the project. Whether it is geotechnical investigation, soil testing, or any other specific type of drilling, knowing the depth, types of materials, and scale of the work will be helpful in directing you to a more affordable solution. If you do shallow drilling or soil testing very often in your operations, then you don't need high-powered rig, but light or medium-duty would suffice.
Inexpensive Geotechnical Drilling Rigs Accessories and Tooling
Accessories and tooling can make your rig more efficient and versatile. Here are a few accessories to consider when choosing an affordable geotechnical drilling rig:
- Core Sampling Tools: Core sampling tools are necessary for soil testing and geotechnical investigations. They make it easy to extract material samples for analysis.
- Drill Bits: Choose high-quality, cost-effective drill bits compatible with your rig and soil or rock conditions.
- Safety Equipment: One should never forget to spend money on such essential safety accessories as safety cages, stabilizers, and personal protective equipment.
Geotechnical Drilling Rigs in Affordable Price Budgeting
Having set a clear budget is important, especially in equipment purchase. As you look forward to purchasing rigs, you shall incur the maintenance and operating expenses, which go beyond the prices of fuel and spare parts; labor also tops the list as you shall seek to purchase a rig with very low maintenance and durability as you will save your money in the long run.
Low-Price Geotechnical Drilling Rigs Maintenance and Support
Maintenance is an essential aspect in making sure your rig keeps on running properly and efficiently. Regular servicing and provision of spares help avoid expensive repairs and down times. Take rigid arms from the more well-known companies that offer great customer support, along with various warranty options, and your funds will be protected for a long period if anything goes wrong with the rig.

When considering the purchase of a used geotechnical drilling rig, it's important to approach the decision with careful attention to detail.
Whether you’re a contractor, construction company, or engineer, the right geotechnical drilling equipment can significantly impact the efficiency, cost, and safety of your operations.
Metadrill walks you through the key factors to consider when buying a used geotechnical drilling rig focusing on what to look for, where to buy, and how to maintain your equipment.
Why Buy a Used Geotechnical Drilling Rig?
Opting for a used geotechnical drilling rig can be a cost-effective solution for many businesses. The initial investment in new equipment can be steep, especially for smaller companies or those with limited budgets.
Used rigs, when properly inspected and refurbished, can provide similar performance at a fraction of the price.
- Lower Cost: Used equipment comes at a significantly lower price point than new models.
- Faster Return on Investment (ROI): Because of the lower purchase price, used rigs can generate ROI more quickly.
- Availability of Older Models: Sometimes, older rigs offer specific features or design elements not found in newer models.
Types of Geotechnical Drilling Rigs
Geotechnical drilling rigs come in various sizes and configurations, tailored to specific project needs. Each type of rig offers distinct benefits, depending on your project requirements.
- Truck-Mounted Drilling Rigs: These rigs are mounted on trucks, making them ideal for large-scale projects that require mobility across different job sites.
- Crawler-Mounted Drilling Rigs: Mounted on tracked vehicles, these rigs offer excellent stability and are ideal for projects in rugged terrain.
- Compact Drill Rigs: A compact drill rig is smaller and more portable, ideal for urban environments or sites with limited space. Their compact size doesn’t compromise on performance, making them highly versatile.
What to Look for When Buying Used Geotechnical Drilling Equipment
When buying used geotechnical drilling equipment, you need to thoroughly assess both the rig and the seller to ensure you’re getting a machine that will perform reliably over time. Here are the key factors to consider:
Condition of the Rig
- Mechanical Condition: Inspect the rig for any visible signs of wear and tear, such as leaks, corrosion, or damage to critical components. Pay attention to the engine, transmission, and hydraulic system.
- Operational Performance: If possible, test the rig on-site to ensure it functions properly. Check for ease of operation, noise levels, and any unusual vibrations or issues.
- Rig Hours: Much like a car, drilling rigs have a certain number of hours they can be used before parts start to wear out. Lower hours generally indicate less wear, but make sure to consider the quality of maintenance it has received.
- Service History: Review the maintenance records and service history of the rig. A well-maintained rig will likely be a better investment in the long run.
- Regular servicing and repairs.
- Any history of major issues, such as engine failures or hydraulic system malfunctions.
- Whether the rig has undergone any refurbishments or upgrades.
- Age and Model: The age of the rig can impact its longevity and technology features. Older rigs may lack modern features such as advanced digital monitoring systems, but they can still be highly functional if they are in good condition.
- Compliance with Safety Standards: Ensure that the used rig meets all the necessary safety standards and regulations for your region.
Where to Buy Used Geotechnical Drilling Rigs
Buying a used geotechnical drilling rig can be a smart financial decision, offering significant savings without compromising on quality if you choose wisely.
- Authorized Dealers: At Metadrill, you can purchase from an authorized dealer. We ensure that our used geotechnical drilling rigs for sale have been inspected and meet certain standards.
- Online Marketplaces: Several online platforms specialize in used construction and geotechnical drilling equipment. Be sure to review the seller’s ratings and look for reviews or references from previous buyers.
- Private Sellers: Buying directly from a private seller can sometimes yield significant savings, but it comes with risks. It’s essential to do a thorough inspection and consider hiring a professional to help evaluate the rig’s condition.
Whenever you decide to purchase a geotechnical drill rig for sale, make sure to buy from trusted sources and prioritize proper maintenance for optimal performance.
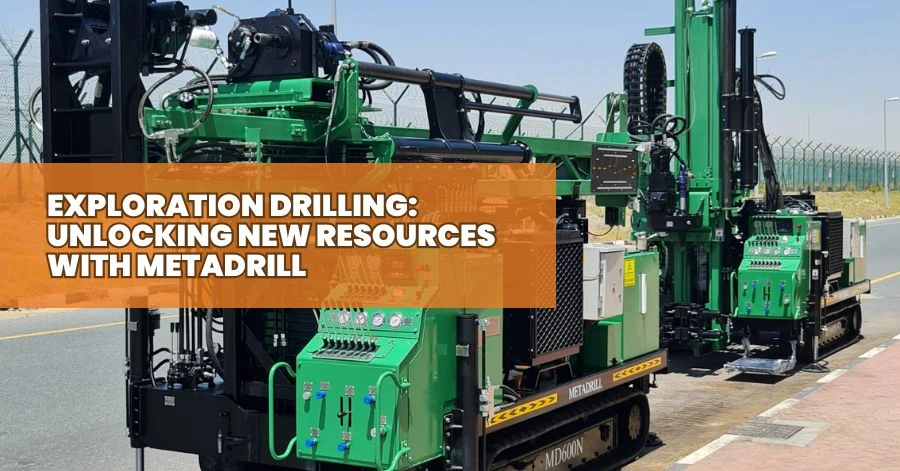
In the mining industries, exploration drilling uncovers new reserves worldwide. To stay ahead in the ever-evolving mining sector, Metadrill provides advanced exploration drilling services designed to tackle the unique challenges of modern operations.
Metadrill promises safety, efficiency, and innovation in your drilling operations.
What is Exploration Drilling?
Exploration drilling is the process of drilling boreholes into the Earth’s surface to assess and locate natural resources. By obtaining geological data, exploration drilling helps to determine the size, quality, and feasibility of reserves.
At Metadrill, we understand the critical role high-quality drilling equipment plays in achieving accurate and efficient results. Our advanced exploration drilling tools and solutions are designed to support precise exploration processes for your resource discovery projects.
How Metadrill Leads in Exploration Drilling
- Advanced Technology: Our fleet of modern exploration drilling rigs and tools provides the highest level of precision. With the latest drilling technologies, even the toughest exploration challenges can be seamlessly performed.
- Skilled Professionals: Metadrill’s team brings aboard a team of highly qualified engineers and geologists who specialize in exploration drilling. With years of experience and knowledge of the industry, our experts ensure streamlined execution of projects while maintaining strict safety and environmental standards.
- Customized Services: No two exploration drilling projects are the same. That’s why we work closely with our clients to tailor our services to meet their specific requirements.
The Process of Exploration Drilling with Metadrill
- Initial Site Assessment and Planning: Before any exploration drilling, Metadrill performs comprehensive geological surveys to assess the site. The assessment aids in identifying potential locations and preparing a strategic drilling plan.
- Drilling Operations: Once the site has been identified, we move forward with the exploration drilling process using state-of-the-art drilling rigs and machinery to conduct operations.
- Data Collection and Analysis: Our team then collects core samples that provide critical geological data. These samples determine the composition of the reserves.
- Reporting and Recommendations: After drilling completion, Metadrill provides our clients with a comprehensive report. Depending on the results, we offer recommendations on whether the site should be proceeded with further exploration.
The Importance of Safety and Compliance in Exploration Drilling
- Strict Safety Protocols: Adhering to international safety standards and industry practices to protect your workforce, clients, and the environment. Our team is trained in emergency response procedures to ensure safeguarding manpower.
- Environmental Protection: Our equipment is designed to minimize environmental impact as we follow guidelines to prevent spills and contamination.
- Regulatory Compliance: At Metadrill, we work closely with regulatory bodies to ensure all our exploration drilling projects meet legal and environmental standards.
Why Choose Metadrill for Your Exploration Drilling Needs?
- Reliability: Metadrill prides itself on being a reliable partner. We ensure that your project is delivered on time, within budget, and to the highest quality standards.
- Proven Track Record: With years of experience, we have successfully completed numerous drilling projects for clients across various sectors.
- Cutting-Edge Equipment: At Metadrill, we only use the latest exploration drilling rigs, machinery, and technology to provide maximum efficiency, safety, and accuracy in every project.
- Customer-Centered Approach: For us, you are unique. We, at Metadrill, take the time to understand the unique requirements of every client, ensuring we deliver tailor-made solutions that fit their specific needs.
Unlock Resources: The Metadrill Way
At Metadrill, we offer the expertise, technology, and commitment to safety that you need for a successful exploration drilling project. Whether you're looking for new reserves or seeking to improve the efficiency of your existing drilling sites, put your trust in Metadrill and unlock the potential of your project.
Connect with our skilled team to learn more about how we can assist with your exploration drilling needs and bring your project to life with precision and professionalism.
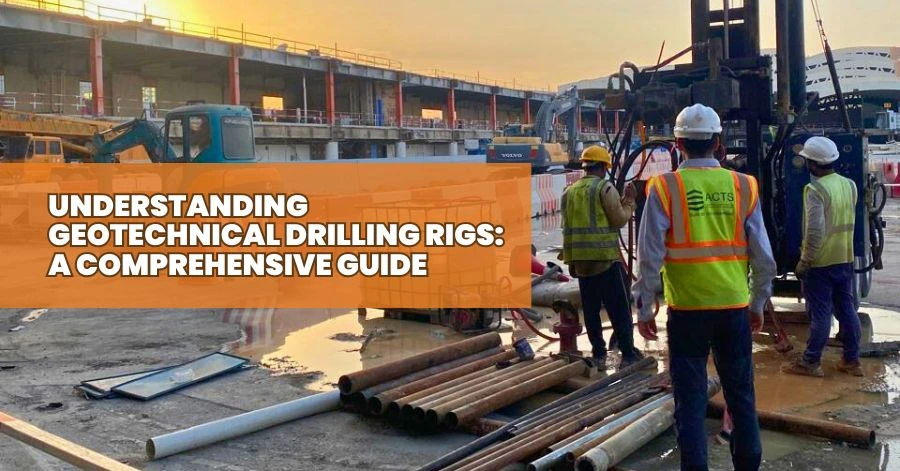
Geotechnical drilling rigs provide clarity of subsurface conditions of a site. From site investigations to resource exploration, Metadrill’s geotechnical drilling rigs have become a propeller towards on-site construction success.
Metadrill doesn’t only deal in equipment but also helps its users comprehensively understand the basics of geotechnical drilling rigs, their components, applications, and how compact drill rigs and other geotechnical drilling equipment are transforming the construction industry.
Key Components of Geotechnical Drilling Rigs
When evaluating geotechnical drilling rigs, it is vital to assess these components. These parts are responsible for the overall performance and longevity of the geotechnical drilling rig.
1. Drill Mast and Derrick
The drill mast provides vertical support and handles the weight of the drill rods. The derrick is a tall structure used to lift the drill rods, casings, and other materials.
2. Drill Rods and Bits
Drill rods and bits penetrate the ground and retrieve core samples. Drill rods are long metal shafts connected together to extend the depth of the drilling, while drill bits cut into the ground material.
3. Hydraulic Systems
Hydraulic pumps, valves, and motors generate force, ensuring optimal performance.
4. Control Panel
Monitors and adjusts drilling parameters in real time.
5. Mud Pumps
Circulates drilling fluids to stabilize boreholes and cool the drill bit.
6. Core Barrels
Extracts soil, rock, or other subsurface materials for analysis.
7. Casing Pipes
Used to stabilize borehole walls during drilling.
8. Drilling Fluids
Maintains borehole pressure and prevents wall collapse.
9. Monitoring Devices
Provides real-time data on drilling depth, penetration rate, and material composition.
Choosing the Right Geotechnical Drilling Rig
- Project Requirements: Determines drilling depth, soil type, and sample size.
- Site Conditions: Accessibility, space constraints, and environmental factors.
- Budget: Balances cost and operational efficiency.
Why Choose Our Geotechnical Drilling Rigs?
Metadrill’s compact drill rigs offer portability, efficiency, and cost-effectiveness. These rigs provide precision, ease of use, and reliability.
Metadrill Drilling Rigs: A Varied Portfolio
- MD75N, MD150N, MD600N, MD1000N, MDCR34: Designed for diverse geotechnical applications.
- Equipped with advanced hydraulic systems, high mobility, and powerful performance.
Metadrill Geotechnical Drilling Rigs: Unmatched Equipment
1. Truck-Mounted Rigs
MD1000N is ideal for large-scale projects requiring mobility and power.
2. Compact Drill Rigs
MD75N and MD150N are efficient in confined or remote spaces.
3. Trailer-Mounted Rigs
MD600N offers a balance between portability and performance.
4. Auger Drills
MDCR34 is used for shallow drilling in softer soils.
What Makes Metadrill Compact Drill Rigs the Best?
Metadrill’s compact drill rigs blend portability, efficiency, and cost-effectiveness. They are designed to meet the demands of various geotechnical drilling projects.
About Metadrill
At Metadrill, we provide drilling rig tools and equipment to meet the diverse needs of various industries. Metadrill’s commitment to quality and innovation makes us a reliable partner for challenging drilling projects.
Critical Factors to Consider in Drilling Rig Tools and Equipment
When selecting drilling rig tools and equipment, certain key factors play a vital role. At Metadrill, we make sure that our tools are equipped with:
- Durability: Our high-quality drilling rigs and equipment ensure long-term performance, even under extreme conditions.
- Efficiency: Our tools are designed for optimal performance and minimize downtime to enhance productivity.
- Safety Features: Metadrill’s equipment has a built-in safety mechanism to protect workers and operations.
- Cost-Effectiveness: Investing in reliable tools reduces operational costs over time.
- Adaptability: Equipment can be customized for specific applications.
Why Quality Matters in Drilling Rig Tools
Using substandard tools leads to operational inefficiencies, equipment failures, and safety risks. Metadrill’s drilling rig tools and equipment deliver superior performance, durability, and compliance with industry standards.
When you choose Metadrill, you invest in reliability and success.
Drilling Tools and Equipment by Metadrill: Precision and Efficiency
Metadrill provides a comprehensive range of high-quality drilling tools and equipment essential for successful drilling operations. Our tools are designed to meet the specific needs of different drilling applications. Metadrill offers:
1. Conventional/Wireline Core Drilling
Conventional core drilling is used for standard drilling operations, whereas wireline core drilling retrieves core samples using a wireline system. Metadrill offers advanced core drilling tools, ensuring that every sample is retrieved with the highest precision and minimal disruption to the drilling process.
2. Top Hammer Bits / Casing Shoes
Top hammer bits are used for drilling through hard rock formations. Casing shoes secure casing pipes into the ground during the drilling process. Metadrill provides high-performance top hammer bits and casing shoes for extreme conditions.
3. PWF Long Standard / PWF Long Set to Liner
The PWF Long Standard and PWF Long Set to Liner prevent casing collapse during drilling. With Metadrill, you can be assured of high-quality PWF tools that improve the reliability of your drilling operations.
4. Tungsten Carbide Insert Bits
Tungsten carbide insert bits are essential for drilling through hard formations. These bits feature tungsten carbide inserts that increase their hardness and wear resistance. Metadrill offers tungsten carbide insert bits engineered for long-lasting performance in difficult drilling environments.
5. Steel Tooth Tricone
Steel tooth tricones feature steel teeth for exceptional penetration rates and durability. Metadrill supplies high-quality steel tooth tricones that deliver excellent performance, even in challenging drilling conditions.
6. Full Faced PCD Bits
Full faced PCD (Polycrystalline Diamond) bits are designed for high-efficiency drilling in abrasive formations. Metadrill offers PCD bits that deliver superior performance in demanding environments.
7. PCD Coring
PCD Coring uses polycrystalline diamond compact bits to obtain rock samples for geological analysis. Metadrill provides innovative PCD coring tools that ensure optimal core recovery and minimal loss of sample material.
8. DTH - Down the Hole
Down-the-hole (DTH) drilling is a technique where the drill bit is located at the end of a drill string to drill directly into the rock. Metadrill offers durable and efficient DTH drilling tools to drill faster and more effectively in tough conditions.
9. Drill Rods
Drill rods are used to connect the drill bit to the drilling machine and transfer the drilling forces to the bit. Metadrill provides high-quality drill rods that ensure durability, flexibility, and optimal performance in any drilling operation.
10. Adapters
Adapters are essential for connecting different components of the drilling system for easy interchangeability and compatibility between various tools. Metadrill offers a range of adapters that ensure smooth transitions and connections between different drilling tools.
11. Manual/Automatic SPT Assemblies
Standard Penetration Test (SPT) assemblies are used to assess soil conditions. Metadrill provides high-quality SPT assemblies for geotechnical investigations, ensuring the integrity of the drilling operation.
12. Sampling Cones/Split Tubes
Sampling cones and split tubes collect soil and core samples during drilling operations. Metadrill offers precision-engineered sampling tools for high-quality sample recovery.
13. Mud Pumps/Water Swivels/Wrenches
Metadrill provides reliable and durable mud pumps, water swivels, and wrenches to improve operational efficiency.
Why Choose Metadrill for Drilling Rig Tools and Equipment?
At Metadrill, we understand the importance of using the right tools for the job. Our range of high-quality drilling rig tools and equipment is designed to meet the toughest challenges of drilling operations. Metadrill promises:
- Extensive Product Range: A comprehensive catalog that covers everything from drill bits to advanced directional drilling systems.
- Superior Quality: Premium materials to withstand the toughest drilling conditions.
- Innovation-Driven Solutions: Tools designed for enhanced performance.
- Expert Guidance: Assistance in selecting the right tools.
- Global Standards: International safety and performance certifications.
How Metadrill Supports Your Operations
We offer:
- Custom Solutions: Tailored equipment packages.
- Technical Support: Ongoing guidance.
- Maintenance and Repairs: Professional services.
- Training Programs: Workforce training.
- Global Distribution Network: Quick and reliable delivery.
Partner with Metadrill for Your Drilling Needs
Contact Metadrill today to learn more about our products, request a quote, or get expert advice on optimizing your drilling operations. Let Metadrill be your partner in delivering precision, safety, and efficiency to your projects!

Benefits of Hiring a Geotechnical Driller
Geotechnical drilling is essential to determine the subsurface conditions of a construction site. It is a major step in designing foundations and retaining walls. One can hire a geotechnical driller for:
- Accurate Site Assessment
- Risk Mitigation
- Cost Savings
- Compliance with Legislation
- Enhanced Safety
- Making Informed Decisions
- Protection of the Environment
- Tailor-made Solutions
- Better Project Planning
- Long-Term Performance
Accurate Site Assessment
One of the primary advantages of hiring a geotechnical driller is accurate site condition determinations. Geotechnical drilling provides significant advantages in providing enough information about soil, rock layers, groundwater levels, and other subsurface elements. Information regarding these issues is essential to designing foundations, retaining walls, and other structural components. Such information is critical in avoiding significant risks prevailing when structural failures and costly delays in construction projects occur.Risk Mitigation
Geotechnical drilling reveals all risks involved at the site. This lets an engineer ensure that safe structures can be designed in under-surface conditions. For instance, if the soil condition is unstable or liquefiable, proper foundation designs can prevent such a risk and ensure the long-term stability of the structure.Cost Savings
Hiring a geotechnical driller costs more upfront, but the economy of saving is highly valued overall. With good site data, the design and construction stages go optimally, reducing the chances for surprise factors that result in costly rework. Early detection of potential problems ensures that costly delays and modifications are avoided at the construction stage.- Compliance with Legislation
Construction projects are regulated by local, state, and federal regulations. Geotechnical drilling ensures the project's implementation while adhering to these regulations, as all necessary data will be available for permits and approvals. This avoids legal complications and fines when such regulations are not observed. Enhanced Safety
Safety is a huge concern associated with any construction activity. Geotechnical drilling enhances the process by providing crucial information concerning the site conditions. This information allows the design of structures that can withstand natural forces such as earthquakes, landslides, and floods. Ensuring that the foundation and other structural elements are designed properly definitely contributes to improving the safety factor of the construction workers and future occupants.Making Informed Decisions
Available detailed and accurate subsurface information allows for effective project management and engineering decisions in selecting appropriate construction methods, materials, and equipment. Informed decision-making leads to more efficient and effective project execution, thereby reducing the possibility of errors and delays.-
Protection of the Environment
Geotechnical drilling is also environmentally friendly. Engineers can design projects with minimal environmental impact if they understand subsurface conditions. For example, the level of the water table and flow pattern can help engineers design a drainage system that will not cause pollution and erosion. This means that contaminated soil or water can be properly remediated before construction. -
Tailor-made Solutions
Every construction project site is different. The geotechnical drilling data helps design individual solutions based on the unique characteristics of the project site. Be it challenging soil conditions, high groundwater levels, or complicated rock conditions, the expert geotechnical driller will produce suitable suggestions for resolving such issues. This will ensure the project is planned and carried out efficiently and effectively. -
Better Project Planning
The overall quality of the geotechnical data ensures effective project planning. Understanding the subsurface conditions allows the project managers to lay down realistic timelines and budgets. Better planning will, therefore, prevent appropriate resource allocation and avoid surprises during the construction period. Improved project planning leads to smooth project implementation and successful completion. Long-Term Performance
The structure's performance eventually depends on the state of the ground on which the structure is based. Data from geotechnical drilling is used to describe sound foundations and other structural elements that will perform well for some time in the future. This way, the structure will be safe and stable for its times. It will have less frequent costly repairs and maintenance.
Final Thoughts
The benefits of hiring a geotechnical driller are essential for any construction. From actual site assessment to mitigating risks and potential cost savings to increased safety, geotechnical drilling provides valuable insights regarding subsurface site conditions. By understanding the soil composition, rock layers, and groundwater levels, engineers can design stable and resilient structures to environmental factors.
For the ideal experience, partner with MetaDrill, a leading geotechnical drilling company in the United States. Offering unmatched expertise and state-of-the-art equipment, MetaDrill is your perfect partner for any construction project. With an endless drive for quality, precision, and customer satisfaction, MetaDrill will ensure your project has a solid foundation both ways.

A well is vital in everyday life, from drinking and cooking to domestic activities and gardening. When your well breaks down, you might encounter breakdowns in routine, inconvenience, and even health risks. Recognizing the signs that it is time to replace the water well is necessary. Some indicators may be calling for you to invest in a new water well drilling. These are the qualities of water, low flow, and the often-malfunctioning pumps, which would ensure one gets an idea early and acts ahead to continue having a steady safe water supply for their home.
Signs You Need a New Water Well
- Noticeable Changes in the Quality of Water
- Reduced Water Flow or Pressure
- Frequent Pump Cycling
- Spikes in your electric bill
- Air in the Plumbing System
- Requires Constant Maintenance
- Well Age
Noticeable Changes in the Quality of Water
Changes in water quality are one of the initial signs that your water well may be failing. If your water appears cloudy, has an unfamiliar taste, or has an unusual smell, it might be contaminated or have another problem in the well.
-
Common Indications:
- Cloudiness or Sediment: This can signify silt and even sand entering the well, primarily due to a damaged casing or screen.
- Unpleasant Taste or Odor: Bacteria, chemicals, and minerals contamination can alter the taste or odor of the water.
- Discoloration: Brownish or yellowish water indicates the presence of iron or manganese, while blue or green color may be caused by copper corrosion.
-
Reduced Water Flow or Pressure
Heavy water flow or a pressure drop are other signals that you may be out of order. Reasons include a failing pump, clogged pipes, or a declining water table. Possible Causes:
- Pump Problem: A worn-out or ill-sized pump needs to maintain adequate water pressure.
- Pipe Clogging: Deposited sediment and minerals constrict the water passage.
- Falling Water Table: The water table can drop in time, especially in periods of drought. This may lead to a time when the water is more challenging to locate.
-
Frequent Pump Cycling
Well, pump cycling on and off exceptionally frequently can be a symptom of a problem. This problem is called short cycling by pump, which diminishes your pump's life span by increasing wear and tear. Possible Causes:
- Pressure Tank Issues: A malfunction in the pressure tank causes the pumps to cycle too often.
- Leakage: Leaks in the plumbing make the pump work too often to establish pressure.
- Electrical Problems: Wrong wiring and faulty control switches provoke the pumps' erratic behavior.
-
Spikes in your electric bill
A sudden rise in your electricity bill usually indicates that your well pump is overworking. This usually occurs when the pump operates continuously, cycles excessively because of problem conditions, or simply requires a lot of power to drive it. Check For:
- Continuous Pump Operation: Relying on a constant pump operation may indicate a faulty pressure switch or leakage in the system.
- High Frequency of Cycling: Frequent cycling has been noted to increase electrical usage.
- Old or Inefficient Pump: Older pumps are less efficient than newer models and tend to use more electricity as they age.
-
Air in the Plumbing System
So, if the air is spouting out of your faucets, there may be a problem with your well running out of supply or even a faulty pump. The air in the water supply system can cause a misdirected flow of water and further damage your plumbing.
Possible Causes:- Low Water Level: The pump draws air because the declining water table cannot give it enough water.
- Pump Placement: If the pump is not installed at a suitable depth, it will suck air into the system.
- Leaks: Leaks within the well casing or plumbing can also allow air to enter the system.
-
Requires Constant Maintenance
Regular problems in your well system should make you realize that it is high time to replace it. Although maintenance is standard, constant problems may signify that the well has almost reached its end.
Some Known Problems:
- Pump Failures: Repeated pump failures might indicate a problem with the well.
- Leaky Plumbing: Continued leaks may indicate that pipes or fittings are failing.
- Water Quality Problems: Chronic problems with water quality may indicate the well no longer supplies safe water.
-
Well Age
The age of your well is an essential determinant of whether it needs to be replaced. Depending on their construction quality and maintenance, most wells have a lifespan of 20 to 30 years.
Considerations:- Lifespan: If your well is about to reach or exceed its expected lifespan, then it is already time to replace it.
- Historic Performance: The well's performance in terms of years should be examined. It will last longer if it has constantly provided water.
- Technological Innovation: That is where new wells come in, helping you take advantage of improvements in drilling technology and even materials that give you better performance and longevity.
If you detect any of these signs, it is advisable to seek services from professional contractors who will analyze the situation and offer the correct solution. With a new well or other alternatives, water can be safely provided for years.
Final Thoughts
Recognizing signs pointing out the need for a new water well is crucial in maintaining a reliable, safe water supply. Some signs that could mean it is time for a new well include a decrease in water quality, flow, or pressure, frequent cycling of the pump, spiking of electricity bills, air entrainment in the plumbing system, constant repairs, age of the well, and changes in the environment. Alternative options like hydrofracturing might add years to your well. Be alert and deal with problems immediately to sustain a safe water supply for your home.
MetaDrill is one of the USA's top water well drilling service companies. With years of experience and commitment to quality, you can count on MetaDrill to appraise your good condition and tailor solutions to help improve it. If you see any of these symptoms in your well, contact MetaDrill today to schedule a consultation.

Direct Push Drilling: Versatile and Efficient Solution
Direct push drilling is an essential solution that interests various industries due to its efficiency, cost-effectiveness, and minimal environmental impact. This technique boasts several advantages over traditional drilling techniques, which is the main reason most projects choose it.
Here is an in-depth look at why direct push drilling is often preferred over other methods:
Efficiency and Speed
On the positive side, direct push drilling is one very efficient means of drilling. In such a process, penetration into the ground occurs extremely fast. Hence, depth is reached in a brief period and with fewer efforts than traditional methods. Such speed helps reduce project times and costs, becoming lucrative for many projects.Cost-Effectiveness
Direct push drilling is cheaper than traditional methods. The drilling equipment is smaller and lighter, reducing transportation and setup costs. The method also produces less waste, which thereby saves on disposal costs. This makes it appropriate for projects that operate within stringent resource budgets.Least Environmental Impact
Environmental considerations are critical in modern drilling projects. Direct push drilling generates fewer drill cuttings and less site disturbance, leaving the site cleaner and more environmentally friendly. Waste generation is reduced, making the footprint smaller and making it easier to restore the site after the drilling is done.Versatility and Flexibility
Direct push technology is versatile and can be used in various projects, such as soil, groundwater, and geotechnical investigations. The equipment used can be designed to fit any site condition or project requirement, whereas traditional drilling equipment is less flexible. This technology can be used in applications ranging from environmental assessments to investigations for construction sites.Quality Data Collection
Direct push drilling offers the preciseness of gathering high-quality, depth-discrete samples, which genuinely depict the fundamental nature of subsurface conditions. During environmental investigations, it is essential to agree on reliable data regarding soil and groundwater conditions. During environmental investigations, beds of contaminants at known depths can easily be identified with the help of collected samples and a better perception of subsurface conditions.Reduced Site Preparation and Setup Time
Traditional drilling operations require extensive site preparation and setup, which takes time and expense. Direct push drilling requires minimal site preparation. The equipment is compact and thus fast to deploy, allowing speedy start-ups and end-ups of a job. This is especially important where space and time are at a premium, such as in urban or restricted-access areas.Safety and Reduced Labor Intensity
Safety is always the paramount consideration in any drilling operation. Compared with other drilling operations, direct push drilling is less manpower-intensive, involving fewer manual operations; therefore, fewer chances for accidents and mishaps to occur at a site. It is also designed to be operated with minimal manual intervention, enhancing overall safety for the drilling crew.Ease of Access within Difficult Terrain
In comparison, direct push drilling equipment is often more compact and mobilizable than traditional drilling rigs, which can make it easier to access very cramped or restricted areas, such as urban environments or remote locations with limited clearance. Operating in challenging terrains without extensive site modifications is a significant advantage for applications in environmental remediation.Applications in Environmental Remediation
Besides site investigations, direct push technology is also applied in environmental remediation. This can inject remediation agents directly into contaminated zones, including oxidants or nutrients. Thus, targeted remediation improves the efficiency of remediation and reduces the site's global impact.New Tooling and Techniques
With the development of recent innovative tooling and techniques, direct push drilling has expanded further, for instance, with more advanced tools combined with rigs. Advanced tools include groundwater samplers, soil gas samplers, and geophysical instruments that can be used directly with push rigs to collect and analyze data efficiently. Such advancement continues to influence and push the limits of what can be achieved with direct-push technology.
Final Thoughts
Direct push drilling has emerged as one of the versatile and efficient tools for subsurface investigation. It possesses benefits beyond those offered by any other traditional drilling method. Direct push drilling can advance in the ground rapidly, provide good-quality information, and be less destructive to the environment.
Direct push drilling reduces project time and cost and ensures data accuracy. The technology's versatility also makes it appropriate for various applications, such as environmental assessment and construction site investigation.
MetaDrill is the USA's prime direct push drilling technology house, leading the competition and directly supporting the need to provide innovative products and quality solutions. MetaDrill can provide you with the tools and expertise to maximize the benefits of direct push drilling, whether you are working on a challenging site or need precise data collection.

Track-mounted drill rigs must be required in many segments of the industry: construction, mining, and geotechnical engineering. Sometimes, it comes down to the availability of a machine for the short-term execution of a project, whereas other times, it may be an investment for the long term. For whatever reason, finding the proper track-mounted drill rig to rent or buy can be a daunting task. For this reason, this blog takes up some sources and tips to guide you into finding the perfect drill rig to help you meet your goals.
Understanding Your Requirements
Assess carefully what each project requires to do before going out on the hunt for the proper track-mounted drill rig. Decide on the period your project will take to help determine whether you will rent or buy appropriately. Evaluate and determine the amount you will spend on the drill rig. Determine the specifications needed for your project, including the drilling depth and power source, among other added specifications. This will enable you to narrow your choices and find a rig that explicitly fits your project goals. The last is the location of your project. Some suppliers may offer local deliveries, while others might even need shipping, thus making an impact on overall costs. Weigh these factors carefully so that an informed decision can be made and the best track-mounted drill rig that will satisfy the requirements of your project can be found.
Specialized Equipment Suppliers
Specialized equipment suppliers often keep large inventories of track-mounted drill rigs for rent or purchase and will often offer new and used equipment as well as provide options for rental. Some major suppliers include:
- MetaDrill: MetaDrill is among the world's biggest drill rig manufacturers, offering both rental and on-sale. It ranges from various models of track-mounted drill rigs to be used in geotechnical, environmental, and exploration drilling applications.
- Drill Rigs for Sale: This website offers an extensive line of drill rigs, both new and used. It provides equipment for the geotechnical, environmental, geothermal, and water well drilling sectors.
- CME Drill Rigs: CME offers a variety of truck—and track-mounted drill rigs for sale and rent and supplies equipment services for geotechnical and environmental drilling.
Rental Equipment Companies
A track-mounted drill rig rented from an equipment rental company can be cost-effective for a short-term project. They are flexible with their rental terms and have a large stock with many items to rent. Below is a list of notable and reputed rental companies:
- MetaDrill: MetaDrill is one of the world's most significant equipment rental companies. Its range of construction and industrial equipment includes many track-mounted drill rigs.
- Sunbelt Rentals: Sunbelt Rentals rents everything available for rental, including drill rigs. Their rental terms are very elastic and can be delivered across the country.
- Rig Source: Rig Source sells track-mounted drill rigs, but it also offers a rental option. Its locations carry several rigs for rent for days to several months at a time.
Check manufacturer websites
For the available models, you can check with the manufacturers of the drill rigs on their respective websites. They usually supply drilling equipment through their network of authorized dealers who can help in purchasing or renting. Some well-known manufacturers include:
- MetaDrill: MetaDrill is a leading manufacturer of drilling rigs. Their website contains comprehensive product information and a dealer locator that helps you find authorized dealers near you.
- Boart Longyear: Boart Longyear offers drilling equipment, such as tracked drill rigs. Its website contains product details and a dealer locator.
- Sandvik: Sandvik is another well-known manufacturer of drilling products. This site offers information about its products and a locator to locate authorized distributors.
Industry Events and Trade Shows
Industry events and trade shows are a wonderful way to see the latest in drilling equipment and suppliers. Often, they are done with demonstrations where you may know the equipment operating and can ask questions directly to the manufacturers or dealers. Some of the most notable events include:
- CONEXPO-CON/AGG: CONEXPO-CON/AGG is one of North America's largest construction trade shows. It features a wide range of equipment, including drill rigs.
- Bauma: Bauma is one of Munich, Germany's largest construction machinery exhibitions. It brings together exhibitors and visitors from around the world. This kind of exposition bauma highlights innovations in drilling equipment.
- PDAC: Prospectors & Developers Association of Canada ranks among the best mineral exploration and mining conventions. It features an extensive collection of drilling equipment and services.
Networking and Referrals
The best approach to sourcing reliable suppliers of track-mounted drill rigs is to network with professionals within the industry. Thus, one would need to join industry associations, conferences, and online forums, which will connect him or her with other professionals who will offer suggestions and insights.
Final Thoughts
Finding the right track-mounted drill rig requires research and consideration. Knowing exactly what you are looking for, where to look, and which resources are useful will make all the difference in finding your ideal equipment for the project at hand.
MetaDrill is a company that dominates in the provision of track-mounted drill rigs in the USA. With quality commitment and years of experience, MetaDrill can pledge reliable and efficient equipment to fulfil any drilling application. Your trustworthy drilling rig rental or purchasing partner, MetaDrill will guide you through all drilling applications.
Continually evaluate your project requirements regarding sources of supply, budget, specifications, and location factors. Then, with the help of reputable suppliers like MetaDrill, you can rely on the track-mounted drill rig selection for your project's success.
A Comprehensive Guide to Drilling Techniques
The act of drilling is one of the major skills that apply in different sectors, such as the construction or even woodworking industries. By mastering these techniques, you can attain an almost perfect and efficient outcome when drilling.- Choosing the Right Drill
- Choosing the Right Drill Bit
- Preparing the Work Surface
- Marking the Drilling Location
- Clamping the Material (if necessary)
- Using a Drill Press (optional)
- Starting the Drill
- Controlling The Twist
- Drilling Through Materials
- Finishing Touches
Choosing the Right Drill
There are two main types: cordless drills, where portability and convenience become primary in most tasks, and superior power corded drills for heavy-duty applications. Hammer drills are designed specifically for use on concrete or masonry, providing the "punch" required to bore through these challenging materials. Impact drills are the best for screw driving: they impart a confident hammering motion to fasteners that drives them in firmly. Choose a drill bit based on your project's needs.
Choosing the Right Drill Bit
The drill bit is critical to the quality and effectiveness of your drilling. Pick up some suitable material for the material you will be drilling. For example, use an HSS for most metals, carbide-tipped for masonry, and a wood bit for drilling into wood. Whichever you will use, please, do make sure that its diameter is appropriate for the hole you will want to see or fill with screws, bolts, or other fasteners. Consider specialized bits such as twist, spade, or Forstner for specific jobs.
Preparing the Work Surface
The work surface should be sturdy and stable to prevent accidents or unintended movement of drilled material. Use clamps or work holding devices to keep the material securely in place, especially with larger or heavier material.
Marking the Drilling Location
Carefully mark your drill location with a pencil or marker. This way, you avoid mistakes and ensure accurately placed holes. For increased accuracy in hole placement, you can use a combination square or marking gauge for some projects that require proper alignment.
Clamping the Material (if necessary)
Clamp bigger, heavier material firmly against the work surface during drilling. This helps to avoid movement while the drill is being processed to ensure control and thus prevent the drill from slipping or wandering, hence producing a clean, accurate hole.
Using a Drill Press (optional)
Even a drill press can be utilized for more accuracy and precision. A drill press constrains the drill bit to be kept in one position and control, with no error or drilling diagonally to the surface. It is convenient when working on projects that require many holes to be drilled straight or at an angle in particular directions.
Starting the Drill
Hold the drill by gripping it with two hands; ensure the grip is secure. Align the drill bit at the marked location. Take it slow when drilling so you do not let it slip or wander around. Gradually increase the speed as you permit it to cut through the material for effective performance. Use light pressure so the bit is in contact with the material. You should not use too much pressure, or you will bind the bit and eventually break it off.
Controlling The Twist
Do not exert too much force, as it makes the bit bind or even break out. Control the angle of the drill so that the bit does not walk while creating a clean hole. Control the temperature to check for overheating, which could destroy the motor orbit. For metals such as oil or coolant, use cutting fluid to reduce friction on the bit and avoid heating up while penetrating.
Drilling Through Materials
Wood drilling requires a slow drill without causing splitting. To make drilling easier, use a metal cutting fluid in case of overheating. On the masonry side, a hammer drill is recommended, which should be used gradually from slow speed to full speed once the bit starts digging into it. A masonry bit best suited for the type is also recommended to avoid moving out the whole lot while remaining in the hole.
Finishing Touches
After you drill your hole, there are some finishing steps to ensure it stays clean and smoothed out. Use a brush or compressed air to remove all the debris from the hole. Degrease the hole if required for the best possible adhesion of your screw or bolt. Check the hole for any imperfections or burrs and use a file or deburring tool to smooth them out. If essential, counterbore or chamfer the hole to accept specific types of fasteners or to prevent the material from splitting.
Final Thoughts
These steps and techniques can make you good at drilling and successful in achieving professional-level outcomes. As the saying goes, "Practice Makes Perfect." The more you drill, the more confident and better you will be.
MetaDrill is the leading drilling company in the USA, particularly for those who have inquiries or need professional drilling. With its experience, besides its tools, MetaDrill can complete projects of any complexity, as short as just home repair and as long as industrial uses.

Understanding the Basics of Well Drilling
The basic principles of well drilling involve creating a borehole in the ground to access water sources below the earth's surface. Factors such as the water table, intended usage of the water, and the area's geological conditions influence the well's depth and diameter. There are three categories of wells:
- Dug Well: Shallows made through hand digging a hole in the ground. Their depths are less than 50 feet and are always lined with stones, bricks, or concrete to avoid collapse. Dug wells are appropriate for areas with high water levels but might easily be contaminated and dry when drought occurs.
- Drilled Wells: Drilled wells depend on drilling rigs, which may go thousands of feet deep. Compared with dug wells, drilled wells are more dependable, resistant to contamination, and better. This type of well is suited for places where the water table is deep and thus could be relied upon for consistency in supply.
- Bored Wells: These are the same as drilled wells, except that they are constructed using a boring machine instead of drilling. The primary application of bored wells is in industrial processes and extensive irrigation programs. They can be designed to considerable depth and are suited to high yields.
Water Well Drilling Equipment Types
One can select from several types of drills, which vary depending on aspects such as the depth of the water table, geological conditions, and the well's purpose. Below is a list of the most common drills used in water well drilling.
-
Rotary Drilling
This is the most common method applied to shallow and deep wells. Rotary drilling involves rotating a drill bit into the ground while simultaneously pumping drilling fluid to cool the bit and remove cuttings.
- Advantages: It can be very versatile in varying soil conditions. It can drill to a significant depth. Both shallow and deep wells apply. It facilitates the collection of core samples for geological analysis.
- Disadvantages: It might be slower than other methods, especially in complex structures. It will demand specialty equipment and staff.
-
Percussion Drilling
Percussion drilling is also known as cable-tool drilling. In percussion drilling, the rock is crushed with the help of a hammer and bailer, which brings the cuttings to the surface. These drums are lowered successively on the drill string tied up with a bailer, which raises the cuttings from the bottom, bringing them to the surface.- Advantages: It is simple and inexpensive equipment. It does well in more complicated rock formations. It can be used in areas that are restricted to others.
- Disadvantages: It is expensive and time-consuming. It might be more useful in deep wells or soft formations. It is unsuitable for regions with a fear of groundwater contamination.
-
Air rotary drilling
Air rotary drilling is a standard conventional rotary drilling method that replaces the cooling and flushing of the drill bit with water-based drilling fluid by compressed air. This technique is used in areas where the groundwater can be contaminated while penetrating sensitive formations.- Advantages: It is non-environmentally hazardous because it will not inject drilling fluids into the groundwater. It can be applied even where there is suspicion of aquifer contamination and under different soil conditions.
- Disadvantages: Ineffective if the well is too deep or complicated rock formation Has to apply with special equipment and expertise
-
Reverse Circulation Drilling
Reverse circulation drilling is a category of rotary drilling in which circulating fluid flows inside the drill string and returns to the surface through the annulus, which forms the hollow space between the drill string and the borehole wall. It is widely used in deep wells and other operations that encounter incredibly challenging formations.- Advantages: Efficient for deep wells and challenging formations. Provides better control over drilling fluid flow.
- Disadvantages: Requires specialized equipment and expertise.
-
Sonic drilling
Sonic drilling is a high-frequency vibration that breaks the rock and soil to pass the drill bit. This drilling technique is often applied to shallow wells where groundwater pollution might be an issue.- Advantages: This technique causes less damage to the environment. It can be applied when there is a suspicion of groundwater contamination in shallow wells.
- Disadvantages: It will need to be more efficient in deeper wells or more complex rock formations. It requires special equipment and expertise.
Factors in Choosing Type of Drill for Water Well
Some factors that need to be considered in the selection of the type of drill used for your water well include:
- Depth: Depending on the depth at which the hole is to be dug, it calls for either higher power or specialization if it is a deep hole.
- Soil and rock: These conditions decide on the drilling method to use.
- Water quality: Groundwater contamination may require fewer environmentally disrupting drilling methods.
- Budget: Drilling might vary based on the methods.
- Site accessibility: The more inaccessible your property is, the fewer types of equipment you can use there.
Taking all these factors seriously, you can now choose the best drill type for your water-healthy project, which can be installed without failure.
Final Thoughts
This will make your installation successful and efficient. You will have to choose the appropriate drill for your water well. This depends upon several factors, such as your needs, the depth of the water table, and geological conditions.
Given these factors and the many drilling methods, you can make an informed decision about selecting the best drill for your water-healthy project. Consult with an experienced well-driller such as MetaDrilland ask for advice appropriate to your circumstances.

What is Geotechnical Engineering?
Geotechnical engineering is a civil engineering science investigating earth materials and their interactions with other earth materials and structures. Many projects are developed regarding stability and safety, whether a building, a bridge, a tunnel, or a dam, with geotechnical services. Once soil or rocks are deemed constructible and the decision has been made, an appropriate design for the foundation is further developed.
Why Do Geotechnical Services Matter?
Geotechnical services provide stability, safety, and economy to any construction. In this regard, geotechnical engineers can identify potential threats such as soft soil layers, underground water, expansive soils, and other geotechnical issues that might thus prevent structural failures and the resulting risks through construction activities. On the other hand, the geotechnical survey would recommend ideal project sites, improve designs with cost-saving measures, and strictly adhere to the local building codes and environmental regulations.
Types of Geotechnical Services
-
Site Investigation
Soil samples are collected at different depth intervals within the site. Properties of the collected samples, such as particle size, moisture content, strength, etc., are determined. Subsurface conditions are measured, and undisturbed samples are obtained for laboratory testing through borehole drilling. This is done on the ground without digging the soil, so it is known as in-situ testing, which can be CPT or SPT. -
Laboratory Testing
Laboratory testing is used to test soil properties. Some standard laboratory tests in soil mechanics include strength, permeability, and consolidation tests. Geophysical testing is a non-destructive subsurface exploration technique, including seismic refraction surveys or electrical resistivity tomography. -
Foundation Design
Foundation design is of shallow type, the depth of the foundation is less than the width of the structure or comes in the spread footing or combined footing. A deep foundation involves piles or caissons with a depth more than the height based on heavy loads or to increase stability in weak soils. We are retaining wall designs to prevent soil from sliding or erosion through gravity, cantilevered, or anchored retaining walls. -
Slope Stability Analysis
This expression can take the form of landslides or slumps. Slope stability analysis assesses the possibility of these slope failures. The risk can be calculated and analyzed using geotechnical calculations and computer modeling. Considering the determined risk, retaining walls, drainage systems, or soil reinforcement can be developed as a recommendation for stabilizing the ends of the slope. -
Ground Improvement
Ground improvement techniques help strengthen and stabilize the soil. Compaction: Compaction is done by rolling or vibratory compaction to enhance the density of the soil. Grouting: Grouting injects grout into the ground, improving its strength and reducing permeability. Soil reinforcement: Soil reinforcement uses geotextiles and other materials to strengthen the soil and increase its bearing capacity and stability.
Select the Right Geotechnical Services Company
Select a geotechnical services company that has the following characteristics:
- Experience and Competence: Ensure that they have a track record of offering geotechnical services and are competent engineers with expertise in geotechnical engineering. This way, your project will be handled appropriately because they will know and be equipped to do it right.
- Range of Services: Therefore, the company should provide services that exactly represent what you want to enjoy, including a wide range of services, including site investigation, laboratory testing, and foundation design. In this manner, you do not need to run up and down between many companies to acquire all your requirements at one point.
- Quality Assurance: Try to learn about their quality control processes and whether they have any certifications that assure you that they are certified to ensure the quality of work they produce and according to this industry.
- Client References: Request references of previous clients so that you may seek feedback from them regarding whether it was a reliable, responsive, and performing provider.
- Cost and Time comparison: Compare quotes from different suppliers based on their quotes and the time it would take to accomplish your project. Then, you can base your choice on whether they fall within your budget and meet your project needs.
Recruit an experienced geotechnical engineering firm to solidify your project, preventing secondary problems or issues. Final Thoughts
Geotechnical services can become an essential requirement for properly executing any construction project. They can produce valuable insight by determining the earth's material behaviours and their interaction with structures. This article will enumerate many factors to consider when choosing a geotechnical services provider such as MetaDrill, that suits your needs and gives reliable, quality results.
Geotechnical services are indeed an investment in stability and safety for your construction project for a considerable period. You reduce the risk of expansive costly repairs or even structural failures in cases of total disaster through a qualified firm, meaning your project will stand intact over time.

Embracing Environment-Friendly Drilling Practices
Another mainstream approach environmental drilling companies use to address the climate issue is embracing environment-friendly drilling practices. This primarily includes using state-of-the-art innovative drill techniques with an ecological footprint small enough. For example, directional drilling can pinpoint resources with minimal surface interference. In general, the company should minimize cases of multiple drilling sites. Companies have adopted more biodegradable drilling fluids and non-toxic additives to not pollute soils or waters in any way.
Carbon Capture and Storage (CCS)
Carbon capture and storage (CCS) is a technology innovated against climate change. Environmental drilling companies invest in capturing carbon dioxide released in drilling operations and storing it underground. CO2 is not allowed to rise into the air and thus causes global warming. Once those companies adopt CCS in their operations, their carbon footprint will be significantly reduced.
Renewable Energy Sources Utilization
All these companies are seeking to leverage renewable energy resources to further reduce environmental impacts and power in most aspects of their operations. Electricity is produced from sunlight by solar panels, wind turbines, and geothermal energy to light the drilling rigs and support facilities. This reduces greenhouse gas emissions and fossil fuels and leads towards a greener energy future.
Improvement in Energy Efficiency
The third critical strategy used by environmental drilling companies is energy efficiency. The improvements made to drilling operations and equipment minimize the amount of energy consumed and, consequently, emissions. Examples include energy-efficient motors and pumps and real-time monitoring systems, which help identify places of inefficiency in drilling operations. These improvements benefit the environment and save money for the companies making them.
Improving Environmental Monitoring and Assessment
Environmental drilling companies are doing their best to avoid disrupting the ecosystem, so they have invested in environmental monitoring and assessment. This is composed of baseline environmental studies before the drilling process begins and monitoring before, during, and after the operation. Advanced sensors and data analytics will enable companies to immediately identify and counter drilling effects.
Taking part in Reforestation and Land Reclamation
Most companies are involved in reforestation and other methods of land reclamation. This helps in restoring the environment and reversing the harmful drilling activities that take place in these areas. This also means planting trees and making sure that natural habitats are restored instead of drilling sites. There is reforestation, which absorbs carbon dioxide. There is land reclamation by ensuring an ecosystem is rehabilitated and biodiversity maintained.
Involving Stakeholders
Involving stakeholders, including local community members, governments, and environmental groups, is critical in reducing climate problems. Drilling environmental companies collaborate with the stakeholders to establish and implement accountable practices. In this regard, the concerns of all parties are consulted, and responsible drilling activities are undertaken.
Investment in Research and Development
Unrelenting investment in R&D has to be the hallmark of environmental drilling firms looking for better ways to address climate change. Research and innovations into innovative technology enhance the performance of companies under their environmental mandate. For example, more efficient rigs and water-based drilling fluids for clean rig operations are byproducts of continued R&D.
Methane Emission Mitigation
Methane is a potent greenhouse gas, and emissions from a drilling operation can significantly contribute to climatic change. Environmentally concerned drilling companies are taking detection and mitigation measures regarding methane emissions. The most prominent of these measures is modern leakage detection and remediation technology and the capture and utilization of methane for energy production.
Training and Employee Education
Employee education and training on best environmental practices are critical to the success of sustainability initiatives. Environmental drilling companies provide extensive training courses to ensure that their workforce is completely updated on the latest regulatory and technological changes regarding the environment. Employees will be empowered to make well-informed decisions and take proactive steps to minimize the company's negative impacts on the environment.
Final Thoughts
The environmental drilling industry has reached a crossroads. Until now, the industry has been associated with contributing to climate change. However, it now needs to prioritize greater sustainability. This revolves around technological advancements and collaborative efforts based on strategies set within this blog that ensure the reduction of the industry's environmental footprint.
This is, however, a fact; transitioning to a more sustainable future requires an all-rounded approach. The role of continued innovation, investment in emerging technologies, and a well-established commitment towards sustainability are all crucial. With such principles adopted, environmental drilling companies will find their place in the effort towards mitigating climate change and ensuring future generations inherit a more sustainable globe.
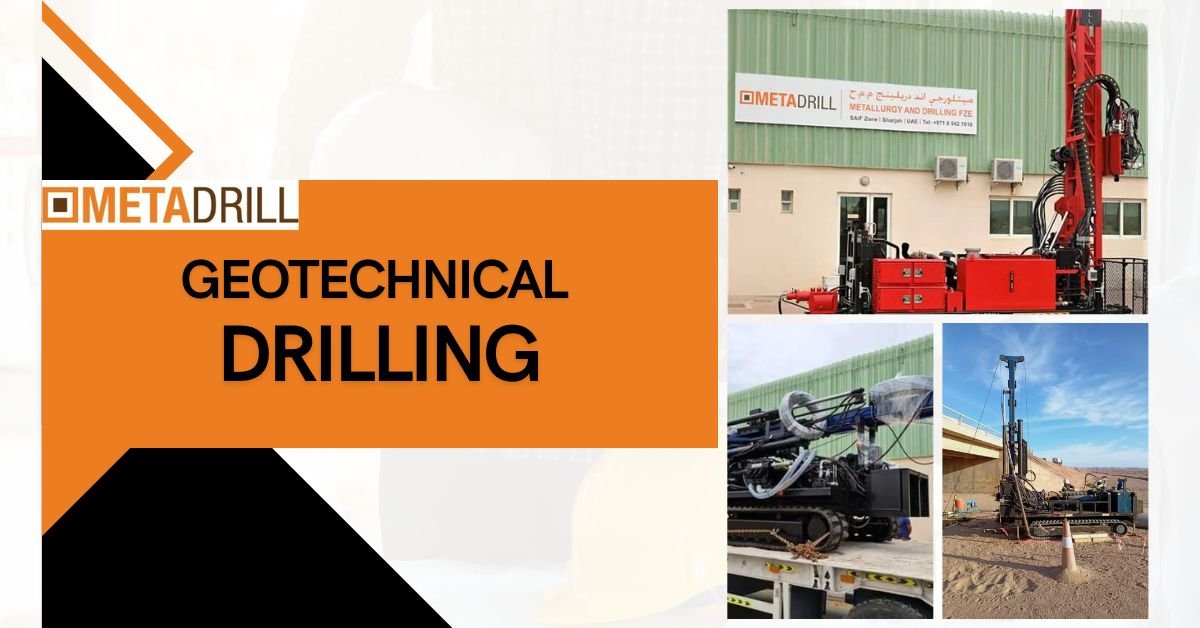
Challenges and Solutions in Geotechnical Drilling
Geotechnical drilling is indispensable in construction and environmental projects. The process provides important data regarding soil and rock conditions and even those related to groundwater. However, this process does not come without challenges. Here are the top five challenges in geotechnical drilling and how companies address these challenges:
- Site Accessibility and Difficult Terrain
Challenge: One of the many challenges within the geotechnical drilling industry is access to remote or inaccessible sites. Rough terrain, steep slopes, and heavy vegetation may impede heavy machinery and personnel motions used in drilling.
Solution: The companies get special equipment for rough terrain, including all-terrain vehicles, usually ATVs, and portable drilling rigs. Such rigs are lightweight and can thus easily be transported to a remote site. Companies may even charter helicopters to airlift the equipment to incredibly inaccessible sites. In addition, proper planning with site surveys is a prerequisite to identifying the best access routes and ensuring minimum environmental damage. - Subsurface Conditions and Unexpected Obstacles
Challenge: Significant variations in subsurface conditions concerning soil types, rock formations, and underground utilities often pose a considerable challenge. The consequences may include damage to equipment and increased costs due to unexpected delays.
Solution: Accurate and detailed geophysical surveys before drilling can establish the most favorable subsurface conditions and obstacles. Several methods, such as GPR and seismic surveys, provide much information on the subsurface. Moreover, companies utilize adaptive drilling techniques, such as rotary and sonic drilling, to work with different soil and rock types. Continuous real-time monitoring and analysis during drilling also allow immediate adjustments to the drilling plan. - Groundwater and Environmental Considerations
Challenge: Groundwater complicates the drilling process by destabilizing the borehole and malfunctioning equipment. Other possible environmental dangers drilling poses include contamination of groundwater and disturbance of natural habitats.
Solution: To manage groundwater issues, companies use drilling fluids and mud to stabilize the borehole and avoid collapse. Other dewatering techniques entail pumping and wellpoint systems to control groundwater levels. Measures protect the environment through biodegradable drilling fluids and appropriate waste disposal. EIAs are also conducted to identify and mitigate potential risks. - Reliability of Equipment and Maintenance
Challenge: The challenge is that the drilling equipment must work in harsh conditions. As a result, wear and tear, breakdowns, and increasing maintenance difficulty will result. Equipment failure results in huge delays and raises project costs.
Solution: Preventive maintenance and regular monitoring of the drilling equipment are especially important in ensuring its reliability and durability. Most firms thus engage in routine preventive maintenance programs involving checks, lubrication, and replacement of worn-out parts. Investment in durable capital equipment and personnel training in the best practices of operation and maintenance reduce the frequency and duration of failures. Delays can be further reduced by having standby equipment and spare parts at the site to handle unexpected breakdowns. - Data Accuracy and Interpretation
Challenge: The challenge is that data collection and interpretation in geotechnical projects may be considered problematic. Any defects or incompleteness in the data lead to design errors, safety issues, and increased costs.
Solution: The firms implement advanced data collection equipment, such as CPT, SPT, and geotechnical software, for accurate data gathering. Drilling personnel should be well-trained and experienced in data interpretation and collection. Data quality control allows for better accuracy through the cross-checking of results using various data sources. Collaboration with geotechnical engineers and experts ensures the data is correctly interpreted and applied to project designs.
Final Thoughts
Geotechnical drilling forms the foundation for many construction and environmental projects. However, it can also be incredibly challenging. Learning about common mistakes and unique solutions employed by geotechnical drilling companies helps project teams prepare for issues and limit potential risks.
Operating countrywide, MetaDrill is one of the most significant geotechnical drilling companies with a well-established history of addressing these issues to provide safe, accurate data. Combining specialist expertise with state-of-the-art equipment and concern for environmental sustainability, MetaDrill will become the partner that will allow any project requiring geotechnical investigations to be performed.
This would mean project teams can have informed, supported projects with accurate, reliable data as an outcome of engaging a reputable geotechnical drilling company like MetaDrill.

Introduction to Geotechnical Drilling
Geotechnical drilling is the most common way of boring the earth to gather soil and rock samples. These samples are then analyzed to determine the physical and synthetic properties of the subsurface materials. This data is crucial for engineers to plan safe and viable structures. The equipment used in geotechnical drilling is different, each filling a specific need in the examination cycle.
Kinds of Geotechnical Drilling Equipment
- Auger Drills
Auger drills are one of the most well-known types of geotechnical drilling equipment. They are used for shallow drilling and for delicate to medium-hard soils. Auger drills comprise a helical screw sharp edge, known as an auger, which rotates to cut into the ground and carry soil to the surface. There are two principal kinds of auger drills
Hand Augers: These are manually used for extremely shallow drilling, commonly up to 10 meters.
Power Augers: These are precisely worked and can drill further than hand augers, making them appropriate for more excellent geotechnical examinations. - Rotary Drills Rotary drills are flexible and can be utilized for various soil and rock types. They utilize a rotating drill to slice through the ground, and drilling fluid is often used to cool the piece and eliminate cuttings from the hole. Rotary drills are arranged into two basic types: Direct Rotational Drills: These utilize a turning drill string to cut through the ground. They are reasonable for drilling in delicate to medium-hard formations. Reverse Circulation Rotary Drills: These utilize a double-wall drill pipe framework to channel penetrating liquid down the external and internal lines, conveying cuttings to the surface. They are excellent for drilling hard rock arrangements.
- Percussion Drills
Percussion or cable tools drills utilize a heavy drill repeatedly lifted and dropped to separate the ground. This drilling is viable for hard rock arrangements and is often utilized with other boring strategies. Although percussion drills are more uncommon today, they are still utilized in certain geotechnical applications. - Sonic Drills Sonic drilling is a general innovation that utilizes high-recurrence vibrations to infiltrate the ground. The vibrations reduce friction between the drill bit and the soil, allowing for quicker and more effective drilling. Sonic drills are especially compelling in unconsolidated materials like sand and rock. They also produce continuous core samples, essential for practical details subsurface examination.
- Cone Penetration Test (CPT) Equipment The Cone Penetration Test (CPT) is a broadly involved strategy for determining the geotechnical properties of soils. CPT equipment comprises a cone-formed test-driven into the ground at a constant rate. Sensors in the test measure protection Cone Penetration Test (CPT) Equipment The Cone Penetration Test (CPT) is a broadly involved strategy for determining the geotechnical properties of soils. CPT equipment comprises a cone-formed test-driven into the ground at a constant rate. Sensors in the test measure protection from entrance, giving information on soil strength, thickness, and other properties. CPT hardware is exceptionally compact and can be utilized in a variety of soil conditions.
Applications of Geotechnical Drilling Equipment
Geotechnical penetrating gear is utilized in many uses, including:
- Site Examination: Understanding the subsurface conditions is fundamental before any development project starts. Geotechnical drilling provides essential information for planning establishments, holding walls, and structures.
- Natural Evaluation: Drilling is utilized to collect soil and groundwater tests for ecological testing. This is significant for evaluating defilement and arranging remediation endeavors.
- Mineral Exploration: Geotechnical boring investigates minerals and other regular assets. It decides the area, amount, and nature of the assets.
- Geotechnical Instrumentation: Boring introduces instruments, such as piezometers and inclinometers, which screen subsurface circumstances over the long run. This information is essential for surveying the strength of slopes, banks, and structures.
Picking the Right Equipment
Choosing the fitting geotechnical drilling equipment relies upon a few variables, including the kind of soil or rock, the profundity of the examination, and the prerequisites of the undertaking. Here are a few contemplations while picking boring equipment:
- Soil and Rock Type: Different equipment suits various soil and rock types. Drills are great for delicate soils while turning drills are better for hard rock arrangements.
- The profundity of the Examination: The profundity of the examination will decide the kind of gear required. Hand drills are reasonable for shallow drilling, while rotational drills can reach more noteworthy profundities.
- Test Quality: The nature of the examples required will impact the equipment decision. Sonic drills, for instance, give consistent center examples, which are significant for point-by-point analysis.
- Site Conditions: The circumstances at the site, such as accessibility and natural contemplations, will likewise affect the decision to use equipment.
Final Thoughts
Geotechnical drilling equipment plays an essential role in geotechnical engineering. Each piece of equipment, from augers to sonic drills, has unique benefits and applications. Understanding the abilities and constraints of each tool is fundamental for leading viable subsurface examinations. By picking the right equipment to make it happen, engineers can guarantee the well-being and progress of their activities. MetaDrill, a leadinggeotechnical drilling companyin the USA, offers a wide range of advanced drilling equipment and expert services to meet clients' diverse needs in various industries.

Understanding Geotechnical Services
Geotechnical services contain a complete assessment of subsurface conditions to ensure the steadiness and safety of systems. This includes project internet site investigations through strategies like drilling and sampling to collect soil and rock samples. These samples are then subjected to rigorous laboratory testing to decide their physical and mechanical homes. Based on the collected data, geotechnical engineers' layout suitable basic structures that face up to ground conditions. Additionally, they determine the chance of landslides and advise suitable mitigation measures to save you slope screw-ups. Furthermore, Geotech services regularly include imposing techniques to improve the ground's power and balance, ensuring the systems' lengthy-term sturdiness.
Why Geotechnical Services Are Essential
The significance of geotechnical offerings in manufacturing cannot be overstated. Here are a few key reasons why they are essential:
- Risk mitigation: By identifying capacity dangers, such as risky floor or groundwater troubles, geotechnical engineers can help prevent expensive screw-ups and ensure the protection of systems.
- Cost-powerful design: An appropriate basic layout based on geotechnical investigations can optimize manufacturing costs by avoiding useless over-layout.
- Structural stability: Geotechnical offerings ensure that systems are well supported by the resources of the underlying floor, preventing agreement and other structural troubles.
- Compliance with guidelines: Many construction codes and regulations require geotechnical tests to ensure compliance with safety requirements.
- Environmental safety: Geotechnical investigations can help discover capability ecological impacts and suggest mitigation measures.
Types of Geotechnical Investigations
Read Also:- MetaDrill: Your Driving Decision Among Geotechnical Drilling Companies
Geotechnical investigations include an aggregate of field and laboratory techniques. Standard techniques consist of:
- Drilling
Drilling is like taking a middle sample of the Earth. It includes boring the floor to retrieve soil and rock samples for evaluation. The type of drilling techniques used is based on the specific situations underground. Rotary drilling is a flexible approach that may control diverse soil and rock kinds. Auger drilling is a short and green preference for shallow depths and cohesive soils. Percussion drilling is frequently used for shallow depths and unconsolidated soils, even as middle drilling is proper for obtaining undisturbed rock samples for laboratory testing. - Sampling
Once the drilling is complete, it is time to collect the samples. Different sampling techniques are used depending on the shape of the cloth being collected. Shelby tube sampling is best for purchasing undisturbed samples of cohesive soils, while break-up-spoon sampling is used for several soil types. Rotary center drilling is the pass-to approach for rock samples, ensuring the pattern remains undisturbed for correct evaluation. - Testing
Once the samples are collected, they go through laboratory checks to show their residences. Particle length analysis determines the distribution of numerous-sized particles, while Atterberg limits confirm the plasticity of cohesive soils. Strength exams measure the capability of soils and rocks to resist deformation, and permeability exams decide how, without problems, water can drift via them. In addition to laboratory testing, in-situ tests like cone penetration exams (CPT) and favored penetration tests (SPT) are executed immediately inside the situation to offer actual-time data the surface condition.
Geotechnical Services Near You
Finding reliable geotechnical services for your location is vital for achieving your creation assignment. Look for businesses that enjoy similar tasks and a tuned file of turning in first-rate consequences. Consider the following elements when deciding on a geotechnical company:
- Qualifications and Experience: Ensure the corporation has qualified geotechnical engineers and technicians.
- Range of services: Look for a corporation that offers a full range of geotechnical services to fulfill your assignment's requirements.
- Reputation: Check the corporation's popularity and client evaluations.
- Cost: Obtain prices from several corporations to assess pricing and offerings.
By going for walks closely with an excellent geotechnical company, you may ensure your advent challenge is built on a stable foundation.
Final Thoughts
Geotechnical services are essential for the success of any production assignment. By analyzing subsurface conditions, geotechnical engineers can ensure systems' stability, protection, and durability. From internet website investigations to foundation format and environmental protection, geotechnical offerings are crucial in mitigating dangers and optimizing manufacturing charges.
MetaDrill is the leading geotechnical drilling company in the USA. With a team of skilled professionals and modern tools, we provide a complete range of services to satisfy your challenge's desires. Our dedication to exceptional quality, reliability, and client satisfaction sets us apart in the enterprise.
If you are looking for a reliable partner for your geotechnical drilling needs, look no further than MetaDrill. Contact us today to learn more about how our services can benefit your mission.

Here are a Few Challenges of Drilling in Sensitive Environments
Identifying Sensitive Environments
Before starting any drilling project, it is essential to be aware of the region's sensitiveness. This means public parks, wildlife sanctuaries, historical sites, or areas where rare animals live. These spots are extraordinary and need to be protected. Drilling here can hurt the environment and the creatures that live there.
Regulatory Consistency
Drilling companies should observe strict guidelines to protect the environment and keep up with public trust. This incorporates getting the proper permits, focusing on how drilling might affect the environment, and trying to keep noise, water, and air pollution to a base.
Minimizing Disturbance
Drilling operations can affect sensitive environments. To moderate these impacts, it is crucial to utilize proper drilling strategies, such as directional or flat boring, which can limit surface disturbance.
Protecting Water Resources
Water resources are especially vulnerable to contamination during drilling operations. To protect these valuable resources, vigorous measures are fundamental. Regular observation of groundwater can identify contamination early. Appropriate casing and cementing are essential to forestall leaks.
Managing Noise and Vibration
Noise and vibration can be genuine buzzkills for wildlife and people. To keep things calm, it is best to pick drilling equipment that is intended to be less noisy. You can construct barriers around the drilling site to shut out the commotion. And, if you genuinely need to be friendly, avoid boring when creatures are having babies or individuals are attempting to rest.
Engaging with Local Communities
Building trust with local communities is vital for fruitful drilling tasks in sensitive environments. By communicating, involving, and supporting, drilling companies can build trust, address concerns, and limit conflicts. This commitment can prompt improved results and add to the district's prosperity.
Promoting Sustainable Practices
The objective of drilling in sensitive environments ought to be sustainability. This means consistently further developing procedures, putting resources into exploration, and gaining from past tasks to protect the environment.
By cautiously considering these challenges and responding appropriately, drilling companies can contribute to resource extraction while saving the sensitive environment for future generations. Finding some balance between economic development and environmental stewardship is fundamental.
Picking Environmental Drilling Companies Near You
While picking an environmental drilling company for your project, finding a nearby firm that can give vital mastery and services is essential. Here are a few critical elements to consider while looking for "Environmental drilling companies near me":
Experience and Ability
An experienced environmental drilling company will have a demonstrated history of handling different tasks, from small-scale site examinations to large-scale remediation endeavors. Search for companies that comprehend environmental guidelines, regulations, and best practices.
Equipment and Technology
The right equipment and technology can affect the accuracy, productivity, and cost viability of your environmental drilling project. Guarantee that the organization you pick uses best-in-class drilling hardware, such as direct push rigs, rotational drills, or sonic drills.
Safety and Environmental Obligation
Safety ought to continuously be a primary concern in any drilling venture. Search for organizations that have areas of strength for safe conventions and adhere to industry guidelines.
References and Testimonials
One of the most mind-blowing ways of surveying a company's capacities is to request references or testimonials from its past clients. This will give you firsthand experience of the company's across-the-board abilities, work qualities, and general consumer loyalty.
Protection and Permitting
It is fundamental to check that the environmental drilling company you pick has sufficient protection to protect your project in the event of mishaps or unexpected conditions.
Pricing and Terms
Before finalizing your decision, it is vital to get a point-by-point breakdown of an environmental drilling company's costs. This should incorporate activation fees, drilling and sampling charges, and disposal charges.
Local Information and Relations
A local environmental drilling company might better comprehend nearby circumstances, guidelines, and local area elements. Their experience with the area can assist with smoothing out the allowing system and addressing challenges that might emerge.
By cautiously assessing these variables, you can choose an environmental drilling company that meets your project needs and guarantees a fruitful result.
Final Thoughts
Are you searching for an environmental drilling company that often thinks about the planet? Look no further than MetaDrill. They are the biggest enchilada in the USA, about mindful drilling practices. Their team of specialists has the tools to handle any environmental drilling project, big or small.

The Significance of Soil Boring Tests
- Establishment Design: Soil boring tests assist engineers with deciding the suitable kind and profundity of establishment for a building. This is essential to forestall settlement, which can prompt underlying harm and expensive fixes.
- Site Solidness: By understanding the soil's properties, specialists can evaluate the potential for landslides, erosion, or other stability issues. This data is fundamental for creating moderation gauges and guaranteeing the venture's security.
- Development Planning: Soil boring tests can assist with recognizing obstacles, such as underground utilities or contaminated soil, which might influence development timelines and costs.
- Environmental Consistency: Soil boring tests can be conducted to survey impurities, such as heavy metals or dangerous materials. This data is essential for adhering to environmental guidelines and protecting public health.
The Soil Boring Process
The soil boring process regularly includes the following steps:
- Site Preparation: The building site is carefully marked before drilling starts to determine where soil samples will be collected. Any current designs, vegetation, or obstacles that might disrupt the boring system are removed.
- Drilling: A drilling rig, a piece of equipment, is used to drill into the ground. The drilling strategy used depends on the soil conditions and the ideal examination profundity. Regular strategies incorporate revolving boring, percussion drilling, and auger drilling.
- Sample Collection: Various tools are used to gather soil samples. Split-spoon samplers are frequently used for shallow profundities, while Shelby tubes are appropriate for more profound examples. These devices are embedded into the borehole and crashed into the ground, catching undisturbed soil samples.
- Sample Examination: The collected samples are dissected in a lab to determine their physical and mechanical properties. This might include tests such as sieve analysis, Atterberg limits, and unconfined compressive strength.
Factors Affecting Soil Boring Test Outcomes
A few elements can impact the outcomes of soil boring tests, including:
- Sampling Profundity: The samples' profundity can influence the outcomes' precision, as soil properties can differ with profundity.
- Sampling Method: The sampling tool utilized can influence the quality and representativeness of the samples.
- Lab Testing: The accuracy of laboratory testing is urgent for acquiring dependable outcomes.
- Site Conditions: Factors such as climate, groundwater conditions, and impediments can influence the boring system and the nature of the samples.
Soil Boring Test Costs
The cost of soil boring tests differs depending on a few elements, including:
- Project Size: Larger projects typically require more excellent testing.
- Site Conditions: Difficult site conditions, such as rough territory or profound groundwater, can inflate costs.
- Testing Requirements: The tests required will likewise influence the cost.
- Location: Costs might shift depending on the location of the project.
Picking a Soil Boring Company Near You
When choosing a soil boring company for your development project, finding a nearby firm that can give the essential expertise and services productively is important. Here are a few critical factors to consider while looking for Soil boring companies near me":
- Experience in Comparable Projects
A company with a demonstrated history of effectively finishing comparable projects in your space is a strength in terms of its capacities. Search for companies with experience with projects of identical size, scope, and complexity. This experience guarantees they comprehend the nearby soil conditions and regulatory necessities. - Vital Equipment
Soil drilling requires specific equipment, such as drilling rigs, samplers, and testing instruments. Ensure that your chosen company has the necessary hardware to meet your project's needs. For instance, the company should have the fitting equipment and expertise if your task requires deep boreholes or testing soil conditions. - Qualified Staff
The capabilities and experience of the company's staff are fundamental for the exactness and dependability of soil boring tests. Search for a firm with engineers, geologists, and experts who have the necessary confirmations and preparation. A team of experienced professionals can provide valuable knowledge and suggestions for your project. - Positive References
Request references from past clients to get a firsthand record of the company's presentation. Learn about their involvement in the company's professionalism, communication, and the nature of their work. Positive references can confirm that the organization is solid and reliable. - Local Knowledge and Connections
A nearby soil boring company will better comprehend the soil conditions and regulatory necessities in your area. They may likewise have established relationships with nearby specialists and organizations, which can smooth the process and save you time and money.
By carefully considering these factors, you can pick a solid, trustworthy soil boring company to address your project's issues.
Final Thoughts
Soil boring tests are a fundamental investment for any development project. By providing accurate and dependable data about subsurface circumstances, they help guarantee your project's security, stability, and long-term progress.
When choosing a soil boring company, it is critical to pick a partner with the expertise, experience, and obligation to quality that MetaDrill offers. Their team of experts is committed to providing remarkable soil testing services customized to meet your project needs.
Do not compromise on your project's foundation. Partner with MetaDrill, and let us help you build a profitable future.
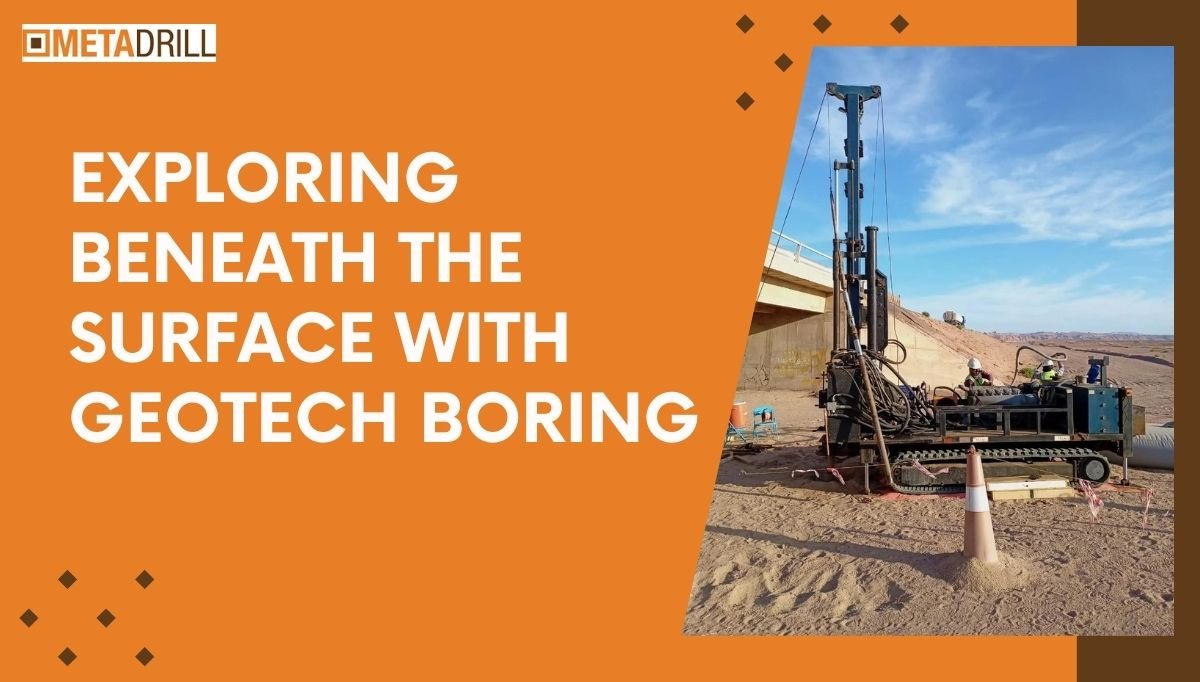
Grasping Geotech Boring
Geotech boring, also known as geotechnical drilling, is a vital cycle in development and design. It includes drilling into the ground to gather soil and rock tests. These samples provide priceless insight into the subsurface conditions, empowering engineers to make informed decisions about different projects' plausibility, design, and construction.
The Significance of Geotech Boring
Why is Geotech boring so fundamental? The answer lies in the eccentric idea of the ground beneath our feet. Soil creation, water content, and rock formations can fluctuate altogether, starting with one area and then onto the next. By leading Geotech boring, engineers can:
- Evaluate soil bearing limit: By deciding the ground's capacity to support primary burdens, Geotech boring assists engineers with designing structures that can securely convey a structure's weight, forestalling expensive underlying failures.
- Identify groundwater levels: Understanding the area of the water table is pivotal for the foundation design and development. Geotech is boring and assesses the effect of groundwater on the project, like hydrostatic pressure or soil erosion.
- Perceive subsurface hazards: Geotech boring can reveal hidden challenges like contamination, expansive soil (which can cause foundation development), or underground utilities. Recognizing these hazards from the get-go in the process considers fitting moderation measures.
- Optimize foundation design: Fitting foundation designs to explicit soil conditions is fundamental for underlying solidness and cost productivity. Geotech boring gives the essential information to make good-for-reason establishments.
- Mitigate Risks: By distinguishing expected issues before construction begins, Geotech boring forestalls costly delays, adjustments, and unexpected challenges. It is an investment in project achievement.
The Geotech Boring Process
A Geotech boring regularly includes the following steps:
- Site examination: Engineers examine the task site to decide the best areas for drilling boreholes, considering elements like proposed designs and potential ground conditions.
- Drilling: Hardware is utilized to make cylindrical holes in the ground to the necessary profundity, permitting admittance to subsurface soil and rock layers.
- Soil sampling: Delegate soil and rock samples are gathered at various profundities inside the borehole to depict the subsurface circumstances precisely.
- Laboratory Testing: Gathered samples undergo a detailed analysis to determine their properties, such as particle size, moisture content, strength, and other applicable characteristics.
- Data analysis and understanding: Engineers decipher the laboratory test results and field perceptions to make an extensive geotechnical report, which provides essential knowledge for project planning and design.
Advantages of Geotech Boring
Investing in Geotech boring offers diverse benefits:
- Cost-effective
Early recognizable proof of ground conditions through Geotech boring can prompt tremendous expense reserve funds by forestalling costly design changes and construction delays later in the project. By understanding the subsurface challenges forthrightly, engineers can improve design and construction, minimizing unexpected issues. - Risk mitigation
Geotech boring is essential for moderating dangers by uncovering potential subsurface challenges, like unsteady soils, groundwater variances, or toxins. By recognizing perils beforehand, designers can execute fitting measures to guarantee project achievement. - Optimized Designs
Precise soil information acquired from Geotech boring empowers engineers to make structures that explicitly fit the site's conditions, further developing effectiveness and life span. By fitting plans to the dirt, engineers advance the project. - Improved Safety
Geotech boring is fundamental for identifying hazards like unstable slopes, sullied soil, or underground utilities and guaranteeing a protected development climate for workers and society. By revealing dangers, engineers can implement safety measures to safeguard workers and people in public. - Ecological assurance
Geotech boring limits natural effects by distinguishing potential issues like defiled groundwater or delicate biological systems, considering targeted mitigation methodologies.
Expand on a Strong Groundwork
Geotech boring is an essential device that guarantees the outcome of any construction project. It provides priceless insights into the subsurface conditions, encouraging engineers to make informed choices, improve plans, and relieve risks. Understanding the ground underneath is foremost in everything from residential buildings to enormous-scale frameworks.
MetaDrill, a central geotechnical drilling company in the USA, conveys exact and dependable geotechnical data. Their expertise and high-level hardware guarantee that your project is based on solid groundwork. Contact them today to discuss your geotechnical needs and experience the MetaDrill difference.

Types of Geotechnical Drill Rigs
A few types of geotechnical drill rigs are available, each designed for explicit ground conditions and project requirements. A few standard types include:
- Augar Drill Rigs: These rigs utilize a screw-like piece to enter the ground and bring soil tests to the surface. They are appropriate for shallow profundities and delicate ground conditions.
- Rotary drill rigs: These rigs utilize a pivoting bore to slice through rock and soil. They are more flexible than auger drills and can deal with profound profundities and more complex developments.
- Core drill rigs: These rigs separate the cylindrical rock core for detailed examination. They are ordinarily utilized in geological explorations and geotechnical examinations for large-scale projects.
- Direct push rigs: These rigs utilize hydraulic or pneumatic power to drive tests into the ground, considering quick soil examination and installation of monitoring wells.
Why Invest in Geotechnical Drill Rigs?
-
Cost Effectiveness
- Decreased Functional Costs: Proprietorship disposes of repeating rental fees, producing significant expense reserve funds over the gear's life expectancy.
- Improved Project Management: Direct command over hardware accessibility streamlines project planning, limiting delays and related costs.
-
Expanded Efficiency
- Advanced Workflow: Fitted equipment utilization to explicit project scheduling expands effectiveness and limits margin time.
- Quick Development: Proficient assembly and retirement abilities speed up project timetables.
- Dependable Execution: Ordinary support and administrator commonality add to predictable hardware uptime and efficiency.
-
Expanded Service Offerings
- Diversification: Offering geotechnical drilling services to outer clients grows income streams and mitigates market risks.
- Competitive advantage: Position your business as a complete specialist co-op, drawing in a more extensive client base.
- Revenue Generation: Extra help contributions add to the general benefit.
-
Resource Worth
- Financial Benefits: Devaluation benefits and potential resale esteem add to the equipment's overall return on investment.
- Financial Adaptability: The drill rigs can act as insurance for procuring extra assets.
Key Contemplations for Buying a Geotechnical Drill Rigs
Securing a geotechnical drill rig is a huge investment that requires cautious consultation. A few essential elements should be assessed to guarantee ideal hardware determination and functional productivity.
Ground Conditions
The geological qualities of a project site significantly impact drill rig suitability. Key contemplations include:
- Soil structure: The kind of soil, whether clay, sand, or gravel, will decide the critical drilling technique and hardware.
- Rock developments: Rock development's presence, hardness, and profundity will influence the expected boring abilities.
- Hydrogeological conditions: Groundwater levels and potential water interruption should be calculated into rig determination.
Project Depth
The necessary drilling depth is a central determinant of hardware particulars.
- Depth range: The project's depth prerequisites will direct the rigs' entrance limit.
- Depth inconstancy: On the off chance that tasks include fluctuating depths, a flexible rig might be favorable.
Mobility Requirements
The recurrence of rig relocation influences mobility contemplations.
- Movability: A minimal and effectively movable rig is fundamental for regular site changes.
- Site permanence: If the rigs will fundamentally work in a proper area, versatility might be less essential.
- Terrain: The type of territory where the rigs will work impacts its portability needs.
Monetary Requirements
Monetary contemplations are foremost in the buying system.
- Starting investment: The forthright expense of the drill rig is a considerable cost.
- Functional costs: The budget should consider fuel utilization, support, and work.
- Return on Investment: Examining the average return on investment is critical.
New or Used Rigs
The choice between new and used geotechnical drill rigs for sale includes compromises.
- Capital consumption: Used rigs typically have lower starting expenses yet may require extra upkeep.
- Equipment condition: An intensive examination is fundamental for used rigs to evaluate their general condition and remaining life expectancy.
- Technological progressions: New rigs frequently consolidate the most recent technical advancements.
- Guarantee Coverage: New gear ordinarily incorporates guarantee security.
- Depreciation: Used rigs have proactively gone through a part of their deterioration.
Tracking down the Right Geotechnical Drill Rigs
A few choices are available when buying a geotechnical drill rig:
- New drill rigs: Buy new rigs from reputable geotechnical drilling rig manufacturers to get the most recent innovations and guarantee coverage.
- Used drill rigs: To save costs, consider buying a used rig; however, cautiously examine the equipment's condition.
- Rental: You can rent a drill rig for specific ventures if you do not have to own one permanently.
Final Thoughts
Investing in a geotechnical drill rig is an essential choice that can fundamentally influence your undertaking's positive outcome and your business's main concern. You can make an informed decision by figuring out the various kinds of rigs, cautiously considering your task requirements, and investigating different buying choices.
MetaDrill is a leading provider of great geotechnical drill rigs in the USA. With our expertise and broad stock, we can assist you with tracking down the ideal tool for your requirements. Contact us today to discuss your project and investigate our range of new and used drill rigs. Allow MetaDrill to be your partner in uncovering the ground truth.

Key Factors Influencing the Water Well Drilling Process
- Understanding the Ground Conditions
- Permitting and Regulations
- Hardware and Innovation
- Water Quality and Yield
- Environmental Considerations
- Cost and Budget
Understanding the Ground Conditions
Your property's geographical makeup is essential to the water well drilling process. Factors such as soil type, rock developments, and water table depth fundamentally influence the drilling technique, time required, and overall cost.
- Soil Type: Different soil types present fluctuating challenges. Clay can be tacky and laborious to drill through, while sandy soils could require extra measures to forestall well collapse.
- Rock Arrangements: Experiencing strong stones can require specific hardware and procedures, expanding the drilling time and cost.
- Water Table Depth: The profundity of groundwater influences the well's depth and the required siphoning framework.
Permitting and Regulations
Exploring the complicated snare of permits and regulations is fundamental for a smooth drilling and well process. Each state and local purview has its arrangement of rules regarding well drilling, including:
- Well Dispersing: Regulations direct the base distance between wells to protect water quality.
- Well Construction Standards: Explicit rules frame the materials and strategies for sound construction.
- Water Quality Testing: Prerequisites for testing water quality after drilling are ordinarily ordered.
Hardware and Innovation
The decision to use drilling equipment and innovation can influence the productivity and outcome of the undertaking. High-level boring techniques and hardware can frequently prompt quicker culmination times, decreased natural effect, and worked-on well execution.
- Drilling Technique: Different drilling strategies, like rotating, link device, or mud rotational, are reasonable for different geographical circumstances.
- Drilling Rig: The size and limit of the drilling rig decide the profundity and distance acs of the well that can be bored.
- Well Casing and Screen: Great materials are fundamental to forestall breakdown and defilement.
Water Quality and Yield
The essential objective of drilling a water well is to get a solid wellspring of clean water. A few factors influence water quality and yield:
- Hydrogeology: The basic geological formations decide the amount and nature of groundwater accessible.
- Well Depth: Arriving at a suitable spring is vital for augmenting water yield.
- Water Testing: Customary testing assists screens with watering quality and recognizes any toxins.
Environmental Considerations
Drilling a water well ought to be finished with insignificant effect on the climate. Key considerations include:
- Site Selection: Picking a reasonable area safeguards touchy environment.
- Waste Management: Appropriate removal of drilling waste is fundamental to prevent pollution.
- Water Conservation: Effective water use practices should be urged to protect groundwater assets.
Cost and Budget
The cost of water well-digging changes relying upon a few variables, including:
- Well Depth: More profound wells commonly cost more to drill.
- Equipment and Labor: The equipment utilized, and the quantity of faculty required influence the general cost.
- Permits and Fees: Government charges and permit costs add to the undertaking's budget.
The Drilling Process: A Deeper Dive
While the factors framed above understanding the means engaged with drilling a well for water is fundamental, a standard water well drilling undertaking comprises of the accompanying stages:
- Site Assessment: This includes leading a careful evaluation of the site, including soil investigation, geographical overviews, and water table profundity assurance.
- Permit Acquisition: Acquiring necessary permits and following local regulations is essential before beginning the drilling system.
- Drilling Activity: The drilling process starts with utilizing proper hardware and strategies given the site conditions.
- Well Development: When the ideal profundity is reached, the well is created to eliminate drilling mud and trash, further developing water quality.
- Well Completion: This stage includes introducing a well casing and screen alongside a siphon and channeling framework.
- Water Quality Testing: The water from the recently bored well is tested to guarantee that it fulfills security and quality guidelines.
Final Thoughts
Understanding the elements influencing water well drilling is significant for a fruitful and practical venture. From geological conditions, which allow for the gearing of water quality, and natural contemplations, every viewpoint assumes an imperative part.
At MetaDrill, we have the aptitude and innovative innovation to explore these intricacies and give remarkable water well drilling services. Our team is focused on providing dependable, clean water arrangements custom-made to your requirements. Reach out to us today for a free consultation. We can assist you with completing your water well project.
With MetaDrill, you can believe your water well is in the best hands.
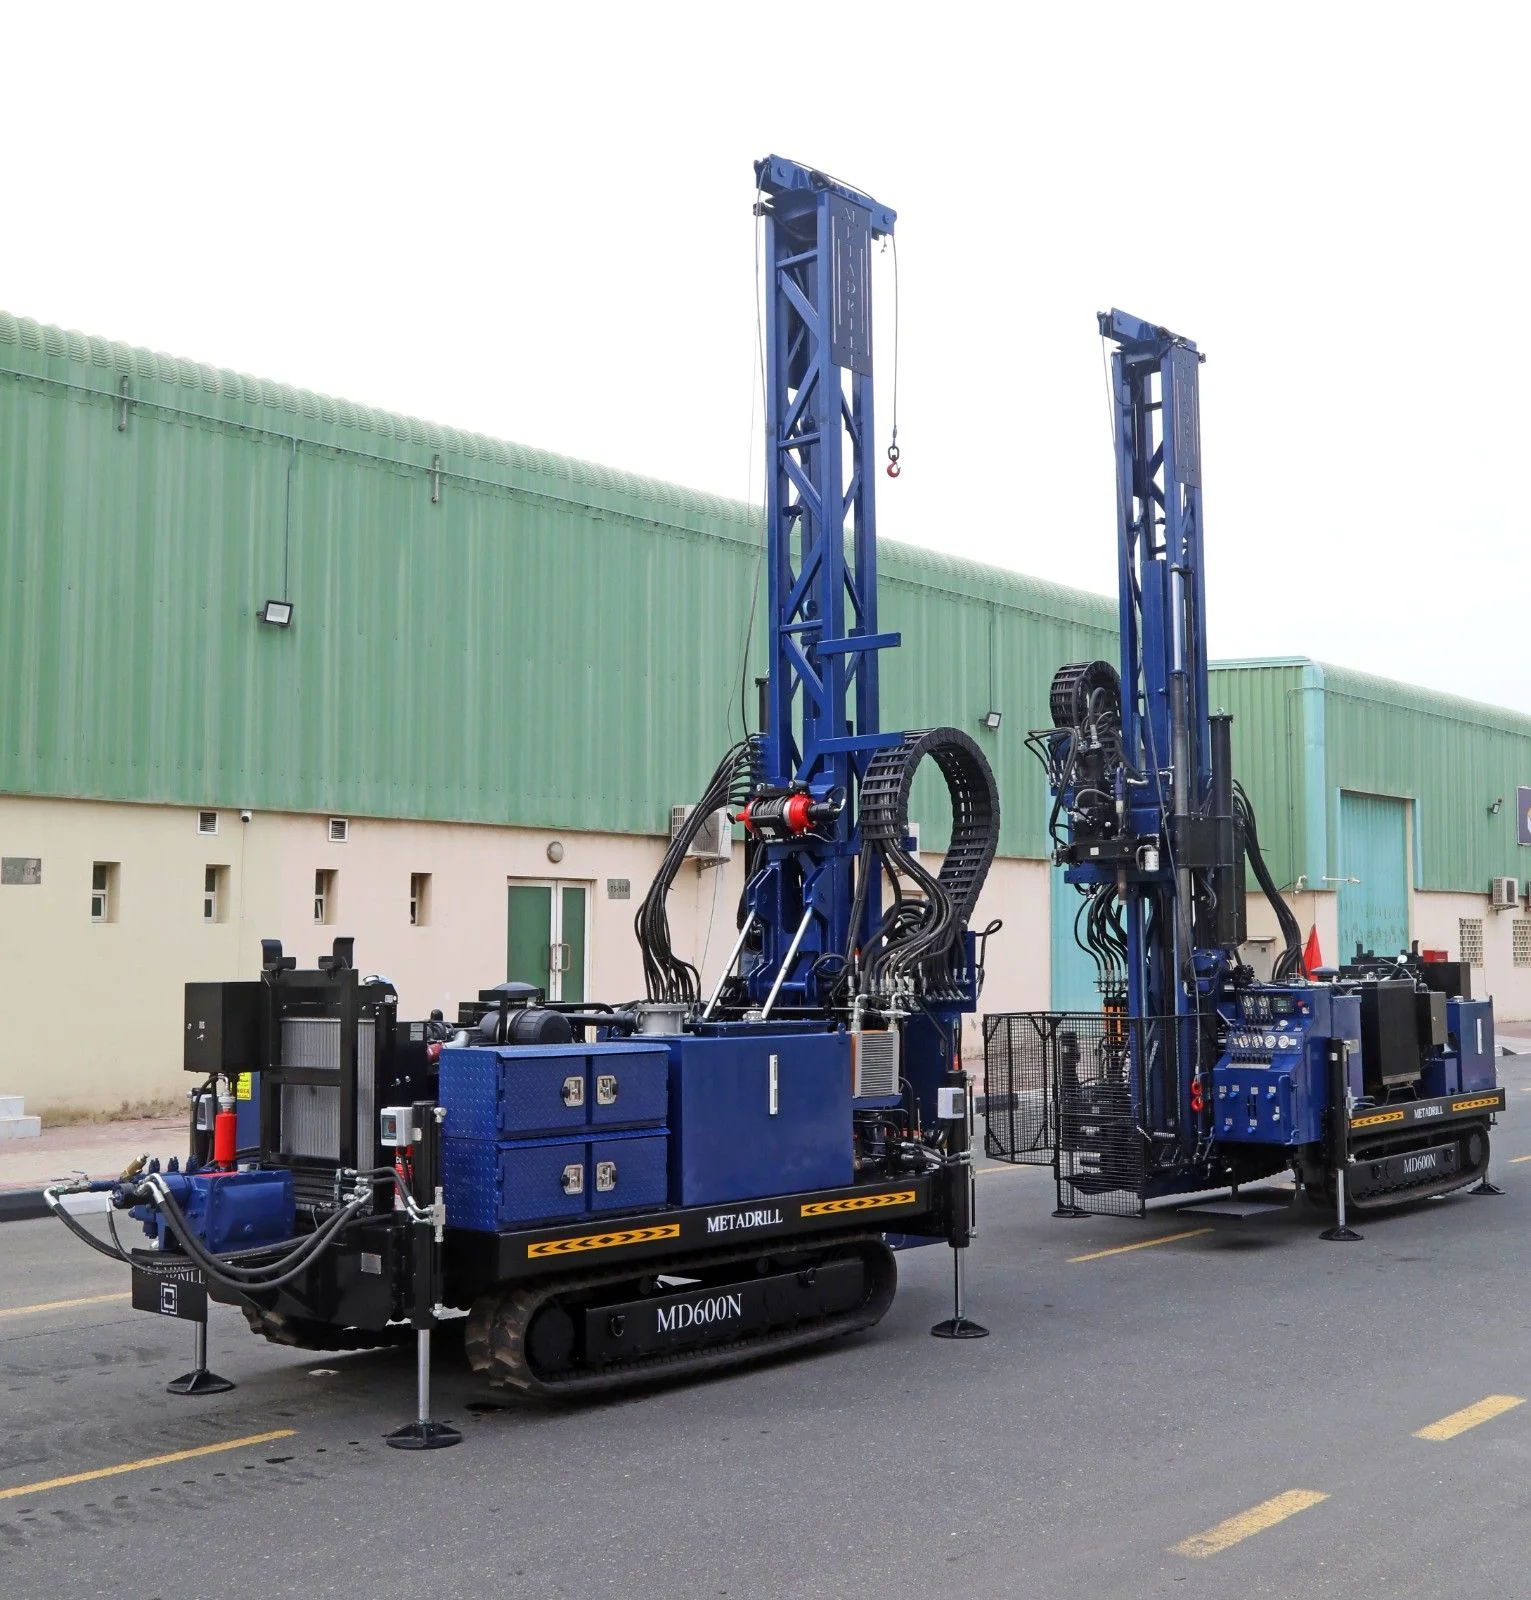
Understanding Direct Push Drilling
Direct push drilling is a subsurface examination technique that utilizes specific gear to propel sampling tools into the ground without requiring revolving penetrating. This interaction offers several benefits over conventional drilling techniques, including speeding up, decreased costs, insignificant ecological effects, and flexibility.
Direct Push Drilling Equipment: A More Intensive Look
Drill Rig
The drill rig is an essential part of a direct push drilling method. It gives the indispensable power for driving sampling tools into the ground. Accessible in truck, slip, or track-mounted variants, the decision relies upon site conditions and task needs. Truck-mounted rigs offer versatility, slide-mounted rigs are appropriate for restricted spaces, and track-mounted rigs succeed in testing territory.
Hydraulic Power Unit
The hydraulic power unit is fundamental for operating the drill rig. It produces high-pressure hydraulic liquid that powers different capabilities, such as pushing poles, working mallets, and initiating downhole tools. A dependable hydraulic power unit guarantees smooth and practical drilling tasks.
Sampling Tools
Direct push drilling uses various tools for data assortment.
- Soil sampling Tools incorporate split spoons for ceaseless soil centers, direct push cones for undisturbed soil tests, and drill trips for gathering soil cuttings.
- In-Situ Testing Tools: Cone penetrometers measure soil strength and pore pressure, while piezocones measure pore pressure and different boundaries. Direct push electrical conductivity logging gives data on soil conductivity.
- Observing Well Installation Tools: These devices make transitory boreholes for introducing checking wells to monitor groundwater.
Push Rods
Pushrods to expand the range of the drill rig. Made of high-strength steel, they come in various lengths and widths to suit different project depths and soil conditions. Push poles are connected to frame a continuous string for deeper drilling.
Accessories
Extra hardware can improve direct push drilling tasks. Hammers help enter intense soils, while drills make brief boreholes for explicit applications.
Direct Push Drilling Rigs: Customized for Explicit Needs
Determining a drill rig depends on factors including project scope, soil conditions, and site openness. Typical kinds of direct push drilling rigs are:
- Truck-mounted rigs: These rigs are mounted on trucks, giving great versatility to projects across different areas. They are well-known for their flexibility and capacity to explore different landscapes. Whether directing natural site evaluations at numerous areas or completing geotechnical examinations on rambling building locales, truck-mounted rigs offer the adaptability to get to various workspaces productively.
- Slide-mounted and track-mounted rigs: Offer adaptability for various site conditions. Slip-mounted rigs are minimized for restricted spaces, while track-mounted rigs succeed in testing landscapes.
Utilizations of Direct Push Drilling Gear
Direct push drilling gear is utilized across many applications because of its productivity and adaptability.
- Environmental and Geotechnical Designing: This technique is instrumental in surveying soil and groundwater pollution and directing exhaustive assessments of soil conditions for different development projects.
- Rural and Hydrological Exploration: Direct push drilling is used to investigate soil fertility and supplement levels, likewise, providing significant information on groundwater assets the board and spring portrayal.
- Remediation and Checking: This innovation is fundamental for observing the advancement of remediation endeavors at polluted locales and assessing the adequacy of treatment techniques.
Safety: A Principal Consideration
The safe operation of direct push drilling gear is pivotal for safeguarding staff and the climate. Adhering to severe security conventions is fundamental for forestalling mishaps and guaranteeing workers' prosperity.
- Operator Training and Certificate: Thorough practice programs are fundamental for furnishing administrators with the valuable information and abilities to handle direct push drilling gear securely. Affirmation guarantees that administrators fulfill explicit skill guidelines, limiting the chance of mishaps.
- Gear Exploration and Support: Standard reviews and upkeep of direct push drilling hardware are crucial for recognizing perils and forestalling gear disappointments. A very much kept up with hardware is less inclined to glitch, decreasing the gamble of mishaps.
- Personal Protective Equipment (PPE): Giving and upholding the utilization of fitting individual defensive gear is significant for protecting specialists from perils. PPE, such as hard caps, safety glasses, gloves, and defensive dress, should be worn consistently during drilling tasks.
- Site-Explicit Security Plans: Creating and executing site-explicit security plans is fundamental for addressing potential dangers related to each boring undertaking. These plans ought to frame crisis systems, clearing courses, and other wellness measures to safeguard workers if mishaps should occur.
- Emergency Response Systems: Having obvious crisis reaction strategies set up is critical for dealing with unexpected occurrences. Regular emergency drills and instructional meetings should be directed to guarantee that staff are ready to respond successfully to crises.
The Future of Direct Push Drilling
Mechanical advancements consistently extend the abilities of direct push drilling gear. Developments like automated data assortment, ongoing checking, and scaled-down sensors are ready to alter subsurface examinations. As the business advances, we can expect more modern and proficient direct push drilling solutions.
Final Thoughts
Direct push drilling (DPT) is a distinct advantage in subsurface examinations, offering speed, exactness, and negligible natural effect. With gear like drill rigs, hydraulic power units, and different sampling tools, DPT succeeds in ecological evaluations, geotechnical designing, farming, hydrology, and remediation projects.
At MetaDrill, we are specialists in direct push drilling innovation. Our best-in-class hardware and exceptionally prepared experts convey unmatched outcomes for your subsurface examination needs. Contact us today to learn how we can assist you with achieving your task objectives proficiently and effectively.
Find the power of direct push drilling with MetaDrill.

Upgrading Accuracy with Track Innovation
Track drill rigs take accuracy drilling to the powerful through a combination of inventive highlights:
- Hydraulic Ground Strain Control: This framework permits administrators to adjust the tension the tracks apply to the ground considering constant territory conditions. This guarantees the rigs keep a stable platform for drilling, even on lopsided or testing surfaces.
- High-level Stabilizer Frameworks: Extendable stabilizers further upgrade strength by offering extra help when deployed. These frameworks can be used with pressurized water changed to match the requirements of the boring activity, limiting vibrations, and guaranteeing exact outcomes.
- Automatic Leveling Frameworks: Some drill rigs are furnished with modern automatic leveling frameworks for the most requested applications. These frameworks use a mix of sensors and actuators to screen and change the rig's position continually, keeping an altogether level drilling platform no matter the terrain. This is especially valuable for errands requiring elevated accuracy, such as center boring or directional drilling.
- GPS Joining: Many follow-up drill rigs offer a combination of GPS innovation. This considers the exact positioning of the tools and even empowers automated drilling capabilities. Using pre-modified arrangements, the GPS mix can further develop effectiveness and diminish the risk of human error during drilling activities.
The Benefits of Tracks Over Wheels
- Prevalent Footing: Tracks disperse weight more equitably across the ground, giving outstanding foothold. This is significant while working on delicate, sloppy, or lopsided surfaces. Wheels, then again, can stall out or turn out without much of a stretch in such circumstances.
- Expanded Dependability: The wide impression of tracks gives more noteworthy security, keeping the rig from spilling on slopes or uneven ground. This improves the well-being of administrators and the general proficiency of the boring activity.
- Decreased Ground Pressure: Tracks apply less tension on the ground than wheels, limiting soil compaction and harming the climate. This is especially significant in delicate regions like wetlands or timberlands.
- Better Mobility: Tracks consider smoother turns and better mobility in restricted spaces. This is fundamental while working in restricted regions or around obstructions.
Applications of Tracked Drill Rigs
The flexibility of tracked drill rigs makes them reasonable for many applications:
- Mining: In mining activities, these rigs succeed in getting too remote and testing territory, boring openings for impacting, investigation, and framework improvement.
- Development: Tracked drill rigs are utilized for foundation drilling, anchor installation, and soil testing in development projects. Their capacity to deal with different ground conditions makes them crucial for these tasks.
- Exploration: Drill rigs are utilized in exploration for core drilling, geotechnical examinations, and natural testing. Their accuracy and versatility are critical for obtaining precise information.
- Environmental Remediation: These rigs are utilized for groundwater testing, soil remediation, and sound installation in natural cleanup projects. Their capacity to work in defiled or unsound circumstances is fundamental for these tasks.
The Future of Track Innovation
As innovation keeps propelling, we can expect significantly more creative track situations for drill rigs. Here are a few likely turns of events:
- Electric and Hybrid Drivetrains: The gas-powered motors that power most drill fixes today are a critical wellspring of discharges. Electric and half-breed drivetrains offer a cleaner and more manageable alternative. Electric engines are cleaner and more effective, which would help the climate and decrease costs.
- Autonomous Activity: Autonomous innovation can further develop security and effectiveness in drilling. Semi-independent frameworks for situating and evening out are now a work in progress.
- High-level Ground Tension Control Frameworks: Current hydraulic ground pressure control frameworks permit administrators to change the strain the tracks apply to the ground. Given sensor information, we can expect more astute frameworks that naturally change pressure later.
Final Thoughts
Tracked drill rigs are the unrivaled decision for tasks in challenging terrain. Their unrivaled versatility, steadiness, and accuracy make them crucial across ventures. From the rough mining scenes to sensitive natural remediation locales, these machines give outstanding execution. MetaDrill, a leading provider of drilling solutions in the USA, offers a wide variety of drill rigs customized to meet the necessities of your task—our obligation to state-of-the-art innovation guarantees that our hardware is at the very front of advancement.
Whether you are confronting steep inclines, sloppy circumstances, or truck mounted drill rigs, MetaDrill's tracked drill rigs are worked to overcome. Contact us today to examine your project's needs and discover how our mastery can lift your drilling tasks. With MetaDrill, you are putting resources into execution, accuracy, and peace of mind.
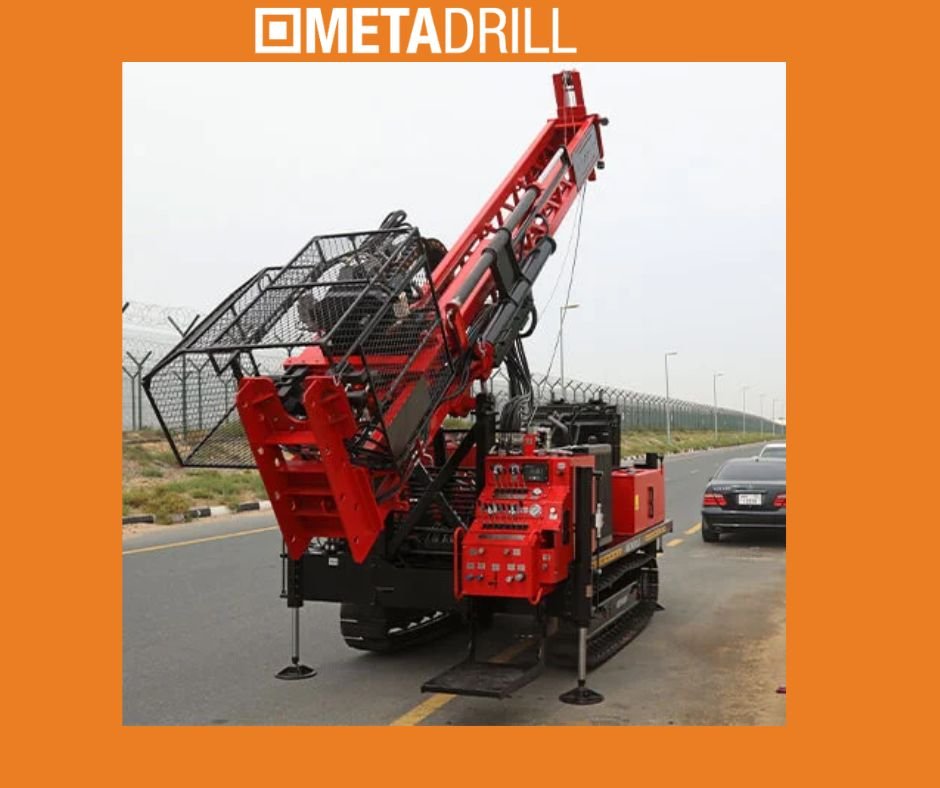
Examining the Subsurface: The Role of Geotechnical Drilling
MetaDrill is at the fore of geotechnical drilling companies. Our ability lies in using drill rigs to assemble pivotal data about the subsurface. This data is fundamental for different development projects, including:
- Establishments: Deciding the soil's load-bearing ability to configure secure starting points for structures, bridges, and other structures.
- Road and Highways: Evaluating soil strength to guarantee the life span and security of roads and highways.
- Slopes and Holding Walls: Examining soil composition and strength for planning stable slopes and holding walls to forestall landslides.
- Environmental Assessments: Gather soil and groundwater tests to distinguish defilement and guide remediation endeavors.
MetaDrill's Arsenal: Drill Rig on Tracks and Beyond
Geotechnical drilling structures are the foundation of MetaDrill's capability. We recognize its primary role in development tries, guaranteeing the dependability and security of foundations. Our armada brags a different range of drilling rigs, including:
- Drill Rigs on Tracks : These robust machines are ideal for unpleasant territories and circumstances requiring high solidity. They can easily handle testing and drilling circumstances.
- Direct Push Drilling Rigs: These rigs are ideal for fast and effective soil testing in open locations. This technique uses a downhole hammer to infiltrate the soil, limiting natural unsettling influence.
- Truck-Mounted Drill Rigs: Offering magnificent mobility and adaptability for different drilling projects.
Accuracy and Speed: Divulging the Water Well Drilling Process
MetaDrill is your trusted partner for water well drilling. We offer a complete well drilling cycle, including everything from the underlying conference and allowing stages to well development and pump installation. Our carefully prepared geotechnical drillers influence progressed methods to find the most reasonable water source on your property, guaranteeing a trustworthy and feasible water supply for your residence or business. We utilize a meticulous interaction to ensure admittance to perfect and solid groundwater:
- Site Assessment: Our team examines geological data and conducts fundamental overviews to decide the ideal location.
- Drilling: Utilizing specific hardware, we cautiously drill into the ground, arriving at the water-bearing spring.
- Well Development: We utilize explicit strategies to eliminate any residue or garbage from the well, guaranteeing proficient water flow.
- Pump Installation: A reasonable pump is introduced to separate water from the well, meeting your requirements.
MetaDrill: Something Beyond Geotechnical Drilling
Our proficiency reaches out beyond geotechnical drilling. We offer an extensive scope of environmental drilling services, including:
- Soil and Groundwater Sample Collection: We utilize exact methods to gather precise examples for pollution analysis.
- Remediation Well Installation: Our team decisively introduces wells to expel poisons from soil and groundwater.
- Monitoring Well Installation: We introduce wells to screen groundwater levels and recognize potential defilement issues over the long term.
Looking for Geotechnical Drill Rigs for Sale? Look No Further!
We broaden its mastery beyond simply giving geotechnical drilling services. We recognize that claiming the most reasonable drill rig is fundamental for any geotechnical drilling contractor. Thus, we thoroughly determine top-quality geotechnical drill rigs for sale, taking exceptional care of the scope of utilizations and budget. Whether you are a carefully prepared drilling project worker looking to extend your armada or a newcomer to the business, our team of experts is here to direct you toward choosing the best rig for your needs.
Advantages of Getting a Drill Rig from MetaDrill:
- Broad Stock: Look over a wide cluster of drill rigs, including truck-mounted rigs and auger drills, reasonable for different drilling projects.
- Master Direction: Our accomplished sales team will provide customized suggestions to ensure you select the drill rig that best suits your applications and needs.
- Competitive Pricing: We offer competitive pricing on all our drill rigs, including new and utilized models.
- Budget Choices: We understand that buying a drill rig can be a significant investment. To this end, we team up with trusted moneylenders to offer adaptable support choices that align with your budget.
- After-Sales Support: Our obligation to support stretches beyond the sale. We provide far-reaching after-sales support, including administrator preparation, upkeep help, and prepared admittance to certifiable extra parts.
Grasping the Fundamentals: Geotech Boring and Soil Boring Test Near to Me
A Geotech boring, a soil drilling test, involves boring a limited opening into the ground to gather soil samples. This essential test helps geotechnical engineers survey the soil's organization, strength, and solidness. MetaDrill offers this help throughout the USA, so you can undoubtedly find a soil boring test near you.
Boring Methods - The Right Tools for the Job
We comprehend that each project has extraordinary necessities. Our team is knowledgeable in different drilling procedures, including:
- Hollow Stem Auger Drilling: This quick and proficient drilling technique uses hollow augers to gather persistent soil tests.
- Rotary Sonic Drilling: A robust procedure that uses sonic vibrations to enter even the most complex soils with insignificant commotion and vibration.
- Mud Rotary Drilling: This technique utilizes mud dissemination to calm and settle the borehole while drilling through free arrangements.
- Diamond Core Drilling: This method uses a precious diamond-tipped core barrel to separate unblemished stone cores for detailed examination.
MetaDrill: Your Partner in Geotechnical Services
MetaDrill is your all-inclusive resource for all geotechnical, environmental, and water well drilling necessities. We offer a full range of services, from introductory site evaluation and drilling to test assortment and well turn-of-the-century events. Our team of professional experts is devoted to giving you remarkable help, state-of-the-art innovation, and a pledge to be somewhere safe.
The MetaDrill Sign of Greatness
A few elements separate MetaDrill from its competitors:
- Enduring Obligation to Safety: Well-being remains our central need. Our team adheres to the most rigid well-being conventions and undergoes predictable preparation to ensure a solid workspace for all.
- High-level Drilling Strategies: We invest in state-of-the-art drilling hardware and methods, engaging us to handle undertakings of any intricacy with productivity and accuracy.
- Prepared and Qualified Experts: Our team contains profoundly talented drillers, geologists, and specialists with broad involvement with assorted drilling applications.
- Unmatched Client Services: We focus on open correspondence and coordinated effort throughout the undertaking lifecycle. Our devoted team is always accessible to address your requests and concerns.
MetaDrill - Your Reliable Drilling Partner
MetaDrill is a transcendent drilling company in the USA, handling geotechnical, environmental, and water well drilling projects. Our steady obligation to greatness includes prevalent services, trend-setting innovation, and a group of old pros. We focus on security, use state-of-the-art procedures, and guarantee remarkable client support throughout your task. Contact MetaDrill today to discuss your drilling needs and experience the MetaDrill distinction.

Grasping Geotechnical Drilling Rigs
Geotechnical drilling rigs are perplexing pieces of hardware utilized in investigating and examining subsurface circumstances. They are fundamental in different industries, including construction, mining, and natural design. Because of their intricacy and the unforgiving conditions, they work in regular and exhaustive maintenance, which is essential.
Here are the critical maintenance practices for assuring the longevity and ideal execution of geotechnical drilling rigs
- Significance of Standard Maintenance
- Everyday Maintenance Practices
- Weekly Maintenance Practices
- Monthly Maintenance Practices
- Best Practices for Prolonging Rig Life
Significance of Standard Maintenance
- Upgraded Security: Appropriately keeping up with rigs decreases the gamble of mishaps and hardware disappointments.
- Expanded Effectiveness: Keeping up with hardware works more proficiently, diminishing margin time and expanding efficiency.
- Cost Reserve funds: Preventive maintenance helps keep a strategic distance from exorbitant fixes and substitutions by resolving issues before they arise.
Everyday Maintenance Practices
- Pre-Activity Assessments
Before starting any drilling activity, leading an exhaustive investigation of the rig is significant. This incorporates checking - Liquid Levels: Guarantee that pressure-driven oil, motor oil, coolant, and fuel are at proper levels.
- Hoses and Associations: Assess every hydraulic hose and association for signs or indications of wear.
- Controls and Checks: Test all controls and measures to ensure they work accurately.
- Drill String and Tools: Check the state of the drill string, bits, and different tools for wear and harm.
- Grease
Grease is essential to forestall unnecessary mileage on moving parts. Day-to-day grease of the accompanying parts is suggested: - Direction and Bushings: Apply the fitting oil to all orientations and bushings.
- Rotational Heads and Joints: Guarantee that revolving heads and joints are greased up to work with smooth activity.
- Cleaning
Keeping the rigs clean is crucial for its life span. Day-to-day cleaning undertakings include: - Eliminating Trash: Clear any mud, soil, debris, and jetsam from the apparatus to forestall obstruction and erosion.
- Cleaning Air Channels: Consistently spotless or supplant air channels to guarantee ideal motor execution.
Weekly Maintenance Practices
- Itemized Reviews
A more itemized review should be held weekly to distinguish potential issues that may not be obvious during everyday checks. Key regions to review include: - Hydraulic Framework: Check for spills, pressure drops, and indications of wear in the water-powered framework.
- Structural Uprightness: Investigate the rig's casing, pole, and supports for breaks or harm.
- Electrical Framework: Test every electrical association and parts for appropriate working.
- Part Checks and Substitutions
Certain parts have a restricted life expectancy and should be checked and supplanted on a case-by-case basis. These include: - Filters: Supplant hydraulic and fuel filers to guarantee the framework remains foreign substance-free.
- Belts and Hoses: Review and supplant any well-used or harmed belts and hoses.
Monthly Maintenance Practices
- Far-reaching Framework Checks
Monthly support should include exhaustive checks, everything being equal, to guarantee the rig works at top proficiency. This incorporates: - Motor Execution: Lead a careful assessment of the motor, including pressure tests and fuel framework checks.
- Hydraulic Tension Tests: Perform hydraulic pressure tests to ensure the framework works within the suggested boundaries.
- Drivetrain Investigation: Review the drivetrain parts, including the transmission and axles, for wear and harm.
- Arrangement and Alignment
Legitimate arrangement and alignment of the rig's parts are fundamental for exact activity. Monthly errands include: - Arrangement Checks: Guarantee that the pole and other primary parts are appropriately adjusted.
- Alignment: Adjust checks, sensors, and control frameworks to keep up with precision.
Yearly Maintenance Practices
- Redesign and Significant Investigations
A yearly redesign is essential for the maintenance of the rig's longevity. This includes: - Dismantling Significant Parts: Dismantle and completely examine significant parts, like the motor, transmission, and hydraulic siphons.
- Remaking or Supplanting Parts: Modify or supplant broken down parts to reestablish the rig to ideal condition.
- Nondestructive Testing: Perform nondestructive testing (NDT) on essential primary parts to distinguish any secret deformities.
- Refreshing Maintenance Records
Keeping nitty gritty upkeep records is fundamental for following the state of the rigs and arranging future support. Yearly updates ought to include: - Maintenance Logs: Update logs with subtleties of assessments, fixes, and substitutions.
- Administration History: Keep an extensive help history to recognize repeating issues and develop upkeep arranging.
Best Practices for Prolonging Rig Life
- Training and Verification
Guarantee that all workforce members work appropriately and are trained and verified to maintain the rigs. This incorporates: - Administrator Training: Standard training for administrators to deal with the rigs securely and productively.
- Maintenance Training: Training for support faculty to perform routine and high-level support errands.
- Utilizing Quality Parts and Liquids
Utilizing excellent parts and liquids is significant for the longevity of the rigs. This incorporates: - OEM Parts: Consistently utilize original equipment manufacturer (OEM) parts for substitutions.
- Premium Liquids: As the manufacturer suggests, use premium-grade oils, greases, and coolants.
- Executing a Preventive Maintenance Program
A preventive maintenance program helps methodically resolve expected issues before they cause huge problems. Key components include: - Scheduled Investigations: Routinely scheduled examinations based on the rigs' working hours and conditions.
- Prescient Maintenance: Utilizing proactive maintenance strategies, like vibration investigation and warm imaging, to distinguish early indications of wear and disappointment.
- Training and Verification
Standard maintenance of geotechnical drilling rigs assures the accompanying advantages:
Amplifying Geotechnical Drilling Rig Execution
At MetaDrill, we understand the fundamental role that maintenance plays in improving the exhibition and life expectancy of geotechnical drilling rigs. By adhering to the basic maintenance practices outlined in this guide, administrators can guarantee improved well-being, expanded effectiveness, and cost-reserve funds for their drilling tasks.
Carrying out a proactive maintenance technique, including daily, weekly, monthly, and yearly practices, is essential for recognizing and resolving expected issues before they heighten. From directing pre-activity examinations to upgrading significant parts, every maintenance task is indispensable to guaranteeing the rig's work at top productivity.
At MetaDrill, we are focused on providing exhaustive solutions for geotechnical drilling rig maintenance, guaranteeing our clients the highest efficiency and productivity in their activities.
For more information on enhancing your drilling rig execution, contact MetaDrill today.